Need a charming fall crochet decoration? This adorable animal head pumpkin comes together with clever shaping and delightful little details you’ll want to see from start to finish.

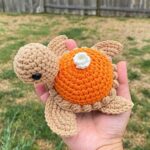
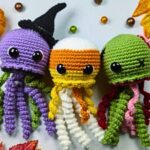
Some seasonal decorations instantly stand out, and this animal head crochet pumpkin is one of them. A ribbed pumpkin, a sweet animal face, and a tiny pumpkin hat blend into one adorable design that brings extra charm to any autumn display. The cutest details appear as each crochet piece comes together, making every stage worth seeing.
The tutorial begins with the textured crochet pumpkin base and then moves to the rounded animal head. Small ears, paws, and a tiny hat are added before everything is assembled into one charming decoration. Each crochet step naturally leads to the next, making the final result satisfying from beginning to end.
Credit Tiệm Bé Con
Your Pumpkin Basket Checklist
- Yarn:
- Cotton milk yarn (125g) in the following colors:
- Orange
- White
- Green
- Black/Red (for details)
- Cotton milk yarn (125g) in the following colors:
- Safety Eyes:
- 5 mm safety beads/eyes.
- Stuffing:
- Polyester fiberfill.
- Cosmetic Blush:
- For giving the finished piece extra decorative touches.
The Crochet Essentials You’ll Reach For
- Crochet Hook:
- 2.0 mm hook.
- Notions:
- Tapestry needle
- Stitch markers
- Scissors
- Hot glue gun
Pattern Language Made Simple
ch: chain
sc (x): single crochet
inc (v): increase
dec (a): decrease
hdc: half double crochet
dc: double crochet
slst: slip stitch
st(s): stitch(es)
A Peek Inside This Charming Design
- Textured Pumpkin Base:
A ribbed rectangle (worked with back-loop half-double crochets) is cinched into a grooved pumpkin using thread sculpting. - 3D Animal Head:
A seamless sphere worked in continuous single crochet rounds with cheek shaping. - Embellishments:
Includes a mini hat, embroidered jack-o’-lantern face, and rosy cheek details.

Bringing This Animal Pumpkin to Life
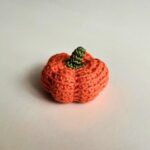
The pattern begins with an orange ribbed rectangle worked in back-loop half double crochet stitches. Once the rows are complete, the rectangle is joined into a tube, stuffed with fiberfill, and tightly sculpted through the center to form six defined pumpkin ridges.
The animal head is then crocheted in continuous single crochet rounds. Carefully placed increases shape the cheeks, while the following decrease rounds create a smooth finish before the head is stuffed. Safety eyes and a simple embroidered nose and mouth complete the face, while the tiny pumpkin hat, ears, and paws are made as separate pieces.
The final stage brings every element together. The ears, hat, head, and paws are attached to the pumpkin, the jack-o’-lantern face is embroidered onto the pumpkin base, and a touch of blush adds the finishing detail. The completed design combines a festive pumpkin with a playful animal character, creating a cheerful handmade decoration for the season.
Step-by-Step Crochet Pattern: Pumpkin Animal Plushie
1. Pumpkin Base
(Using Orange Yarn)
Chain:
- Ch 18
Row 1:
- 1 slst, 15 hdc, 1 slst (18 sts).
Rows 2–16:
- Chain 1, turn.
- Work in back loops only: 1 slst, 15 hdc, 1 slst across.
Finishing:
- Bind off, leaving a long tail.
- Sew together Row 1 and Row 16 to form a tube.
- Cinch one end shut using a needle and thread.
- Stuff the tube with fiberfill, then cinch the other end shut.
- Sculpt deeply by wrapping yarn through the center, pulling tightly to form 6 ribs.

2. Animal Head
(Using White Yarn)
Round 1:
- 6 sc in Magic Ring (6 sts).
Round 2:
- 6 inc (12 sts).
Round 3:
- (1 sc, inc) × 6 (18 sts).
Round 4:
- (1 sc, inc, 1 sc) × 6 (24 sts).
Round 5:
- 24 sc around.
Round 6 (Cheek Bulges):
- 7 sc, 4 inc, 2 sc, 4 inc, 7 sc (32 sts).
Rounds 7–8:
- 32 sc around.
Round 9:
- 7 sc, 4 dec, 2 sc, 4 dec, 7 sc (24 sts).
Round 10:
- (1 sc, dec, 1 sc) × 6 (18 sts).
- Stuff firmly.
Round 11:
- (1 sc, dec) × 6 (12 sts).
Finishing:
- Bind off and close the opening.
- Embroider a nose/mouth in a “T” shape.
- Add safety eyes.

3. Mini Pumpkin Top Hat
(Using Orange & Green Yarn)
Hat Base:
- Round 1: 6 sc in Magic Ring (6 sts).
- Round 2: 6 inc (12 sts).
- Round 3: (1 sc, inc) × 6 (18 sts). Bind off.
Stem:
- Round 1: 5 sc in Magic Ring.
- Create a curled stem by chaining 3, crocheting 2 sc back down the chain, and slip stitching to the stem’s base.
- Attach the stem to the hat.

4. Ears (Make 2)
(Using White Yarn)
Chain:
- Ch 8
Row 1 (Both Sides):
- 2 sc, 4 hdc, 5 dc (into end of chain — one side).
- Work back along the opposite side: 4 hdc, 2 sc, slst.
- Fasten off.
5. Paws (Make 2)
(Using White Yarn)
- Work 3 rounds of 6 sc in a Magic Ring.
- Bind off to form small paws.
Watch Every Piece Come Together
Attach Ears & Hat:
- Use hot glue or sew the ears and mini hat onto the animal head.
Embroider Pumpkin Face:
- Stitch jack-o’-lantern eyes and a mouth onto the pumpkin base, using black and red yarn.
Secure Head:
- Attach or sew the animal head onto the pumpkin base.
Add Paws:
- Place the paws at the rim of the pumpkin, securing them with stitches or glue.
Finish Details:
- Apply pink blush to the animal’s cheeks for extra charm.
Before You Tie the Final Knot
Troubleshooting:
- Pumpkin Ridges: Pull yarn tightly during sculpting for well-defined ribs. Add more stuffing if needed.
- Amigurumi Stitches: Keep tension tight to avoid loose gaps.
Make It Uniquely Yours
- Colors: Try pastel tones for a modern look or substitute the base for a white pumpkin.
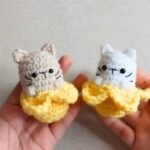
- Animals: Change the ear shape to create bunnies, bears, or cats!
A Handmade Treasure for the Season
Your cute pumpkin animal amigurumi is ready! Perfect for brightening your desk or decorating your mantle for fall. Gather your materials and let the crochet magic begin. Be sure to watch the full video tutorial for step-by-step guidance. Happy crafting!