Special Crochet Rose Gift for Any Season or Holiday
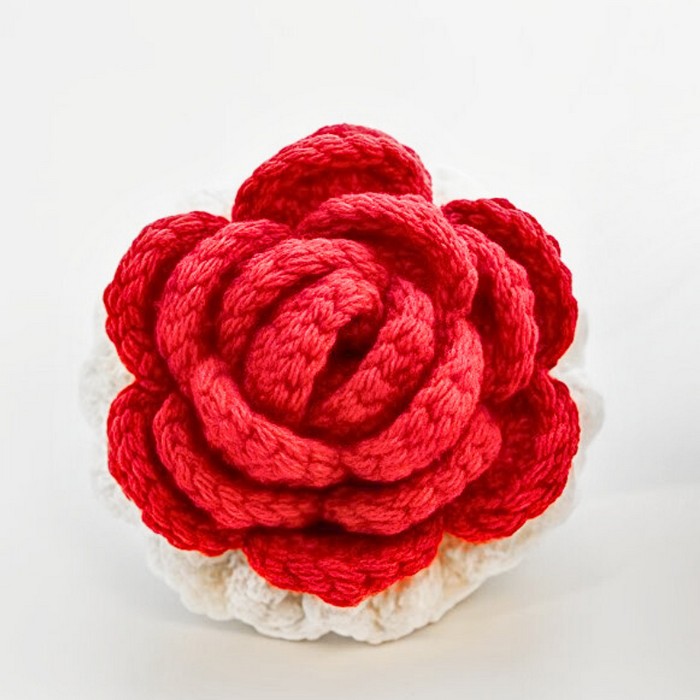
Through this tutorial, you’ll learn how to crochet charming roses with intricate layers that are simple to make. What sets this pattern apart is the way small details are added to the petals, making each bloom stand out as delicate and lifelike. The tutorial provides an effective yet accessible method for giving your creation its elegant shape.

This rose design fits well with the romantic atmosphere of Valentine’s Day or the warm sentiment of Mother’s Day. It can also reflect the cozy, colorful spirit of autumn or make for a thoughtful handmade winter gift, as it reminds us of blooming beauty no matter the season.
Credit Xúy Crochet
Stitch Pattern & Structural Elements
The pattern uses foundation chain stitches to start the rose, followed by neat rows of double crochet and half double crochet to form the petals. Gradual layering gives the flower its depth, while the base stitch pattern ensures clean edges and stable construction.
Features & Benefits
- Timeless Design: Perfect for gifts or decorations year-round.
- Reusable Décor: Unlike real flowers, these roses last forever.
- Beginner-Friendly: Straightforward steps with detailed visuals.
- Personal Touch: Adapt colors and sizes to match any occasion.
Required Materials
To complete the crochet rose project, you will need the following items:
- 4-ply yarn: Choose your favorite color for the rose.
- 2.0mm crochet hook
- Tapestry needle: For weaving ends and sewing the rose together.
- Fiberfill: A small amount is needed to shape the bouquet holder.
- Optional: Stitch markers for keeping track of stitches.
- Scissors: For cutting yarn.
- Hot glue gun (optional): To attach the rose to the bouquet holder, if you prefer not to sew.
Important Notes
- Beginner-Friendly: This tutorial is suitable for beginners and guides you through creating both the rose and its bouquet holder.
- Consistency in Stitches: Maintain even tension for uniform stitches, especially crucial when crafting the petals and lace.
- Use the Long Tail for Sewing: Leave a long yarn tail after completing the rose to easily sew it onto the bouquet holder.
- Optional Alternatives: You can glue the rose onto the holder instead of sewing.
- Stitch Markers Are Helpful: For beginners, use stitch markers to identify the start of your rounds, especially in the bouquet holder section.
- Color Customization: Personalize your bouquet by using different yarn colors for the rose, holder, and lace edge.
Step-by-Step Instructions
Part 1: Crocheting the Rose
- Create a Slip Knot
- Hold your yarn comfortably, make a loop, and pull the working yarn through to form a slip knot.
- Chain 53 Stitches
- Yarn over and pull through the loop on your hook. Repeat until you have 53 chains.
- Row 2: Single Crochet
- Skip the first chain and insert your hook into the second chain from the hook.
- Yarn over, pull up a loop, yarn over again, and pull through both loops on your hook.
- Repeat for a total of 52 single crochet stitches.
- Row 3: V-Stitches
- Chain 5 and turn your work.
- Double crochet into the first stitch, skip a stitch, and in the next stitch work a V-stitch: Double crochet, chain 2, double crochet into the same stitch.
- Repeat this V-stitch pattern across.
- Row 4: Shell Stitches
- Chain 3 and turn.
- Into each chain-2 space from the V-stitch row, work 2 double crochets, chain 2, and 2 more double crochets to form a shell stitch.
- Repeat this shell stitch in each space across.
- Row 5: Form Petals
- Chain 1 and turn. In each chain-2 space, work 8 double crochets to form petals.
- Slip stitch into the small spaces between shells and repeat. Finish with a slip stitch into the last double crochet and chain 1.
- Roll & Secure the Rose
- Leave a long tail and cut the yarn.
- Roll the strip tightly from one end, keeping the base aligned. Sew through the base with a tapestry needle to firmly secure the rose’s shape.

Part 2: Creating the Bouquet Holder
- Start with a Magic Ring
- Create a magic ring and chain 3 (not counted as a stitch).
- Work 12 double crochets into the magic ring and pull the tail to close.
- Round 2: Crochet Increases
- Chain 3, work one double crochet into the same stitch, then work two double crochets in every second stitch (a double crochet increase) for six repeats. You’ll have 18 stitches.
- Round 3: DC3 Together
- Chain 3 and work the Double Crochet 3 Together (DC3tog) stitch in sets of three. Do this for six repeats, adding fiberfill before finishing the round.
- Round 4: Waistcoat Single Crochet
- Work six single crochet increases with the “waistcoat stitch” by inserting your hook into the center of the V of the previous row’s stitches and crocheting two single crochets per stitch.
- Round 5-6: Build Shape
- Continue increasing with waistcoat single crochet stitches following the pattern:
- Round 5: Work two single crochets into each stitch (12 increases).
- Round 6: Work three single crochets, then one increase (repeat).
- Continue increasing with waistcoat single crochet stitches following the pattern:
- Rounds 7-10: Maintain Shape
- Work 1 single crochet in each stitch for four rounds, maintaining 30 stitches around.
- Add Lace Edge
- Switch to your lace color yarn and crochet this round in front loop only, with a simple single crochet in each stitch.
- For the decorative edge, chain 3, work 3 double crochets into every front loop, alternating between front loop and back loop in each stitch.

Part 3: Assemble the Rose Bouquet
- Attach the Rose to Holder
- Using the long tail left from the rose, sew it securely onto the bouquet holder. Stitch through the back loops of the holder and into the rose’s base. Skip a stitch if needed to distribute the weight evenly.
- Add a Decorative Bow (Optional)
- Using a contrasting yarn, tie a bow around the bouquet holder for a polished finish.
And that’s it! Now you have a delightful mini crochet rose bouquet, perfect for gifting or decorative purposes. Enjoy creating!


