Give your little crochet amigurumi a graduation-day look with a tiny chenille mortarboard, complete with a square top, shaped band, and colorful handmade tassel.
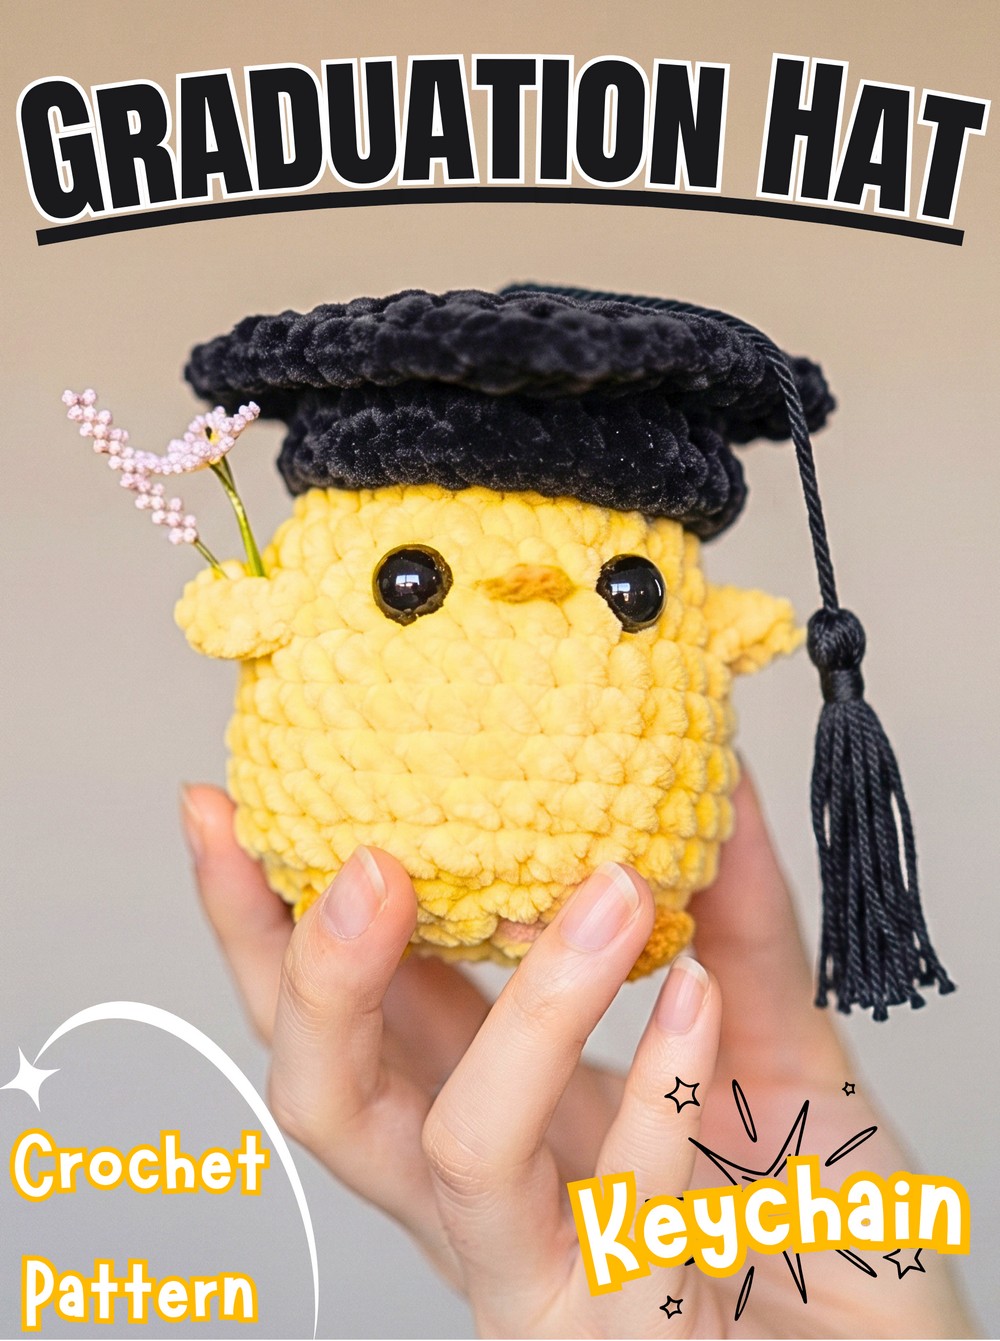
Miniature crochet graduation hats add a special finishing touch to amigurumi gifts and seasonal keepsakes. Made with chunky chenille yarn, this little crochet mortarboard has a soft, plush appearance while its square top and flared base give it the familiar graduation-cap shape.
Follow the instructions to crochet the square top, build the hat band using the reserved back loops, and make a matching tassel from contrast yarn. You can change the colors to represent school traditions, team colors, or your favorite combination, then adjust the tassel length to suit your amigurumi.
Credit Julianne’s Jems
Materials & Tools Needed
- Chunky Yarn: Premier Parfait Chunky or an equivalent chenille or chunky yarn in black, or your chosen color for the mortarboard and base.
- Contrast Yarn: White, yellow, gold, or red yarn for the tassel.
- Crochet Hook: Size 8 or 5.0 mm hook.
- Tools: Scissors, tapestry needle, stitch marker, and a ruler.
Finished Size & Customization Ideas
Finished Size: This miniature graduation hat is designed to fit small amigurumi creations, such as baby chicks and penguins.
Customization Ideas:
- Change the main yarn color to match school or team colors, such as green, black, blue, or maroon.
- Choose yellow, gold, white, or red for the tassel to reflect traditional graduation colors or your preferred look.
- Adjust the hanging height of the tassel to make it more noticeable or give it a shorter, neater appearance.
A Note About Working with Chenille Yarn
Chenille yarn can be delicate when pulled or tightened too firmly, especially when working into a small starting ring. For this reason, the top begins with a chain-2 foundation rather than a magic ring. This gives you a more suitable starting point for the chunky yarn and helps avoid snapping it while forming the first stitches.
Keep your tension comfortable throughout the pattern. Avoid pulling the yarn too tightly when joining rounds or weaving in the ends.
Pattern Abbreviations & Terminology
- ch: Chain
- sc: Single crochet
- inc: Increase (work 2 single crochets in the same stitch or space)
- sl st: Slip stitch
- st(s): Stitch(es)
- BLO: Back loop only
- FLO: Front loop only
- Rnd: Round

Step-by-Step Crochet Instructions
The hat is worked in two main sections: the square mortarboard top and the lower band. The top is crocheted first, with its back loops reserved for attaching the base later. Once both sections are complete, you will make and attach the tassel.
Part 1: Crochet the Square Mortarboard Top
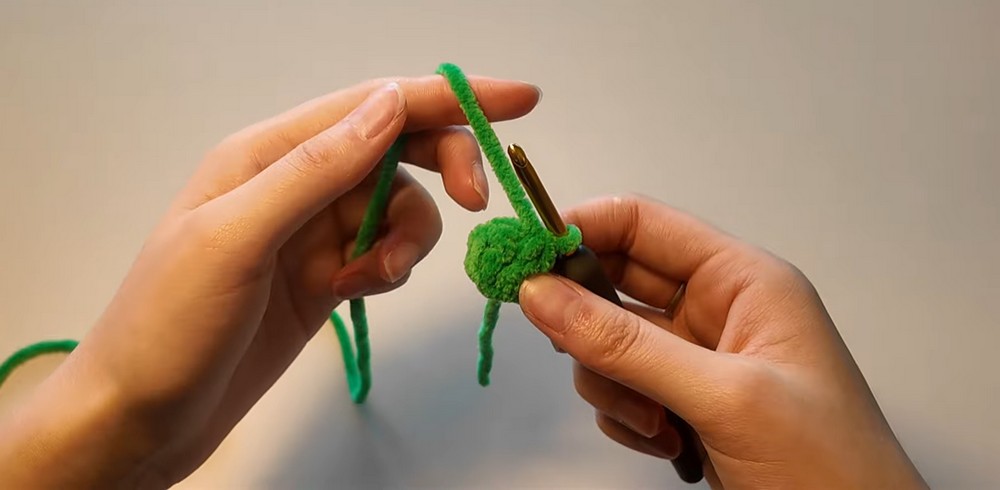
Rnd 1: Create the Starting Circle
- Begin with a slip knot.
- Chain 2. Using a chain-2 foundation instead of a magic ring helps prevent the chenille yarn from snapping easily.
- Skip the first chain closest to the hook and work 7 single crochets into the first chain.
- Join the round with a slip stitch into the first single crochet, then chain 1.
Stitch count: 7 sc.
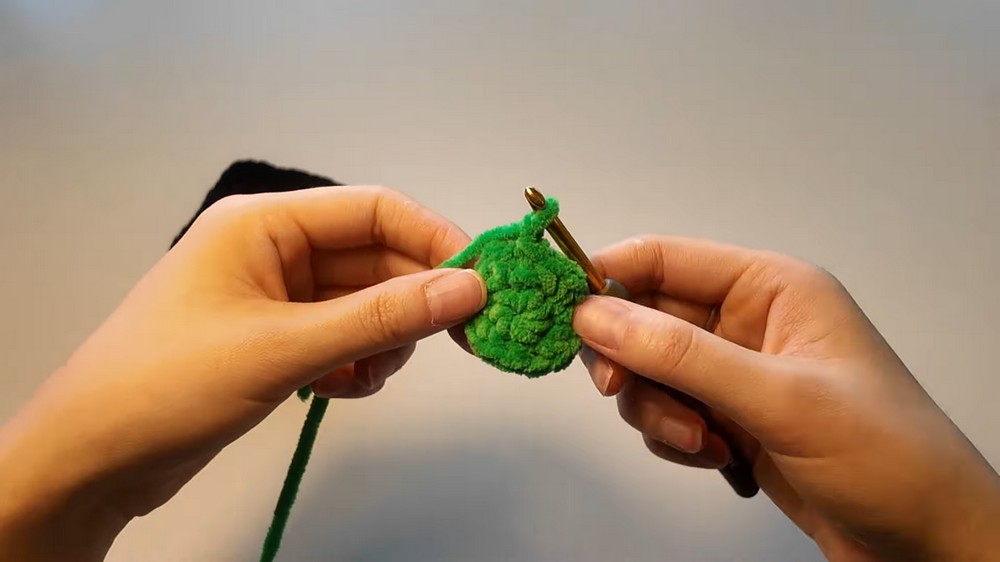
Rnd 2: Form the Square
- In the very first space, which is the same single crochet space where you made the previous slip stitch, work 3 single crochets.
- Work 1 single crochet in the next space.
- Continue alternating
(3 sc, 1 sc)in each space all the way around. The groups of 3 single crochets help form the square’s corners. - Slip stitch into the first single crochet, then chain 1.
Rnd 3: Shape the Corners
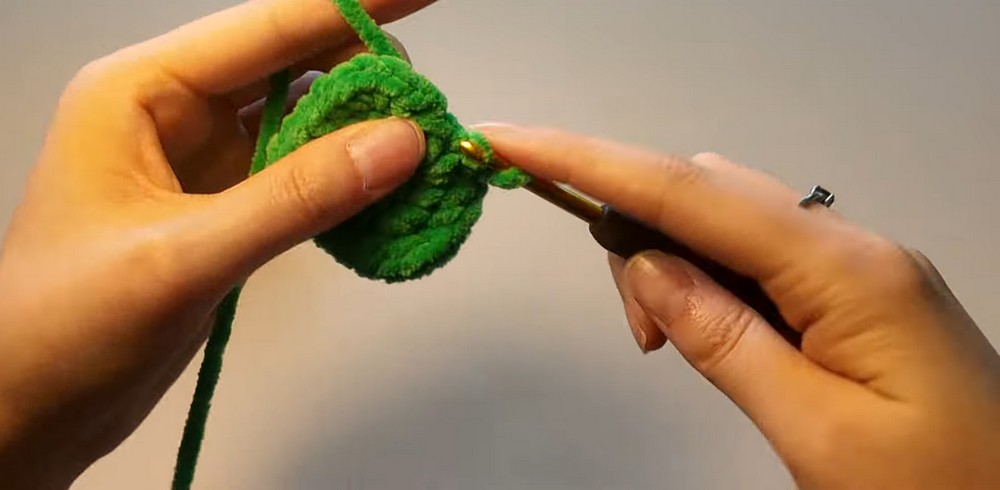
- Work 1 single crochet in the same space where you just made the slip stitch.
- Work 3 single crochets in the next stitch to form the corner.
- Continue around by working 1 single crochet in each of the next 3 stitches, followed by 3 single crochets in the corner stitch.
- At the end of the round, work 1 single crochet in the final stitch.
- Slip stitch into the first single crochet, then chain 1.
Rnd 4: Work in Front Loops Only
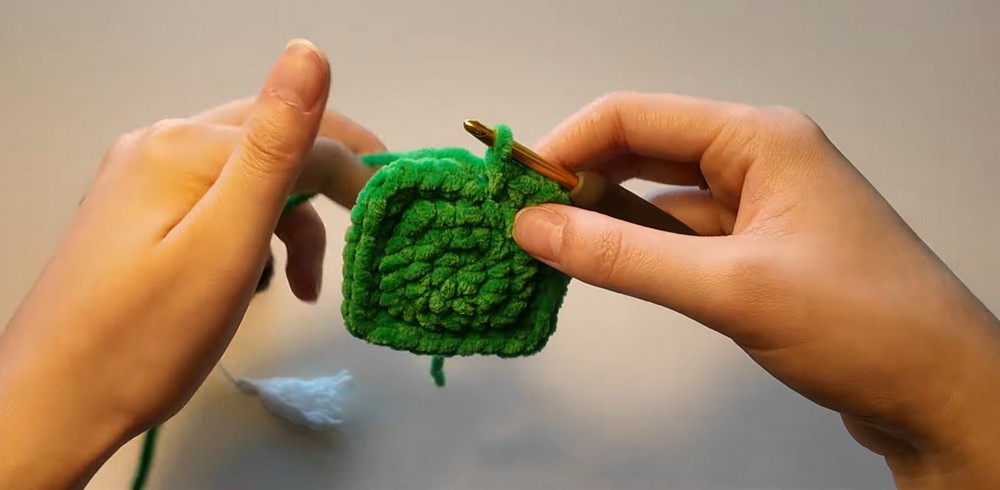
This round creates the edge of the mortarboard top while leaving the back loops available for attaching the lower band.
- Place a stitch marker into the back loop of the very first single crochet, where the slip stitch was just made. This marks the starting loop for the base later.
- Work through the front loops only (FLO) throughout this round.
- Work 1 single crochet in each of the first 2 stitches.
- Work 3 single crochets in the corner stitch.
- Work 1 single crochet in each of the next 5 stitches.
- Continue repeating the pattern around:
3 sc in the corner, 1 sc in each of the next 5 sts. - Finish with 1 single crochet in each of the last 2 stitches.
- Slip stitch into the first single crochet, then chain 1.
Rnd 5: Finish the Top
- Return to working through both loops for this final round of the top.
- Work 3 single crochets.
- Work 3 single crochets in the corner stitch.
- Work 1 single crochet in each of the next 7 stitches.
- Continue repeating the pattern around:
3 sc in the corner, 1 sc in each of the next 7 sts. - Finish with single crochets in the last 3 stitches.
- Cut the yarn, leaving a tail for finishing.
Create a Seamless Join
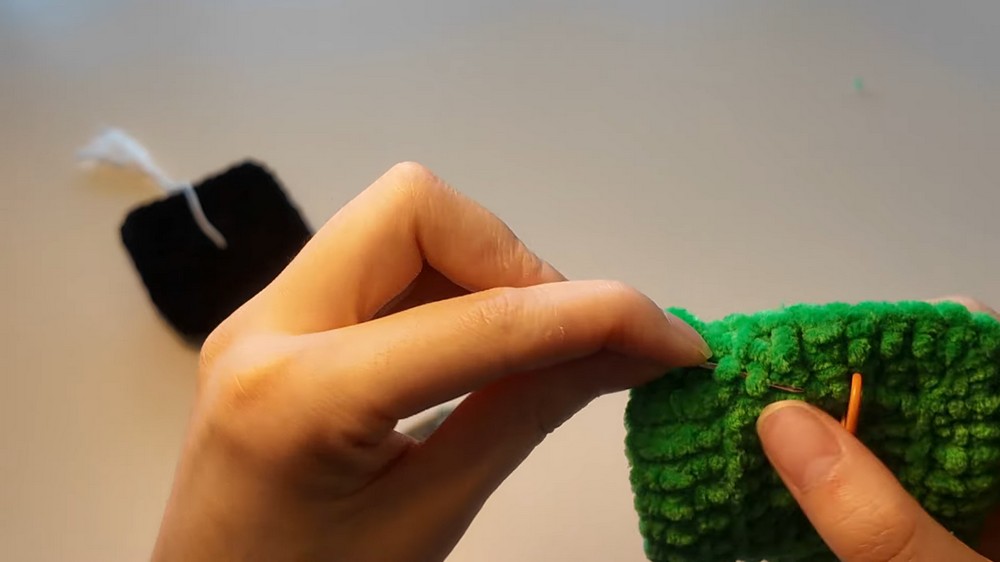
Instead of leaving a noticeable slip-stitch join, use the following method to create a clean, crochet-like finish:
- Take your hook and insert it through both loops of the first single crochet, going from the front to the back.
- Pull the yarn through to the front.
- Flip the work over.
- Insert the hook through the back loop only of the last single crochet.
- Pull the yarn tail through to the back. This creates a neat fake stitch that blends with the surrounding stitches.
- Use a tapestry needle to weave in this outer yarn end.
Important: Keep the long center yarn tail intact. You will need it to secure the tassel later.
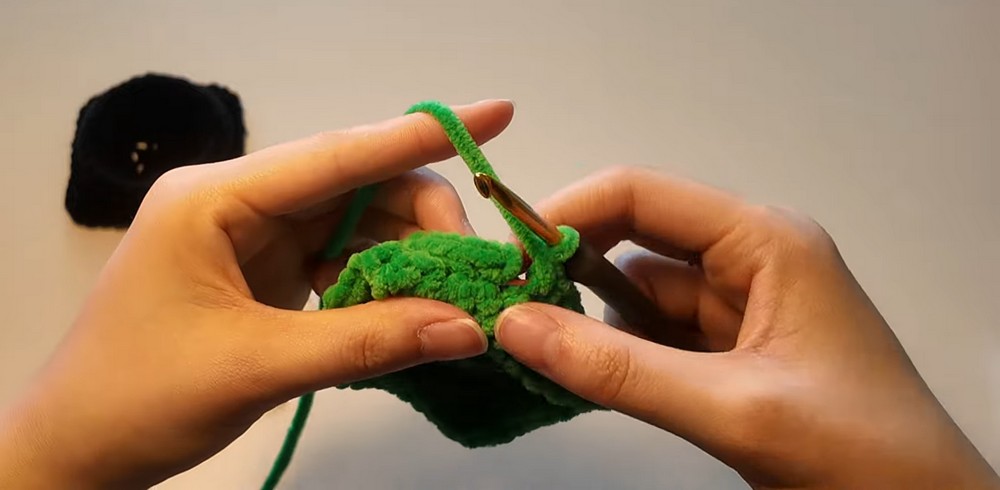
Part 2: Crochet the Hat Base
The lower band is worked into the exposed back loops left behind during Round 4. These loops create the attachment point between the square top and the base.
Rnd 1: Attach the Yarn to the Reserved Loops
- Locate the 23 exposed back loops left behind from Round 4.
- Use the stitch marker to identify loop number 1. The corner stitches should fall approximately on loops #3, #9, #15, and #21.
- Insert your hook into the first back loop, where the stitch marker was placed.
- Pull up a loop of your main yarn and chain 1.
- Work 1 single crochet in each of the 23 back loops. Pick up 1 additional loop to bring the total to 24 stitches, distributing the stitches evenly around the base.
- As you crochet, lay the starting yarn tail across the top of the stitches and crochet over it. This saves time when weaving in the end.
- Slip stitch into the first single crochet, then chain 1.
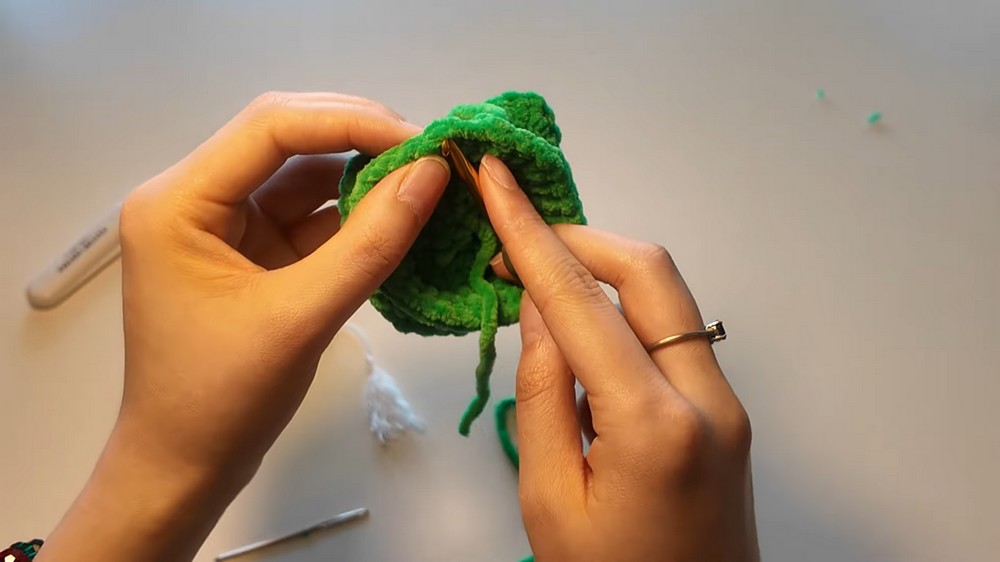
Rnd 2: Add the Flared Base
- Work 1 single crochet in the same stitch where you made the slip stitch.
- Work 1 single crochet in the next stitch.
- Work an increase (2 single crochets in the same stitch) in the corner stitch.
- Work 1 single crochet in each of the next 3 stitches.
- Continue repeating the sequence around:
(2 sc, inc, 3 sc). - Cut the yarn, leaving a tail for finishing.
- Use the same seamless join technique as the top: pull the yarn through the first stitch, then route it back through the back loop of the last stitch.
- Weave in all remaining loose ends on the base.
Part 3: Make the Graduation Tassel
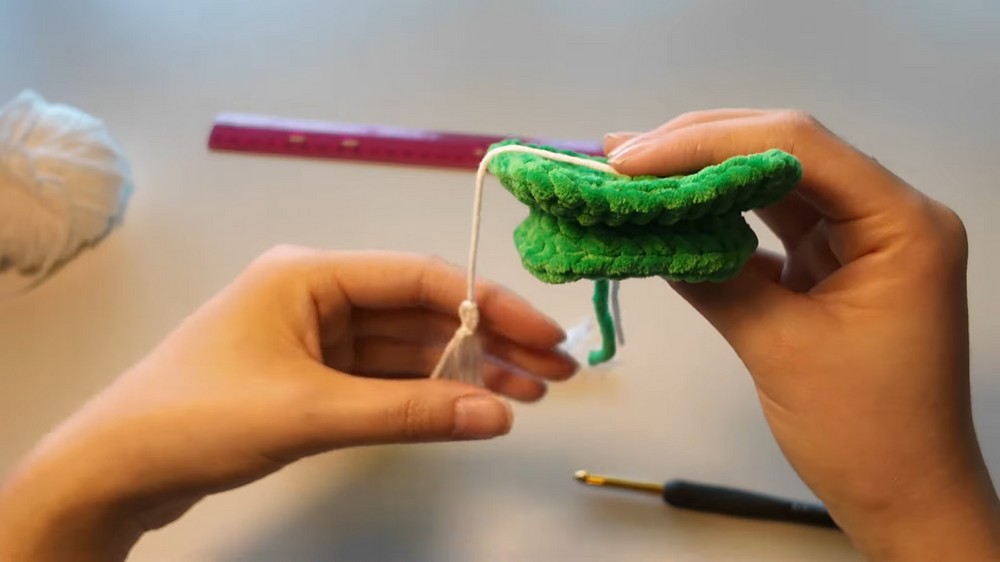
A contrast-color tassel gives the miniature mortarboard its recognizable graduation-day appearance. You will make it separately and attach it through the center hole of the square top.
1. Cut the Tassel Yarn
Use your ruler to measure and cut the following pieces:
- One 10-inch piece of contrast yarn for the main hanging cord.
- Three 5-inch pieces of contrast yarn for the tassel fringe.
2. Assemble the Tassel Fringe
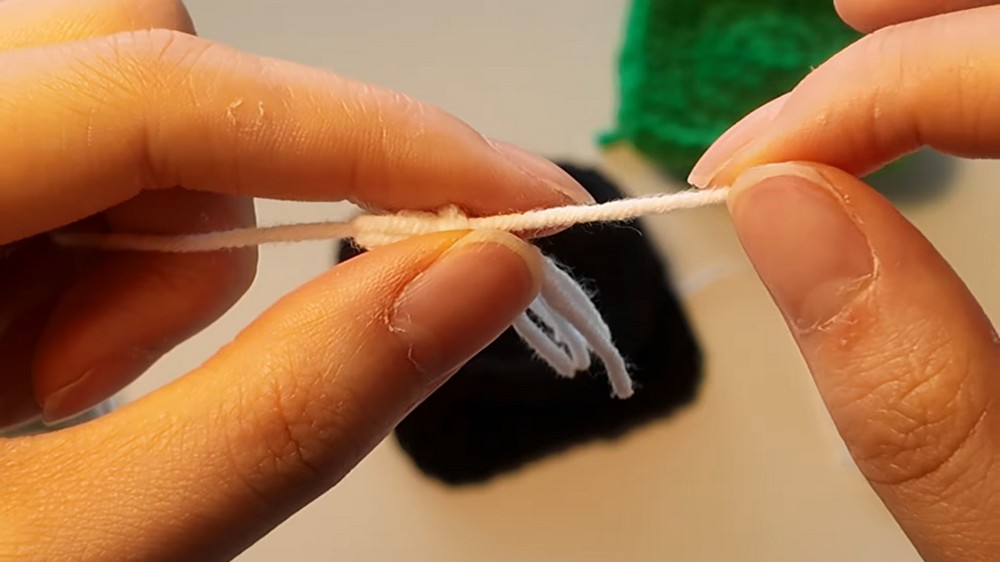
- Lay the 10-inch piece of yarn flat on your work surface.
- Take two of the 5-inch pieces and place them horizontally across the center of the longer piece. Make sure both sides have equal lengths.
- Use the long piece to tie a single knot around the two shorter pieces. Adjust the position until the knot is centered, then pull it tight.
- Lay the third 5-inch piece horizontally across your work surface.
- Place the assembled tassel piece on top of it.
- Leave approximately a half-inch space below the top knot, then tie the third short piece securely around the bundle with a single knot.
- Flip the tassel over and tie a second knot on the opposite side to secure it in place.
- Trim the bottom ends evenly with scissors to create a neat fringe.
Optional: If you prefer a softer, frayed appearance, gently untwist the yarn plies before trimming the tassel.
Part 4: Attach the Tassel to the Mortarboard
- Insert your crochet hook down through the very center hole of the square mortarboard top.
- Grab the two hanging ends of the 10-inch tassel cord with your hook.
- Pull both ends through the center hole to the inside of the hat.
- Adjust the tassel until it hangs approximately 1 inch below the base, or to your preferred length.
- On the inside of the hat, tie the tassel cord securely to the reserved center yarn tail from the top. Use a double or triple knot to keep it firmly in place.
- Trim any excess yarn carefully on the inside.
Your miniature graduation hat is now ready to dress up a small amigurumi chick, penguin, or another favorite crocheted character. A contrasting tassel makes the little cap stand out, while changing the main yarn color gives you an easy way to coordinate it with different characters and graduation themes.