
This crochet gingerbread cookie plushie combines a classic holiday shape with sparkling icing, colorful gumdrop buttons, and a charming bow for a cheerful handmade decoration. One clever construction method keeps the body, arms, and feet connected as you work, making each crochet round even more satisfying.
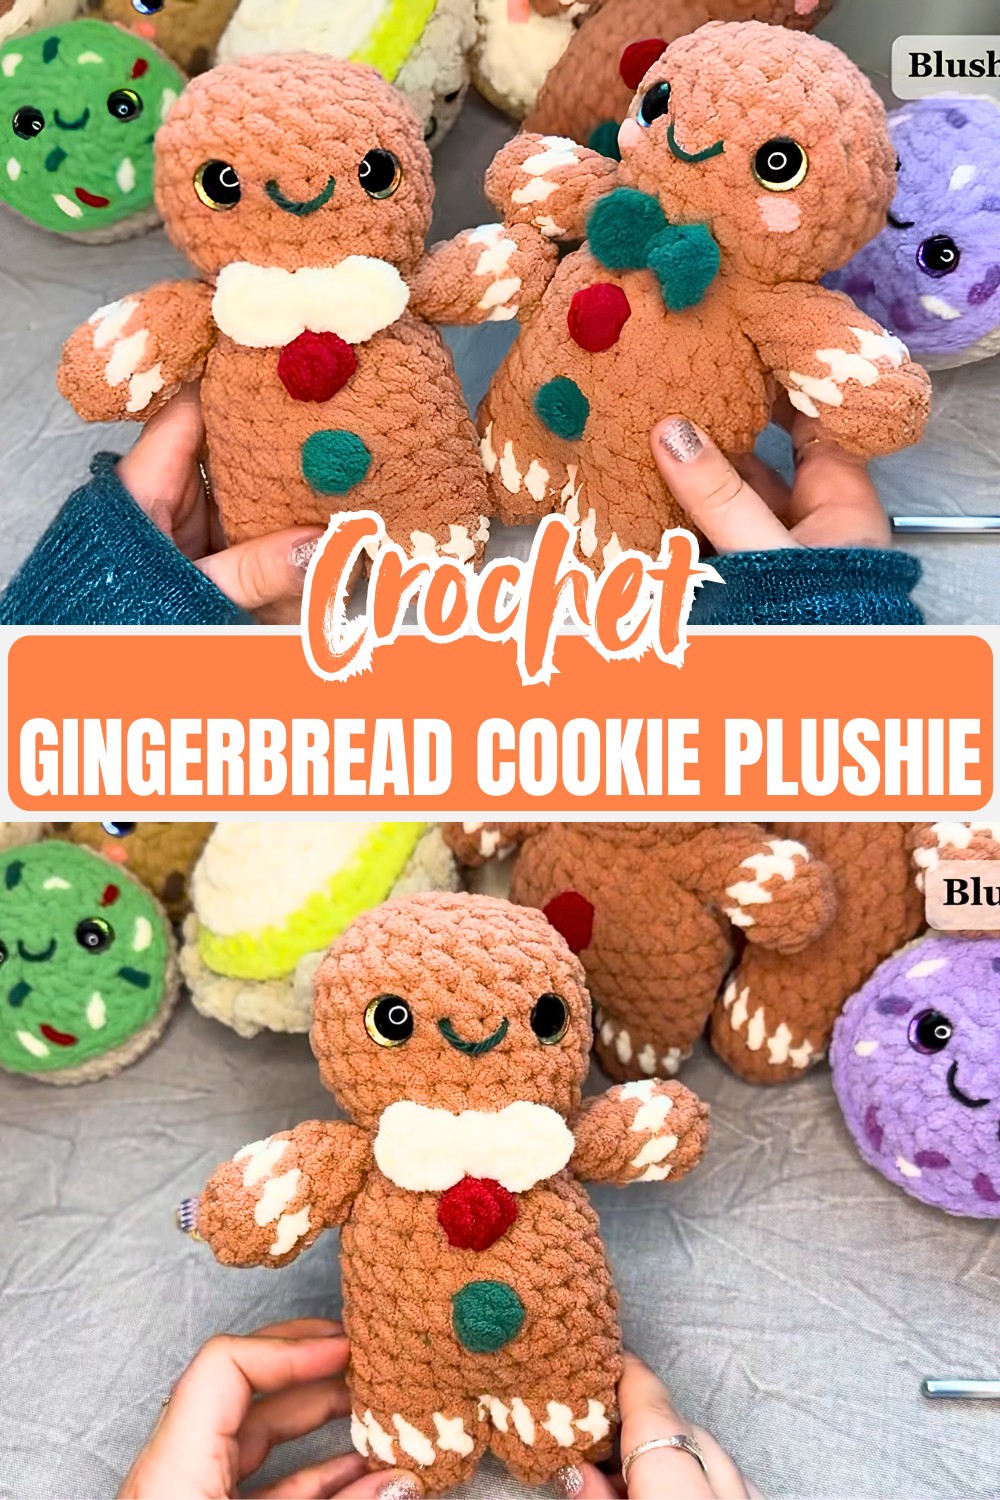
The tutorial guides you through every stage, from the first magic circle to the final decorative touches, while leaving plenty of room to personalize the face and accessories. As the soft shape fills out and the festive details appear, the crochet gingerbread cookie quickly comes to life with its own playful personality.
Credit Annie Carraway Art
Materials & Tools Needed
- Yarn: Bernat Blanket Yarn in Sienna (hard to find in smaller skeins; opt for 400-yard skeins), sparkly white for icing details. Cotton worsted yarn for facial embellishments.
- Hook: 6.5 mm crochet hook.
- Eyes: 16 mm safety eyes (optionally hand-painted, customize colors like green or gold).
- Stuffing: Polyfill for a plush finish.
- Additional Tools: Stitch markers, scissors, yarn needle, Arlene’s fabric fusion glue (optional).

Pattern Note
The pattern is worked seamlessly, meaning no sewing for the arms, feet, or body—every piece is crocheted together directly. It uses fundamental crochet techniques and simple color-changing methods for festive flair.
Gauge
Not crucial unless aiming for a particular size. Adjust hook/yarn for tighter/looser stitches. Ensure consistency for a polished look.
Pattern Construction & Key Features
- Uses magic circles for a seamless start to arms, legs, and body.
- Features attractive gumdrop bobble stitches for playful embellishments.
- Color changes for decorative icing details—seamless and hidden for a clean finish.
- Arms crocheted directly onto the body—no sewing required!
- Includes optional additions like bows, blush, and smiles painted on by you.

Making Process
The pattern begins with the arms and feet, each worked in the round using a magic circle. Sparkly white yarn creates the icing details before changing back to brown, and the feet are joined together with a seamless technique to start building the body.
The body is worked continuously with single crochet stitches, while colorful gumdrop bobble stitches are added for decoration. The arms are crocheted directly onto the body instead of being sewn later, creating one seamless piece throughout.
The head is shaped with gradual increases and decreases, then stuffed firmly before the safety eyes are placed and the opening is closed with invisible decreases. The plushie is finished with optional details such as a bow, blush, and a stitched smile to complete the festive gingerbread look.
Step-by-Step Pattern
Round-by-Round Construction
Arms
- Magic Circle: Create 8 single crochets (sc) into a magic loop.
- Pull circle closed; ignore starting chain. Work 8 sc in a round.
- Add icing detail by switching to sparkly white yarn for one row.
- Switch back to brown yarn for two rows.
- For the final row, decrease invisibly for smooth shaping (pull up front loops only). Finish off and stuff lightly. Repeat for the other arm.

Feet
- Magic Circle: Start with 10 sc into a loop.
- Alternate brown and white yarn to create icing details.
- Set aside the unfinished foot stitch, then join it to the second crochet foot using a seamless connection technique.

Body
- Begin joining the feet by crocheting around them with increases for shaping.
- Add rows of single crochet, finishing off gumdrop colors with bobble stitches (three unfinished double crochets in one stitch).
- Work steadily for the arms, single crocheting them directly onto the body for seamless connections.

Head & Final Touches
- Gradually increase, then decrease, as you build the head. Stuff firmly as you go.
- Place the safety eyes between rows 17 and 18, four stitches apart.
- Close off with invisible decreases and sew the hole shut. Add blush, smiles, or a bow for personalized style!

Troubleshooting & Suggestions
Tips for Common Issues:
- Magic Circle Problems: If it’s tricky, start with chain stitches to form a loop. Close gaps later with a needle.
- Color Changes: Carefully carry your yarn behind stitches to avoid visible strands and tangles.
- Messy Edges: Pull snugly to even out stitches for clean borders.

Creative Modifications:
- Experiment with colors: pink bows, blue icing details, or multicolor gumdrops.
- Swap safety eyes for embroidered features (perfect for younger children or a vintage look!).
- Transform the cookie into a holiday tree topper with hanging loops!
Conclusion & Action Step
Celebrate the holidays with a batch of festive Gingerbread Cookie Plushies. Whether you’re dressing them with bows or handing them out as heartfelt gifts, these crochet creations bring charm and creativity to any occasion. Gather your yarn and hook today, and let’s make your cookie dreams come true.


