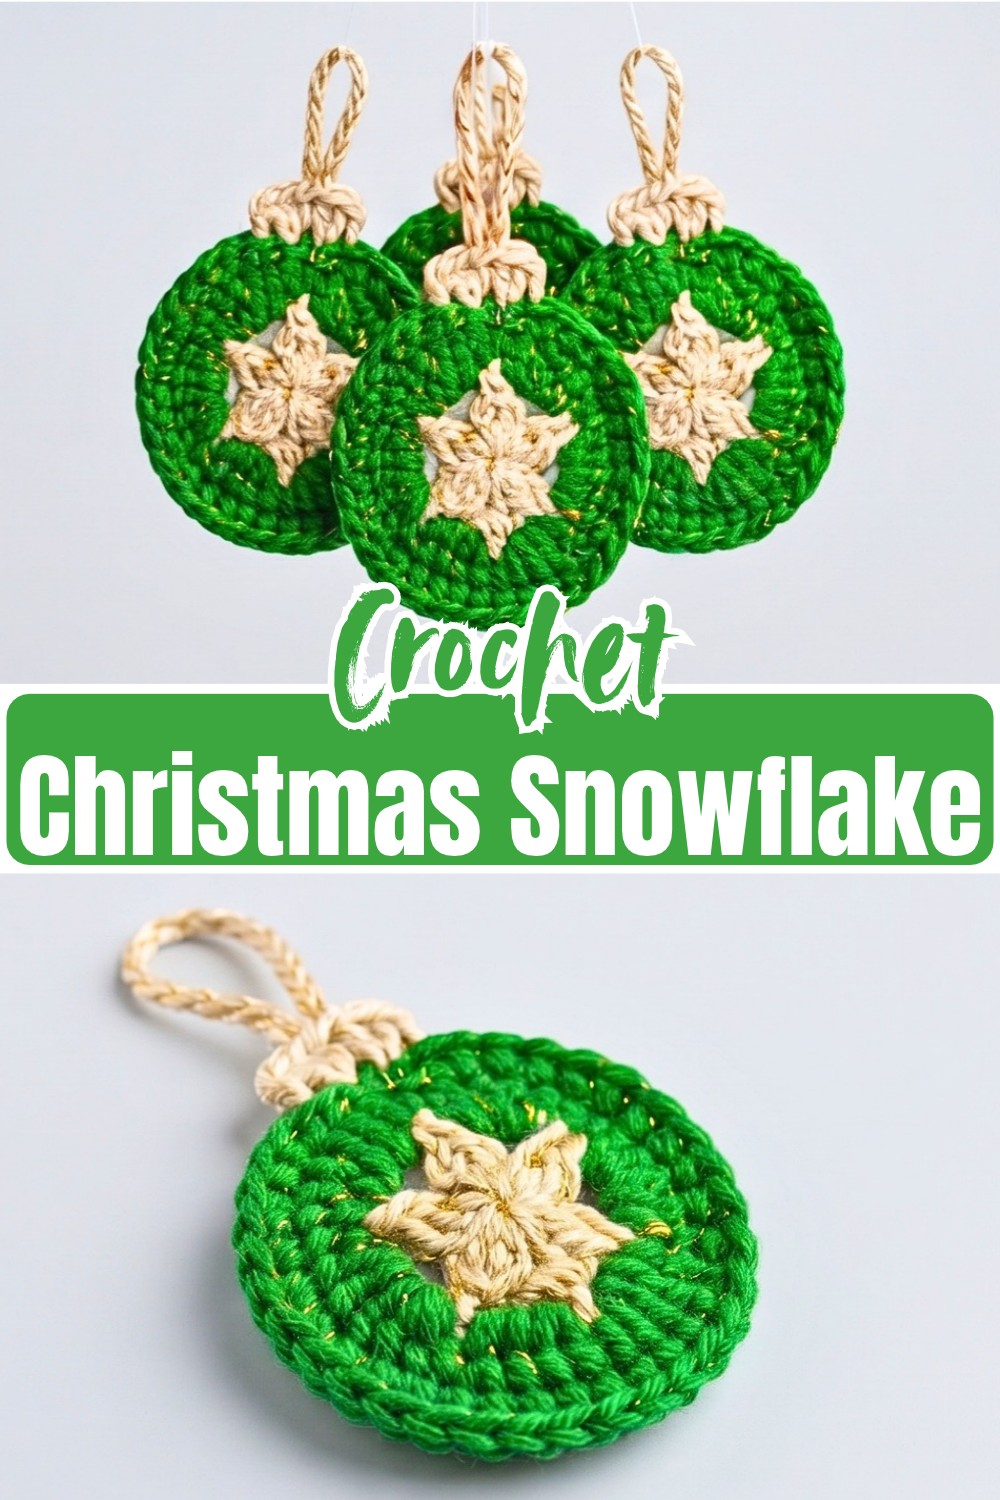
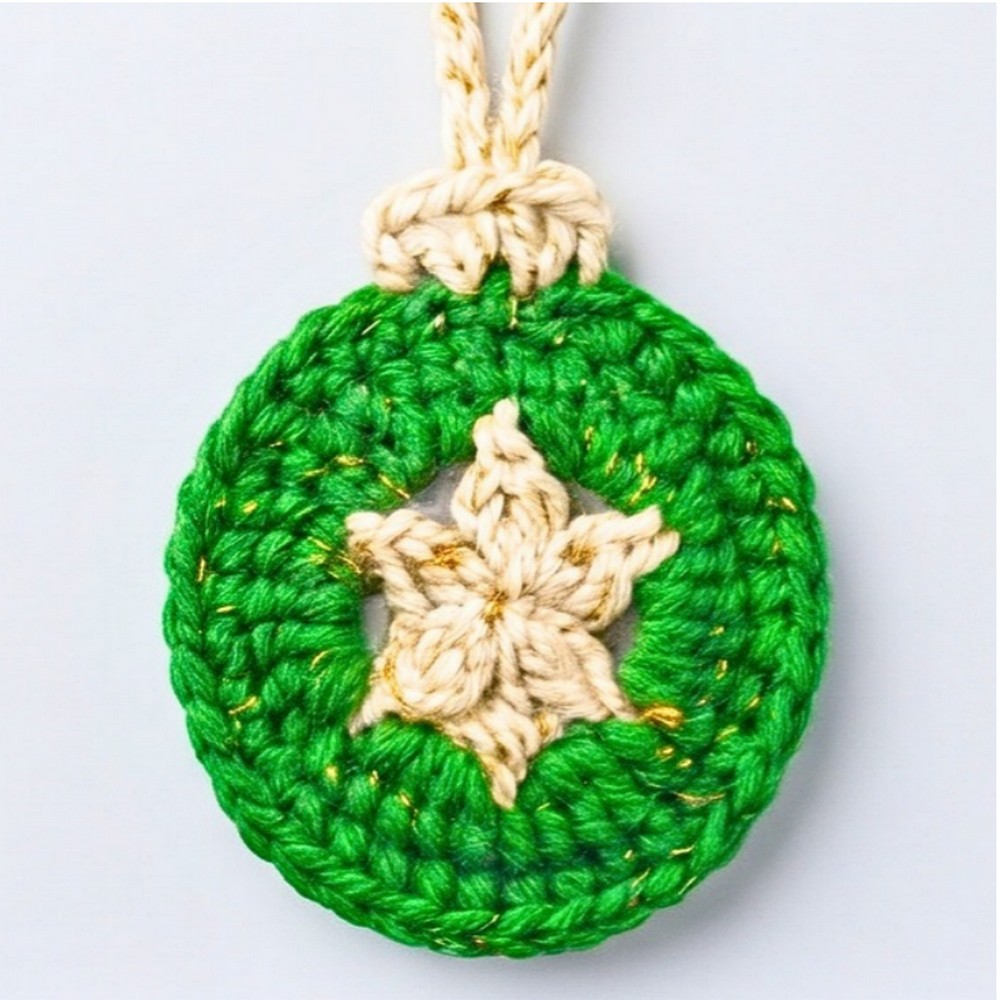
Christmas decorating gets a little more personal when a small handmade ornament joins the crochet tree. This flat crochet snowflake ornament combines a delicate white center with a green bulb-shaped body, so the finished piece has a cheerful holiday look without requiring a complicated shape.
The crochet pattern is worked in four rounds, with the center created first and the green body built around it. The final white round adds the cap and hanging loop, so there is no sewing assembly at the end-just a few yarn ends to weave in before it is ready to hang.
Credit Crochet Patterns Free
Materials & Tools Needed
- Yarn: 3-ply yarn in White for the snowflake center and top cap, and Green for the main bulb body.
- Hook: 2.5 mm crochet hook.
- Extras: Scissors and a yarn needle for weaving in ends.
Finished Size & Customization Ideas
This pattern creates a small, flat ornament measuring approximately 2.5 to 3 inches in diameter, depending on your tension. Its compact size makes it useful for a Christmas tree, gift tag, or bunting.
The classic green-and-white combination can easily be changed to suit your decorations. Try red, gold, or blue for the bulb, or add small seed beads or sequins to the green sections to suggest Christmas lights. A little glitter on the white center can also make the snowflake stand out.
Pattern Abbreviations & Terminology
The pattern uses US crochet terms:
- ch: chain
- sc: single crochet
- dc: double crochet
- cl: cluster
- spc: space, referring to chain spaces
- sl st: slip stitch
- st: stitch
Step-by-Step Crochet Instructions
Round 1: Create the Snowflake Center
The first round establishes the six-part snowflake center. The cluster stitches are worked into the magic ring, with chain-2 spaces separating each section.
Step 1: Create a magic ring.
Step 2: Ch 3, which counts as your first partial stitch. Work a 2 dc cluster (2dc cl) into the magic ring, then ch 2.
Step 3: Work a 3 dc cluster (3dc cl) into the ring, followed by a ch 2. Repeat this sequence (3dc cl, ch 2) 5 times in total.
Step 4: Pull the tail of the magic ring tightly to close the center. Sl st into the top of the very first cluster to join the round.
Color Change & Finish: Fasten off the White yarn. Stitch Count: 6 clusters and 6 ch-2 spaces.
Check the Center: Before moving to the green yarn, make sure the magic ring is pulled closed and that you can clearly see six ch-2 spaces around the snowflake. These spaces are where the next round will be worked.
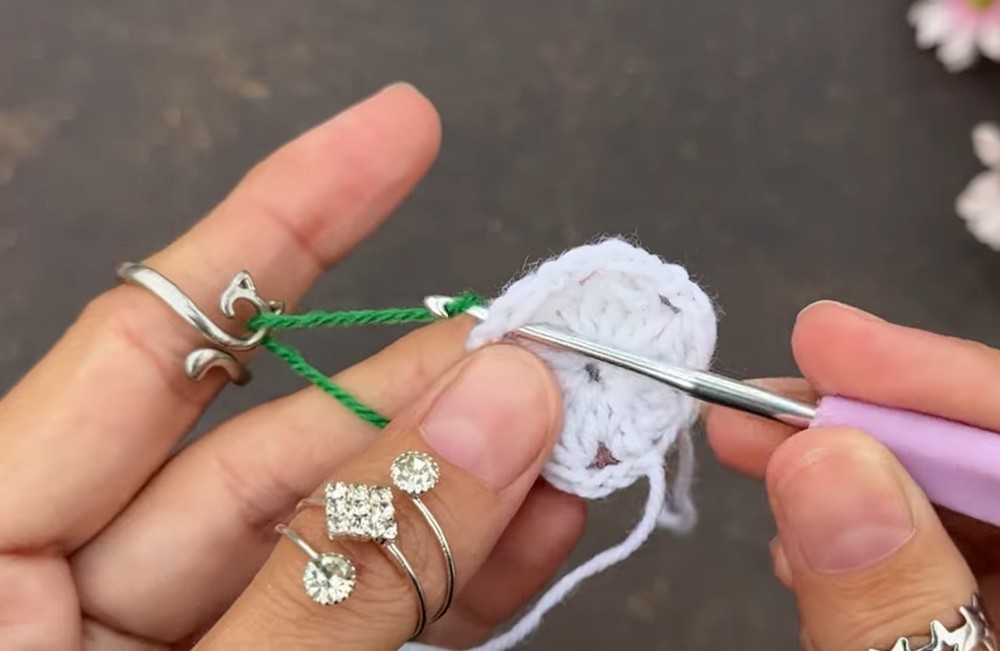
Round 2: Build the Green Bulb Body
The green round turns the small snowflake center into the wider circular body. Each ch-2 space receives a group of 6 dc.
Step 1: Attach the Green yarn into any of the ch-2 spaces from the previous round.
Step 2: Ch 3, which counts as 1 dc, and work 3 dc into that exact same space.
Step 3: Moving to the next ch-2 space, work 6 dc. Continue placing 6 dc into each of the remaining ch-2 spaces around the snowflake.
Step 4: Once you reach the original starting space, work 2 more dc into it. This completes the 6 dc grouping for that space together with the initial ch 3 and 3 dc.
Step 5: Sl st into the top of the starting ch 3 to join.
Stitch Count: 36 dc.
Why This Join Matters: The starting space receives its stitches in two parts: the first ch 3 and 3 dc at the beginning, then 2 additional dc at the end. Those final 2 dc complete the six-stitch grouping rather than creating an extra increase.
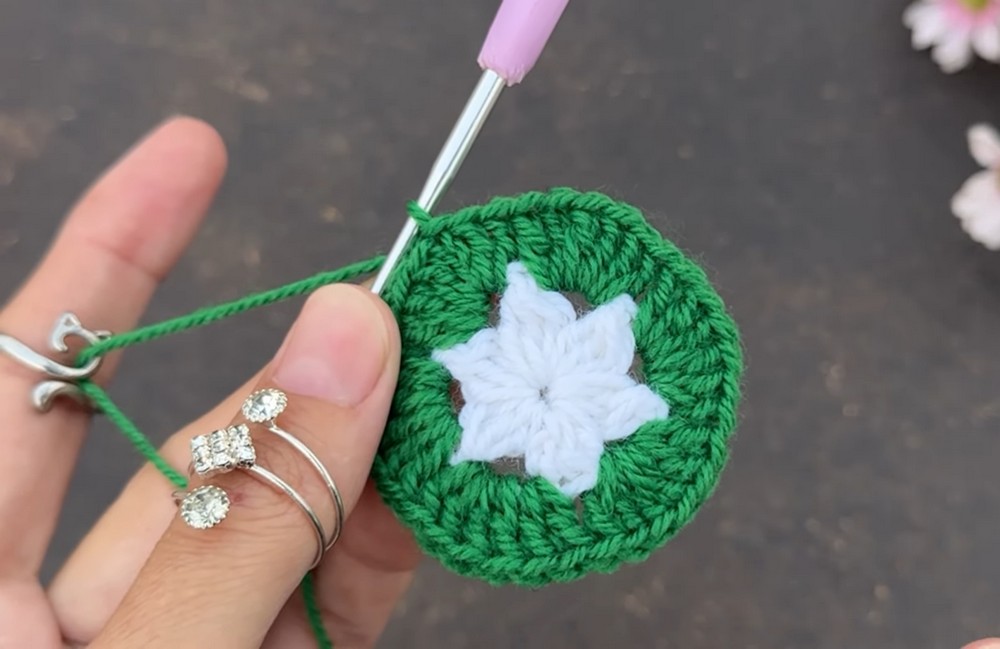
Round 3: Add the Neat Edge
With the circular bulb established, this round gives the outside edge a cleaner finish before the white cap is added.
Step 1: Ch 1, then place 1 sc into each stitch all the way around the circle.
Step 2: Sl st into the first sc to finish the round.
Color Change & Finish: Fasten off the Green yarn. Stitch Count: 36 sc.
Round 4: Shape the Ornament Cap and Hanging Loop
The final round adds the white cap and creates the hanging loop directly from the ornament, so no separate loop needs to be sewn on afterward.
Step 1: Attach the White yarn to any stitch at the top edge of your green bulb.
Step 2: Ch 3, which counts as 1 dc, and work 1 dc into each of the next 2 stitches. You now have 3 stitches forming the right side of the cap.
Step 3: Ch 20 to 25 to form the hanging loop.
Step 4: Sl st directly into the top of the last dc you just made to anchor the loop.
Step 5: Work 1 dc into each of the next 3 stitches along the green edge to complete the left side of the metal cap.
Finish: Fasten off. Stitch Count: 6 dc total for the cap, plus the chain loop.
Loop Check: Before fastening off, look at the loop from the front and make sure it sits above the cap rather than twisting to one side. Choosing 20 chains gives a smaller loop, while 25 chains creates a little more hanging length.
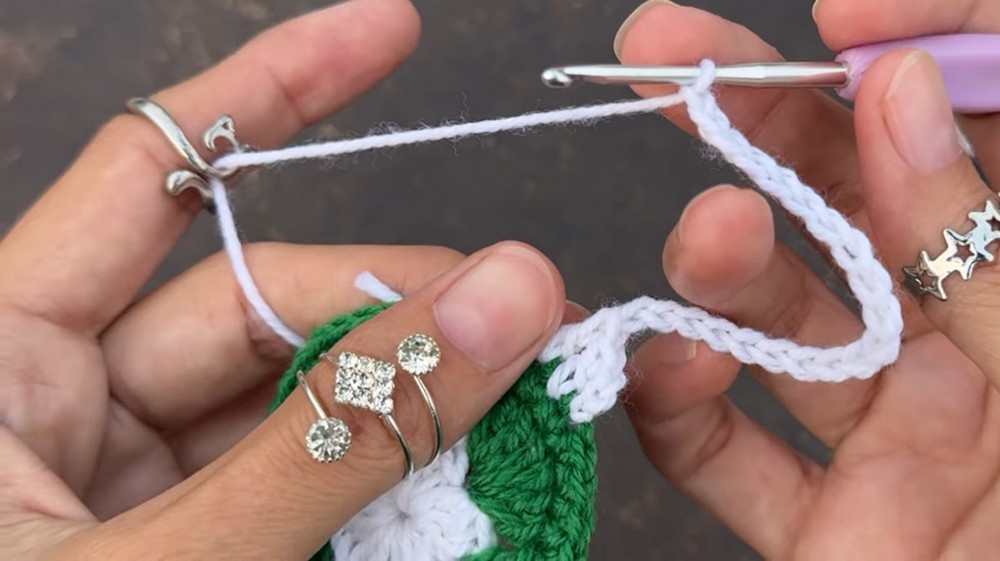
Finishing the Ornament
There is no sewing assembly for the crocheted pieces because the ornament is worked as one flat motif. Once the final round is complete, use a yarn needle to weave all loose ends securely into the back loops of the work.
If the ornament curls slightly after crocheting, give it a light steam block so the motif settles flat. This is especially useful when you want the snowflake center and circular green sections to sit neatly when the ornament is hanging.
From the white cluster center to the green bulb and final cap, the ornament comes together in just four rounds, with the hanging loop built directly into the last round. Its small, flat shape makes it easy to repeat in different color combinations for a coordinated Christmas display.
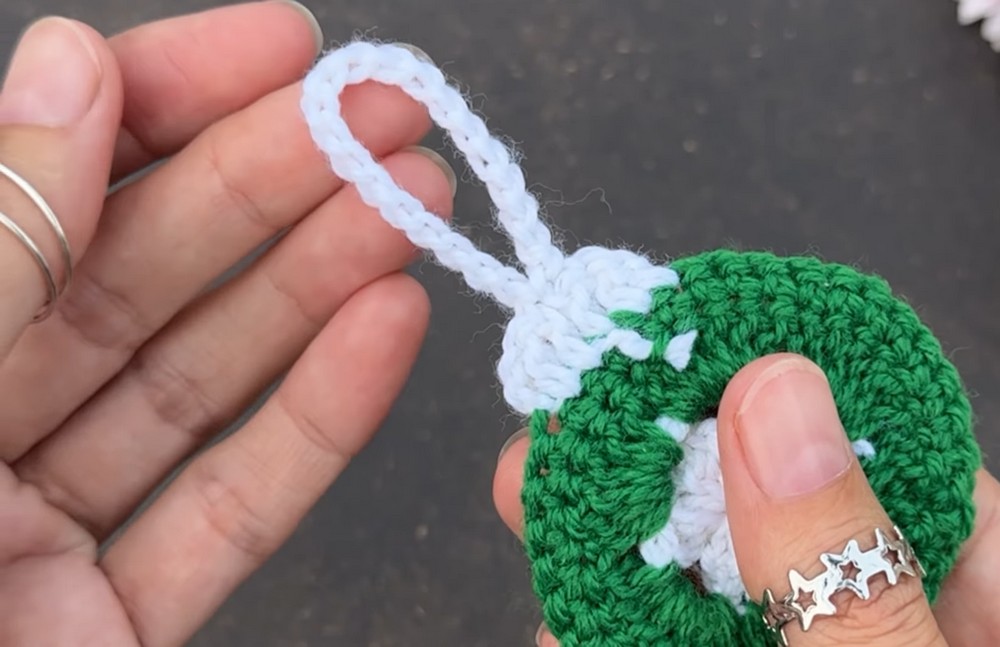
Troubleshooting
A few small details can affect the shape of this flat ornament, especially around the snowflake center, the green joining round, and the hanging loop.
The Snowflake Center Looks Uneven
If the white center does not look evenly divided, check that you have 6 clusters and 6 ch-2 spaces in Round 1. The chain-2 spaces create the points where the green round is worked, so an extra or missing space can make the outer circle look uneven.
The Green Round Does Not Look Circular
Check the first ch-3 and the stitches worked into the starting space. Round 2 is completed in two parts: the opening ch 3 + 3 dc, followed by 2 more dc in the same space at the end. These together make the required 6 dc for that space.
The Ornament Is Curling
Slight curling can happen if your tension is firm or the stitches are pulling toward the center. Check that your stitches are not unusually tight, then lightly steam block the finished ornament so it settles into a flatter shape.
The Hanging Loop Twists
If the loop turns to one side, check where the slip stitch is placed. It should anchor directly into the top of the last dc. Keep the chain relaxed while making the loop so it can rise naturally above the white cap.
The Ornament Feels Too Small or Large
Because the finished diameter depends partly on your tension, your ornament may fall slightly outside the 2.5–3 inch range. If the pattern is otherwise matching the stated stitch counts, a difference in size is usually caused by crochet tension rather than an incorrect round.