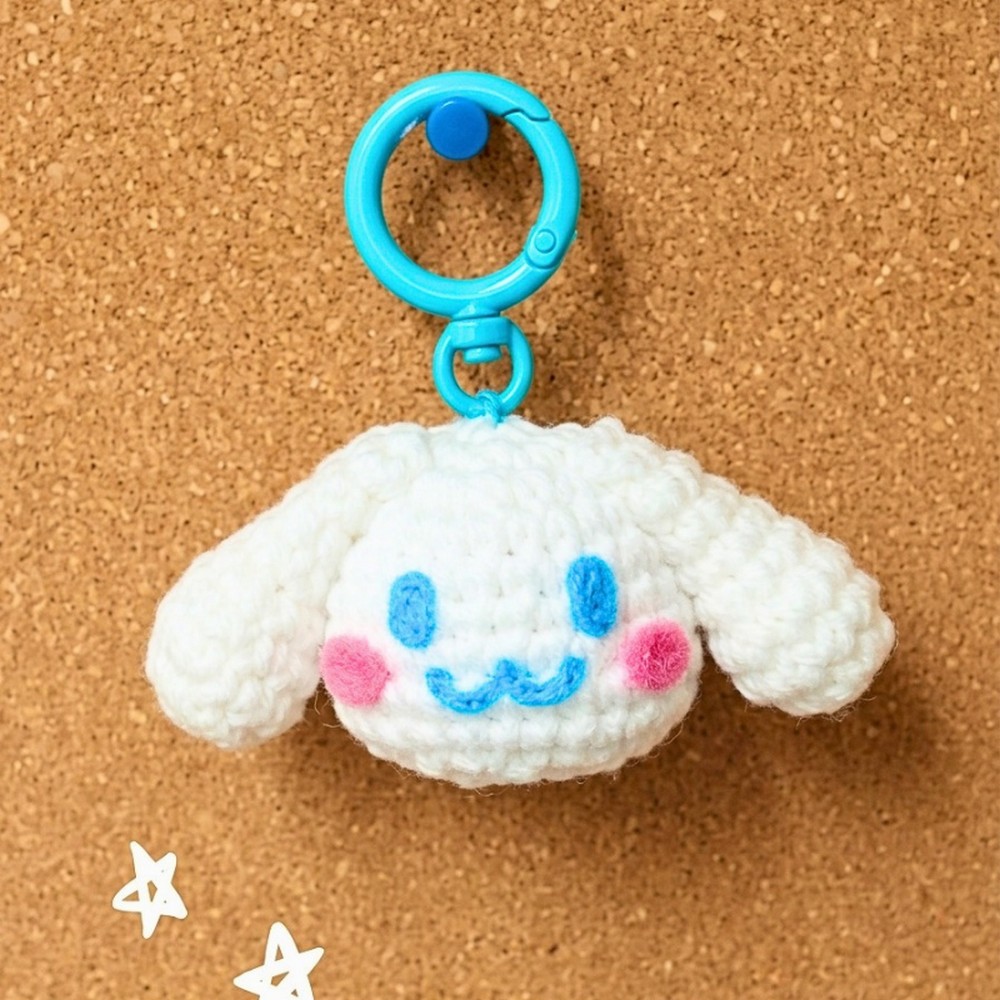
Those floppy ears and tiny blue-and-pink face give this little amigurumi its charm-follow the steps to crochet your own Cinnamoroll-inspired keychain.
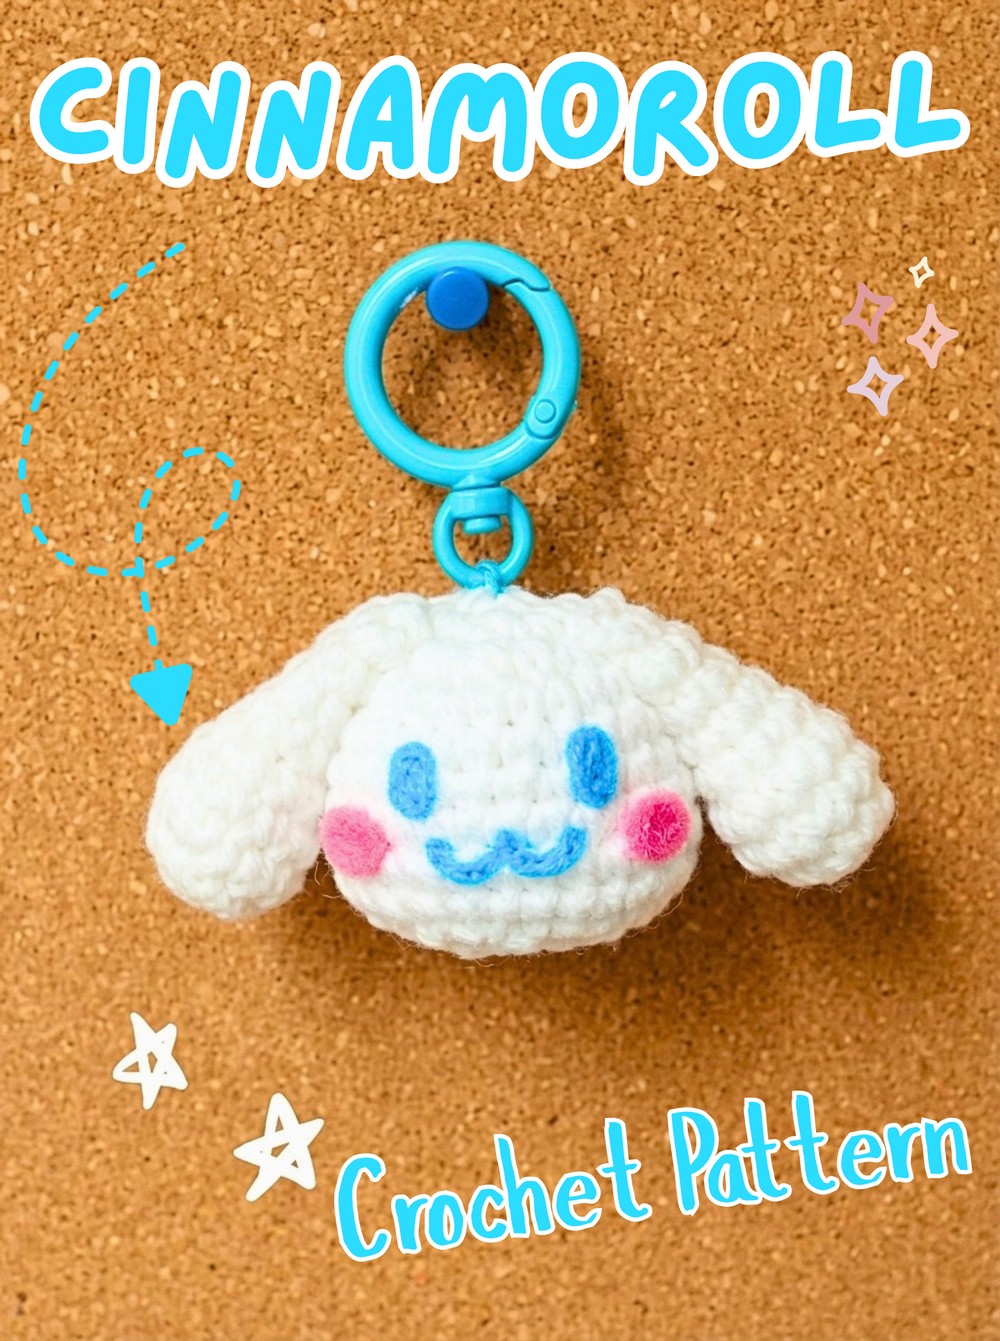
A tiny rounded head, floppy ears, and a simple blue-and-pink face give this amigurumi its instantly recognizable character. The design is crocheted in white Milk Cotton Yarn using basic single-crochet shaping, then finished with felt eyes, blush, and a small “w” mouth. A keychain ring can be added at the top to turn the finished piece into a miniature hanging accessory.
The instructions begin with the head worked in continuous rounds, followed by two matching ears that are lightly stuffed and flattened at the top. After the crocheted pieces are finished, the ears are sewn into position, the felt facial details are prepared and attached, and the keychain hardware is added at the top. The stitch counts included throughout each round make it easier to check your shape as you work.
Credit Tedzukurida
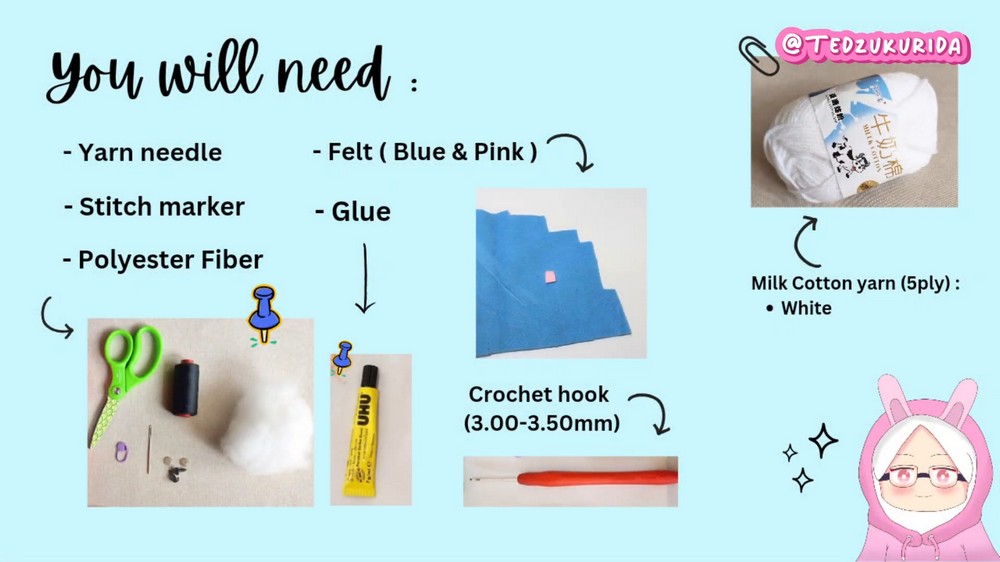
Materials & Tools Needed
- Yarn: Milk Cotton Yarn (5ply) in White
- Crochet Hook: 3.00mm–3.50mm; a Tulip 5/0 hook is used in the tutorial
- Felt: Blue for the eyes and mouth, and Pink for the blush
- Stuffing: Polyester fiberfill
- Adhesive: Craft glue such as UHU
- Hardware: Keychain ring, optional for hanging
- Basic Tools: Yarn needle, stitch markers, and scissors
Finished Size & Customization Ideas
The finished amigurumi measures roughly 2.5 to 3 inches across, although the exact size can vary with your tension and hook size.
The tutorial uses felt and glue for the facial details, but embroidered details with thin embroidery floss can also be used as an alternative when making the piece for a small child. The tutorial also mentions adding a squeaker inside the head before stuffing.
Pattern Abbreviations & Terminology
The pattern uses US terms:
- Rnd: Round
- sc: Single Crochet
- inc: Increase – 2 sc in the same stitch
- dec: Decrease – single crochet 2 stitches together
- ( ) x …: Repeat the sequence inside the brackets for the indicated number of times
- Number in parentheses at the end of a round: Total stitch count after completing that round
Before You Begin the Head
The head is worked in continuous rounds, so you do not join with a slip stitch at the end of every round. Place a stitch marker to keep track of the end of each round and move it as you progress.
Pay attention to the stitch count at the end of each round. The increases gradually widen the head, while the later decreases bring the shape back in toward the opening.
Crochet Cinnamoroll Amigurumi Keychain Pattern
Head
Work the head in continuous rounds using White yarn. Keep your stitch marker in place so you can identify where each round begins and ends.
Rnd 1: Make 6 sc in a magic ring. (6)
Rnd 2: (inc) x 6. (12)
Rnd 3: (sc, inc) x 6. (18)
Rnd 4: (sc, inc, sc) x 6. (24)
Rnd 5: sc all around. (24)
Rnd 6: sc all around. (24)
Rnd 7: (3 sc, inc) x 6. (30)
Rnd 8: sc all around. (30)
Rnd 9: sc all around. (30)
Rnd 10: (sc, dec) x 10. (20)
Rnd 11: (sc, dec, sc) x 5. (15)
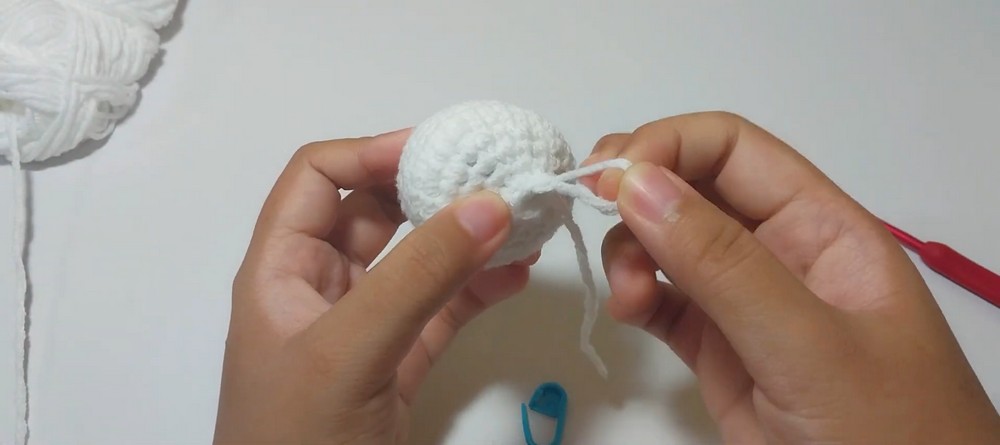
Rnd 12: (sc, dec) x 5. (10) Pause here and firmly fill the head with polyester fiber.
Stuffing Checkpoint
The stuffing needs to be added before the final decrease round closes the head. At the end of Rnd 12, the opening has 10 stitches, giving you the space needed to fill the shape before continuing.
Rnd 13: (dec) x 4. (6) Cut the yarn, leaving a tail, and fasten off. Thread the yarn tail onto a yarn needle and sew through the front loop only of the remaining 6 stitches. Pull tightly to close the opening, then hide the remaining yarn tail inside the head.
Using the front loop only when closing the final six stitches is important because this is the specified finishing method for drawing the opening closed neatly.
Ears – Make 2
The ears are made separately in continuous rounds using White yarn. Unlike the firmly stuffed head, these should remain soft and relatively flat toward the top.
Rnd 1: Make 6 sc in a magic ring. (6)
Rnd 2: (inc) x 6. (12)
Rnd 3: sc all around. (12)
Rnd 4: sc all around. (12)
Rnd 5: (sc, dec) x 4. (8)
Rnd 6: sc all around. (8)
Rnd 7: sc all around. (8)
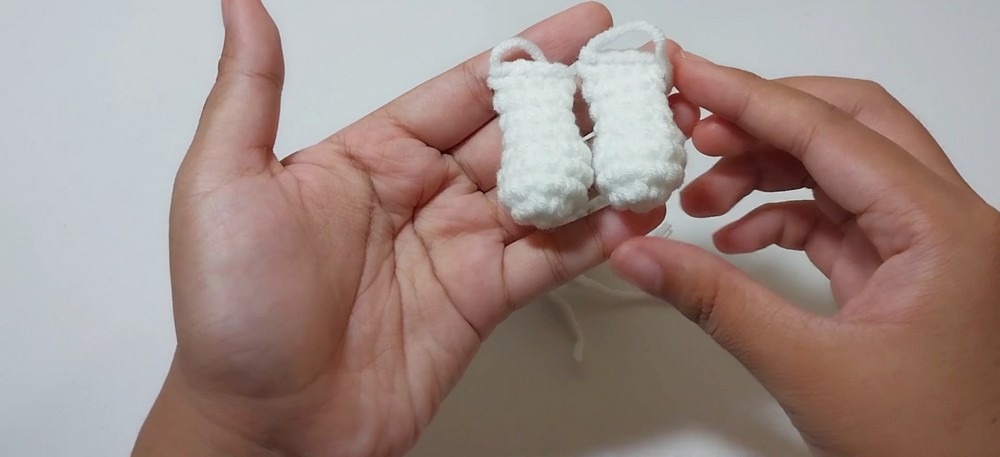
Rnd 8: sc all around. (8) Fill the ear lightly with polyester fiber, placing stuffing only at the very bottom end so the top remains flat.
Flattening the Ear
After Rnd 8, pinch the open top edge flat. Insert your hook through both layers of the flattened opening and join the two layers by working 4 single crochets across.
Finishing: Cut the yarn, leaving a long tail for sewing, and fasten off. Repeat the same pattern to make the second ear.
Keeping the upper portion flat is important because the ears are attached to the sides of the head rather than being left as open, rounded pieces.
Attaching the Ears
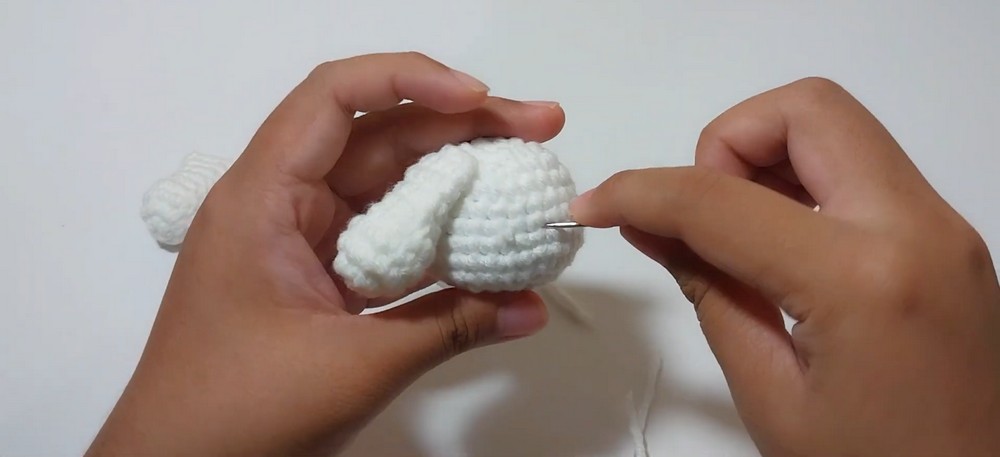
Thread the long yarn tail from one ear onto your yarn needle. Position the ear against the side of the head and sew it securely between Rnd 2 and Rnd 3.
Repeat the same process with the second ear on the opposite side of the head. Check the placement before securing the stitches so the ears sit on opposite sides in matching positions.
Creating the Face Details
The face is made from small pieces of Blue and Pink felt.
- Cut the Blue and Pink felt into small squares that are easy to trim into the required shapes.
- Eyes: Trim the blue felt into two small ovals.
- Blush: Trim the pink felt into two small ovals.
- Mouth: Carefully cut a tiny “w” shape from the blue felt.
Because these pieces are small, prepare all of them before gluing so you can check their placement together on the front of the head.
Securing the Face
Position the blue eyes, blue mouth, and pink blush patches on the center front of the head. Take a moment to check their arrangement before permanently attaching them.
Use craft glue such as UHU to secure the felt pieces in place. The tutorial also mentions an alternative: the blue facial pieces can be sewn on with fine blue thread instead of being glued.
Adding the Keychain Ring
Once the facial details are secured, add the optional hardware to turn the amigurumi into a hanging keychain.
Open the keychain hardware loop and hook it securely through the top center of the head. Check that the loop is attached firmly before using the finished piece as a keychain.
Final Finishing Check
Before attaching the finished piece to a bag, keys, or another item, check that the ear seams are secure, the face details are firmly attached, and the keychain loop is properly closed. Trim or hide any remaining loose yarn tails for a neat finish.
Your small white amigurumi now has its rounded head, floppy ears, blue-and-pink facial details, and optional keychain hardware ready to complete the character-inspired look.