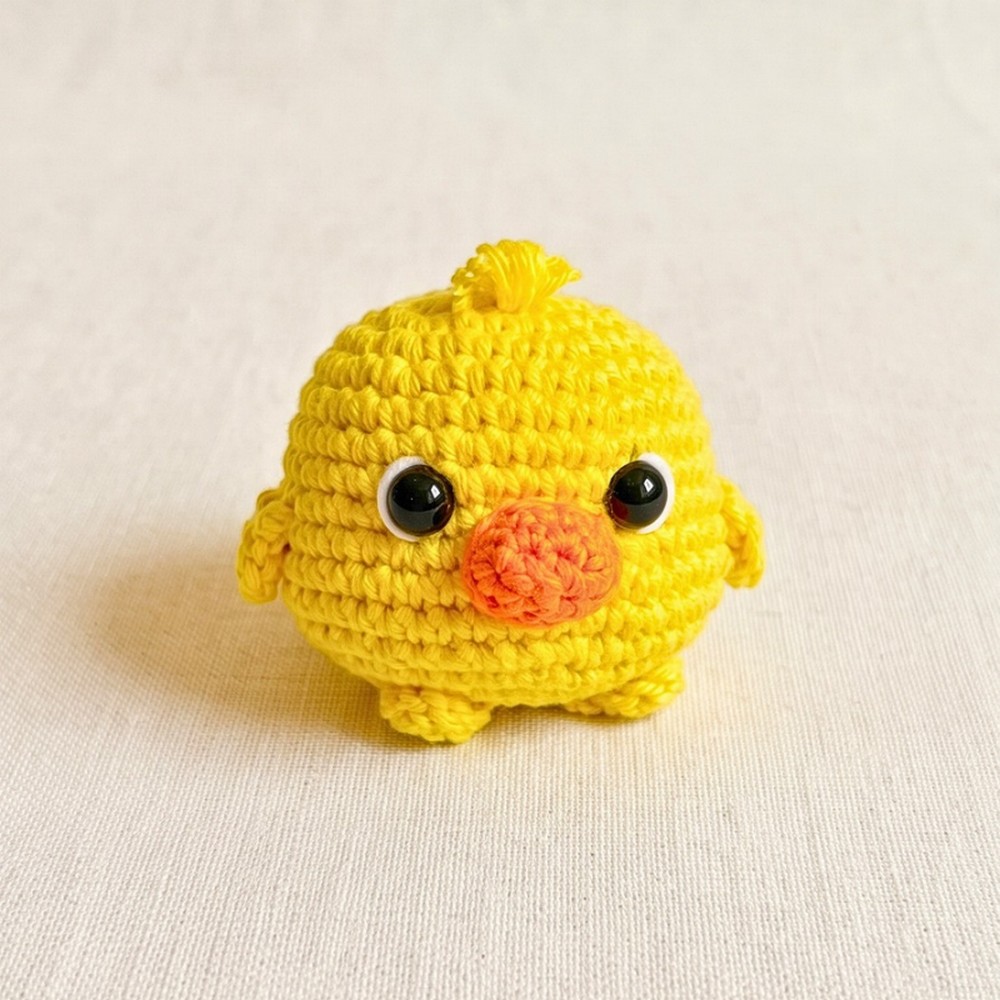
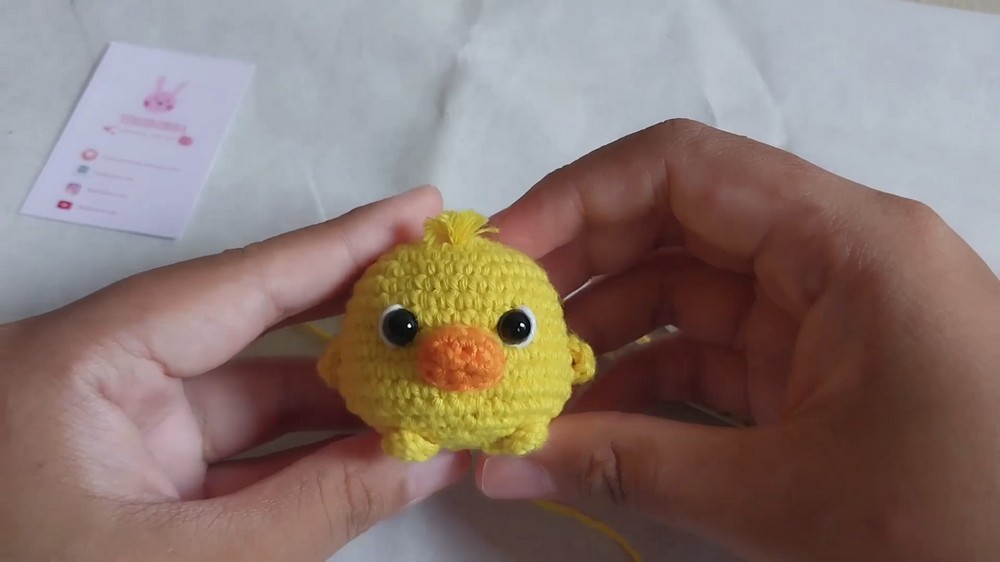
Want to make a tiny chick with plenty of personality? This crochet baby chicken has a round yellow body, little wings, bright eyes, and fluffy top hair.
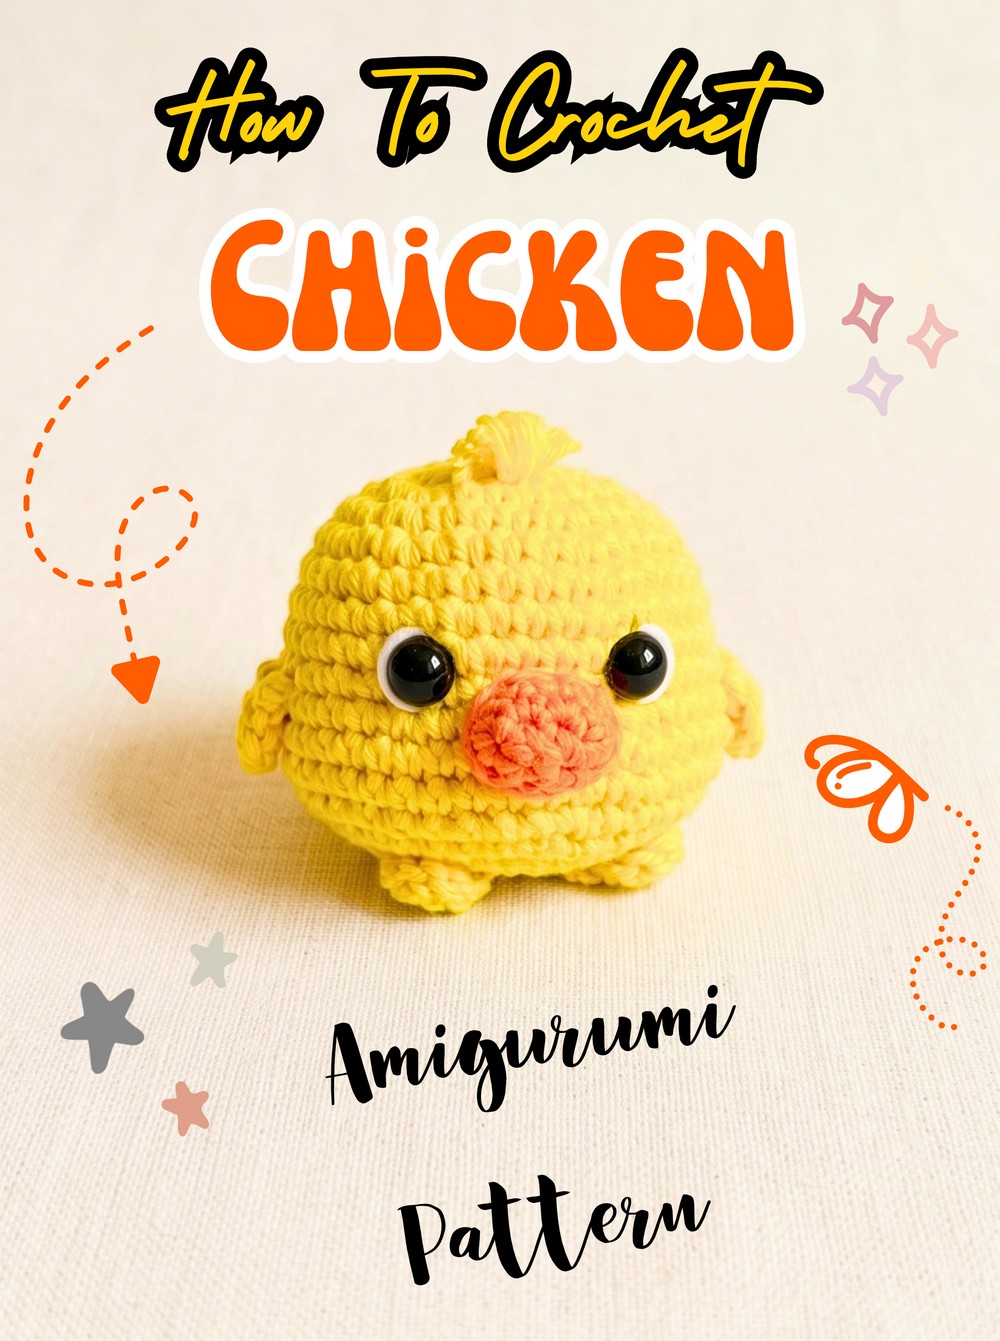
The tiny crochet baby chicken is made with small-ply cotton yarn and shaped into a cheerful palm-sized amigurumi with a rounded yellow body, little wings and feet, and a small orange beak. Its playful character comes from the 6mm safety eyes, simple white eye highlights, and three yellow yarn loops at the top that are trimmed into a fluffy tuft, giving the crochet chick a sweet handmade expression.
Follow instructions: begin with the yellow body worked in continuous rounds, gradually increasing to form the rounded shape before narrowing again around the face and lower body. You’ll stop at the specified round to place the safety eyes, add the fiberfill before the opening becomes too small, and then close the body. From there, the beak, two wings, and two feet are made separately, followed by sewing each crochet piece into position and finishing the eyes and top hair detail.
Credit Tedzukurida
Materials & Tools Needed
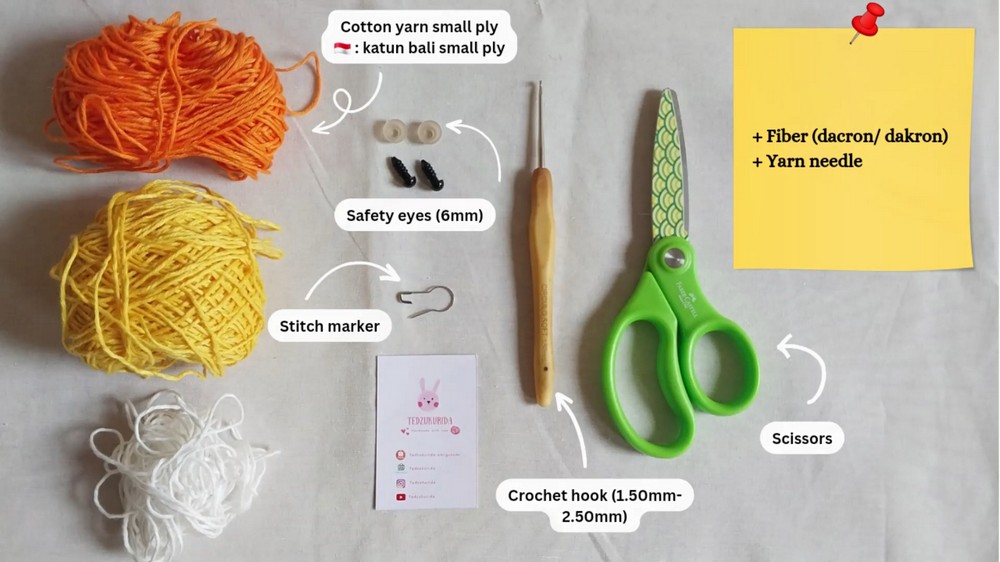
- Yarn: Small ply cotton yarn (or katun bali small ply) in Yellow for the body, wings, and feet; Orange for the beak; and a small amount of White for eye detailing
- Crochet Hook: 1.50mm–2.50mm
- Eyes: 6mm safety eyes
- Stuffing: Fiberfill (dacron/dakron)
- Tools: Stitch marker, yarn needle, and scissors
Finished Size & Customization Ideas
The exact size depends on your yarn and tension, but the finished baby chicken has a classic palm-sized amigurumi shape.
You can also adapt the finished piece in a few simple ways:
- Keychain: Attach a key holder to the top hair loops before cutting them to create a cute bag charm.
- Easter Theme: Crochet a small half-shell using White yarn for the chick to sit inside as part of a spring or Easter display.
- Color Variations: Replace the Yellow yarn with light pastel pink, blue, or green to create a flock of fantasy baby chicks.
Pattern Abbreviations & Terminology
- MR: Magic Ring
- ch: Chain
- sc: Single Crochet
- inc: Increase – 2 sc in the same stitch
- dec: Decrease – join 2 stitches into one
- hdc: Half Double Crochet
- dc: Double Crochet
- FLO: Front Loop Only
- (…) x N: Repeat the sequence in parentheses N times
- (…): Total stitch count at the end of the round
Step-by-Step Crochet Instructions
Body – Yellow Yarn
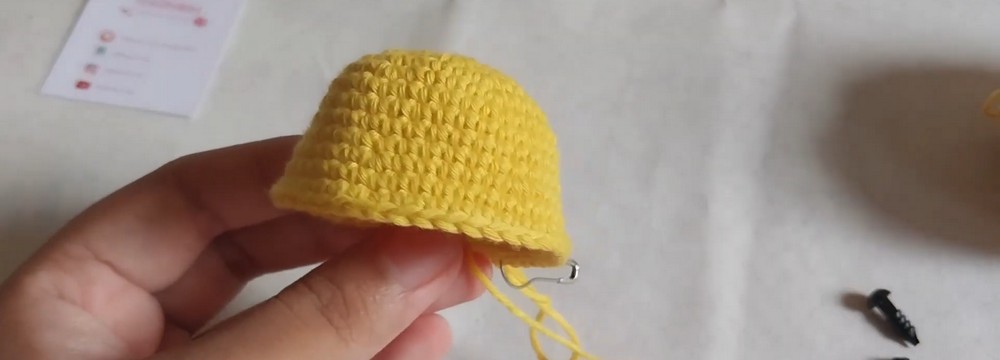
Work the body in continuous rounds. Do not join at the end of each round. Use a stitch marker to keep track of the first stitch.
Round 1: 6 sc in magic ring (6)
Round 2: (inc) x 6 (12)
Round 3: (sc, inc) x 6 (18)
Round 4: (2 sc, inc) x 6 (24)
Round 5: (3 sc, inc) x 6 (30)
Round 6: (4 sc, inc) x 6 (36)
Rounds 7–10: sc all around for 4 rounds (36)
Round 11: (5 sc, inc) x 6 (42)
Rounds 12–13: sc all around for 2 rounds (42)
Pause Here for Eye Placement
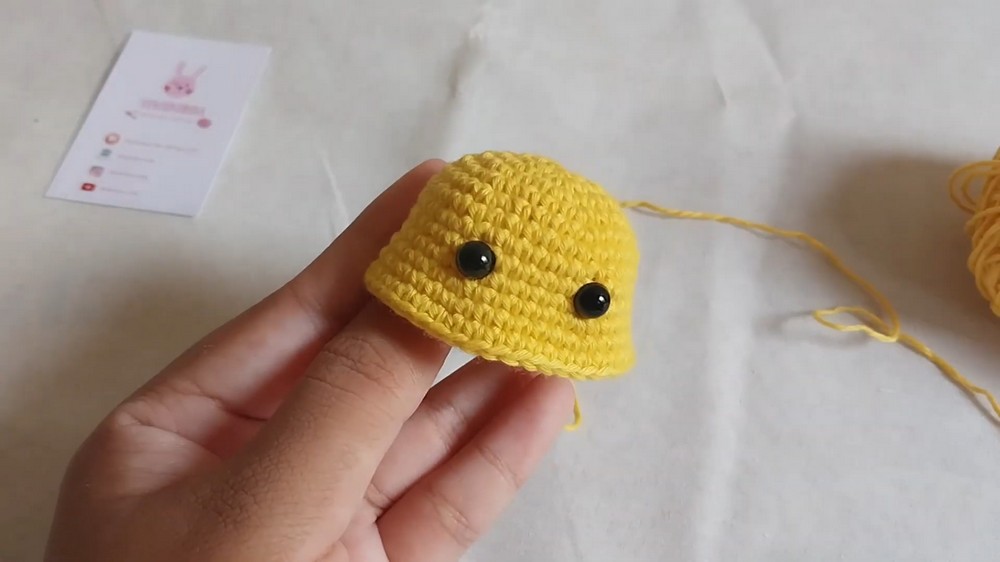
Stop crocheting after Round 13 before continuing with the decreases. Insert the 6mm safety eyes between Rounds 9 and 10, with 5 stitches (loops) between them, then secure the backings tightly.
This is the specified point for the eyes, so it is better to place them now rather than continuing into the decrease rounds and trying to position them afterward.
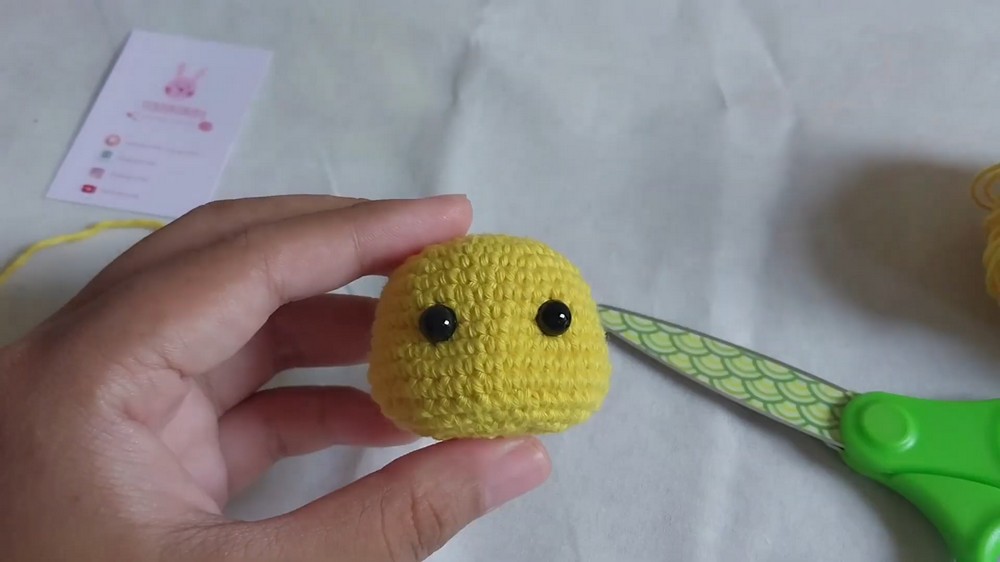
Round 14: (5 sc, dec) x 6 (36)
Round 15: (4 sc, dec) x 6 (30)
Round 16: (3 sc, dec) x 6 (24)
Round 17: (2 sc, dec) x 6 (18)
Round 18: (sc, dec) x 6 (12)
Stuff the Body Before Closing
Firmly fill the body with fiberfill before the opening becomes too small. Complete the stuffing before Round 19 so the filling can be positioned inside the rounded body properly.
Round 19: (dec) x 6 (6)
Finishing: Fasten off, leaving a tail. Thread the yarn needle and sew through the Front Loop Only (FLO) of the remaining 6 stitches. Pull tightly to close the hole securely, then hide the remaining tail inside the body.
Closing the Body Correctly
The final six stitches are closed using the front loops only. Work the needle through those specified loops, then pull the yarn firmly to draw the opening closed before hiding the tail inside.
Beak – Orange Yarn
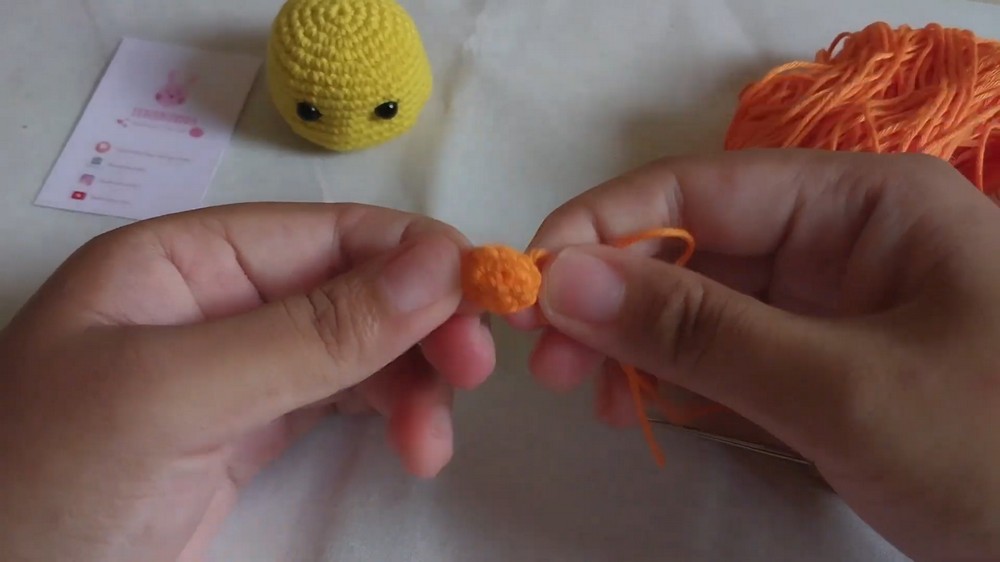
Step 1: Make 4 chains.
Step 2: Starting in the second chain from the hook, work 1 hdc, 1 dc, 1 dc across the chain.
Finishing: Fasten off, leaving a long tail for sewing the beak to the body.
The long finishing tail is kept specifically for attaching the beak later, so leave enough yarn rather than trimming it short.
Wings & Feet – Yellow Yarn
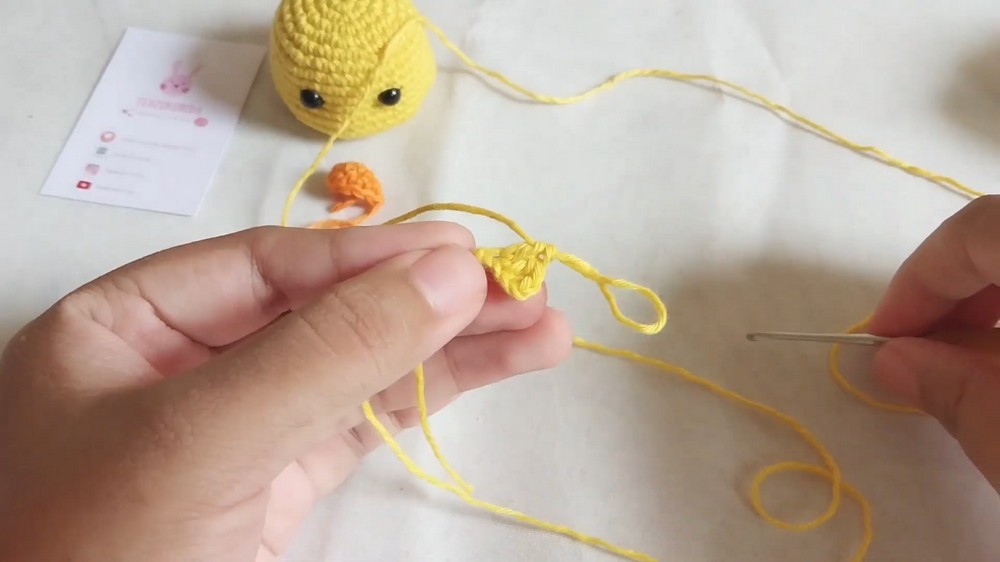
Make 4 identical pieces using the same pattern. Two pieces will be used as wings and two as feet.
Round 1: 4 sc in magic ring (4)
Round 2: (2 sc, inc) x 2 (8)
Round 3: sc all around (8)
Finishing: Fasten off and leave a long tail on each piece for sewing.
Keeping all four pieces identical allows you to use two for the wings and two for the feet without needing a separate pattern for each pair.
Assembly
Add the Eye Highlights
Take a small amount of White yarn on a needle and create a slight crescent or straight-line border along the outer edge of each safety eye.
Hide the yarn ends inside the body when the eye detailing is complete.
Sew On the Beak, Wings & Feet
Beak: Use the Orange yarn tail to sew the beak securely to the center of the face, directly between the safety eyes.
Wings: Pin the wings to the sides of the body around Rounds 11–13, then sew them flat against the sides.
Feet: Pin the feet to the bottom base of the chick so it sits evenly without rolling over, then sew them firmly in place.
Check the Feet Before Sewing
Because the feet determine how the finished chick sits, position both pieces first and check that the body rests evenly. Adjust their placement before making the sewing permanent.
Create the Hair Details
Step 1: Thread Yellow yarn onto a needle.
Step 2: Insert the needle at the top center of the head, around Rounds 2–4.
Step 3: Leave the yarn slightly slack to create a loop, then make a stitch to secure it. Repeat this 3 times in the same general area to create three small loops.
Step 4: Secure the yarn with a knot and hide the tail inside the body.
Step 5: Snip the top of the loops with scissors, then trim the strands evenly to create the spiky baby-chick fluff.
Keep the Hair Loops Slightly Loose
Do not pull the loops tightly against the head before cutting them. The technique calls for slightly slack loops so they can be snipped and trimmed into the fluffy tuft on top.
Troubleshooting
The Body Looks Too Tight After Stuffing
If the body becomes difficult to close after stuffing, check that you added the fiberfill before the opening became too small and that it is distributed inside the body rather than concentrated directly at the opening.
The Safety Eyes Are Not Five Stitches Apart
Recheck the eye placement before continuing beyond Round 13. The specified position is between Rounds 9 and 10, with 5 stitches (loops) between the eyes. It is much easier to correct the placement before the body is closed.
The Feet Make the Chick Roll Over
If the finished chick does not sit evenly, reposition the feet before sewing them firmly. Place both pieces against the bottom base and check the balance from the front and side before securing them.
The Hair Looks Too Long or Uneven
The hair begins as three slightly slack loops. After securing them, snip the loops and trim the strands evenly. If one tuft is longer than the others, carefully trim it to match rather than pulling the loops tighter.
The Final Body Opening Is Not Closing Neatly
For the last six stitches, make sure the needle is passing through the Front Loop Only (FLO) as specified. Pull the yarn firmly after sewing through the remaining loops to draw the opening closed, then hide the tail inside the body.
This completes the palm-sized baby chicken with its rounded yellow body, orange beak, tiny wings and feet, highlighted safety eyes, and characteristic fluffy hair.