Here, colorful crochet daisies come together in a tiny bouquet you can carry on your keys or bag, with simple flower, stem, and assembly instructions.
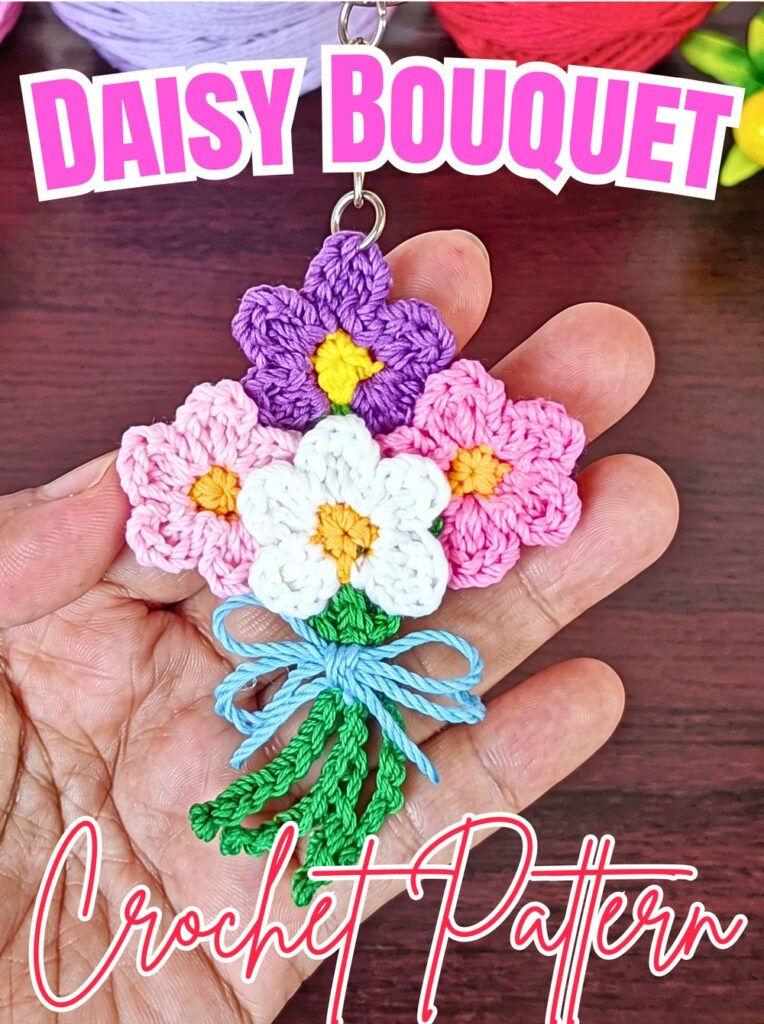
Bright flower colors and miniature bouquet details give this crochet daisy keychain its charm. Each tiny bloom adds personality, while green chain stems and a contrasting bow bring the arrangement together in a floral accessory.
This crochet tutorial guides you through making yellow flower centers, shaping five petals, adding green stems, and assembling your bouquet. You’ll also find color combinations and an alternative for creating a refrigerator magnet. Follow each stage to complete your crochet floral keepsake.
Credit Erfin R. Tangdilintin
Materials & Tools
Gather these supplies before starting your crochet flowers and bouquet assembly.
- Yarn: Mercerized cotton, milk cotton, or lace yarn in yellow, white, light pink, purple, green, and one contrasting color for the bouquet wrap and bow.
- Crochet hook: 2.0–2.5 mm, depending on yarn thickness.
- Keychain hardware: Metal keychain ring with chain.
- Hot glue gun and glue sticks: For securing flower backs and decorative details.
- Tapestry needle: For anchoring yarn and hiding loose ends.
- Scissors: For cutting yarn.
- Lighter: Optional, for carefully sealing suitable synthetic yarn ends.
Safety note: Use hot glue and a lighter with care. Keep both away from children, and only melt synthetic yarn when its fiber type is suitable for heat sealing. Cotton yarn should not be melted.
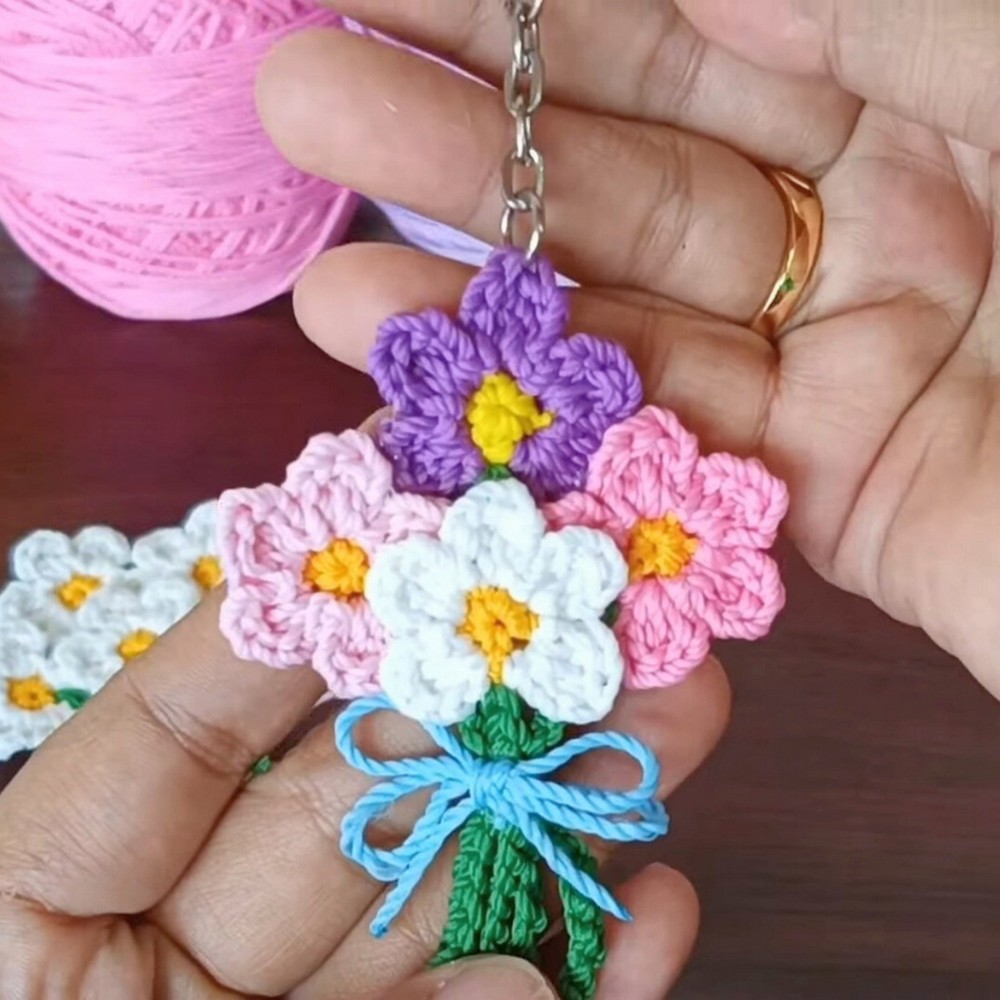
Finished Size and Color Ideas
The finished bouquet measures approximately 3–4 inches tall, making it suitable for keys, handbags, backpacks, or small handmade gifts.
Choose colors to match your intended style:
- Classic daisy bouquet: White petals, yellow centers, and a light pink tie.
- Multicolor bouquet: Combine white, pink, and purple flowers with a light blue wrap.
- Personalized bouquet: Select petal and ribbon colors to match a favorite bag or gift recipient.
For a refrigerator magnet, replace the keychain hardware with a small, flat magnet attached securely to the back of the assembled bouquet.
Abbreviations
These instructions use standard US crochet terminology.
- ch: Chain
- sc: Single crochet
- dc: Double crochet
- sl st: Slip stitch
- st(s): Stitch(es)
- mr: Magic ring
How to Crochet a Daisy Bouquet Keychain
Complete each flower before assembling the bouquet. The supplied tutorial demonstrates a cluster of five flowers, while its stem instructions specify three green stems of different lengths. Follow the flower arrangement and stem placement shown in your reference tutorial.
Step 1: Crochet the Yellow Flower Centers
Using yellow yarn, begin with a magic ring. This creates the small circular center needed to support your petals.
- Form an adjustable magic ring around your fingers.
- Chain 1.
- Work 4 single crochets directly into the ring.
- Insert your hook into the first single crochet and join with a slip stitch.
- Chain 1, cut the yarn, and fasten off, leaving a short tail.
Gently tighten the magic ring so the center closes neatly.
Teaching tip: Keep the four stitches visible and evenly spaced. You’ll need to locate them when attaching the petal yarn.
Repeat this process to create the centers for your intended number of flowers. The supplied tutorial recommends making three to five centers per bouquet.
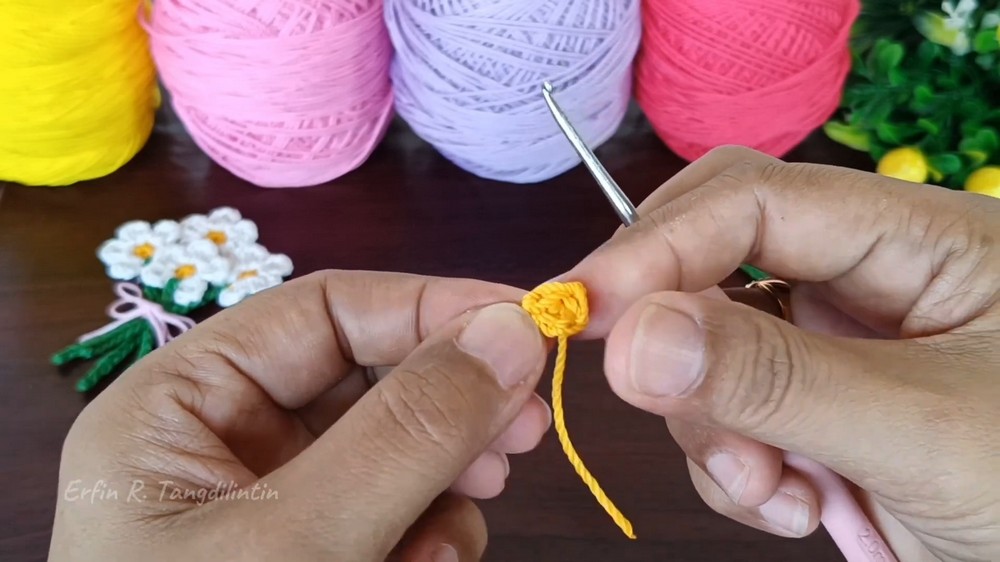
Step 2: Attach Petal-Colored Yarn
Choose white, light pink, or purple yarn for your petals.
- Make a slip knot with your chosen petal color.
- Insert your hook into any stitch on the yellow center.
- Attach the new yarn with a slip stitch.
Keep the yellow center facing you while working. This makes it easier to see where each petal begins and ends.
Before continuing: Check that your new color is secure and that the yarn tail is positioned so it can be hidden neatly during finishing.
Step 3: Form the Five Petals
Each petal is formed with two double crochets separated from the next petal by chain stitches.
Starting from your attached petal yarn:
- Chain 2.
- Work 2 double crochets into the same stitch on the yellow center.
- Chain 2 again.
- Work a slip stitch into that same stitch to anchor the petal.
- Move to the next stitch on the center and work a slip stitch to position your yarn for the next petal.
Repeat the petal sequence around the center until you have five petals.
The supplied tutorial shares the four center stitches as needed to create five petals, so the petals will not each occupy a separate center stitch.
Shape check: Each petal should form a small arch, with two double crochets creating its fuller section and chain stitches defining its outer edge.
Helpful tip: Avoid pulling the anchoring slip stitches too tightly. Excessive tension can make the petals bunch together and hide the yellow center.
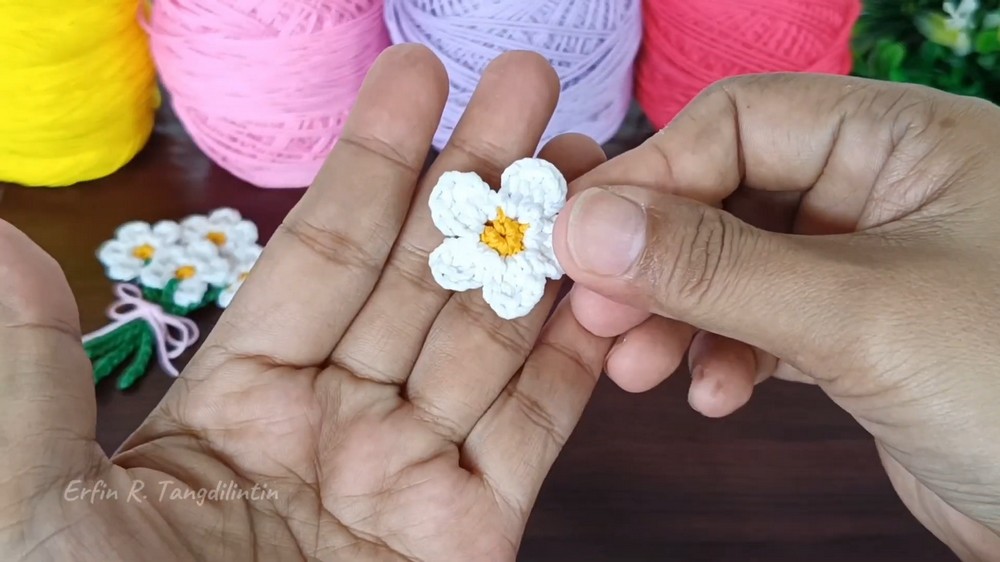
Step 4: Finish Each Flower Neatly
After completing all five petals:
- Work the final slip stitch as shown in your reference tutorial.
- Chain 1.
- Cut the yarn and pull the tail through the final loop.
- Secure and hide loose ends at the back of the flower.
Trim excess yarn carefully. If using a lighter to seal suitable synthetic fibers, keep the flame away from the flower itself and work in a safe, ventilated area.
Repeat Steps 1–4 until all flowers are finished.
Before moving on: Lay the flowers flat and check that each has five recognizable petals and a visible yellow center. Fix loose ends now, before attaching the stems.
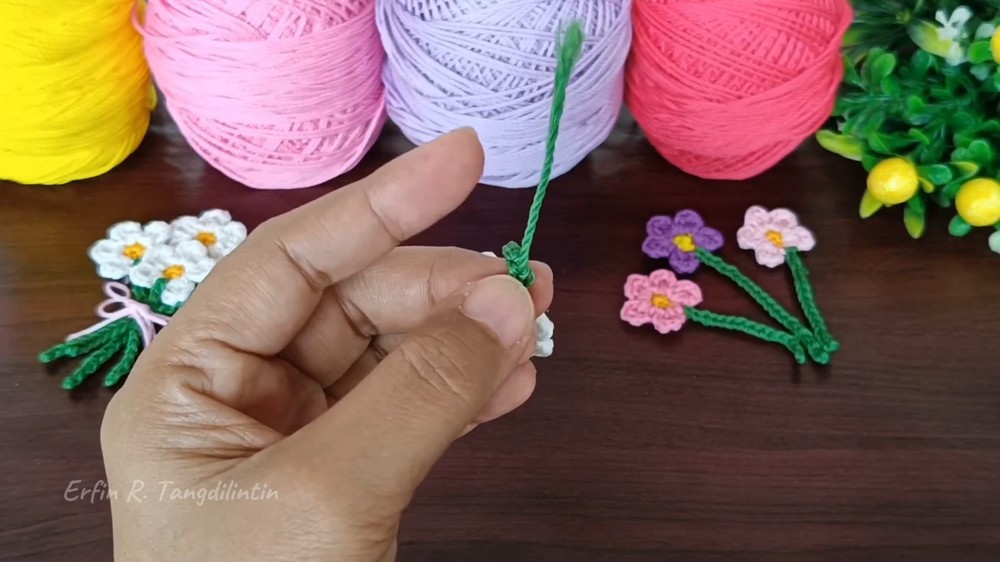
Step 5: Add the Green Chain Stems
Green yarn forms the hanging stems beneath each flower. Varying their lengths gives the bouquet its fan-shaped outline.
For the center stem:
- Attach green yarn to the back loops or base of one finished flower, following the placement in your reference tutorial.
- Chain 15.
- Fasten off, leaving a tail.
- Use your tapestry needle to anchor the yarn securely at the back of the flower.
For the side stems:
- Attach green yarn to the backs of the remaining flowers selected for stems.
- Chain 17 for a side stem.
- Chain 20 for a longer framing stem.
- Fasten off and secure each stem end.
The longer chains should extend farther than the center stem, helping create a natural bouquet silhouette.
Teaching tip: Arrange the flowers with their faces upward while checking stem lengths. This lets you see whether the center and side flowers sit at different heights before gluing the bouquet together.
Step 6: Arrange and Secure the Flower Heads
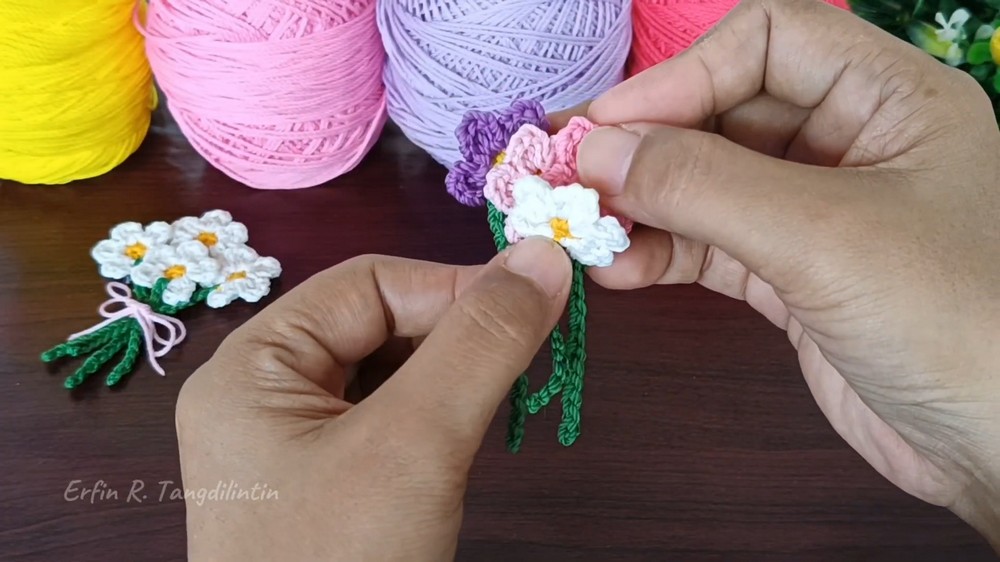
Arrange the finished flowers into a compact bouquet before applying glue.
The reference tutorial suggests positioning three flowers toward the lower front and placing two slightly higher behind them.
- Lay the flowers face up in your chosen arrangement.
- Check that the colors are balanced and all flower centers remain visible.
- Carefully flip the cluster over without disturbing its placement.
- Apply hot glue to the backs of the flower centers where they touch.
- Press the flowers together gently and allow the glue to set according to its instructions.
Arrangement tip: Keep the upper flowers slightly visible above the front row. If they sit too low, the bouquet can look crowded instead of layered.
Use only enough glue to secure the centers. Excess glue may spread beyond the flower edges and become visible from the front.
Step 7: Wrap the Stems With Contrasting Yarn
Bring the green chain stems together at their lower ends.
- Select your contrasting yarn, such as light blue or pink.
- Wrap it tightly around the gathered stems four to five times.
- Add a small amount of hot glue to secure the wrap.
- Trim the excess yarn once the wrap is firmly attached.
This wrapped section creates the appearance of a tied bouquet and keeps the stems grouped together.
Check the result: The stems should remain gathered without the wrap covering too much of their length. Leave enough green chain visible above and below the band to preserve the bouquet shape.
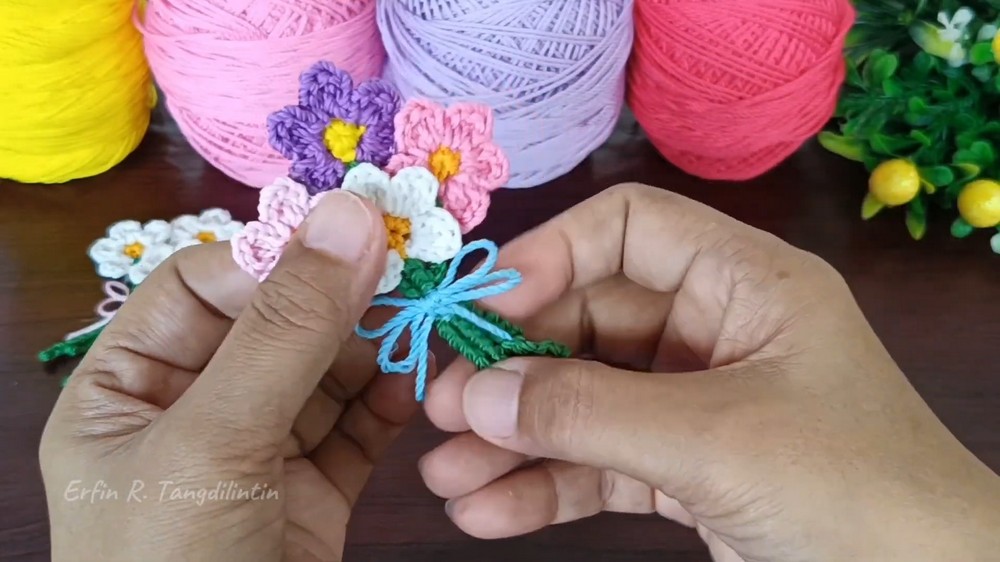
Step 8: Add the Decorative Bow
A small bow completes the wrapped bouquet and provides another opportunity to coordinate your colors.
- Form a small bow from the contrasting yarn.
- Adjust its loops until both sides look balanced.
- Apply a small amount of hot glue to the back.
- Attach the bow to the front of the wrapped stem band.
- Hold it gently in place until secure.
Position the bow centrally over the wrap so it becomes a decorative focal point without hiding the flower heads.
Step 9: Attach the Keychain Hardware
Once the flowers, stems, wrap, and bow are secure, add the metal keychain chain.
- Open the jump ring or connecting loop on the keychain hardware.
- Pass it through a suitable stitch on the topmost flower.
- Close the ring securely.
- Check that the flower fabric is not stretched or damaged by the attachment.
Important: Choose a sturdy stitch near the top of the flower. Avoid attaching the hardware through a loose petal edge, which could pull out with repeated use.
Step 10: Convert the Bouquet Into a Refrigerator Magnet
If you prefer a decorative magnet instead of a keychain, leave off the metal hardware.
- Turn the completed bouquet over.
- Position a small, flat magnet on the back of the flower assembly.
- Secure it with hot glue suitable for the materials.
- Allow the glue to cool and set completely before testing it on a refrigerator.
Choose a magnet that fits behind the bouquet without extending beyond its outline. Keep small magnets away from young children because swallowed magnets can cause serious injury.
Final Finishing Checks
Before using or gifting your daisy bouquet, check the following:
- All flower centers are tightly closed.
- Each flower has five visible petals.
- Green stems are securely anchored.
- The flower cluster stays together when gently handled.
- The wrap and bow are firmly attached.
- Keychain hardware is fully closed, or the magnet is securely fixed.
- No loose yarn ends or excess glue remain visible.
Your miniature daisy bouquet is now ready to decorate keys, bags, or a handmade gift. Try different petal colors and ribbon shades to create another version while keeping the same flower-making and assembly sequence.