Need a tiny handmade gift with a playful touch? This crochet cactus keychain combines textured green stitches, a little flower, and a miniature pot into a charming everyday accessory.
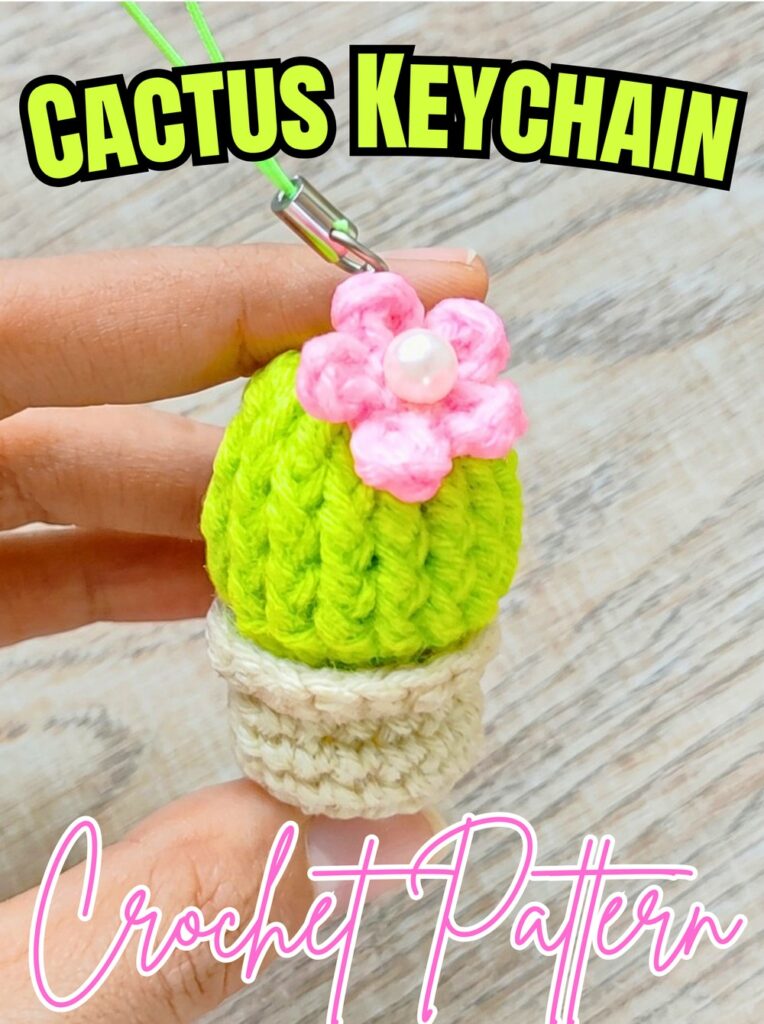
Mini potted cacti bring a cheerful pop of color to keys and bags without needing any care. With crochet, green yarn becomes a textured cactus, while contrasting pot and flower details give this tiny accessory its distinctive look.
This crochet tutorial guides you through shaping the cactus, creating its pot and five-petal flower, and joining each piece into a compact amigurumi charm. You’ll also learn how to position the pearl center, finish yarn ends neatly, and attach a keychain loop securely.
Credit Chapa crochet craft
Materials & Tools
- 4-ply acrylic yarn: Green for cactus body, beige or brown for pot, and pink for flower.
- Crochet hook: 2.50 mm (No. 4/0).
- Polyfill stuffing: For filling cactus and pot.
- White pearl bead: For flower center.
- Keychain strap or loop: For attaching finished cactus to keys or bags.
- Tapestry needle: For sewing pieces and weaving in yarn ends.
- Scissors: For trimming yarn.
- Hot glue gun or craft glue: For attaching pearl bead and flower.
Safety note: Acrylic yarn can melt when exposed to flame. Trimming yarn neatly is safer than using a lighter or candle, especially near finished crochet pieces. Use hot glue carefully and allow it to cool completely.
Finished Size & Customization
Finished cactus measures approximately 2 inches tall, making it suitable for keychains, bag charms, and miniature handmade gifts.
- Change green shades: Try sage, mint, dark green, or variegated yarn.
- Personalize flower: Replace pink with yellow, purple, or another bright color.
- Add cactus details: Use tiny embroidered knots to suggest prickles.
- Change hardware: Attach a different strap or loop to suit your preferred accessory.
Pattern Abbreviations
- ch: Chain.
- sc: Single crochet.
- hdc: Half double crochet.
- dc: Double crochet.
- FPdc: Front post double crochet.
- inc: Increase; work 2 stitches into the same stitch.
- slst: Slip stitch.
- BLO: Back loop only.
- rnd: Round.
- st(s): Stitch(es).
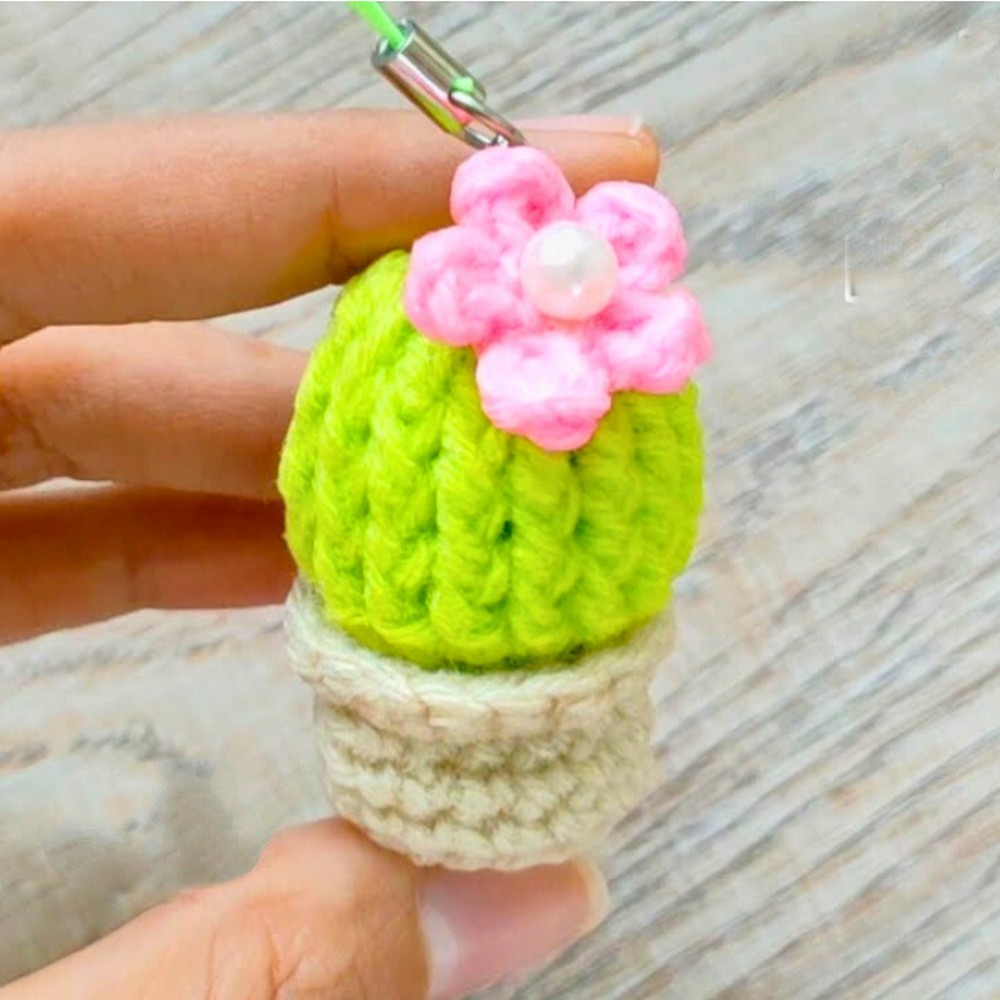
How to Crochet a Mini Cactus Keychain
Work on three separate pieces first: cactus body, pot, and flower. The cactus and pot are stuffed before being sewn together, while the small flower is decorated with a pearl bead and attached near the end.
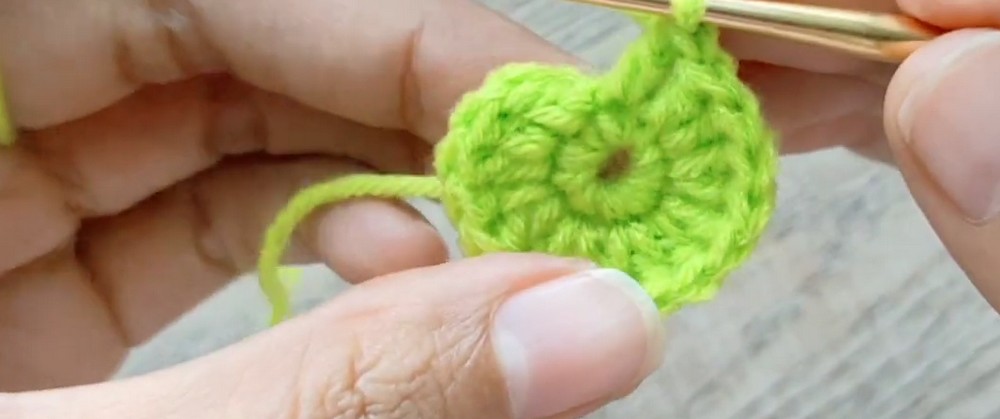
Step 1: Start the Green Cactus Center
Using green yarn, make a magic ring.
- Round 1: Ch 1, work 8 sc into magic ring, then join with 1 slst to first sc. (8 sts)
Pull the ring tail to close the center. Keep the stitches snug so stuffing will not show through later.
Teaching tip: Place a stitch marker in the first stitch if you find it difficult to identify the beginning of each round.
Step 2: Widen the Cactus Base
Build the next round using double crochet stitches to create a wider base.
- Round 2: Ch 2 and turn. Work 1 dc into first stitch, then work a dc increase 7 times, and finish with 1 dc into joining slip stitch. (16 dc)
The increases add width before the raised cactus texture begins.
Check your work: Count 16 double crochet stitches before moving on. If your count differs, check whether each increase was worked twice into its intended stitch.
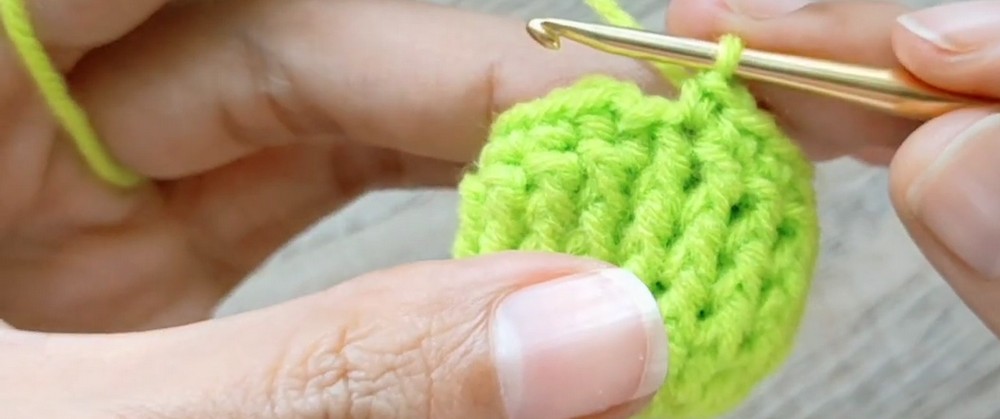
Step 3: Create Raised Cactus Ridges
Rounds 3–5 build texture using front post double crochet stitches.
- Round 3: Ch 2, work 1 FPdc around each of 16 stitches, then join with 1 slst to first dc. (16 sts)
- Round 4: Repeat the same FPdc sequence around. (16 sts)
- Round 5: Repeat once more. (16 sts)
For FPdc, yarn over, insert your hook from front to back and back to front around the post of the stitch below, then complete the double crochet.
Why this matters: Working around stitch posts creates raised ridges rather than flat stitches, giving cactus body its textured appearance.
Helpful tip: Keep post stitches at a consistent height. Uneven tension can make ridges look irregular or cause the piece to lean.
Step 4: Finish the Cactus Body
Complete the base with a round of single crochet.
- Round 6: Ch 1, work 16 sc around, and join with 1 slst to first sc. (16 sts)
Fasten off, leaving a long yarn tail for sewing.
Check that cactus body holds its shape and that its bottom opening is suitable for attaching to pot.
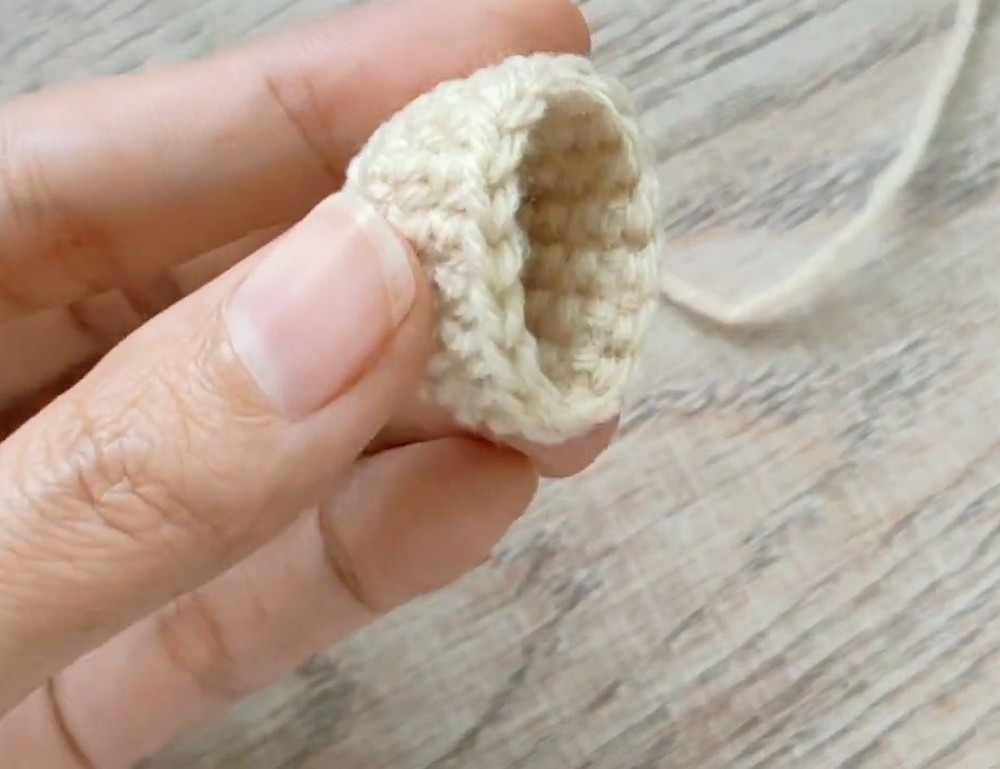
Step 5: Begin the Beige or Brown Pot
Switch to beige or brown yarn and make a magic ring.
- Round 1: Ch 1, work 8 sc into magic ring, then join with 1 slst to first sc. (8 sts)
Close the center by gently pulling yarn tail. This creates the small circular base of pot.
Step 6: Increase Pot Width
- Round 2: Ch 1, work a sc increase 8 times around. (16 sc)
Each stitch receives 2 single crochets, expanding the base evenly.
Result check: Pot base should lie flat. If it curls upward, check stitch count and tension before continuing.
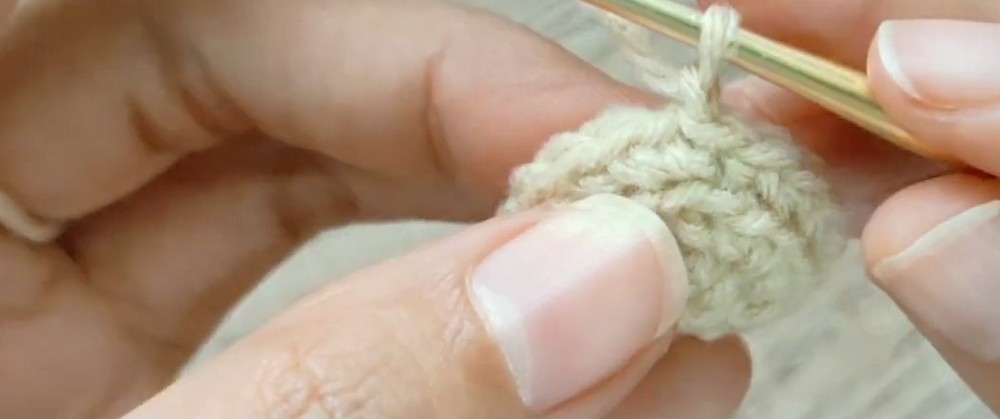
Step 7: Shape Pot Sides With BLO
- Round 3: Ch 1, turn, then work 1 sc in back loop only of every stitch around. (16 sc)
To work BLO, insert hook under back loop only, leaving front loop unworked.
This creates a visible ridge where pot base meets its sides.
Teaching tip: Check that you are using the back loop consistently throughout round. Accidentally switching to both loops can make ridge uneven.
Step 8: Complete Pot Height
Continue with regular single crochet stitches.
- Round 4: Ch 1, work 16 sc around, then join with 1 slst. (16 sts)
- Round 5: Ch 1, work 16 sc around. Pull a long yarn tail and fasten off. (16 sts)
Keep sides even so pot can sit neatly beneath cactus body.
Check before assembly: Compare pot opening with bottom of cactus. Both pieces should meet without excessive stretching or loose gaps.
Step 9: Crochet Five-Petal Flower
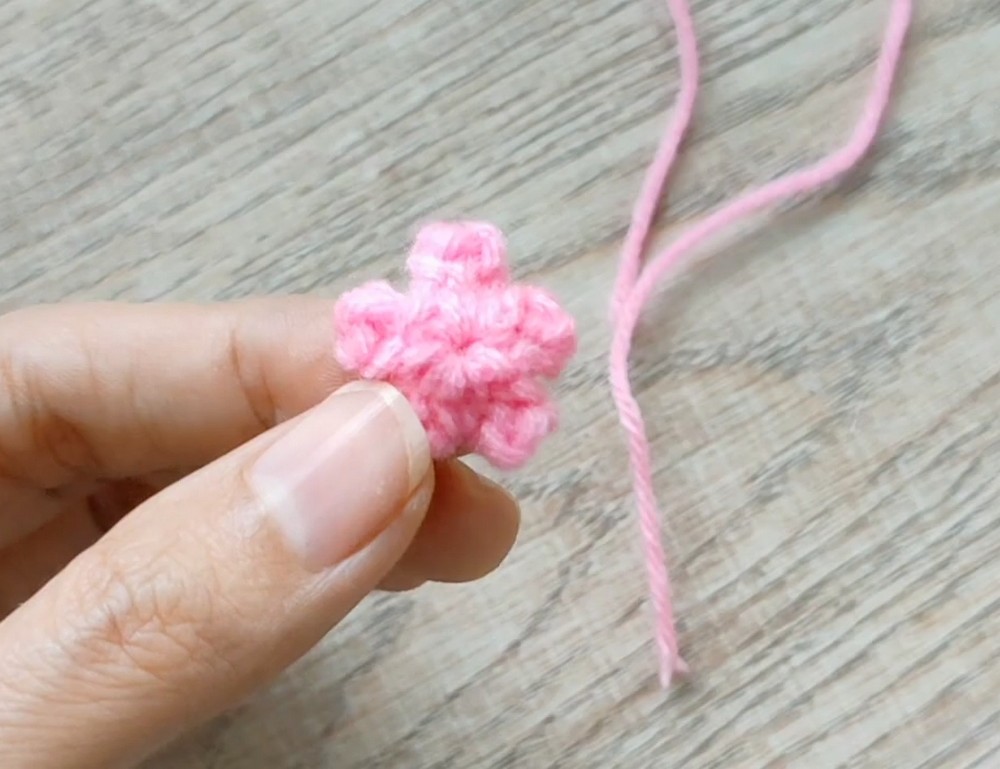
Using pink yarn, create a magic ring and ch 1.
Work following petal sequence five times around ring:
- Work 1 sc.
- Ch 2.
- Work 1 hdc into second chain from hook.
- Insert hook into front loop of magic ring and work 1 slst.
Repeat until five petals are formed. Fasten off and weave in yarn end, or pull tail to close center as demonstrated in supplied tutorial.
Teaching tip: Keep petals arranged evenly around center. If they overlap too much, gently spread them with your fingers before securing flower.
Step 10: Stuff Cactus and Pot
Add polyfill stuffing to both cactus body and pot before joining them.
Use small portions and distribute filling evenly rather than pushing in one large clump. Cactus should hold its upright shape, while pot should remain rounded without becoming overly stiff.
Result check: No large empty sections should remain, and stitches should still close around stuffing without visible gaps.
Step 11: Sew Cactus to Pot
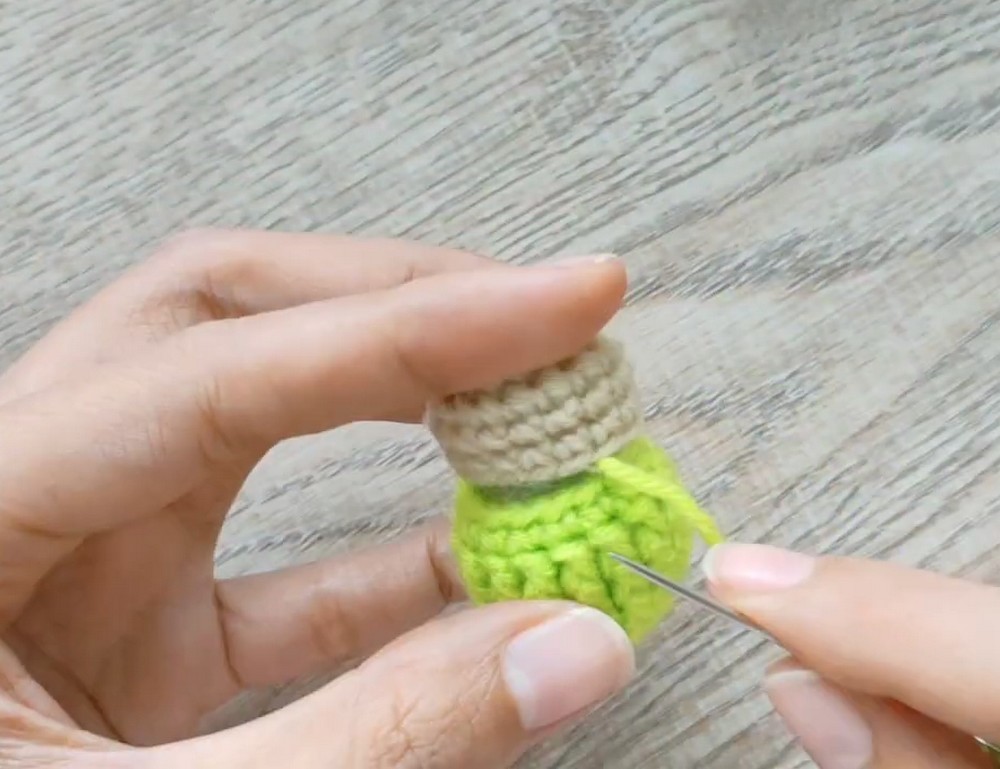
Position lower edge of cactus against upper edge of pot. Use long yarn tail from pot or cactus and thread it through tapestry needle.
Sew around both edges, catching corresponding stitches on each piece. Continue around entire circumference until cactus is securely attached.
Teaching tip: Take a moment to check alignment after every few stitches. Adjust pieces as needed so cactus sits centrally instead of leaning to one side.
Once joined, secure yarn tail and hide it inside crocheted fabric.
Step 12: Add Pearl Center to Flower
Use hot glue or suitable craft adhesive to attach small white pearl bead to center of pink flower.
Apply only a small amount of adhesive, keeping it away from visible petal edges. Allow adhesive to set fully before handling flower.
Safety tip: Small beads can detach and pose a choking hazard. For items intended for young children, use an embroidered flower center instead.
Step 13: Attach Flower to Cactus
Position finished flower on side of green cactus, as shown in supplied tutorial.
Check its placement from front before attaching. Once satisfied, secure flower with a small amount of glue and allow it to dry completely.
If you prefer a fully crocheted finish, sew flower onto cactus using matching yarn instead.
Step 14: Secure Keychain Loop
Attach keychain strap or loop at top center of cactus.
Use a sturdy attachment point and reinforce it with secure stitching or suitable hardware. Avoid relying only on a loose yarn tail or adhesive for supporting the finished accessory.
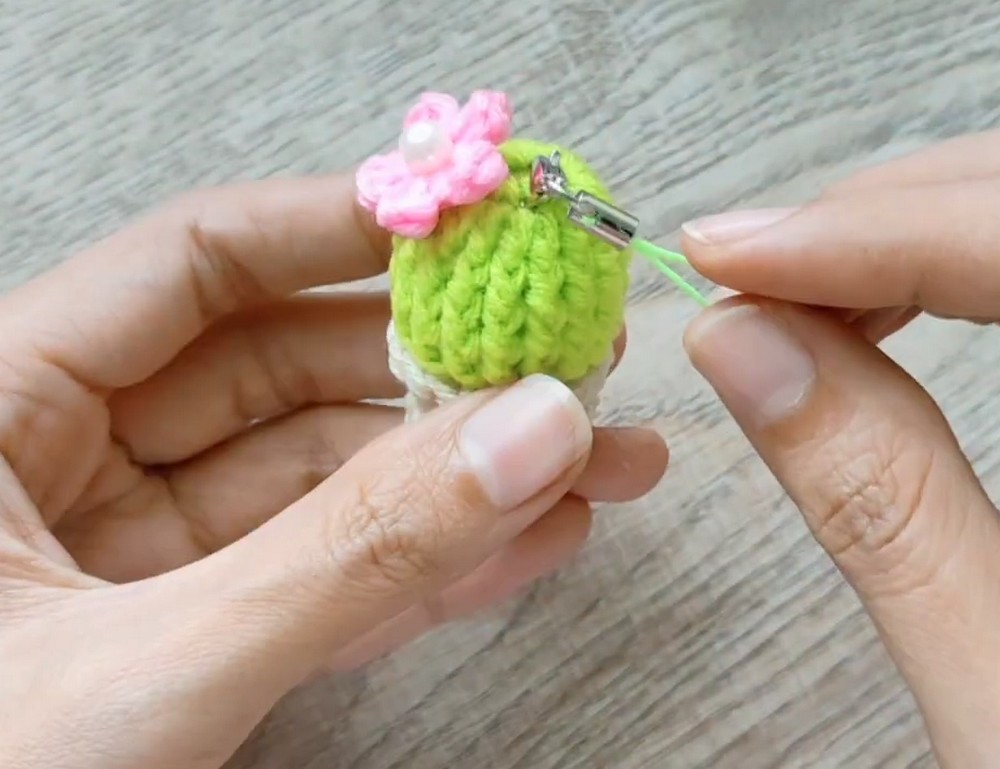
Final check: Gently tug on loop, inspect cactus-to-pot seam, and confirm flower is firmly attached before using keychain.
Finishing Touches
Weave in all remaining yarn ends and trim excess. Check that no loose strands remain around pot rim, flower petals, or attachment loop.
Your miniature crochet cactus is ready to decorate keys, backpacks, purses, or gift packages. Experiment with different yarn colors and flower styles to create several tiny plants with their own personalities.