Need a sweet handmade gift with playful character? This crochet panda pairs classic black-and-white details with a tiny red heart bag for an adorable amigurumi keepsake.
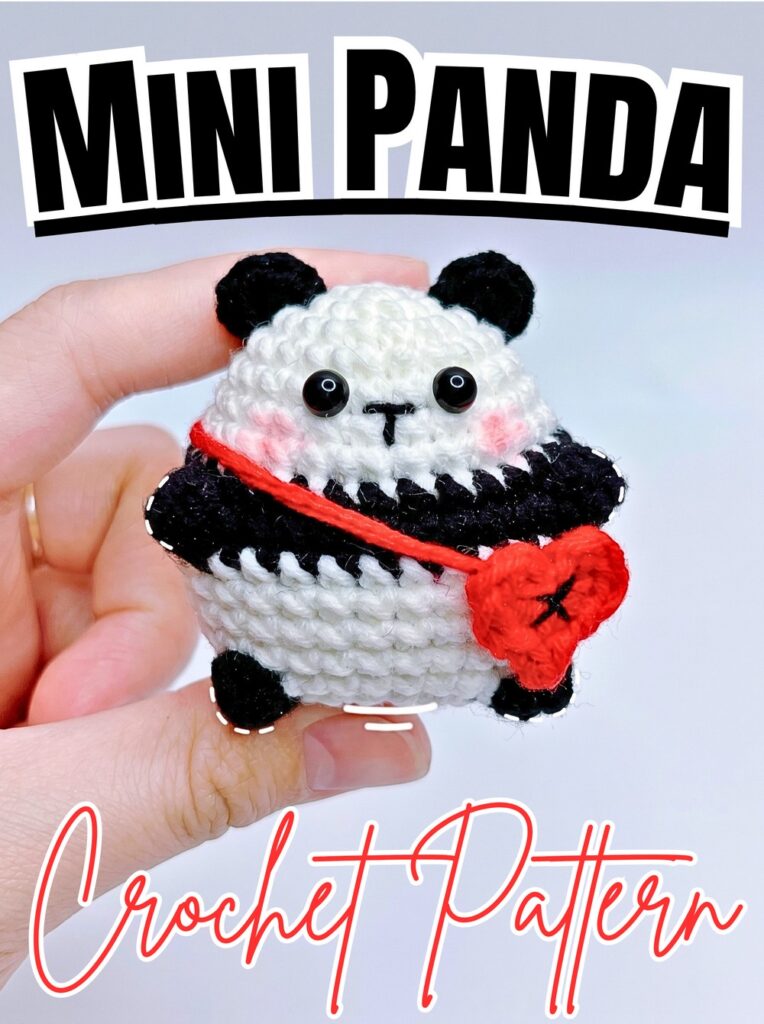
Round ears, dark patches around bright eyes, and contrasting black-and-white yarn give this crochet panda its instantly recognizable look. A miniature red heart bag adds a playful pop of color, turning a familiar animal character into a charming little crochet companion with its own festive accessory.
This tutorial guides you through shaping the panda’s body and head, adding bobble-stitch paws, making matching black ears, and crocheting a heart-shaped crossbody bag. You’ll also learn how the safety eyes, embroidered nose, rosy cheeks, and bag strap bring the separate details together into a finished crochet amigurumi toy.
Credit Xuxu Crochet
Materials & Tools
- White yarn: Susan 5 yarn, approximately 2 mm fiber size, for the main body.
- Black yarn: For paws, ears, and facial embroidery.
- Red yarn: For the heart-shaped crossbody bag and strap.
- Crochet hook: 2.5 mm.
- Safety eyes: Two 5 mm black safety eyes.
- Fiberfill stuffing: For shaping the body.
- Pink makeup or blush: For rosy cheeks.
- Stitch marker: To track rounds.
- Yarn needle: For sewing and embroidery.
- Scissors: For trimming yarn.
Finished Size & Customization
This small, rounded amigurumi panda features a miniature heart-shaped shoulder bag. Change the red bag to pastel blue or pink for a different look, or experiment with yarn weight and hook size to make a larger plushie or smaller charm. Changing yarn weight may also affect the final proportions, so check the shape as you work.
Pattern Abbreviations
ch: Chain stitch
sc: Single crochet
inc: Increase – work 2 single crochet stitches into the same stitch.
dec: Decrease – combine 2 stitches into 1 single crochet.
dc: Double crochet
sl st: Slip stitch
st(s): Stitch(es)
bobble: Four partial double crochets worked into one stitch and joined by pulling yarn through all 5 loops on the hook.

Step-by-Step Crochet Panda Tutorial
Step 1: Begin the White Body and Head
Yarn: White
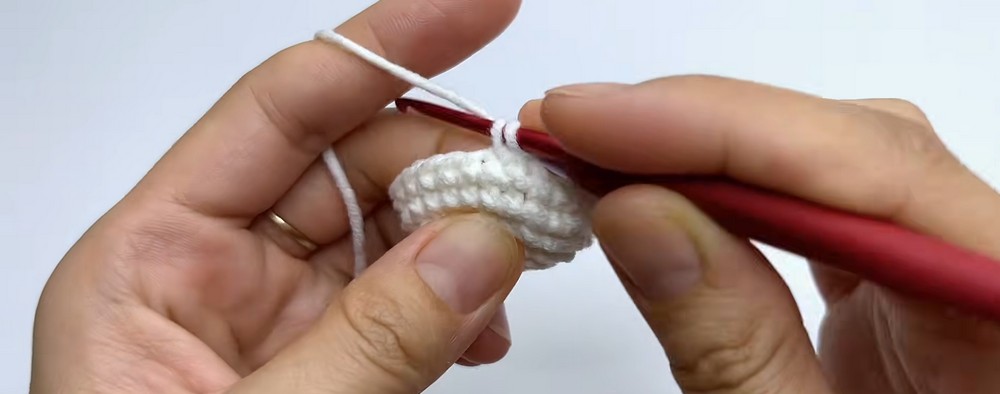
The body and head are worked as one continuous piece, creating the panda’s rounded shape. Start with a small magic ring and increase gradually to form the base.
Round 1: Make a magic ring, chain 1, and work 6 single crochet stitches into the ring. Pull the tail to close the ring and mark the first stitch. (6 stitches)
Round 2: Join with a slip stitch in the first stitch, chain 1, and work 1 increase in every stitch around. (12 stitches)
Round 3: Repeat 1 single crochet and 1 increase around. (18 stitches)
Round 4: Repeat 2 single crochet stitches and 1 increase around. (24 stitches)
Rounds 5–6: Work 1 single crochet in each stitch around for two rounds. (24 stitches per round)
From Round 2 onward, the supplied pattern uses a joined-round method: slip stitch into the first stitch, chain 1, and begin the next round in the same base stitch.
Teaching tip: Keep the join and starting chain consistent. This helps you identify where each round begins and makes it easier to check stitch counts.
Step 2: Widen the Body and Introduce Black Yarn
Yarn: White, then black
The next rounds shape the body and introduce the dark sections that distinguish the panda’s paws.
Round 7: Work the supplied increase sequence of 2 single crochet stitches followed by 1 increase around. The pattern lists 32 stitches at the end of this round.
Round 8: Join with black yarn, chain 1, and work 1 single crochet in each stitch around. Carry the black yarn tail under the stitches for the first few stitches to secure it. (32 stitches)
Important pattern check: The Round 7 sequence and stated stitch total do not align clearly with the 24 stitches from Round 6. Confirm the intended increase placement against the original tutorial before proceeding, so the body shape and following stitch counts remain consistent.
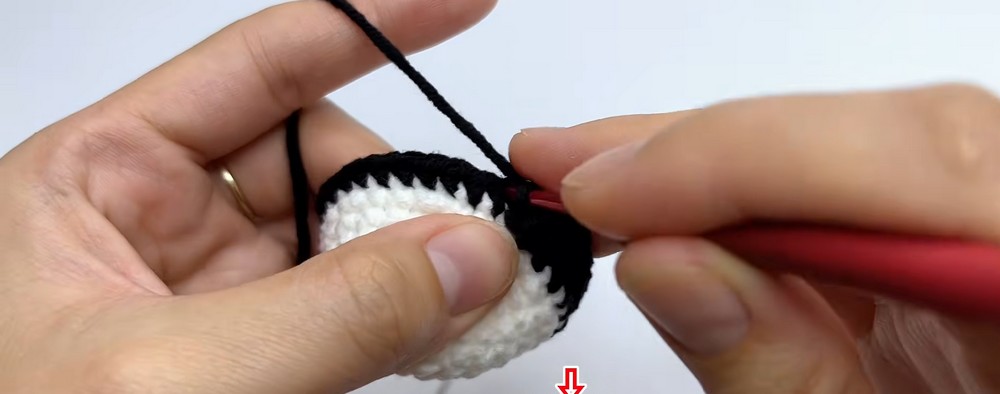
Step 3: Crochet the Lower Black Paws
Yarn: Black
Raised bobbles create the panda’s small paw details. Their textured surface stands out from the surrounding single crochet stitches.
Round 9: Join with a slip stitch, chain 1, then work 10 single crochet stitches, 1 bobble stitch, 10 single crochet stitches, 1 bobble stitch, and 10 single crochet stitches. (32 stitches)
As you make each bobble, keep the partial double crochets in the same stitch and pull through all 5 loops to complete it.
Gently push each bobble outward with your fingers so it sits on the outside of the body.
Check your work: The two bobbles should be separated by the white-and-black stitch sections and appear as raised details rather than flat stitches.
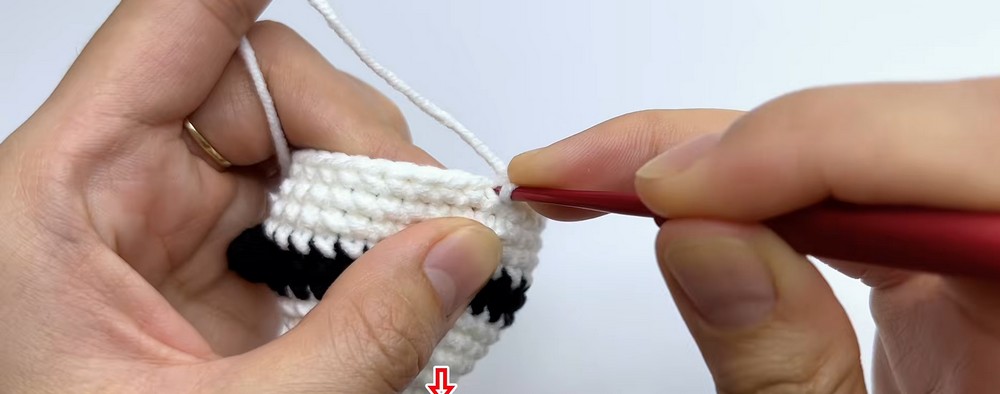
Step 4: Return to White Yarn and Build the Body
Yarn: White
White yarn forms most of the panda’s body. The following even rounds build its height before the upper section is shaped with another pair of black bobbles.
Round 10: Join white yarn, chain 1, and work 1 single crochet in each stitch around. Carry the black tail under the first few stitches, then trim the excess. (32 stitches)
Rounds 11–13: Work 1 single crochet in each stitch around for three consecutive rounds. (32 stitches per round)
Round 14: Work 11 single crochet stitches in white, 1 bobble stitch in black, 8 single crochet stitches in white, another black bobble stitch, then 11 single crochet stitches in white. (32 stitches)
Keep the black yarn carried loosely on the inside where needed, leaving enough room for the body’s stuffing. Trim the short black tail as directed in the supplied pattern.
Helpful tip: Avoid carrying contrast yarn tightly across the inside of the body. Excess tension can pull the fabric inward and interfere with the rounded shape.
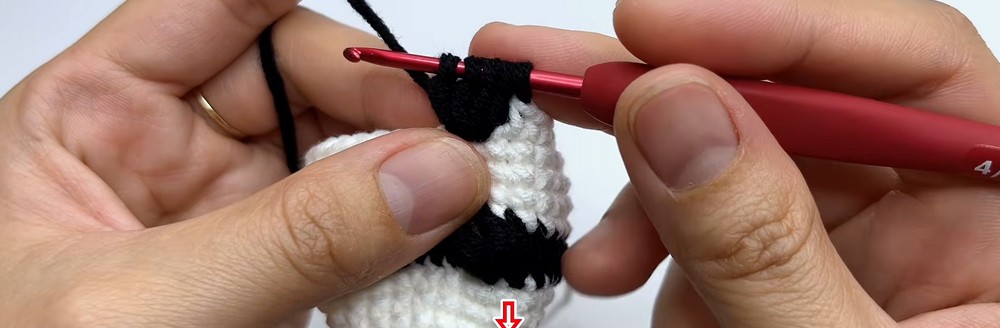
Step 5: Decrease and Stuff the Body
Yarn: White
Gradual decreases narrow the opening so the body can be stuffed and closed securely.
Round 15: Repeat 2 single crochet stitches and 1 decrease around. The supplied pattern lists 24 stitches.
Round 16: Repeat 1 single crochet and 1 decrease around. (16 stitches)
Stop and remove the stitch marker. Pull up a loop and firmly fill the body with fiberfill.
Round 17: Join with a slip stitch to the first stitch, chain 1, and work 8 consecutive decreases. (8 stitches)
Fasten off, leaving a long yarn tail.
Thread the tail onto a yarn needle and weave it through the front loops of the remaining 8 stitches. Pull the yarn tight to close the opening.
Finishing tip: Add stuffing gradually, distributing it evenly before closing the opening. The body should feel rounded without being stretched so tightly that the stitches become distorted.
Pattern note: The supplied Round 15 sequence does not clearly account for all 32 stitches from Round 14. Verify the decrease placement in the original tutorial before working this section.
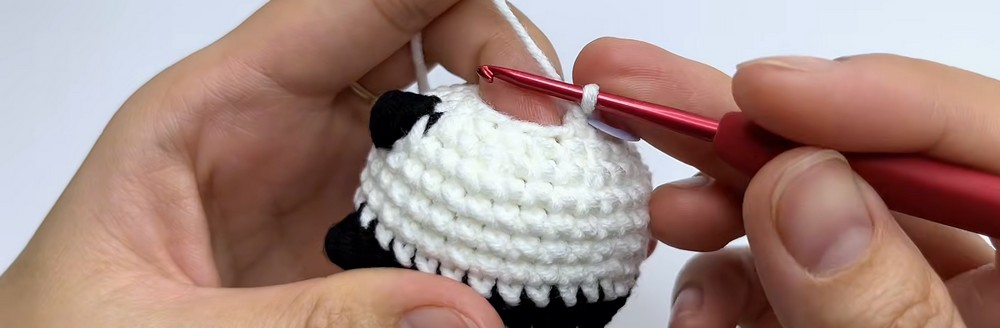
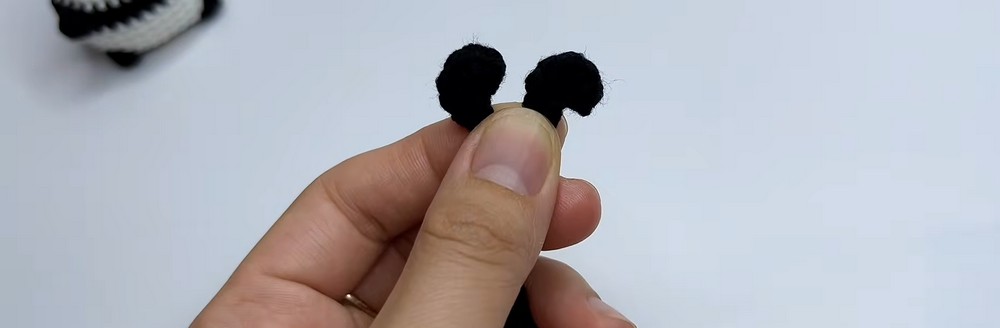
Step 6: Make the Black Panda Ears
Yarn: Black – make 2
The small black ears frame the panda’s face and reinforce its recognizable appearance. Both ears are made separately and sewn onto the finished head.
Make a magic ring and chain 1.
Work 6 single crochet stitches into the ring.
Pull the yarn tail tightly to close the ring.
Fasten off, leaving a long tail for sewing. Do not join with a slip stitch if following the supplied open-circle method.
Repeat to make a second matching ear.
Keep the ears small and similar in size so they sit neatly along the upper sides of the head.
Step 7: Crochet the Red Heart-Shaped Bag
Yarn: Red
The tiny crossbody bag adds a bright accent to the panda and gives the finished toy its distinctive accessory. It is crocheted separately before being attached across the body.
Make a magic ring and chain 2.
Work 2 double crochet stitches and 2 single crochet stitches into the ring.
Chain 1 to form the upper center of the heart. Work 1 slip stitch into the vertical side loop at the tip to sharpen its shape.
Work 2 single crochet stitches followed by 2 double crochet stitches.
Chain 2, then work 1 slip stitch into the center of the magic ring.
Pull the magic ring tightly closed.
Fasten off, leaving a long tail for the shoulder strap.
Check your work: The piece should resemble a small heart, with two rounded upper sections and a defined lower point. Adjust the shape gently before tightening the yarn ends completely.
Step 8: Sew on the Ears and Position the Safety Eyes
Materials: Black ears, two 5 mm safety eyes, yarn needle
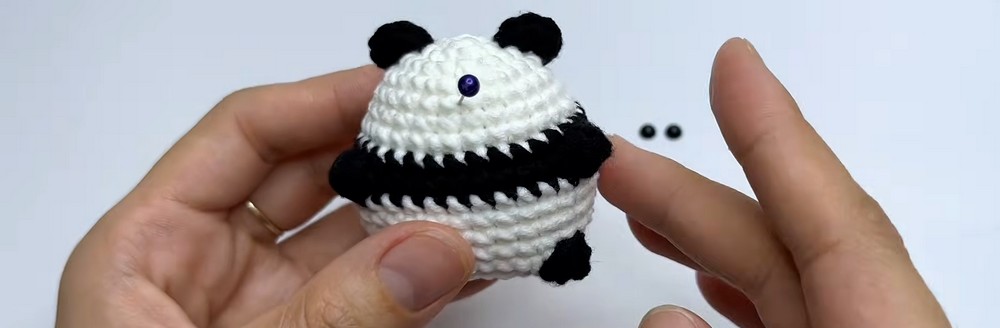
With the body closed, you can position the facial details and establish the panda’s expression.
Place the two black ears on opposite sides of the head, spanning approximately Rounds 3 and 4 when counted down from the top center.
Check their symmetry from the front.
Sew both ears securely using their long yarn tails, then weave the remaining ends into the back of the body.
Position the two 5 mm safety eyes around Round 5, leaving approximately two stitches between them.
Secure the safety-eye backs on the inside of the fabric.
Safety note: Safety eyes can pose a choking hazard. For toys intended for very young children, consider embroidered eyes instead, and ensure all facial details are securely attached.
Step 9: Embroider the Nose and Add Rosy Cheeks
Yarn: Black; optional pink blush
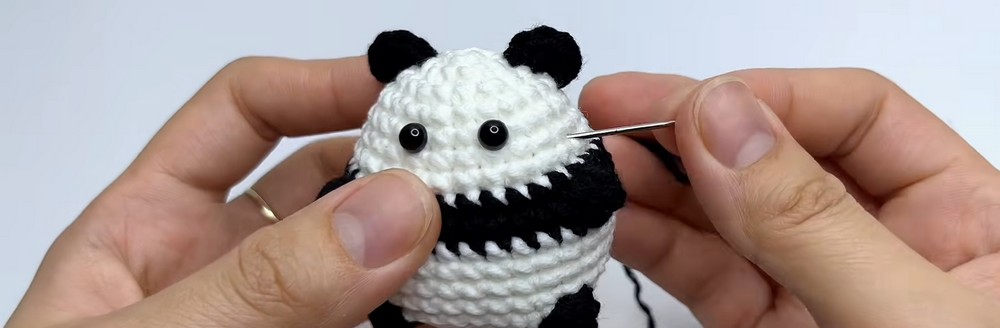
The facial details complete the panda’s familiar look. A small embroidered nose sits between the eyes, while soft pink cheeks add a playful finish.
Separate a thin strand of black yarn.
Embroider a small triangular or horizontal nose centered between the eyes.
Secure the yarn ends inside the body and trim any excess.
Using a small brush, apply a little pink makeup or blush beneath each eye.
Helpful tip: Add blush gradually. A light touch helps keep the cheeks balanced without overpowering the panda’s black-and-white face.
Step 10: Attach the Heart Bag and Shoulder Strap
Yarn: Red
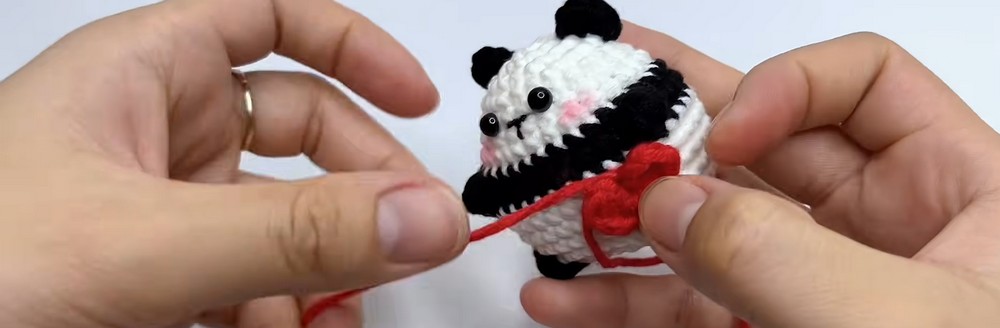
The strap turns the separate heart motif into a crossbody accessory. Its length should allow the heart to rest naturally against the front of the panda.
Thread the long red yarn tail through the center of the heart’s starting ring toward the back.
Use the yarn to form the shoulder strap.
Anchor one side of the strap at the panda’s side.
Measure the strap across the body to check how the bag will hang.
Secure the other side at the opposite side of the panda.
Hide the remaining yarn tails inside the plush.
Use a thin strand of black yarn to embroider a small accent detail on the front of the heart bag, following the supplied design.
Arrange the bag diagonally across the panda’s body.
Final check: Make sure the heart faces outward, the strap is not twisted, and the bag sits securely without pulling the body out of shape.
Finishing Touches & Customization
Once the ears, eyes, nose, cheeks, and heart bag are in place, inspect the toy for loose yarn ends and check that all sewn components are secure.
For a different look, try a pink or light-blue heart bag instead of red. You can also experiment with different yarn weights and hook sizes to change the panda’s overall scale, keeping in mind that the final proportions and fabric density may vary.
Your Crochet Panda Is Ready
Your finished panda combines a rounded white body, black ears and bobble details, embroidered facial features, and a miniature red heart bag. The contrast between its simple color palette and small accessory gives this amigurumi its distinctive charm, making it a sweet handmade gift or a decorative companion for a crochet collection.