Need a cuddly pastel dinosaur with floppy limbs and playful pink spines? This crochet pattern guides you through shaping its head, body, tail, and tiny limbs.

Plush yarn gives this crochet dinosaur its floppy silhouette, oversized head, and soft pastel charm. Crochet shaping can be tricky when separate pieces need to fit together, so careful stitch counts help keep its proportions balanced.
This crochet tutorial covers head and body shaping, matching limbs, and a scalloped spine in contrasting pink yarn. Follow each section before assembling your dinosaur into one cuddly amigurumi friend.
Credit Frayed KnotCo Tutorials
Materials & Tools
- Yarn: Premier Little Bunny yarn.
- Color A – Lilac: For the head, body, tail, arms, and legs. The pattern requires slightly more than one skein.
- Color B – Bubblegum: For the pink back spines.
- Crochet Hook: 5.0 mm.
- Safety Eyes: Choose eyes with a sparkly background.
- Polyfill Stuffing: For shaping the head, body, tail, and legs.
- Stitch Markers: For tracking rounds and positioning pieces.
- Tapestry Needle: For sewing components and hiding yarn ends.
- Scissors: For trimming yarn.
Finished Size & Customization
This dinosaur has a floppy, plush appearance with an oversized head, rounded body, short arms, chunky legs, and contrasting pink scalloped spines. Its finished dimensions depend on yarn tension and stuffing.
- Shorter Muzzle: Work one or two fewer rounds in the straight muzzle section, while checking how this affects subsequent shaping.
- Longer Arms: Begin with more than 9 chains or add extra rows to lengthen each arm.
- Different Berth of Spines: Adjust the orientation of the head and body if your source pattern supports attaching the wider end as the nose or reversing the arrangement.
- Color Variations: Try mint, cream, peach, or pale blue for a different pastel dinosaur.
Pattern Abbreviations
- ch: Chain
- sl st: Slip stitch
- sc: Single crochet
- hdc: Half double crochet
- dc: Double crochet
- tr: Treble crochet
- inc: Increase; work 2 single crochets in one stitch
- inv dec / dec: Decrease 2 stitches into 1 single crochet
- st(s): Stitch(es)
- Rnd(s): Round(s)
- Row(s): Row(s)
- MR: Magic ring; alternatively, ch 4 and join with sl st to form a ring

Step-by-Step Crochet Pattern
Step 1: Shape the Head and Muzzle
Use Color A, Lilac, to begin the head. Work in continuous rounds, placing a stitch marker in your first stitch so you can keep track of each round.
Rnd 1: Make an MR and work 6 sc into its center. Alternatively, ch 4 and join with sl st to form a ring. (6 sts)
Rnd 2: Work 2 sc in every stitch around. (12 sts)
Rnd 3: Repeat (inc, sc) around. (18 sts)
Rnd 4: Repeat (inc, sc 2) around. (24 sts)
Rnd 5: Repeat (inc, sc 3) around. (30 sts)
These increases form the rounded front of the muzzle. Keep your stitches snug and consistent so stuffing does not show through the fabric.
Rnds 6-9: Work 1 sc in every stitch for 4 rounds. (30 sts)
These even rounds create the cylindrical muzzle section. If you prefer a shorter nose, the source notes that one or two fewer rounds may be used, but the following decrease sequence must still be checked against your chosen version.
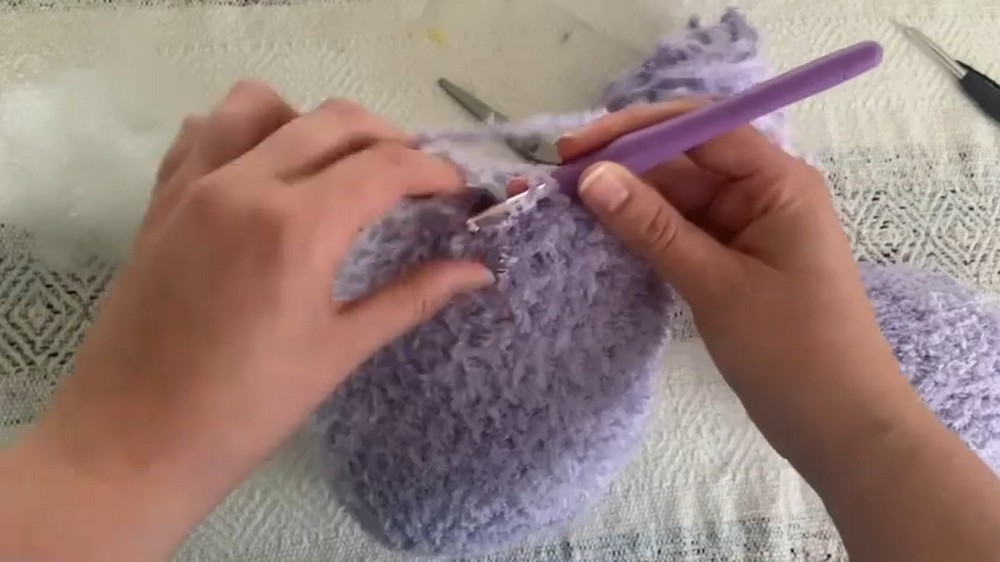
Step 2: Narrow the Muzzle and Form the Back of the Head
The decrease rounds transition from the wider muzzle toward the smaller back section of the head.
Rnd 10: Repeat (dec, sc 3) around. (24 sts)
Rnd 11: Repeat (dec, sc 2) around. (18 sts)
Rnds 12–18: Work 1 sc in every stitch for 7 rounds. (18 sts)
At this stage, pause to insert the safety eyes into the muzzle area and add fiberfill stuffing. Check that the eyes face forward and sit evenly before securing their backs.
Rnd 19: The supplied pattern states (dec, sc 2) around and gives a total of 14–15 stitches. These details do not align with the stated starting count of 18 stitches, so verify this round against the original pattern before continuing.
Rnd 20: The supplied instruction is (dec, sc) around, but it does not specify a final stitch count. Confirm the intended sequence before closing the head.
Closing the Head: Cut the yarn, leaving a long tail. Thread the tapestry needle through the front loops of the remaining stitches, pull tight to close the opening, secure the yarn, and hide the end inside the head.
Important check: Do not force the closing rounds to match an assumed count. The stitch totals for Rounds 19–20 need clarification to ensure the head closes correctly.

Step 3: Crochet the Rounded Body
Use Color A to work the body separately. Begin with a magic ring and expand through regular increases before shaping the torso and neck.
Rnd 1: Make an MR and work 6 sc into the center. (6 sts)
Rnd 2: Work 2 sc in every stitch around. (12 sts)
Rnd 3: Repeat (inc, sc) around. (18 sts)
Rnd 4: Repeat (inc, sc 2) around. (24 sts)
Rnd 5: Repeat (inc, sc 3) around. (30 sts)
Rnd 6: Repeat (inc, sc 4) around. (36 sts)
Rnd 7: Repeat (inc, sc 5) around. (42 sts)
Rnd 8: Repeat (inc, sc 6) around. (48 sts)
Rnd 9: Repeat (inc, sc 7) around. (54 sts)
These increase rounds establish the broad body needed to support the dinosaur’s head and limbs. Use your stitch marker to track each round, particularly when working with plush yarn that can make individual stitches harder to see.
Rnds 10-15: Work 1 sc in every stitch for 6 rounds. (54 sts)
This section builds the main body height without increasing its circumference.
Rnd 16: Repeat (dec, sc 7) around. (48 sts)
Rnd 17: Work 1 sc in every stitch around. (48 sts)
Rnd 18: Repeat (dec, sc 6) around. (42 sts)
Rnd 19: Work 1 sc in every stitch around. (42 sts)
Rnd 20: Repeat (dec, sc 5) around. (36 sts)
Rnds 21–23: Work 1 sc in every stitch for 3 rounds. (36 sts)
Rnd 24: Repeat (dec, sc 4) around. (30 sts)
Rnd 25: Repeat (dec, sc 3) around. (24 sts)
Rnd 26: Repeat (dec, sc 2) around. (18 sts)
The alternating decrease and even rounds gradually narrow the body. Keep the decreases distributed evenly so the shape does not lean to one side.
Rnds 27-28: The supplied pattern says to repeat (dec, sc 2) for two more rounds. However, the resulting stitch counts and intended neck opening are not specified. Verify these rounds against the original instructions before making the neck connection.
Stuff the body firmly but evenly, leaving the neck area accessible for joining the head.

Step 4: Create the Neck Connection
The neck tab connects the head to the body and helps keep the dinosaur upright rather than allowing its oversized head to flop sideways.
Use stitch markers to identify a restricted section of the body opening. Work back and forth across this section in single crochet rows, turn, skip the first stitch, and crochet back across the remaining stitches.
Continue for a few rows until the tab fits against the base of the head.
Placement tip: Check the tab against the head before sewing. It should sit centrally and provide enough surface for a secure seam.
Pattern clarification: The supplied instructions do not specify how many stitches to include in the restricted section or how many rows to work. These measurements need to be confirmed from the original tutorial for an accurate fit.
Step 5: Make the Tail
The tail starts narrow, gradually widens, and continues straight to form its elongated shape.
Using Color A, work the following rounds:
Rnd 1: Make an MR and work 6 sc into the center. (6 sts)
Rnd 2: Work 1 sc in every stitch around. (6 sts)
Rnd 3: Repeat (inc, sc) around. (9 sts)
Rnd 4: Repeat (inc, sc 2) around. (12 sts)
Rnds 5-10: Work 1 sc in every stitch for 6 rounds. (12 sts)
Rnd 11: Repeat (inc, sc 3) around. (15 sts)
Rnd 12: Work 1 sc in every stitch around. (15 sts)
Rnd 13: Repeat (inc, sc 4) around. (18 sts)
Fasten off, leaving a long sewing tail, and stuff the tail firmly enough to maintain its shape.
Result check: The tail should remain flexible enough to curve naturally while retaining a rounded profile. Avoid overstuffing if you want it to sit close to the body.

Step 6: Crochet Two Arms
Each arm is made as a flat rectangle before being folded and sewn closed. This creates a simple, soft limb without requiring a separate stuffed tube.
Using Color A, Row 1: Ch 10, skip the first chain, and work 9 sc across. (9 sts)
Rows 2-6: Turn and work 9 sc across each row. (9 sts per row)
After completing all 6 rows, fold the rectangle lengthwise with the edges aligned.
Use a tapestry needle to whipstitch through both matching edges. Pull the seam slightly snug to create a natural curved shape, then leave a long tail for sewing.
Helpful tip: Keep the seam on the side that will face the body where possible. This helps the finished arms look neat after attachment.
Repeat to make the second arm.
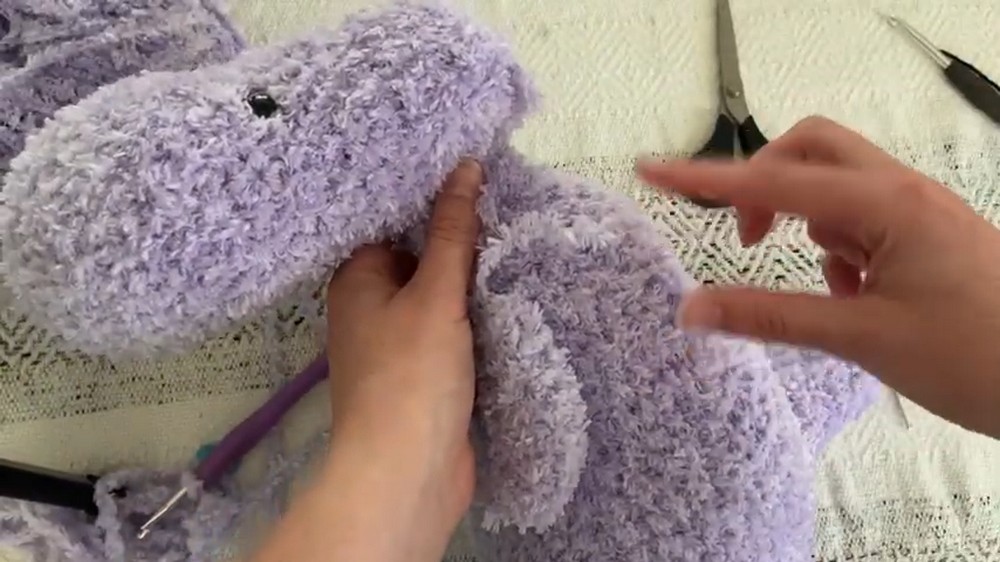
Step 7: Form the Chunky Legs
The legs begin with a rounded foot and continue into a longer section that can be lightly stuffed.
Using Color A, work the following rounds:
Rnd 1: Make an MR and work 6 sc into the center. (6 sts)
Rnd 2: Work 2 sc in every stitch around. (12 sts)
Rnd 3: Repeat (inc, sc) around. (18 sts)
Rnds 4-5: Work 1 sc in every stitch for 2 rounds. (18 sts)
Rnd 6: Repeat (dec, sc 2) around. (14 sts)
Rnds 7-13: Work 1 sc in every stitch for 7 rounds. (14 sts)
Fasten off, leaving a long tail for sewing. Lightly stuff the upper leg while keeping the foot section firmer for support.
Result check: Both legs should have similar lengths and foot shapes. Compare them before sewing so the dinosaur can sit or stand more evenly.
Repeat the instructions to make the second leg.

Step 8: Crochet the Pink Scalloped Spines
Color B, Bubblegum, creates the contrasting ridge that runs along the dinosaur’s back. The combination of short stitches and taller stitches forms the scalloped peaks.
Foundation: Ch 42.
Skip the first chain, then work this sequence along the foundation chain:
- 1 sc
- 1 hdc
- 1 dc
- 1 tr
- 1 dc
- 1 hdc
- 1 sc
- 1 sl st
Repeat the sequence along the chain to create the scalloped ridge.
The taller stitches form each raised peak, while shorter stitches create the valleys between peaks.
Important pattern note: A chain of 42 does not divide evenly into complete groups of 8 stitches after skipping the first chain. The supplied instructions do not explain how to handle the remaining chains, so verify the repeat and intended finishing method before completing the strip.
Once the ridge is complete, lay it along the dinosaur’s back to check its length and orientation before attaching it.

Step 9: Attach the Head to the Body
Position the head on top of the elevated neck tab. Use several stitch markers to hold the pieces in alignment before sewing.
With a tapestry needle and the yarn tail, whipstitch around the entire joining perimeter. Take small, secure stitches through both pieces and distribute them evenly around the seam.
Alignment check: View the dinosaur from the front and sides while the markers are still in place. The head should face forward rather than tilt to one side.
Once the placement looks balanced, finish the seam and weave in the loose end.
Step 10: Sew on the Tail and Arms
Place the stuffed tail at the lower back of the body. Use stitch markers to keep it centered, then sew it securely around its attachment edge.
Next, position the folded arms on the upper sides of the body, just below the neck. Attach each arm with small stitches, weaving the yarn tail through the body stitches for a firm connection.
Positioning tip: Compare both arms from the front before finishing. Similar height and angle give the dinosaur a more balanced appearance.
Step 11: Attach the Legs
Position the legs along the bottom of the body, spreading them enough to support its rounded shape.
Use stitch markers to hold each leg in place, then sew around its attachment edge with the tapestry needle. Secure both the foot and upper leg perimeter as needed to prevent loose edges.
Final balance check: Set the dinosaur on a flat surface before weaving in the last yarn ends. Adjust the leg placement if the body leans noticeably to one side.
Step 12: Sew on the Scalloped Spines
Lay the pink ridge down the center of the dinosaur’s back, following the intended line from the head area toward the tail.
Use stitch markers or pins to hold the strip in place before sewing. Attach the flatter transition points closely to the body while leaving the taller peaks free to stand up naturally.
Work small stitches along the strip, checking the placement as you go so the ridge does not twist or pull to one side.
Result check: The finished spine should show distinct pink scallops along the back. If any section lies flat, adjust its attachment stitches so the peaks remain visible.