Create a cozy small checkered crochet pumpkin with woven-looking texture, alternating post stitches, a plump finish, and a simple stem for warm autumn decor.
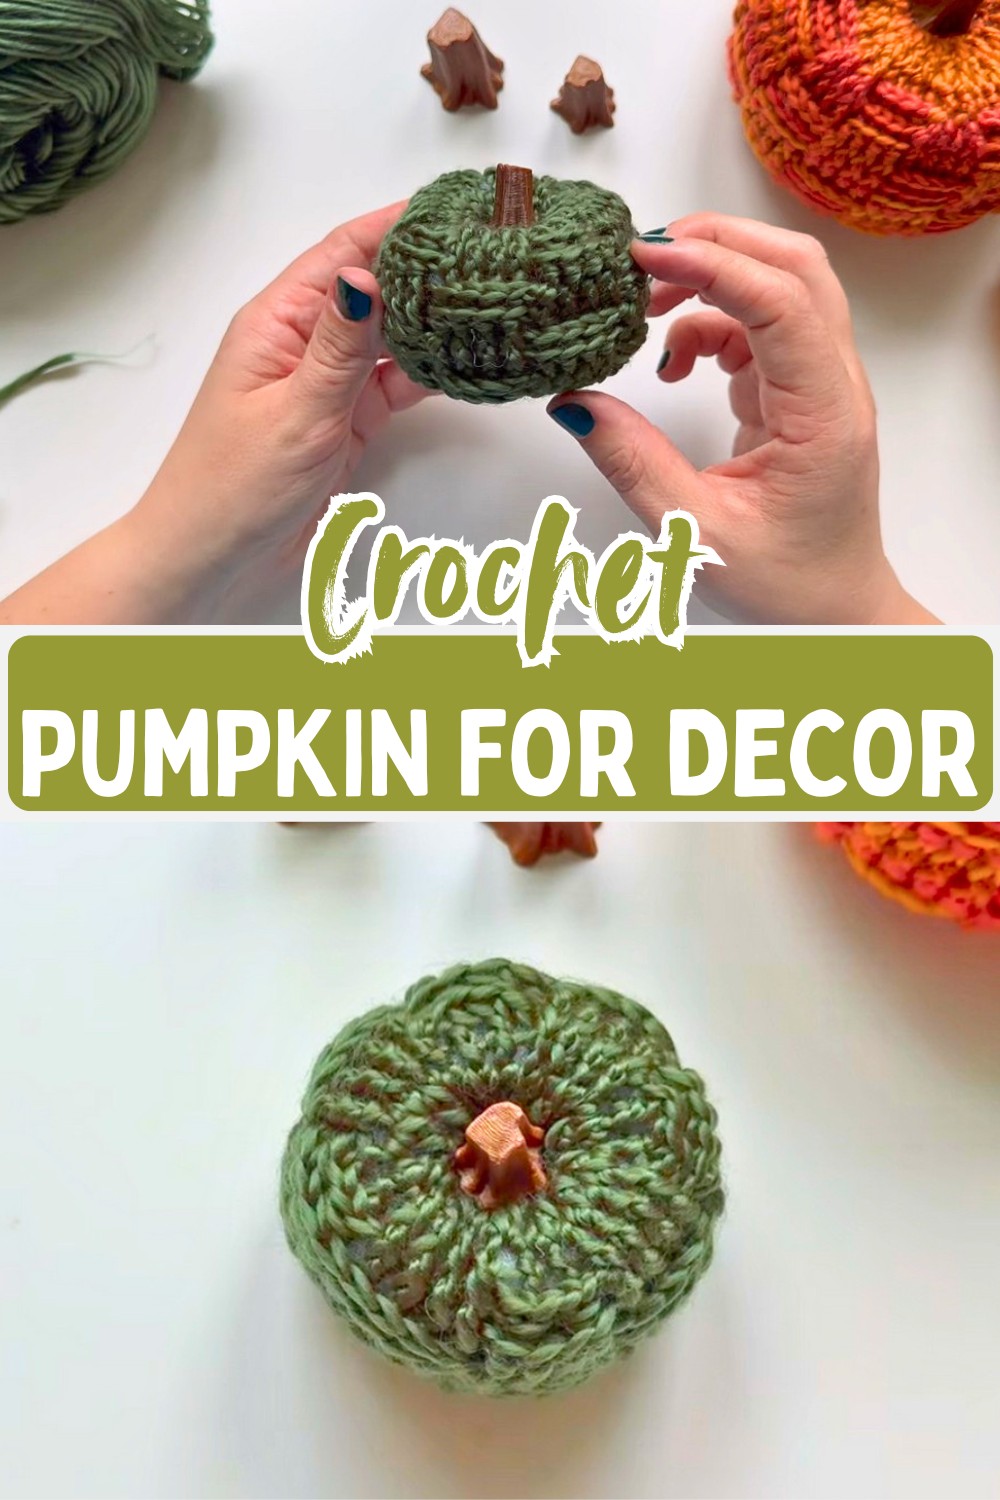
Bring a little extra texture to your fall decorating with this small checkered crochet pumpkin. Alternating front post and back post double crochets create the woven-looking surface, giving the pumpkin plenty of visual interest without requiring a complicated stitch sequence.
The pattern begins with three joined rounds to establish the base, then shifts into continuous rounds as the checkered texture develops. The shaping becomes more important near the top, where decreases, stuffing, and final cinching give the crochet pumpkin its rounded form and deep center indentation.
Materials Needed
- Yarn: Worsted weight yarn (e.g., Loops & Threads Facets or a similar acrylic yarn)
- Hook: 4.0 mm or 4.5 mm crochet hook
- Stuffing: Fiberfill / Polyfill
- Notions: Tapestry needle, scissors
- Finishing: Pumpkin stem (cinnamon stick, 3D-printed stem, or twig) and craft glue (like Gorilla Glue or E6000)
Abbreviations
All crochet terms are written using US terms.
- MR: Magic ring
- ch: chain
- st(s): stitch(es)
- dc: double crochet
- FPdc: front post double crochet
- BPdc: back post double crochet
- BPdc2tog: back post double crochet two together (decrease)
- dc2tog: double crochet two together (decrease)
Pattern Notes
- Rounds: The base (Rows 1-3) is joined at the end of the round, but from Row 4 onward, the pumpkin is worked in continuous rounds without joining.
- Chain Stitches: The starting ch 2 at the beginning of the joined rows does not count as a stitch.

Texture Rhythm Guide
The checkered texture comes from alternating groups of FPdc and BPdc rather than from color changes. In one section, the front-post stitches sit forward while the back-post stitches recede, creating the raised-and-recessed effect.
Rows 4 and 5 establish the first arrangement, while Rows 6 and 7 reverse it. Rows 8 and 9 return to the first arrangement, and Row 10 switches it again. Keeping track of which group is currently made with FPdc and which is made with BPdc will help the squares stay visually defined as the pumpkin grows.
Step-by-Step Instructions
Base of the Pumpkin
Row 1: Make a MR, ch 2. Work 12 dc into the ring. Join with a slip stitch to the first dc. (12 sts)
Row 2: ch 2, 2 dc in each st around. Join to the first dc. (24 sts)
Row 3: ch 2, 2 dc in the first st, 1 dc in each of the next 2 sts. Repeat from * around. Join to the first dc. (32 sts)
Transition: You will no longer join at the end of the rows. Continue working in a spiral for the rest of the pattern.
The first three rows create the wider base needed for the textured body. Once Row 4 begins, the continuous-round method keeps the checkered pattern moving around the pumpkin without a visible joining line interrupting the texture.

Checkered Texture
Row 4: FPdc in the next 4 sts, BPdc in the next 4 sts. Repeat from * around. (32 sts)
Row 5: Repeat Row 4. (FPdc in the FPdc sts, BPdc in the BPdc sts). (32 sts)
Row 6: BPdc in the next 4 sts, FPdc in the next 4 sts. Repeat from * around. (32 sts)
Row 7: Repeat Row 6. (BPdc in the BPdc sts, FPdc in the FPdc sts). (32 sts)
Row 8: FPdc in the next 4 sts, BPdc in the next 4 sts. Repeat from * around. (32 sts)
Row 9: Repeat Row 8. (32 sts)
Row 10: BPdc in the next 4 sts, FPdc in the next 4 sts. Repeat from * around. (32 sts)
Texture check: As you work, look for clear groups of four raised and four recessed stitches. If the texture begins to look uneven, check whether each FPdc and BPdc is being worked around the correct post before continuing.

Shaping the Top
Row 11: BPdc2tog across the next 2 sts, BPdc2tog across the next 2 sts, FPdc in the next 4 sts. Repeat from * around. (24 sts)
Pause here to firmly stuff your pumpkin with fiberfill.
The decrease round begins drawing the textured body inward. Firm stuffing at this point helps the pumpkin keep its rounded shape while the opening becomes smaller.
Row 12: Working into the regular top loops of the stitches (no post stitches), dc2tog around. (12 sts)

Add any remaining stuffing needed to reach your desired plumpness.
At this stage, the opening is much smaller, so check the shape before closing it completely. Add the remaining stuffing now if the pumpkin needs more fullness.
Row 13: dc2tog around. (6 sts)

Finishing & Cinching
- Cut the yarn, leaving a long tail for sewing and cinching, and pull it through the final loop.
- Thread your tapestry needle and weave through the remaining 6 stitches to pull the top hole completely closed.
- To create the pumpkin shape (cinching): Insert the needle down through the top center hole and push it straight out through the bottom center hole. Pull tightly to indent the center.
- Insert the needle back into a stitch near the bottom hole and push it straight up through the top center again. Pull firmly. Repeat this process 1-2 more times until the pumpkin has a deep, secure indentation on both sides.
- Tie off and weave the end securely inside the pumpkin.
- Apply a dab of craft glue to the base of your stem and press it firmly into the top indentation. Hold until secure.
Final shape check: The cinching should pull the top and bottom toward the center while leaving the textured sides full and rounded. If the indentation is not deep enough, repeat the center-to-center stitching before securing the yarn.