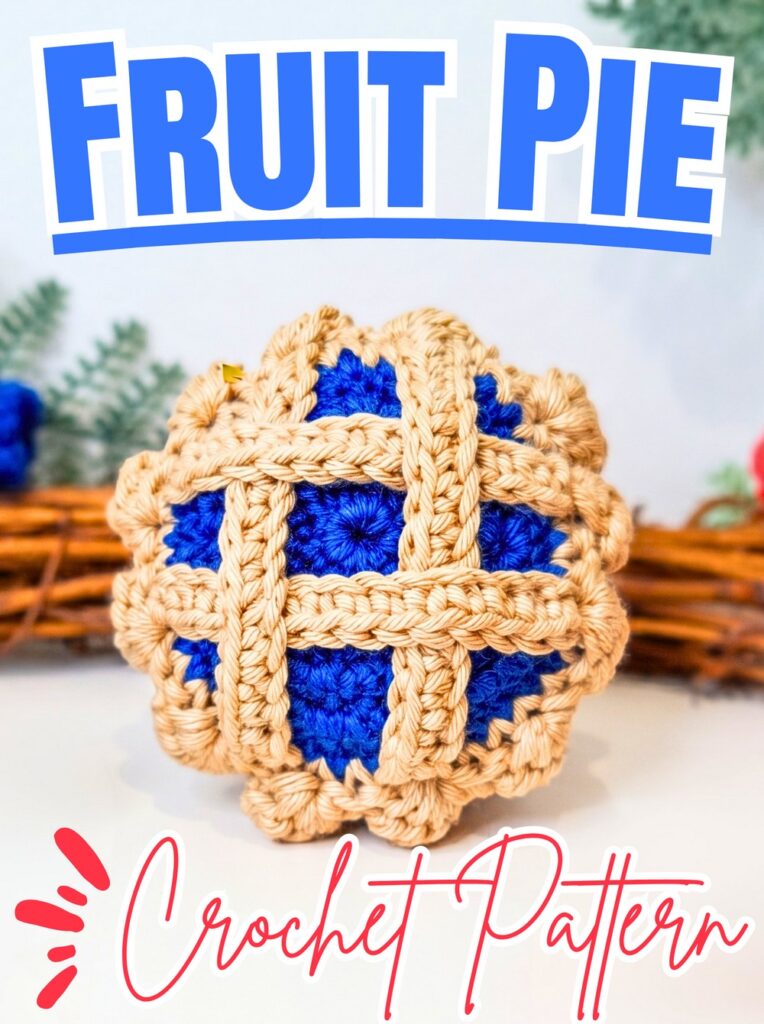
Tiny fruit-inspired details give this crochet amigurumi pie its sweet miniature charm, with a rounded crust, colorful filling, and crossed yarn strips forming a lattice across the top. Warm tan crust contrasts with bright red cherry-inspired filling or blueberry blue, while changing colors creates different fruit crochet pie styles from the same base design.
This crochet pattern brings together a small rounded base, textured crust sides, and a fruit-colored top finished with decorative lattice strips. You’ll learn how the separate crochet pieces are joined to create a plump miniature pie, ready to display as playful food, attach to a keychain, or give as a handmade gift.
Credit Made by Micaella
Materials & Tools Needed
Gather these supplies before starting your miniature fruit pie.
- Crust-colored cotton yarn: Light brown, tan, or another pastry-inspired shade for the base, sides, decorative border, and lattice strips.
- Fruit-colored cotton yarn: Red for a cherry or strawberry-inspired pie, blue for a blueberry version, or another color to represent your favorite filling.
- Crochet hook: 2.5 mm.
- Cardboard: A small piece for cutting a 3 cm circle to reinforce the base.
- Polyfill stuffing: To give the finished pie a rounded, plump shape.
- Glue stick or hot glue: To secure the cardboard support inside the base.
- Stitch markers: To help track rounds and stitch placement.
- Sewing pins: To hold the lattice strips in position before sewing.
- Yarn needle: For joining pieces, attaching the lattice, and weaving in ends.
- Scissors: For cutting yarn and trimming loose ends.
Finished size: Approximately 3-4 cm in diameter, depending on yarn, tension, and construction.

Pattern Abbreviations & Terminology
- st / sts: Stitch / stitches
- ch: Chain
- sl st: Slip stitch
- sc: Single crochet
- inc: Increase; work 2 single crochet stitches into the same stitch
- BLO: Back loop only
- [ … ]: Repeat the instructions inside the brackets the specified number of times
Step-by-Step Crochet Amigurumi Fruit Pie Pattern
Part 1: Crochet the Pie Crust Base and Sides
Use your light brown or tan yarn to create the pastry-colored foundation. The base begins as a flat circle, then develops textured sides to form a small pie shell.
Round 1: Start the circular base
Make a magic ring using your crust-colored yarn. Work 8 single crochet stitches into the ring, then pull the yarn tail firmly to close the center. Stitch count: 8 sts.
The supplied pattern mentions that 6–8 stitches may be used, but the demonstrated version begins with 8. Using that count allows you to follow the remaining stitch totals as written.
Round 2: Increase around
Work 2 single crochet stitches into every stitch around the circle. Stitch count: 16 sts.
These increases expand the base evenly. Check that the circle remains relatively flat rather than pulling into a cup shape at this stage.

Round 3: Increase every second stitch
Repeat the following sequence around the circle: [1 sc, inc]
Work 1 single crochet into the next stitch, then 2 single crochet stitches into the following stitch. Continue repeating the sequence around. Stitch count: 24 sts.
The circle should now be wider, with the increases distributed evenly across the round.
Round 4: Complete the base increases
Repeat the following sequence around: [2 sc, inc]
Work 1 single crochet into each of the next 2 stitches, then work 2 single crochet stitches into the following stitch. Repeat around. Stitch count: 32 sts.
This completes the flat circular base. Check its shape before moving on because the base supports the finished miniature pie.
Round 5: Work an even round
Work 1 single crochet into every stitch around, without any increases. Stitch count: 32 sts.
This round establishes a consistent edge before the side-wall shaping begins.
Round 6: Create a back-loop ridge
Work 1 single crochet into the back loop only of every stitch around. Stitch count: 32 sts.
Working into the back loops creates a visible ridge between the base and the sides. This detail helps define the bottom of the pastry shell.
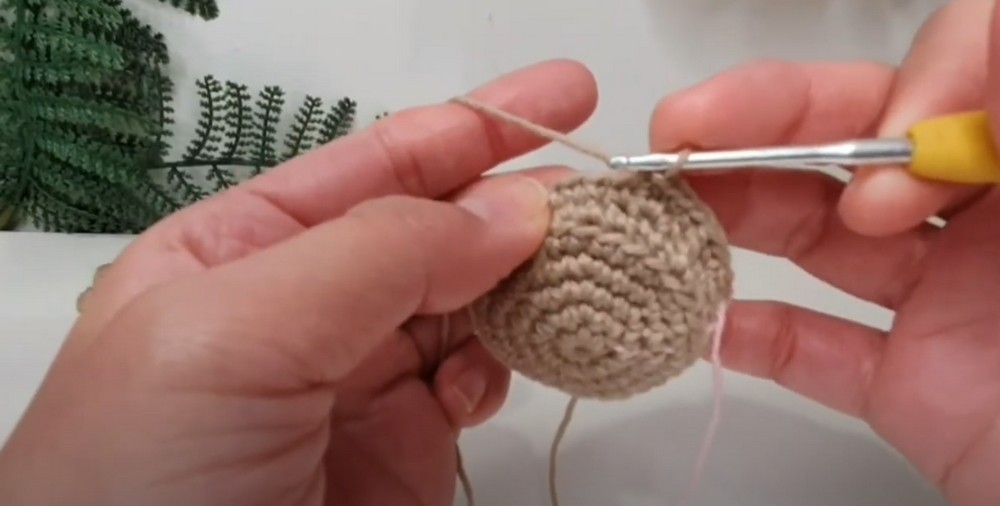
Round 7: Begin shaping the pie walls
Continue in the textured side-wall pattern described by the original tutorial, combining regular single crochet stitches with front-post-style stitches or ridge-forming stitches.
Target stitch count: 36 sts.
The supplied instructions do not specify the exact placement or sequence of these textured stitches. Follow the original demonstration for this round rather than guessing the stitch arrangement, as it determines how the sides form and where the texture appears.
Rounds 8-10: Continue the textured sides
Continue working around in the demonstrated side-wall pattern, maintaining the specified stitch count.
Target stitch count: 36 sts per round.
Keep the sides even as the crust rises around the base. The goal is a small, rounded pie shell with enough depth to hold the filling and stuffing.
Important: Do not fasten off the crust yarn at the end of Round 10 if you are following the original assembly sequence and will continue using this yarn for the decorative border later.

Part 2: Crochet the Fruit Filling
Choose the filling color for your miniature pie. Red gives it a cherry- or strawberry-inspired appearance, while blue creates a blueberry-style design.
The filling is crocheted as a separate circle before being joined to the crust.
Round 1: Start the filling circle
Using your chosen fruit-colored yarn, make a magic ring. Work 9 single crochet stitches into the ring and pull the tail to close the center. Stitch count: 9 sts.
Round 2: Increase in every stitch
Work 2 single crochet stitches into every stitch around. Stitch count: 18 sts.
The circle begins to widen to form the top of the pie.
Round 3: Increase every second stitch
Repeat the following sequence around: [1 sc, inc] Stitch count: 27 sts.
Keep your stitches consistent so the filling circle expands evenly.
Round 4: Increase every third stitch
Repeat the following sequence around: [2 sc, inc] Stitch count: 36 sts.
The filling should now be close to the width required for the crust opening.
Round 5: Finish the filling circle
Work 1 single crochet into every stitch around, without any increases. Stitch count: 36 sts.
Fasten off, leaving a long yarn tail for joining. The finished circle will form the colorful top beneath the lattice strips.

Part 3: Make the Crust Lattice Strips
The crossed strips are the defining detail of this miniature fruit pie. They sit across the filling in an over-under arrangement to imitate the lattice pastry topping found on traditional pies.
Make 4 strips using the crust-colored yarn.
Step 1: Chain 12
Make a slip knot and chain 12. Keep the chain loose enough to work into comfortably.
Step 2: Single crochet across the chain
Starting in the second chain from the hook, work 1 single crochet into each chain across.
Total: 11 sc per strip.
Fasten off, leaving a long tail for sewing. Repeat these steps until you have four matching strips.
Keep the strips similar in length and tension so they can be arranged neatly across the filling. Set them aside until the pie body has been assembled.

Part 4: Assemble the Miniature Pie
Step 1: Reinforce the bottom
Cut a circle approximately 3 cm in diameter from the cardboard. Check that it fits inside the base without extending beyond the crochet edges.
Apply a small amount of glue and secure the cardboard circle against the inside bottom of the crust piece. If using hot glue, handle it carefully and allow it to cool before continuing.
The cardboard support helps the miniature pie maintain a firm, flat base rather than collapsing under its own shape.
Step 2: Join the fruit filling to the crust
Position the fruit-colored circle over the opening of the pie crust, with the colorful side facing upward.
Using the yarn and joining method specified in the original pattern, work single crochet stitches through the remaining loops along the crust edge and the edge of the fruit circle. Continue around to connect the two pieces.
Stuff before completely closing the seam. Add small amounts of polyfill through the remaining opening, distributing it evenly to create a plump shape. Avoid overstuffing, which can distort the round top or stretch the joining stitches.
Finish closing the seam and secure the yarn. Check that the filling sits evenly inside the crust.
Step 3: Add the crimped side-crust border
Reattach the crust-colored yarn to the outer edge where the decorative border is intended to sit.
Repeat the following border sequence around the edge:
- Chain 2.
- Yarn over and pull through 2 loops, repeating the motion until 5 loops are on the hook, as described in the supplied tutorial.
- Yarn over and pull through all 5 loops to complete the textured stitch.
- Work a slip stitch.
- Skip 1 stitch, then work 1 single crochet into the next stitch.
Repeat the sequence around the pie. This creates a raised, crimped effect that resembles the pinched edge of pastry.
The original instructions describe the border motion but do not provide a separate formal stitch name or a complete stitch-by-stitch placement map. Follow the demonstrated motion carefully and keep the border spacing consistent enough to form a decorative edge.
Fasten off and weave in any loose ends securely.
Step 4: Arrange the lattice strips
Place the four crust-colored strips across the fruit filling. Arrange them in a criss-cross pattern, alternating the strips over and under one another where they intersect.
Use sewing pins to hold the strips temporarily against the top and near the edges of the pie. Adjust their positions until the lattice looks balanced and the fruit-colored filling remains visible between the strips.
Step 5: Sew the lattice in place
Thread the long yarn tails from the strips onto your yarn needle. Sew the ends securely into the crust border so the lattice stays in position.
Check that the strips lie neatly across the top without pulling the filling out of shape. Remove the sewing pins, then weave in the remaining yarn ends.
Your miniature fruit pie is now assembled, with a rounded crust, colorful filling, textured edge, and crossed pastry-style topping.
Customization Ideas
Choose a Different Fruit Filling
The same crust and lattice design can represent several kinds of fruit pie. Change only the filling color to create a different look.
- Red: Cherry or strawberry-inspired pie
- Pink: Raspberry-inspired pie
- Purple: Blackberry-inspired pie
- Blue: Blueberry-inspired pie
These are color-based styling options; the pattern construction remains the same.
Add a Tiny Leaf or Stem
For an extra fruit-inspired detail, add a small green leaf or stem to the top. This optional decoration can suggest an apple or cherry pie, although it is not part of the supplied base pattern.
Turn the Pie into a Keychain
Attach a keychain ring securely to the finished piece to create a miniature bag charm or keyring. Choose a strong attachment point and secure the ring through the crochet structure rather than relying on a loose yarn end alone.
Make a Matching Fruit Pie Collection
Create several pies with different filling colors while keeping the crust shade consistent. Display them together as miniature play food or use them as a coordinated set of handmade charms.
Enjoy Your Miniature Crochet Fruit Pie
Your amigurumi fruit pie combines a rounded pastry-colored shell, bright fruit-inspired filling, and a crossed lattice topping in a tiny handmade design. Choose a different filling color for each version, add an optional leaf or stem, or attach a keychain ring to make a playful accessory. Whether displayed as miniature food or given as a small handmade gift, this little pie brings a sweet touch to any crochet collection.