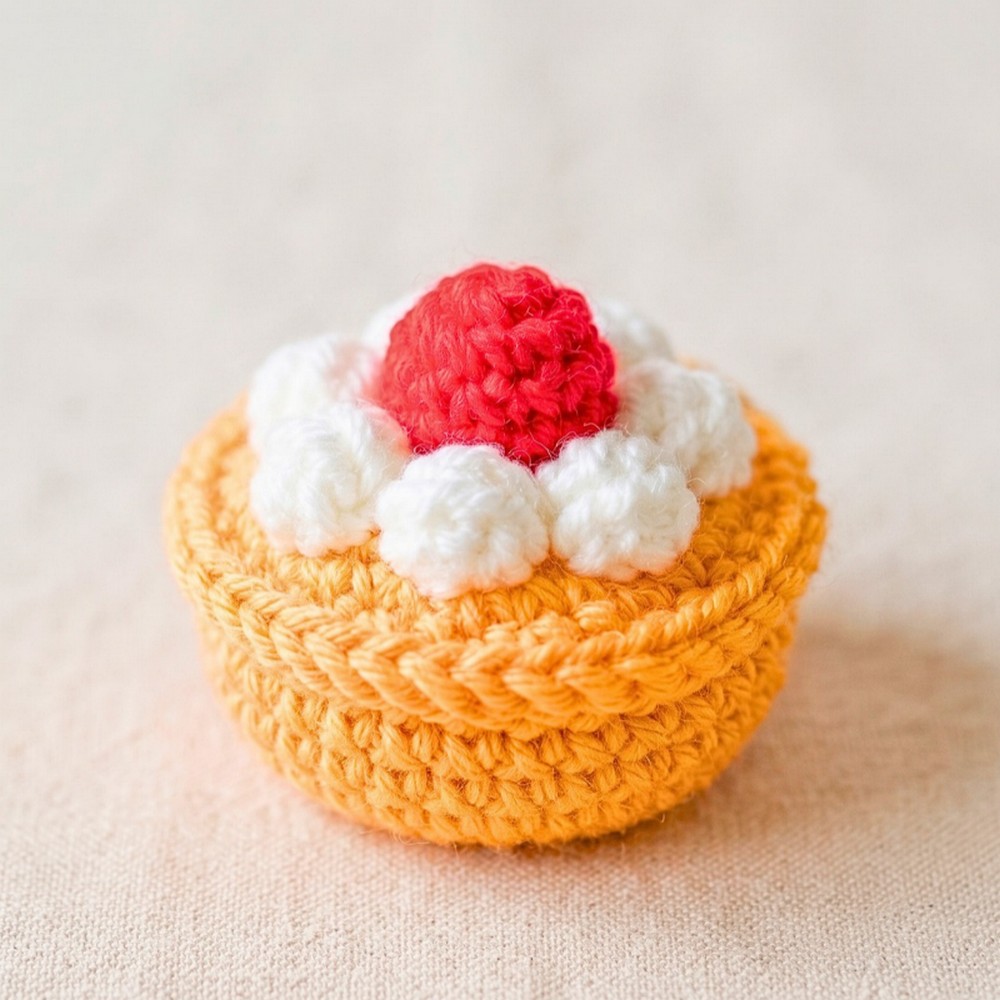
Here, learn how to crochet an adorable mini pie with textured brown crust, creamy filling, and decorative shell edging for charming play food or handmade gifts.
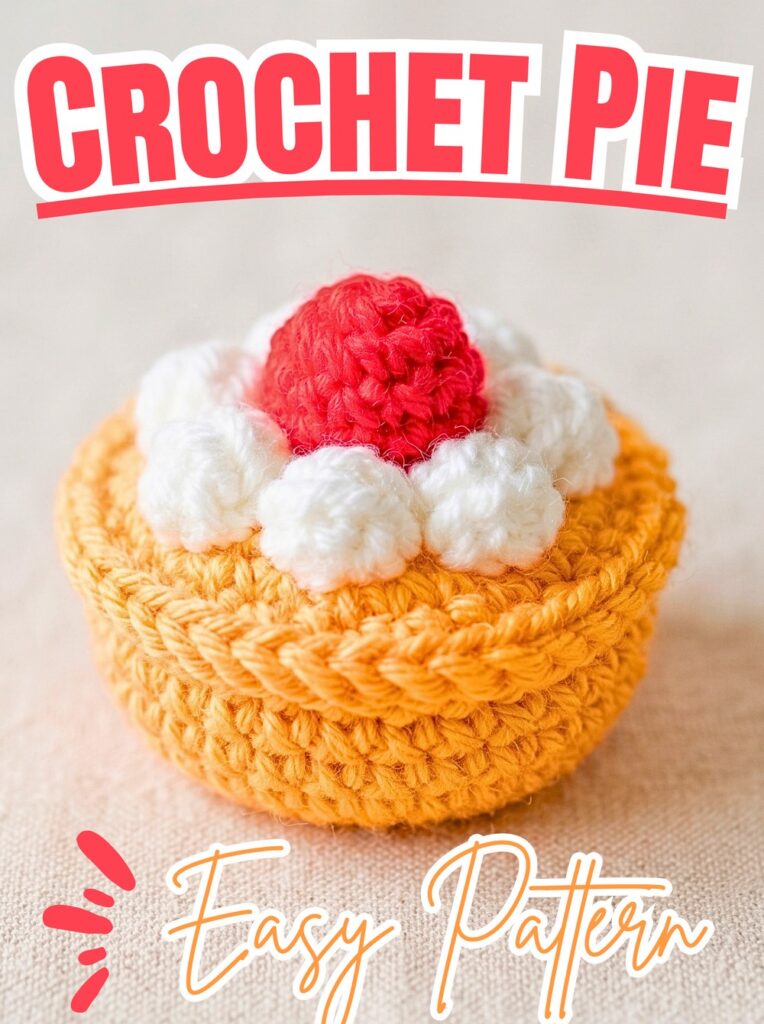
Cream-colored filling, warm brown crust, and raised edging give this crochet pie its classic homemade dessert look. Its round shape and textured sides create a recognizable little pie, while different yarn colors and optional fruit details offer room for personal touches.
This crochet tutorial guides you through shaping both circular layers, building ridged crust texture, and joining pieces with decorative edging. You’ll also learn how crochet finishing techniques help create a plump pie, with simple ideas for customizing its colors and toppings.
Credit Everyday Crochet
Materials & Tools Needed
- 4-ply cotton yarn: Light brown or tan for the crust and cream or off-white for the top
- Crochet hook: 3.5 mm (6/0)
- Polyester fiberfill: For stuffing the pie
- Stitch markers: To keep corresponding stitches aligned
- Yarn needle: For weaving in ends
- Scissors: For cutting yarn
- Optional accent yarn: For embroidered fruit decorations
Finished size: Approximately 10–12 cm in diameter, depending on yarn tension and hook size.
Pattern Abbreviations & Terminology
- Ch: Chain
- St / Sts: Stitch / Stitches
- Sl St: Slip Stitch
- Sc: Single Crochet
- Dc: Double Crochet
- Hdc: Half Double Crochet
- FPdc: Front Post Double Crochet
- FPsc: Front Post Single Crochet
- Inc: Increase; work 2 stitches into the same stitch
- BLO: Back Loop Only
- [ … ]: Repeat instructions inside brackets as specified
Step-by-Step Crochet Pie Tutorial
Part 1: Crochet the Brown Pie Base
Round 1: Create the center
Using brown yarn, begin with a magic ring. Chain 3, counting this as your first double crochet, then work 15 more double crochet stitches into the ring. Pull the yarn tail to close the center tightly and join with a slip stitch into the third chain of the beginning chain-3.
Total: 16 dc.
Check that the center closes neatly before moving on. A loose opening can leave an unwanted hole in the finished pie base.
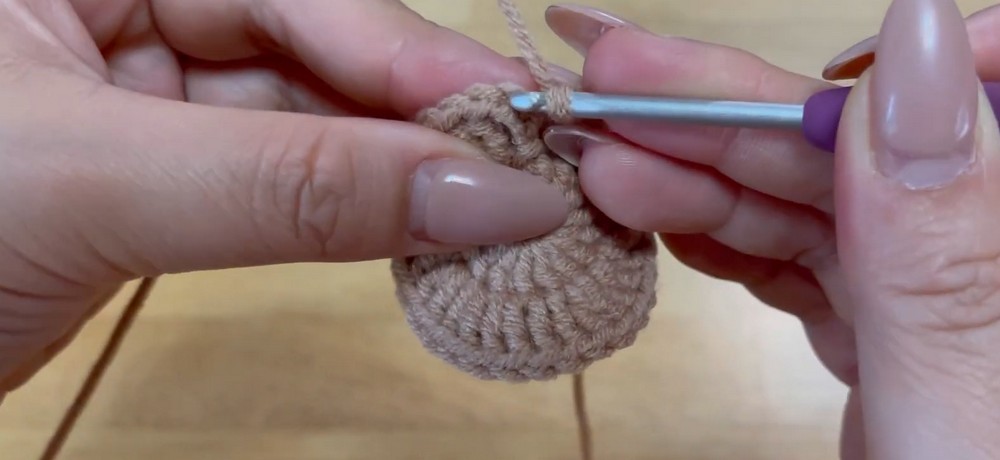
Round 2: Expand the circle
Chain 3, counting it as your first double crochet, and work another double crochet into the same stitch. Continue around by working 2 double crochet stitches into every stitch. Join with a slip stitch into the third chain of the beginning chain-3.
Total: 32 stitches.
Keep your increases evenly distributed around the circle. This round widens the base and creates the foundation for the pie’s round shape.
Round 3: Shape the base
Chain 1 and work 1 single crochet into the same stitch. Work 1 single crochet into each of the next 2 stitches, then make an increase by working 2 single crochet stitches into the following stitch.
Repeat the sequence of 1 single crochet in each of the next 3 stitches, followed by an increase, 7 more times. Join with a slip stitch into the first single crochet.
Total: 40 stitches.
Count your stitches before continuing. Maintaining the correct stitch count helps the circular base line up with the cream top later.
Round 4: Form the sharp base edge
Chain 3, counting it as the first double crochet. Work 1 double crochet into every stitch around, inserting your hook into the back loop only (BLO) of each stitch. Join with a slip stitch into the third chain of the beginning chain-3.
Total: 40 stitches.
Working through the back loops creates a defined ridge between the flat base and the raised crust. Make sure you use the back loop consistently throughout this round.
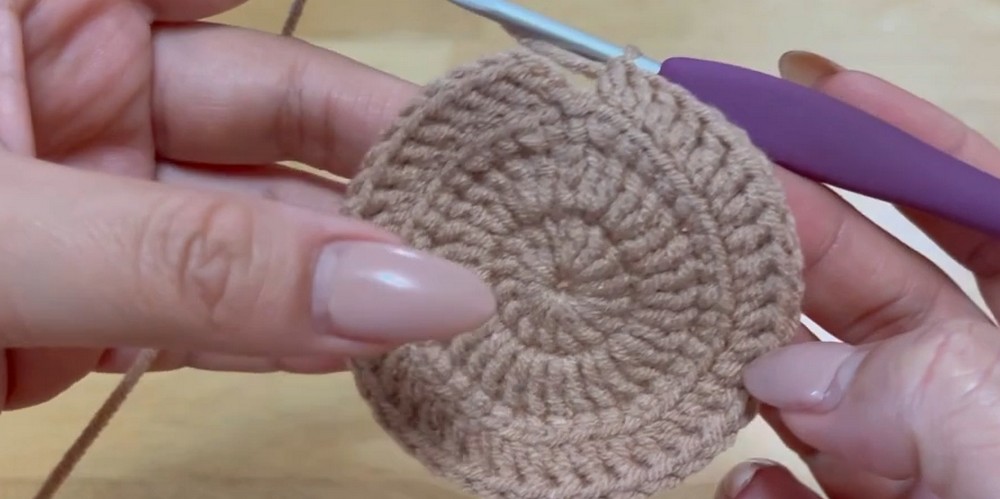
Round 5: Build the ribbed crust
Chain 3, counting it as the first double crochet. Work 1 front post double crochet around the next stitch, then 1 regular double crochet into the following stitch. Repeat this alternating sequence around the circle and join with a slip stitch into the third chain of the beginning chain-3.
Total: 40 stitches.
A front post double crochet wraps around the post of the stitch from the previous round rather than going through its top loops. This brings some stitches forward and creates the raised texture associated with pie crust.
Round 6: Continue the crust texture
Repeat Round 5 exactly: chain 3, then alternate 1 front post double crochet around the next stitch with 1 regular double crochet into the following stitch. Continue around and join with a slip stitch into the third chain.
Total: 40 stitches.
Keep the raised stitches aligned with the pattern from Round 5. This second textured round builds the height of the crust without changing the stitch count.
Round 7: Finish the crust edge
Chain 1. Alternate 1 single crochet in the next stitch with 1 front post single crochet around the following stitch. Repeat around the circle and join with a slip stitch into the first stitch.
Leave a long yarn tail for joining and fasten off. Use a yarn needle to hide the starting tail inside the piece.
Total: 40 stitches.
This final round gives the crust a defined upper edge. Keep the long finishing tail available, as it may be useful when assembling the pie.

Part 2: Crochet the Cream-Colored Top
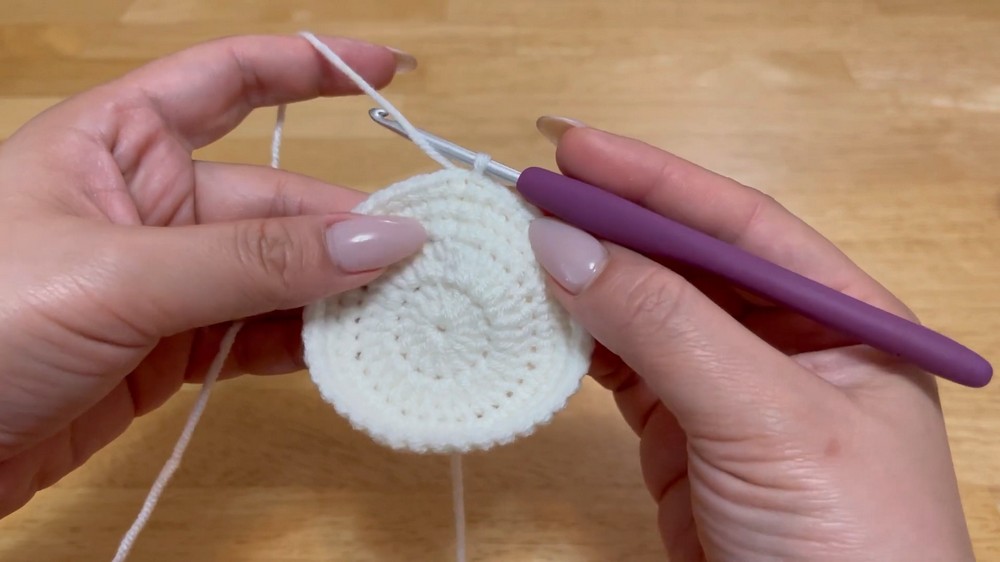
Round 1: Start the top circle
Switch to cream or off-white yarn and repeat Round 1 of the brown base: make a magic ring, chain 3, work 15 double crochet stitches into the ring, tighten the center, and join with a slip stitch into the third chain.
Total: 16 dc.
Using the same starting method helps the top and base begin at a matching size.
Round 2: Increase the circle
Repeat Round 2 of the brown base. Chain 3, work another double crochet into the same stitch, and then work 2 double crochet stitches into every stitch around. Join with a slip stitch into the third chain of the beginning chain-3.
Total: 32 stitches.
Keep the increases even so the top expands into a flat circle rather than curling noticeably.
Round 3: Complete the circular shaping
Repeat Round 3 of the brown base: chain 1, work 1 single crochet into the same stitch, then work 1 single crochet into each of the next 2 stitches and an increase into the following stitch. Repeat the sequence of 3 single crochet stitches followed by an increase 7 more times. Join with a slip stitch into the first single crochet.
Total: 40 stitches.
The cream circle should now match the base’s 40-stitch circumference, allowing both pieces to be joined stitch by stitch.
Round 4: Work the first finishing round
Chain 1 and work 1 single crochet into every stitch around. Join with a slip stitch into the first single crochet.
Total: 40 stitches.
Keep your tension even so the edge stays smooth and does not become too tight for joining.
Round 5: Complete the top
Chain 1 and work 1 single crochet into every stitch around. Join with a slip stitch into the first stitch, leave a yarn tail, and fasten off.
Total: 40 stitches.
Set the cream top aside with its finishing tail accessible. Both pieces are now ready to be aligned and joined.
Part 3: Join the Pie and Add Decorative Edging
Step 1: Align the two layers
Place the cream top directly over the brown crust, with the wrong sides facing inward. Match the stitches around both pieces, using stitch markers if needed to keep them aligned.
Take time to check the circumference before joining. Matching corresponding stitches helps prevent the top from shifting or gathering unevenly around the crust.
Step 2: Attach the edging yarn
At a marked stitch, insert your hook through both the cream top and brown crust. Pull up a loop of cream or edging yarn through both layers to begin joining them.
Keep your hook passing through the corresponding stitch on each piece. This secures the layers together while preparing the edge for its decorative finish.
Step 3: Create the first shell
Chain 2, then work 2 half double crochet stitches into the same stitch, passing through both layers. Skip the next stitch on both pieces and work 1 slip stitch into the following stitch through both layers.
This combination creates a small raised shell followed by a flatter joining stitch. Keep the two half double crochet stitches together in the same location so each shell has a defined shape.

Step 4: Repeat the shell edging
Continue around the perimeter using the same sequence:
- Chain 2.
- Work 2 half double crochet stitches into the same stitch through both layers.
- Skip 1 stitch on both layers.
- Work 1 slip stitch into the next corresponding stitch through both layers.
Repeat this sequence around the pie. Keep checking that the cream top and brown crust remain aligned as you work.
The repeated shells form a decorative border resembling piped cream or pastry edging. Consistent spacing gives the finished pie a neat, scalloped outline.
Step 5: Stuff the pie before closing
When only a short section of the edge remains open, add polyester fiberfill into the cavity between the top and base. Distribute the stuffing across the inside rather than packing it all into one spot.
Add enough fiberfill to give the pie a plump shape while keeping its circular outline. Avoid overstuffing, which can stretch the stitches or make the joining edge difficult to finish.
Step 6: Close the remaining edge
Continue the shell sequence until the layers are joined around the full perimeter. Follow the tutorial’s finishing method by skipping the last stitch and slip stitching into the very first stitch of the round.
Fasten off and use a yarn needle to weave the remaining tails securely into the pie body. Check the border for gaps and make sure the stuffing stays inside.
Your mini crochet pie is now assembled, with a textured brown crust, cream-colored top, and decorative shell edging.

Customization Ideas for Different Pie Designs
Add fruit-inspired details
Use small embroidered shapes or colored yarn accents to suggest strawberries, blackberries, or apple slices on the cream-colored top. Plan the placement before stitching so the decorations sit neatly within the circular surface.
These additions are optional; the original two-color design already has a finished pie appearance.
Try a classic lattice crust
For a different look, replace the solid cream top with crisscrossing crust strips to suggest a traditional apple or cherry pie. This is a modification rather than part of the base instructions above, so the top and joining method may need adapting to suit the lattice design.
Experiment with filling colors
Cream and off-white create a simple, classic filling. Other suitable yarn colors can suggest different flavors, while the brown crust and raised border help retain the recognizable pie shape.
Frequently Asked Questions
How big is this crochet pie?
The finished pie measures approximately 10–12 cm in diameter. Its exact size depends on yarn tension and hook size.
Is this crochet pie suitable for beginners?
The pattern uses common stitches, including single crochet, double crochet, half double crochet, and slip stitch. Beginners may need extra practice with front post stitches and joining two layers, but working through the rounds in order makes the process easier to follow.
Can I use a different yarn color?
Yes. Tan or light brown works well for the crust, while cream or off-white creates a classic filling. Optional accent colors can be used for embroidered fruit or other decorative details.
What is the purpose of the front post stitches?
Front post stitches raise selected stitches forward, creating the ribbed texture along the brown crust. The final front post single crochet round adds definition to its upper edge.
When should I add the stuffing?
Add polyester fiberfill shortly before completing the shell edging. This leaves enough space to distribute the filling between the two layers before the opening is closed.
Enjoy Your Handmade Crochet Pie
With its rounded shape, ribbed brown crust, creamy top, and scalloped border, this amigurumi pie makes a sweet addition to pretend-play food, seasonal displays, or handmade gift collections. Keep the original two-color design for a classic finish or personalize it with small fruit details for a different dessert-inspired look.