Here’s an adorable crochet penguin with cozy earmuffs you can make in just a few simple steps. This fun amigurumi pattern is perfect for all skill levels.
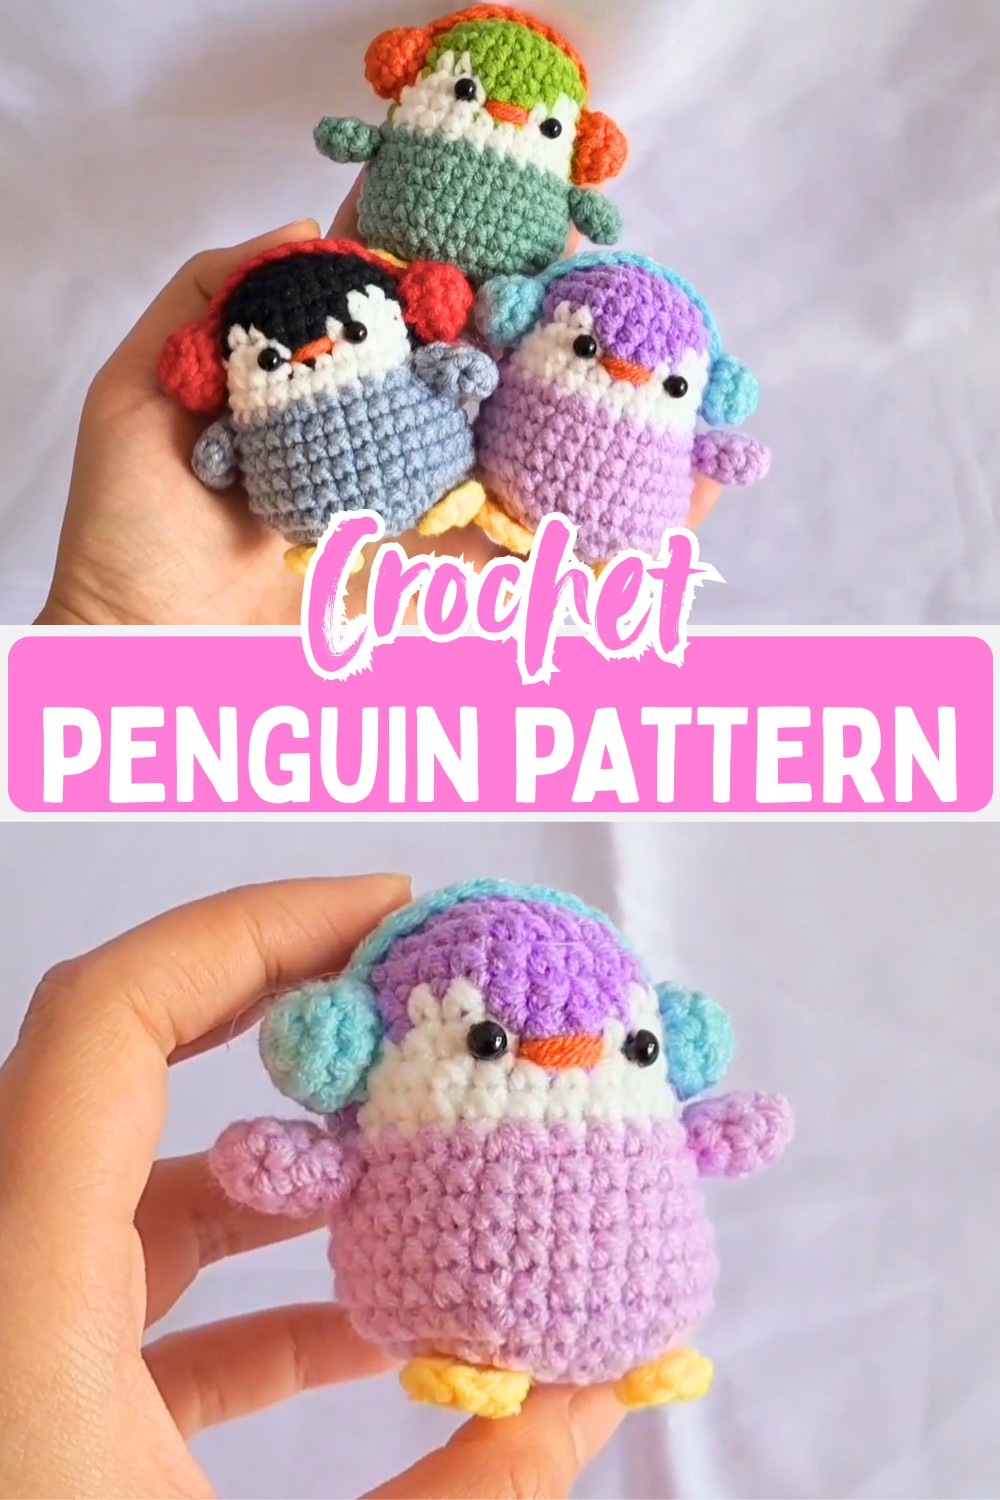
This adorable crochet penguin comes to life with a rounded shape, sweet little wings, and a pair of cozy earmuffs that instantly give it a playful winter look. The neat color changes and simple details make every step satisfying, while the finished piece is full of personality from every angle.
The body is worked as one crochet piece before adding the wings, feet, beak, and earmuffs for the final touches. Each section builds naturally into the next, creating a smooth crochet experience that reveals a charming winter companion one stitch at a time.
Credit from littlespot
Design Details
The design features a rounded amigurumi style representing a festive penguin wearing a cozy set of ear muffs.
Materials:
5 ply milk cotton yarn ( 2mm thickness)
- Purple Yarn: Main body and head.
- White Yarn: Facial stripes and accents.
- Light Purple Yarn: Lower body/hands.
- Orange Yarn: Beak detailing.
- Stuffing: Plush filling to create the puffed-up body.
- Glue (optional): For securing feet if sewing isn’t preferred.
Tools:
- Crochet hook: 3.0mm
- 5 mm Safety Eyes: Adds personality to your penguin.
- Stitch marker: To keep track of rounds.
- Scissors.
- Needle.
- Pins (helpful for placement).
Techniques & Key Stitches Used
- Magic Ring: For creating the round base shapes.
- Single Crochet (sc): Basic stitch worked throughout.
- Increase (inc): To shape the body and components.
- Decrease (dec): For tapering and finishing off.
- Slip Stitch (sl st): Used to join sections.
- Chain (ch): For the ear muff strap.
- Working in front loops only: Essential for clean closures.
Gauge
Gauge is not specified, but maintaining consistent tension is recommended for uniform shaping.
Finished Size / Measurements
Not provided in the tutorial.
Abbreviations & Terminologies
- sc: single crochet
- inc: increase (two single crochet in one stitch)
- dec: decrease (working through the front loops of two stitches)
- ch: chain
- sl st: slip stitch
- r: round
- [ ]: total stitches of the round
- hdc: half double crochet
- tr : trebel crochet
- blo: back loop only
- flo: front loop only
- dc: double crochet
Helpful Tips Before You Start
When performing the color changes on the face, insert the new yarn color just before completing the last step of the previous single crochet stitch
Pin the ear muffs to the head before sewing to make positioning much easier
Pattern Construction Overview
- Head & Body: Start with a magic ring and work upward, incorporating color changes for the face and switching to light purple for the lower body. Safety eyes and stuffing are added during the construction process.
- Separate Components: Create individual parts like wings, feet, and ear muff domes using small magic circles.
- Assembly: Carefully sew or glue each component to the body for final assembly.

Pattern Overview & Making Process
The pattern begins with a magic ring and gradually shapes the head and body using single crochet, increases, and decreases. Purple, white, and light purple yarn are introduced at specific rounds to create the facial markings and lower body, while the safety eyes and stuffing are added before the base is closed.
Once the main body is finished, the smaller pieces are made separately. The wings, feet, and earmuff domes are each worked in small rounds, making every part quick to complete before moving on to the final assembly.
The last stage brings every piece together. The beak is stitched below the eyes, the wings and feet are attached to the body, and the earmuffs are sewn onto each side of the head. A simple chain strap connects the earmuffs across the top, completing the penguin with its cozy winter look.
Step-by-Step Pattern Breakdown
Head & Body
Round 1: Magic ring, 6 sc.
Round 2: Inc in each stitch (12 sts).
Round 3: [1 sc, 1 inc] around (18 sts).
Round 4: [2 sc, 1 inc] around (24 sts).
Round 5: Sc in each stitch (24 sts).

Round 6: Start with 8 purple sc (on last pull-through of 8th stitch, switch to white yarn). Work 2 white sc, switch to purple, 4 purple sc, switch to white for 2 sc, finish round with purple sc (24 sts).
Round 7: 7 purple sc, 4 white sc, 2 purple sc, 4 white sc, finish round with 7 purple sc (24 sts).
Rounds 8-9: 7 purple sc, 10 white sc, finish round with 7 purple sc. On Round 9’s last stitch, insert light purple yarn and tie off other colors (24 sts).

Round 10: Using light purple, [3 sc, 1 inc] repeat around (30 sts).
Rounds 11-15: Sc around. Insert 5 mm safety eyes between rounds 7 and 8 (30 sts).
Round 16: [3 sc, 1 dec] repeat around (working through front loops) (24 sts).
Round 17: [2 sc, 1 dec] repeat around. Insert stuffing (8 sts).
Round 18: [1 sc, 1 dec] repeat around. Loop through front loops to cleanly close bottom (12 sts).

Wings (Make 2)
Round 1: Magic ring, 4 sc.
Round 2: [1 sc, 1 inc] repeat around.
Rounds 3-4: Sc in each stitch. Leave long tail for sewing.

Feet (Make 2)
Round 1: Magic ring, 6 sc. Fasten off and cut (leave tail for sewing or glue instead).
Ear Muffs (Make 2)
Round 1: Magic ring, 6 sc.
Round 2: [1 sc, 1 inc] repeat around.
Round 3: Sc around. Leave long tail for sewing.

Assembly Instructions
- Close Base: Thread yarn tail through final front loops and pull tight to secure stuffing.
- Attach Beak: Stitch orange yarn just below the eyes to create the perfect beak.
- Sew Wings: Position and attach wings to either side of the body.
- Secure Feet: Glue or sew the feet onto the bottom of the body.
- Place Ear Muffs: Pin and sew ear muffs to the sides of the head.
- Add Strap: Slip-knot to one ear muff, chain across the top of the head, and finish with a slip-stitch to the other ear muff for a cozy strap.
Troubleshooting & Suggestions
- Color Changes: Avoid muddled transitions by securing knots before pulling through a new yarn color.
- Stuffing Evenly: Stuff gradually to prevent lumps, especially for small body shapes.
- Final Closures: Loose bottom holes can occur—double-check stitches before sealing.
Creative Modifications
- Swap traditional purple and white colors for blues, reds, or festive greens.
- Add a tiny scarf or winter hat for additional personality.
Conclusion & Action Step
After the final slip stitch on the ear muff strap, your penguin is ready to spread winter cheer! Dive into this fun seasonal design and explore creative variations. Pair it with other holiday crochet designs for a joyful collection—happy creating!