Need an adorable crochet project? This sweet monkey pattern is easy to make, long-lasting, and perfect for all kinds of handmade creations.

This little monkey brings plenty of personality with just a few simple pieces. From its rounded face to its layered ears and tiny bow tie, every detail comes together to create a charming crochet keychain that’s fun to make and even more enjoyable to carry.
The pattern is worked in small sections before everything is assembled into one adorable finish. A stitched smile, neat facial details, and a keychain ring turn this crochet monkey into a playful everyday accessory, while each step reveals how the final design comes together.
Credit Ada’s Handmade
Design Details
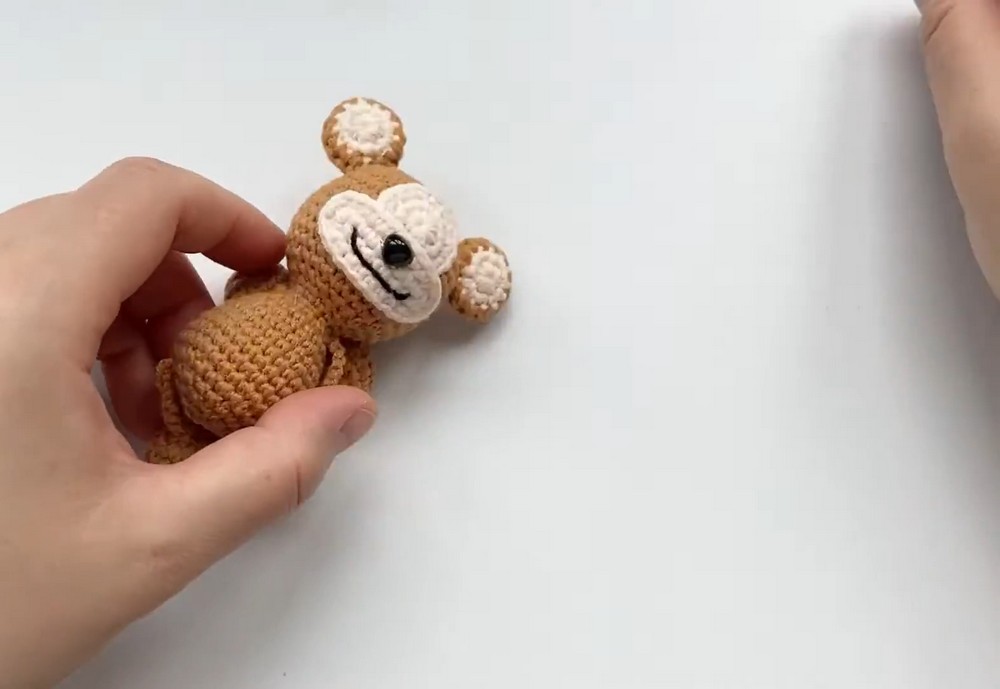
- Shape & Functionality: A small monkey amigurumi in a cute, compact form, designed to be attached to a metal keychain ring for portability.
- Attachment: Can also double as a whimsical charm for bags, purses, or backpacks.
- Finished Size: This is a pocket-sized, handheld project, great for easy carrying.
Key Features & Construction
- Layered Ear Design: This project features a two-tone design for the monkey’s ears, using cream-colored inner ear discs and brown-colored outer ear backs. These are crocheted together by single crocheting around the edges of both pieces to seamlessly merge them. .
- Round & Oval Facial Pieces:
- A circular crocheted base creates the face, achieved through traditional magic ring techniques and consecutive rounds of increases. .
- An oval-shaped mouthpiece is separately crocheted and features a delicate curved stitched smile in black embroidery thread.
- Hot Glue Assembly:
- A hot glue gun is used to attach various components, including the circular face base, the mouthpiece, eyes (small black beads or safety eyes), a nose, and a decorative bow tie under the chin.
Techniques & Stitches Used
- Magic Loop/Magic Ring: Central starting technique for the project
- Single Crochet (sc): The main stitch used throughout the project.
- Single Crochet Increase (inc): Key to shaping circular and oval parts.
- Slip Stitch (sl st): For joining rounds neatly.
- Working in Chains: Utilized when creating the oval mouthpiece.
- Embroidery: The smile is stitched onto the mouthpiece using black embroidery thread.
Materials Needed
- Yarn:
- Cream/Off-White
- Brown
- Optional: Yarn scraps for colored bow ties.
- Black Embroidery Thread: For stitching the mouth line.
- Small Black Beads or Safety Eyes: For the nose and eyes
- Keychain Attachment Ring: To convert the monkey into a functional charm.
Tools Required
- Crochet Hook
- Scissors
- Tweezers (for tucking ends or slight stuffing).
- Yarn/Darning Needle
- Hot Glue Gun
Helpful Tips Before You Start
- Magic Loop: Pull yarn tails firmly to ensure tight and gap-free loops.
- Trimming Excess Yarn: Trim short excess yarn tails on flat pieces to make them sit flush when hot glued.

Pattern Overview & Making Process
The monkey begins with the small details. Each ear is made in two separate pieces using cream and brown yarn, then joined together with single crochet to create a neat layered effect. The round face base is worked from a magic ring with gradual increases to achieve its smooth shape.
Next, the oval mouthpiece is crocheted by working around a foundation chain. A curved smile is embroidered with black thread, giving the monkey its cheerful expression before the facial pieces are prepared for assembly.
Finally, the ears are attached to the head, while the face, mouthpiece, eyes, nose, and bow tie are secured with hot glue. A keychain ring completes the design, turning the finished crochet monkey into a compact charm that’s ready to use or gift.
Step-by-Step Pattern Instructions
1. The Ears (Make 2)
Inner Ear (White/Cream Yarn):
- R1: Make 6 single crochet (sc) in a magic loop.
- Pull the loop tight.
- Slip stitch into the first stitch, chain 1.
- R2: Work 2 sc in each stitch around (12 sc total).
- Slip stitch into the first stitch.
- Chain 1, cut the yarn, and fasten off.
Outer Ear Backing (Brown Yarn):
- R1: Make 6 sc in a magic loop.
- R2: Work 2 sc in each stitch around (12 sc total).
- Do not cut the yarn.
Ear Assembly:
- Place the cream inner ear piece on top of the brown outer ear piece.
- Single crochet through both layers all the way around to attach them (12 sc total).
- Fasten off, leaving a yarn tail for sewing.
- Lightly stuff or tuck loose ends inside using tweezers.

2. The Face Base (Cream Yarn)
- R1: Make 6 sc in a magic loop (6 sc).
- R2: Work 2 sc in each stitch around (12 sc).
- R3: Alternate between 1 sc and an increase (inc) around (1 sc, inc) x 6 (18 sc).
- Fasten off, then weave and trim the ends.
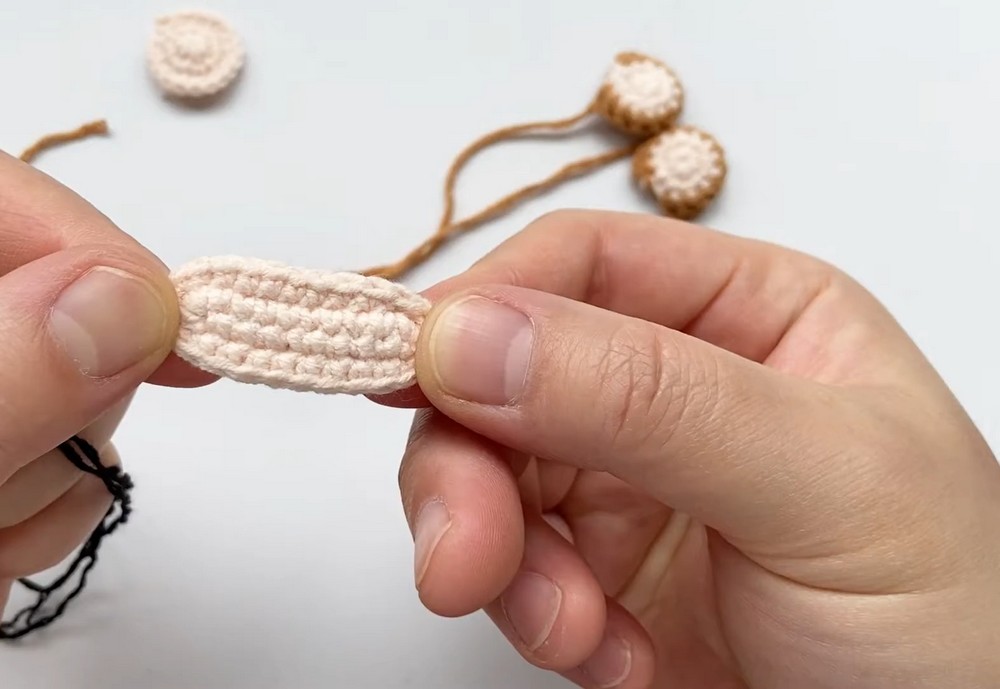
3. The Mouth Piece (Cream Yarn)
- R1: Chain 11.
- Starting from the second chain from the hook, make 9 sc.
- In the last chain, work 3 sc.
- Continue working along the opposite side of the chain, make 1 sc in the next 8 stitches.
- Work 2 sc in the last stitch.
- Finish with a slip stitch to close the round.
- R2: Chain 1.
- Make 1 sc in each stitch around.
- Finish with a slip stitch to close.
- Cut the yarn and fasten off.

Mouth Detail:
- Using black embroidery thread and a needle, embroider a curved smile line across the front of the mouthpiece.
- Tie off ends securely on the back side.
4. Assembly
- Attach the ears:
- Use a yarn needle to attach the finished ears to a separately crocheted head.
- Attach facial details (face base, mouth, eyes, nose):
- Use hot glue and apply it sparingly to the center of the components to prevent excess glue.
- Add the bow tie:
- Affix the pre-crocheted bow tie below the chin.
Customization Options
- Color Variations:
- Experiment with different colors for the monkey’s body, ears, face, or bow tie for a personalized look.
- Alternative Attachments:
- Replace the keychain attachment with a decorative chain to turn it into a bag charm.
Troubleshooting & Tips
- Magic Ring Issues:
- Ensure the yarn tail is pulled tightly to avoid visible holes in circular parts.
- Hot Glue Application:
- Apply glue sparingly to the center to avoid seepage around the edges.

Final Notes
This adorable monkey keychain is a fun and practical craft. It makes a lovely personal accessory or heartwarming gift.