This festive crochet capybara pairs a tiny Santa hat, fluffy white trim, mini Christmas bag, and candy cane for an adorable handmade holiday companion.
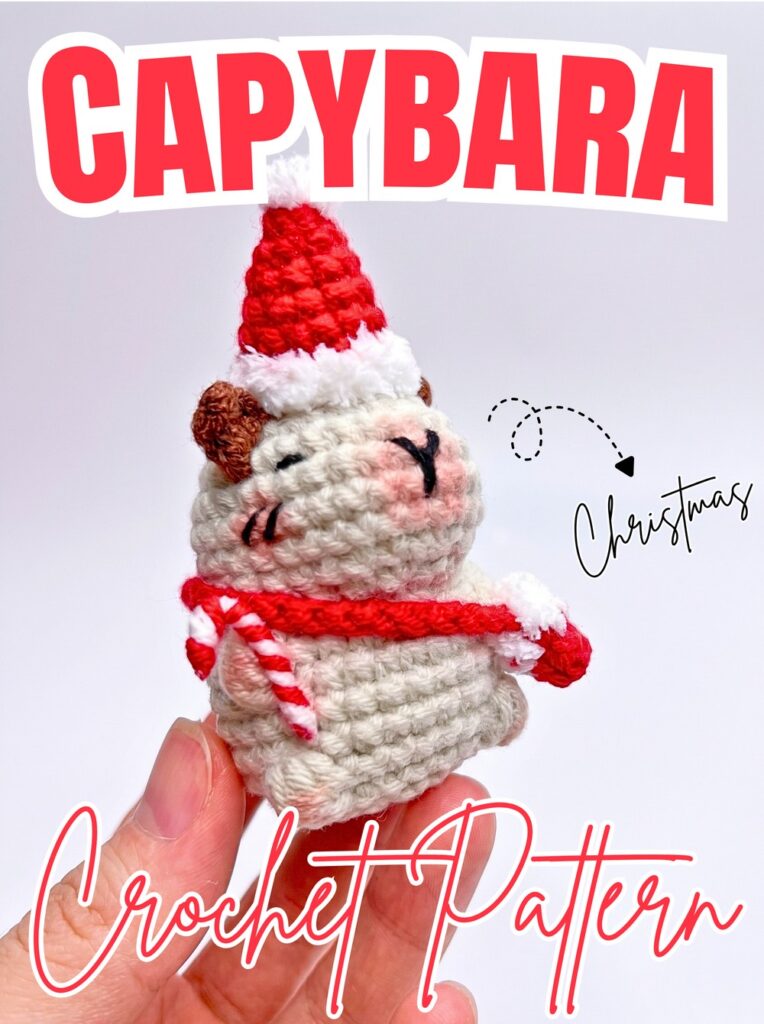
With rounded features, tiny dark ears, embroidered whiskers, and soft cheek shading, this crochet capybara has plenty of character in compact amigurumi form. Red-and-white Christmas accessories give this little crochet animal its Santa-inspired look, while bobble stitches add raised details to its face and body.
This crochet tutorial guides you through shaping the beige body, embroidering facial features, attaching small ears, and making each festive accessory. You’ll also learn where to position the hat, how to fit the bag strap, and how to finish the candy cane prop for a coordinated holiday design.
Credit Xuxu Crochet
Materials & Tools Needed
- Yarn
- Milk Cotton yarn, 50 g: beige for the body, red for the Santa hat and bag, and dark brown for the ears.
- White fluffy or fuzzy yarn for the hat trim, bag cuff, and pom-pom.
- Black embroidery thread or separated black yarn strands for the nose, eyes, and whiskers.
- Crochet hook: 2.5 mm.
- Stuffing and finishing supplies: Polyester fiberfill, yarn needle, stitch markers, and scissors.
- Candy cane supplies: Approximately 3 cm of craft wire, red yarn, white yarn, and hot glue.
- For finishing: Brown blush or makeup powder for shading and a brush.
- Assembly: Hot glue gun.

The finished capybara is described as a compact amigurumi suitable for a holiday ornament, keychain, or desk companion. The source does not provide an exact finished measurement.
Pattern Abbreviations & Terminology
- ch: Chain stitch.
- sl st: Slip stitch.
- sc / x: Single crochet.
- inc / v: Increase; work 2 single crochet stitches into the same stitch.
- dec / a: Invisible decrease; insert the hook through the front loops of two consecutive stitches, yarn over and pull through both loops, then yarn over and pull through the remaining loops.
- Bobble stitch: A raised stitch made by working partial double-crochet movements into the same stitch and pulling through all 5 loops together, as described in the supplied pattern.

Step-by-Step: How to Crochet the Christmas Capybara
Step 1: Crochet the Beige Body
Begin with beige Milk Cotton yarn and your 2.5 mm hook. The body forms the main shape of the capybara, so keep your stitch marker in place as you work through the rounds.
Foundation and Round 1
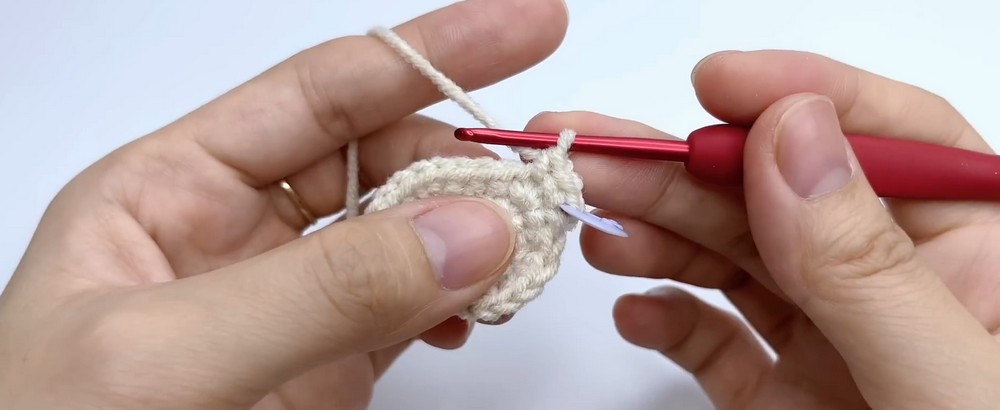
Make a slip knot and chain 5. Skip the first chain from the hook. Work 1 sc into the second chain and place your stitch marker there. Work 1 sc into each of the next 2 chains, giving you 3 sc along one side. In the final chain, work 3 sc into the same stitch.
Continue along the opposite side of the chain. Work 1 sc into each of the next 2 chains, trapping the yarn tail inside as you go, then work 2 sc into the final chain. Join with a sl st to the first stitch, pull the join tight, and chain 1.
Rounds 2–4: Shape the Body
- Round 2: Work an increase in the joining stitch. Work 1 sc into each of the next 2 stitches, then increase in each of the next 3 stitches. Work 1 sc into each of the next 2 stitches and increase in each of the final 2 stitches. Join with a sl st and chain 1. Trim the short starting tail at the back if needed.
- Round 3: Increase in the joining stitch, then work 1 sc into each of the next 3 stitches. Repeat the sequence increase, 1 sc three times. Work 1 sc into each of the next 2 stitches, then repeat increase, 1 sc twice. Join and chain 1.
- Round 4: Increase in the joining stitch, then work 1 sc into each of the next 4 stitches. Repeat increase, 2 sc three times. Work 1 sc into each of the next 2 stitches, then repeat increase, 2 sc twice. Join and chain 1.
Rounds 5–7: Build Height
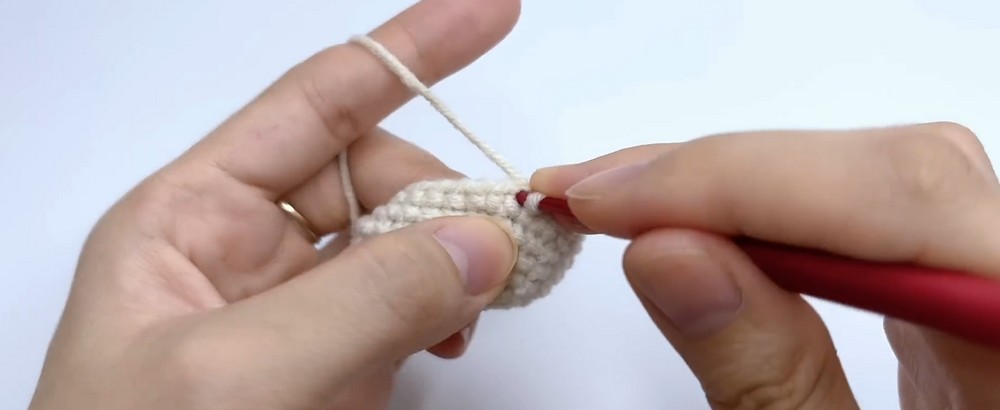
Work 1 sc into every stitch around for each round. At the end of every round, join with a sl st and chain 1. Keep the stitches even so the body maintains a neat shape.
Rounds 8–10: Shape the Front
- Round 8: Work 1 sc into the joining stitch, then increase in the next stitch. Work 1 sc into each of the next 7 stitches. Make 1 invisible decrease, 1 sc, another invisible decrease, and 1 sc. Make a third invisible decrease, then work 1 sc into each of the next 8 stitches. Increase in the next stitch, work 1 sc, and increase again. Join and chain 1.
- Round 9: Work 1 sc into each of the first 9 stitches. Make 3 invisible decreases in a row, using 6 stitches. Work 1 sc into each of the remaining 13 stitches. Join and chain 1.
- Round 10: Work 1 sc into each of the first 9 stitches. Make the specified 3-stitch decrease cluster by inserting the hook through the front loops of 3 consecutive stitches, pulling through all 3 loops, then pulling through the remaining 2 loops. Work 1 sc into each of the remaining 13 stitches. Join and chain 1.
Round 11: Add Raised Facial Texture
Work 1 sc into each of the first 5 stitches, followed by 1 bobble stitch in the next stitch. Work 1 sc into each of the next 2 stitches, gently pushing the bobble outward with your finger.
Increase in each of the next 3 stitches, then work 1 sc into each of the next 2 stitches. Make another bobble stitch, followed by 1 sc into each of the final 9 stitches. Join and chain 1.
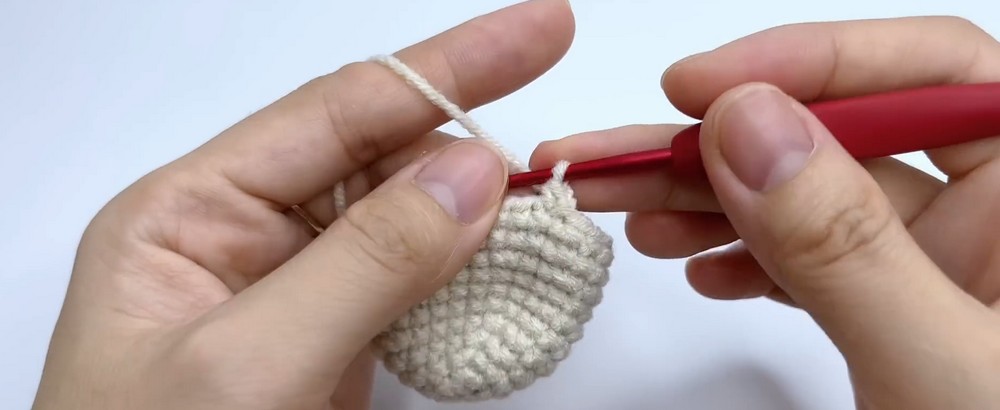
Rounds 12–14: Continue the Body
Work 1 sc into every stitch around for each round. Join with a sl st and chain 1 at the end of each round.
Round 15: Add the Second Pair of Bobbles
Work 1 sc into each of the first 6 stitches, then make 1 bobble stitch. Work 1 sc into each of the next 8 stitches, make another bobble stitch, and work 1 sc into each of the final 10 stitches. Join and chain 1.
Rounds 16–17: Close the Lower Body
- Round 16: Repeat the sequence 1 invisible decrease, 2 sc six times. Work 1 sc into each of the final 2 stitches, then join and chain 1.
- Round 17: Repeat the sequence 1 invisible decrease, 1 sc six times. Work 1 sc into each of the final 2 stitches, then join and chain 1.
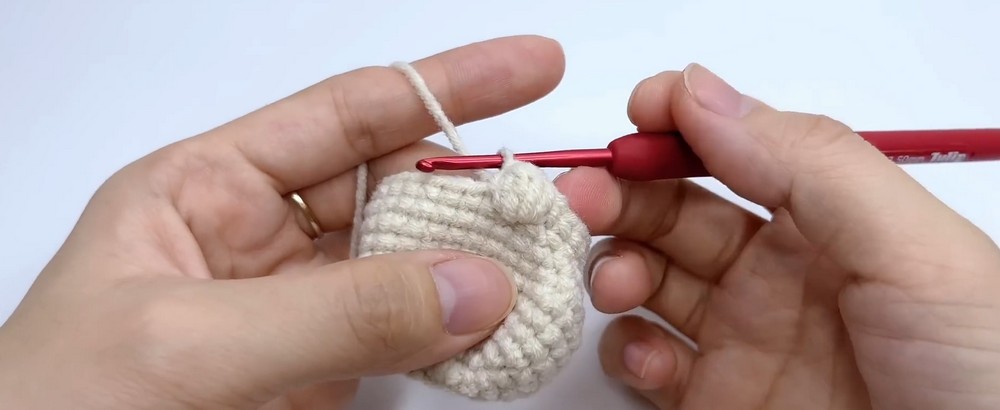
Stuff Before Closing
Remove the stitch marker, pull up a loop, and pause to fill the body firmly with polyester fiberfill. Distribute the stuffing evenly so the body holds its shape without becoming overly stretched.
Round 18: Close the Opening
Work 7 invisible decreases around the opening. Join with a sl st to the first stitch, fasten off, and leave a long yarn tail. Thread the tail through the front loops of the final stitches with your yarn needle, pull tight to close the hole, and hide the remaining yarn inside the body.
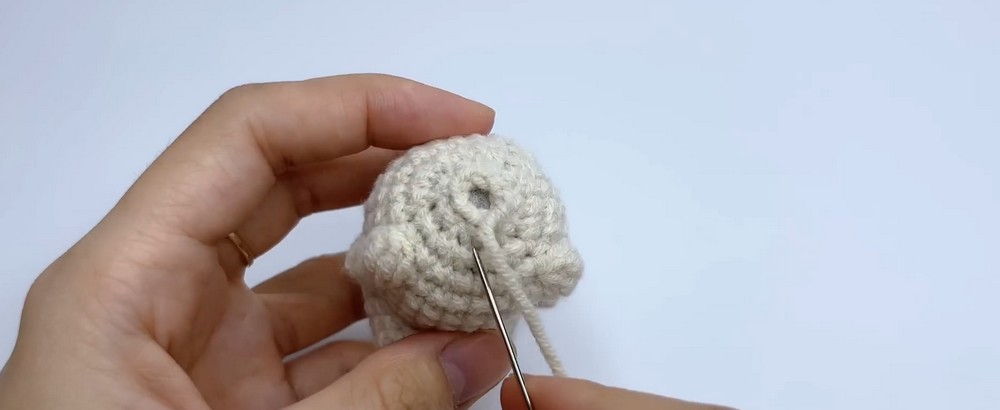
Step 2: Embroider the Face
Use black embroidery thread or separate black yarn strands until you have two fine strands. Fine thread helps keep the features small and defined on the compact body.
- Nose: Embroider a small nose centered between body Rounds 4 and 5. The source describes it as a small vertical/horizontal detail.
- Eyes: Add small black embroidered eyes on either side of the nose, approximately 3 stitch-widths away.
- Whiskers: Embroider short whisker lines directly one row below the eyes.
Check the face from the front before securing the yarn tails. Keep the eyes balanced around the nose and make the whiskers short enough to complement, rather than overpower, the small face.
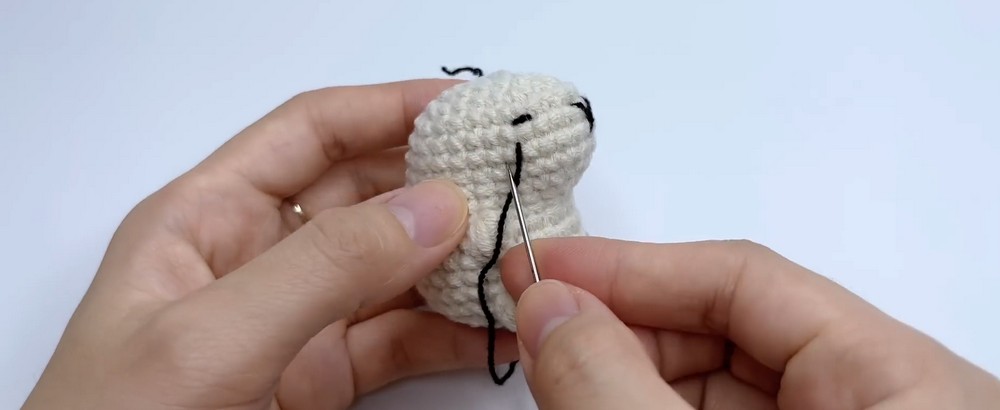
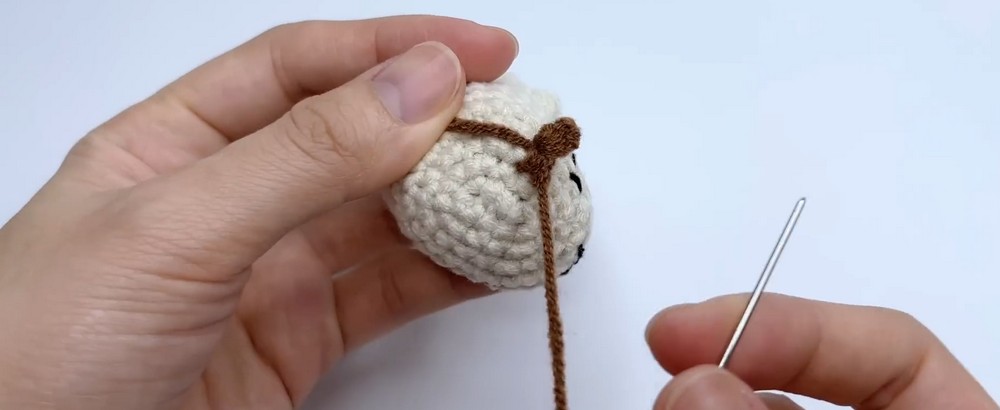
Step 3: Make and Attach the Dark Brown Ears
Use dark brown yarn for both ears. The source places them on body Rows 3 and 4, roughly 2 stitches away from an eye.
- Insert your hook through the designated stitch on the head and pull the brown yarn through.
- Chain 3.
- Skip the first chain, then work 1 sc into the second chain and 1 sc into the final chain.
- Anchor the ear by making a sl st into the neighboring stitch on the head.
- Fasten off and use a yarn needle to hide both yarn tails inside the head.
- Repeat the same process on the opposite side.
Compare both ears from the front. Keep their height and distance from the eyes as similar as possible so the capybara’s face looks balanced.
Step 4: Crochet the Red Santa Hat
The Santa hat consists of a red cone, a fluffy white brim, and a white pom-pom. Make the red section first, then add the trim.
Red Hat Cone
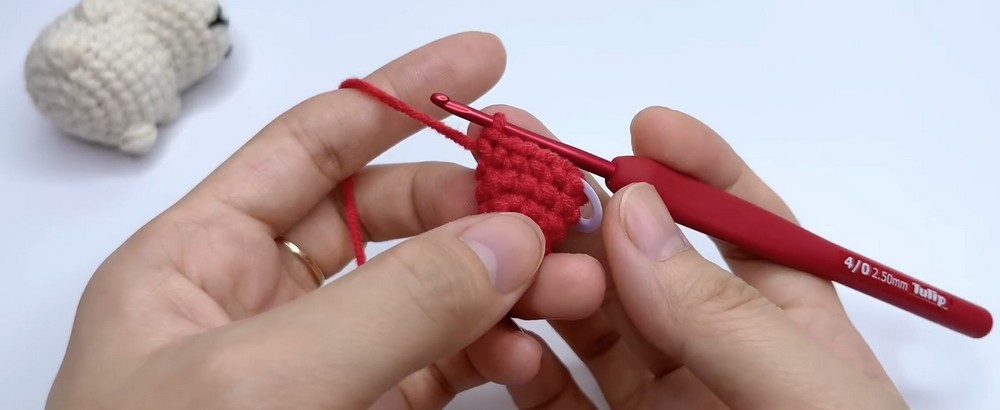
- Round 1: Make a magic ring and work 4 sc into it. Pull the ring closed, join with a sl st to the first stitch, and chain 1.
- Round 2: Work 1 sc into the first stitch and an increase into the next stitch. Repeat 1 sc, 1 increase once more around. Join and chain 1. Trim the short starting tail behind the work.
- Round 3: Turn the work so the right side faces outward. Work 1 sc into each of the first 2 stitches, then increase in the third stitch. Repeat 2 sc, 1 increase around. Join and chain 1.
- Round 4: Work 1 sc into each of the first 3 stitches, then increase in the next stitch. Repeat 3 sc, 1 increase around. Join and chain 1.
- Round 5: Work 1 sc into each of the first 4 stitches, then increase in the next stitch. Repeat 4 sc, 1 increase around. Join and chain 1.
White Fuzzy Brim
For Round 6, switch to white fuzzy yarn at the joining stitch. Trap the red and white yarn tails inside as you crochet. Work 1 sc into every stitch around, join with a sl st, and fasten off. Leave a long white yarn tail for sewing.
Fuzzy yarn can make individual stitches difficult to see, so feel for each stitch with your hook rather than relying only on sight. Avoid pulling the white yarn so tightly that the brim loses its soft appearance.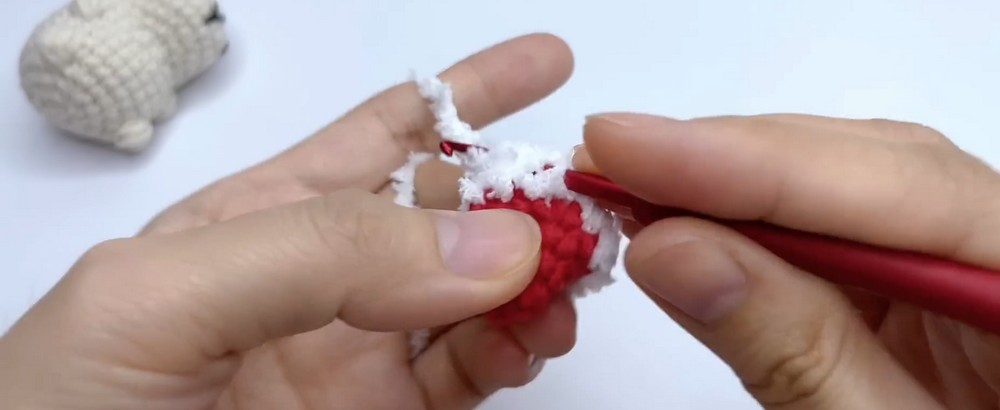
Add the Pom-Pom
Fold a short strand of white fuzzy yarn in half. With your yarn needle, pull it through the tip of the magic ring from the inside to the outside. Secure it by stitching through the center twice, hide the tail inside the hat, and trim the fuzzy loop into a neat pom-pom ball.
Check that the pom-pom is secure before attaching the hat to the capybara.
Step 5: Crochet the Mini Christmas Bag
Use red yarn for the bag body and strap, then add a fluffy white cuff. The strap is designed to sit across the capybara’s body.
Red Bag Body
- Foundation: Chain 4.
- Round 1: Skip the first chain. Work 1 sc into each of the next 2 chains, then work 3 sc into the final chain. Continue along the opposite side, working 1 sc into the next chain and 2 sc into the final chain. Join with a sl st and chain 1. Trim the back tail.
- Round 2: Work 1 sc into every stitch around. Join with a sl st and chain 1.
White Fuzzy Cuff
For Round 3, switch to white fuzzy yarn and work 1 sc into every stitch around. Leave the red working strand unworked on the outside because it will be used for the strap. Do not cut the red yarn yet. Join with a sl st, fasten off the white yarn, and weave in its ends.
Make the Red Strap
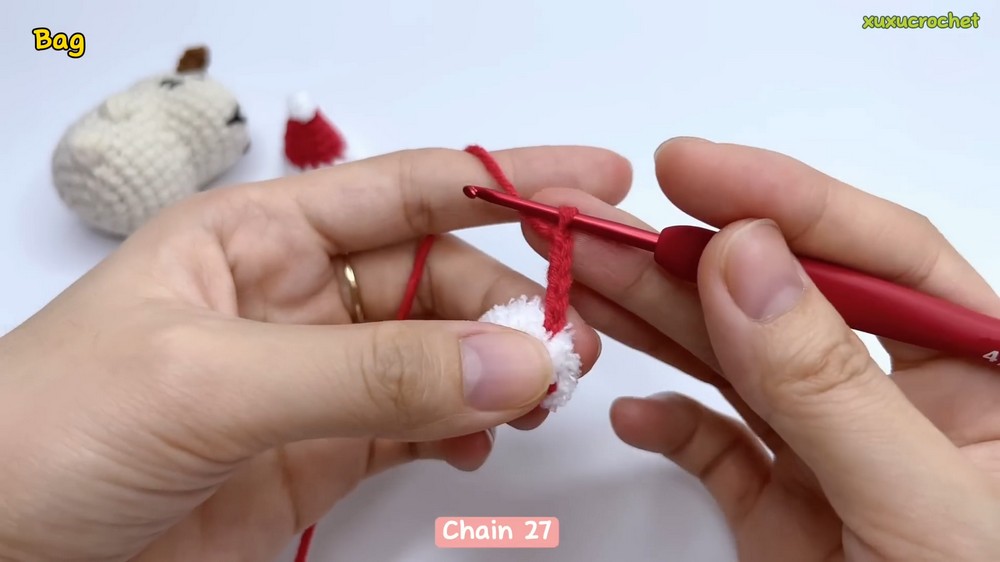
Use the red yarn strand left hanging from the bag base. Insert the hook into a stitch on Row 3, pull the red yarn through, and chain 27 stitches.
Before securing the strap, test its length around the capybara’s body. If needed, adjust the chain length so the bag sits comfortably in the intended position. Anchor the other end symmetrically on the opposite side with a sl st. Chain 1 to lock the stitch, cut the yarn, and weave in the remaining tail.
Step 6: Make the Candy Cane Prop
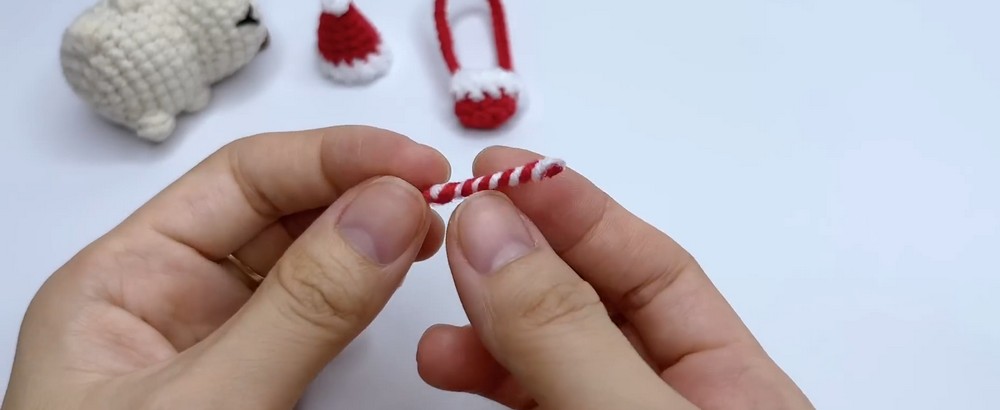
The candy cane is made separately using a short piece of craft wire and alternating red and white yarn.
- Cut a piece of craft wire approximately 3 cm long.
- Wrap red and white yarn around the wire in alternating spirals.
- Use hot glue at both ends to secure the yarn wrapping.
- Bend the top of the wrapped wire into a classic candy cane hook.
Keep the yarn wrapping close together so the wire is covered. Handle the wire ends carefully, and allow the glue to secure the wrapping before placing the prop beside the capybara.
Safety note: This accessory contains wire and hot glue. Keep the finished prop away from young children who may put small objects in their mouths, and supervise children during construction.
Step 7: Add Cheek and Snout Shading
Use a brush to apply a small amount of brown blush or makeup powder around the cheeks, ears, and snout. Build the shading gradually rather than applying a heavy layer at once.
Pause to check the color from the front. The aim is to give the face a soft, warm finish while keeping the embroidered eyes, nose, and whiskers visible.
Step 8: Attach the Santa Hat
Position the hat on top of the capybara’s head before applying glue. Check its placement from the front and sides so the brim sits where you want it and the pom-pom remains visible.
Apply a small amount of hot glue to the bottom rim of the hat, then press it firmly onto the top of the head. Hold it in place until secured. Avoid using so much glue that it spreads beyond the brim.
Step 9: Fit the Bag and Position the Candy Cane
Slip the red bag strap over the capybara’s body and position the mini bag at the front or side. Adjust the strap before making any final changes to its fit.
Use a small dab of hot glue to position the candy cane near the capybara’s paw or side, as described in the supplied instructions. Check the placement from the front to ensure the prop complements the bag without hiding the facial details.
Finishing Checklist
Before displaying your Christmas capybara, check the following:
- The body opening is fully closed and the stuffing is secure.
- The embroidered nose, eyes, and whiskers are clear and balanced.
- Both ears are attached securely and sit at similar heights.
- The white hat trim and pom-pom are secure, with no loose tails showing.
- The bag strap fits around the body and the white cuff is visible.
- The candy cane wrapping is secured at both ends.
- The hat and accessories are firmly attached, with no excess glue visible.

Simple Ways to Personalize Your Capybara
- Change the bag fit: The supplied pattern uses a 27-chain strap. Test its length around the body and adjust it if you want the bag to sit differently.
- Make it a hanging decoration: Add a small keychain loop to the top of the Santa hat, as suggested in the source, to hang the capybara on a holiday tree.
This little Christmas capybara brings together rounded amigurumi shaping, embroidered features, fluffy white trim, and miniature holiday accessories. Take time to check the stitch counts and accessory placement as you work, and you’ll have a festive handmade companion ready for seasonal display.