A delicate dragonfly with layered crochet wings and wooden bead details makes a lovely keychain, bag charm, or handmade gift that is small enough to carry anywhere.
Crochet Dragonfly Keychain Pattern
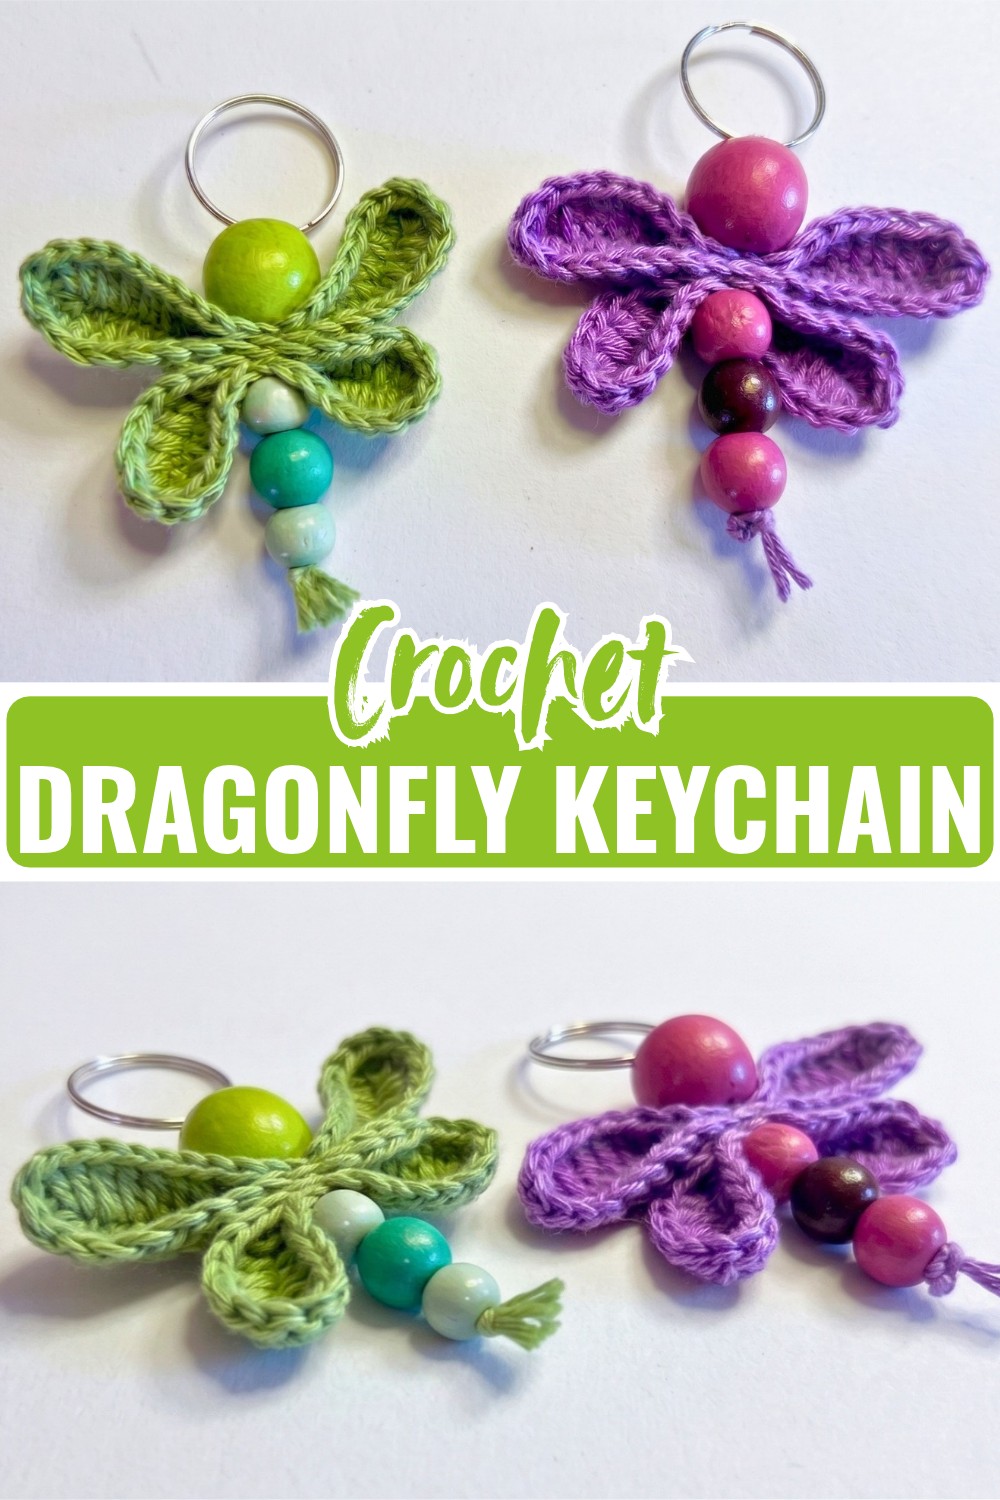
This crochet keychain has a graceful shape that comes from combining two different wing sizes with a simple beaded body. The larger wing sits above the smaller one, creating the layered look that gives this little crochet dragonfly its character without requiring complicated shaping.
The bead assembly is just as important as the crochet itself. Because the beads, wings, and key ring are threaded together in one continuous strand, keeping the pieces centered as you assemble them will help the finished dragonfly hang neatly. Once the sequence is clear, the assembly comes together quickly.
Credit Hook & Loop Crochet Tutorials
Materials & Tools Needed
- Yarn: 100% cotton yarn in your chosen color or colors
- Crochet Hook: 2.0 mm crochet hook
- Wooden Beads: 4 beads in varying sizes-1 large bead for the head and 3 smaller beads for the body and tail
- Key Ring: Metal split ring or key ring
- Tapestry Needle: For weaving in ends and assembling the dragonfly
- Scissors
Finished Size & Customization Ideas
The finished dragonfly measures approximately 3-3.5 inches long, depending on your yarn and bead sizes.
You can easily personalize the design by changing the yarn colors or bead styles. Try contrasting colors for the upper and lower wings, or use colorful acrylic, crystal, or natural wooden beads instead of plain wood.
The finished dragonfly can be used as a keychain, bag charm, zipper pull, or hanging ornament.
Pattern Abbreviations & Terminology
This pattern uses US crochet terminology.
- ch: Chain
- sc: Single crochet
- dc: Double crochet
- st(s): Stitch(es)
Step-by-Step Crochet Dragonfly Keychain
Big Wing
The big wing forms the upper layer of the dragonfly. It is worked around both sides of a foundation chain, so you do not turn the piece after reaching the end of the chain. Instead, the stitches at the end create the rounded center before you continue along the opposite side.
Foundation: Ch 17 + 2, for a total of 19 chains.
Step 1: Starting in the 4th ch from the hook, work 7 dc, then 1 sc in the next st, then 8 dc in the next 8 sts.
Step 2: Work 3 dc in the last stitch, rotate the piece, then work 1 dc back into the same corner stitch to begin the opposite side.
Step 3: Work 7 dc in the next 7 sts, 1 sc in the next st, 8 dc in the next 8 sts, then 3 dc in the final stitch.
Step 4: Pull up a loop, cut the yarn leaving a short tail, and use a tapestry needle to make a neat, seamless join. Weave in both tails on the back of the wing.

A small shaping check
The 3 dc at each end of the foundation chain are what allow the wing to turn smoothly around the center. Make sure you work all three into the intended end stitch rather than spreading them across several chains; otherwise, the wing can lose its rounded shape.
Small Wing
The small wing is made in the same basic way, but its shorter foundation chain creates the smaller lower layer.
Foundation: Ch 13 + 2, for a total of 15 chains.
Step 1: Starting in the 4th ch from the hook, work 5 dc, then 1 sc in the next st, followed by 6 dc in the next 6 sts.
Step 2: Work 3 dc in the last stitch, rotate the piece to work along the opposite side of the foundation chain, then work 1 dc into the same corner stitch.
Step 3: Work 5 dc in the next 5 sts, 1 sc in the next st, 6 dc in the next 6 sts, then 3 dc in the final stitch.
Step 4: Cut the yarn and finish with a seamless needle join. Weave in all loose ends.
Keep the two wings easy to identify
Before beginning assembly, lay the small wing on top of the big wing and check that their center sections line up. This makes it much easier to see which wing belongs underneath and prevents accidentally reversing the layers while threading the beads.

Assembly
The body is assembled by threading the beads and both wings onto one length of yarn. Take a generous length of matching yarn and thread it through your tapestry needle before starting.
1. Thread the Body Beads
Begin with the three smaller beads that form the lower body and tail.
Thread the needle through the smallest bead first, followed by the medium bead and then the third body bead.
Keep the beads close together as you work. This gives you a clear center line for positioning the wings above them.
2. Add the Small and Big Wings
Pass the needle through the center loops of the small wing, then through the center loops of the big wing.
Pull the yarn gently until the two wings sit snugly together above the lower beads.
The small wing should remain visible beneath the larger wing rather than disappearing completely behind it. If the wings shift while you pull the yarn, loosen the strand slightly, recenter the pieces, and then tighten again.

3. Attach the Head Bead
Thread the needle upward through the largest wooden bead, which forms the dragonfly’s head.
Check the alignment from the front before continuing. The bead should sit directly above the center of the two wings.
4. Add the Key Ring
Pass the needle through the loop of the metal key ring at the top of the head bead.
This step creates the attachment point, so make sure the yarn passes securely through the ring rather than only catching a nearby strand.
5. Secure the Entire Dragonfly
Route the needle back down through the head bead, then through the centers of both wings and through all three lower beads.
Pull the yarn firmly enough to hold the entire dragonfly together, but avoid pulling so tightly that the crocheted wings curl or become distorted.
Tie a secure knot at the bottom of the lowest bead.
Finally, trim the remaining yarn to leave a small decorative tassel at the base.
Finishing Touches
Once everything is secured, gently spread the large and small wings so both layers are visible. Straighten the bead body and check that the key ring sits directly above the head.
If one wing has shifted slightly during assembly, adjust it before trimming the final yarn tail. A small correction at this stage can make the finished dragonfly look much more balanced.

Conclusion
Your crochet dragonfly keychain is complete. The combination of delicate crocheted wings, wooden beads, and a simple metal key ring gives it a graceful handmade look while keeping the finished piece lightweight and easy to carry.
Use your dragonfly as a keychain, attach it to a favorite bag, turn it into a zipper pull, or make several in different colors for handmade gifts. The two wing sizes also make it easy to experiment with color combinations and bead styles while keeping the same basic design.