Looking for a tiny autumn crochet pattern? Make this 3.5–4-inch acorn plushie with a textured cap, sweet face, optional feet, and a keychain loop.
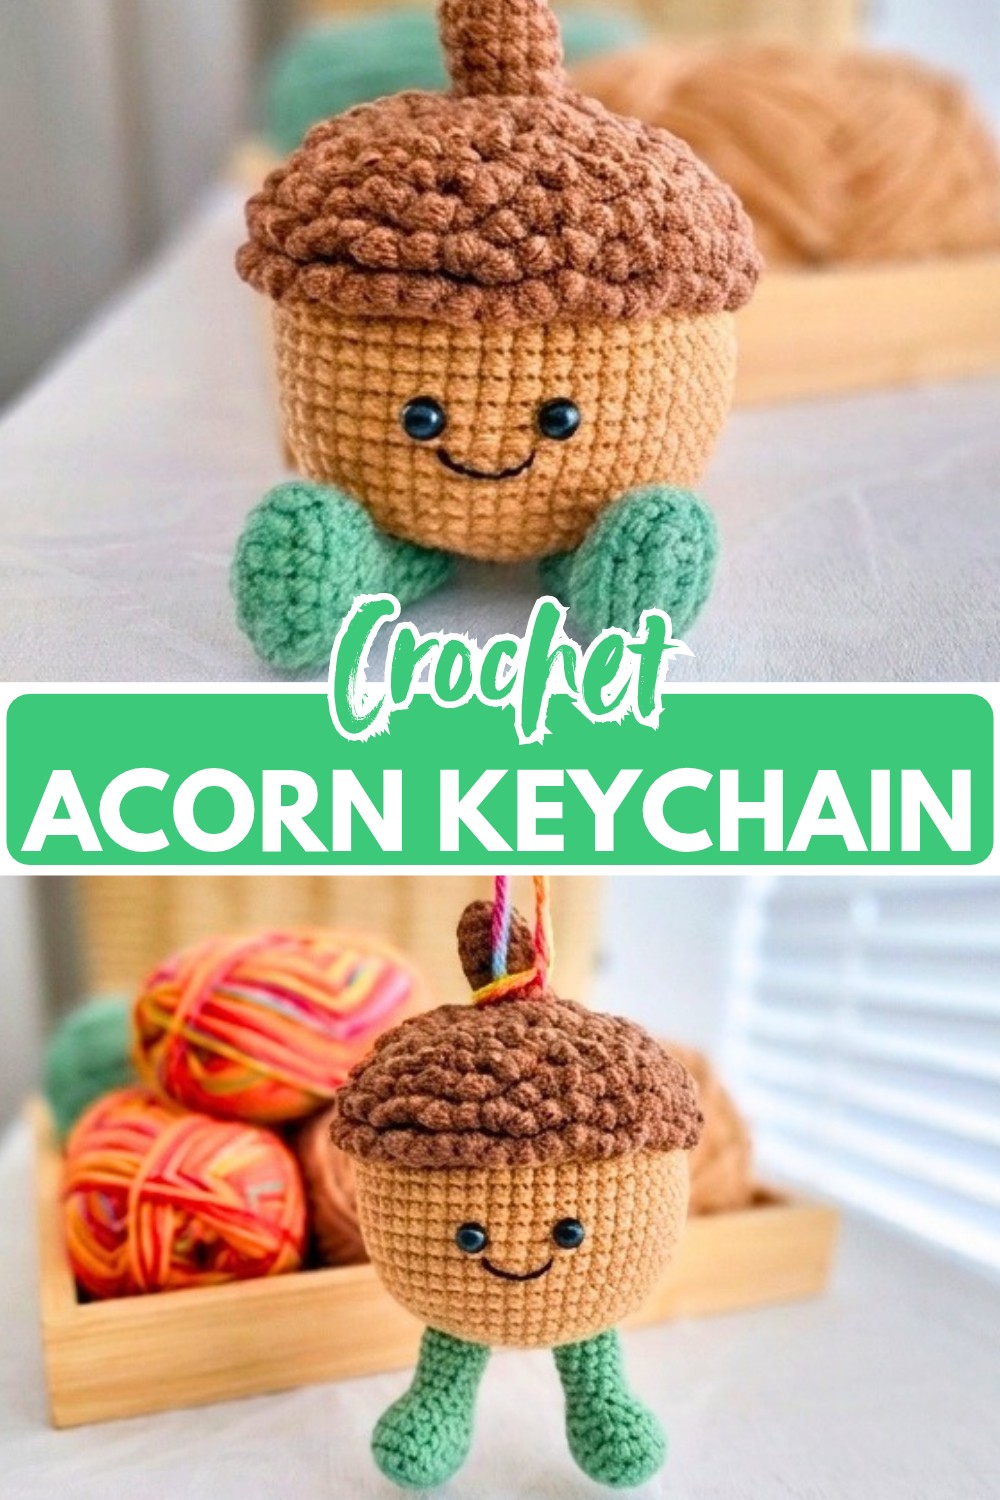
Autumn charm meets amigurumi in this little crochet acorn, with a rounded light-brown body, a dark-brown textured cap, and a tiny stem that gives it its unmistakable acorn shape. Add the green feet for an extra playful look, or leave them off for a simpler mini crochet acorn.
The pattern walks you through the continuous crochet rounds for the body, the BLO shaping that creates the cap, and the small details that bring the finished piece to life. You’ll also learn where to place the safety eyes and smile, how to secure the stem and feet, and how to turn the finished acorn into a useful keychain.
Credit Eny’s crochet
Materials & Tools Needed
- Yarn: Medium / Worsted Weight / 4-ply Milk Cotton:
- Light Brown: For the acorn body
- Dark Brown: For the acorn cap and stem
- Green (Optional): For the feet/shoes
- Hook: 2.0 mm crochet hook
- Eyes: 6 mm safety eyes or small glue-on black eyes
- Filling: Polyester fiberfill stuffing
- Notions: Stitch marker, tapestry/yarn needle, scissors
- Accents: Black embroidery floss or fine yarn for the mouth/face
- Hardware: Keychain ring or attachment
- Adhesive: Craft glue or hot glue gun if using glue-on eyes or securing the smile
Finished Size & Ways to Customize It
The finished acorn measures approximately 3.5–4 inches tall.
For a keychain, add the keychain loop to the stem. If you prefer a small desk companion, simply skip the keychain hardware and keep the acorn as a mini plush.
You can also leave off the feet for a classic mini acorn, or switch to velvet/plush yarn with a larger hook to create a jumbo, squishy version.
Pattern Abbreviations & Terminology
This pattern uses US crochet terms:
- MR = Magic Ring
- ch = Chain
- sc = Single Crochet
- inc = Increase (2 sc in the same stitch)
- dec = Decrease (single crochet 2 stitches together)
- sl st = Slip Stitch
- BLO = Back Loop Only
- FLO = Front Loop Only
- rep = Repeat
- st(s) = Stitch(es)
- [ … ] = Total stitch count at the end of the round

Pattern Note: Continuous Rounds
This pattern is worked in continuous rounds. Do not join at the end of a round with a slip stitch unless explicitly noted.
Use a stitch marker to keep track of the first stitch of every round. This is especially helpful as the body moves through repeated increases and decreases.
How to Crochet the Acorn Body and Cap
Start with Light Brown yarn for the bottom of the acorn.
R1: Create a magic ring; work 8 sc into the ring. [8 sc]
R2: Work 8 inc around. [16 sc]
R3: (1 sc, 1 inc) rep 8 times. [24 sc]
R4: (1 sc, 1 inc, 1 sc) rep 8 times. [32 sc]
R5: (3 sc, 1 inc) rep 8 times. [40 sc]
R6: (2 sc, 1 inc, 2 sc) rep 8 times. [48 sc]
R7–R8: Work 1 sc in each st around for 2 rounds. [48 sc per round]
R9: (7 sc, 1 inc) rep 6 times. [54 sc]
R10–R18: Work 1 sc in each st around for 9 rounds. [54 sc per round]

Color Change: In the last stitch of R18, change to Dark Brown yarn to begin the cap.
R19: Working in BLO, (7 sc, 1 dec) rep 6 times. [48 sc]
The unworked Front Loops from R19 will be used later to create the textured rim of the cap, so keep those loops clearly visible as you work this round.
R20–R21: Working in BLO, work 1 sc in each st around for 2 rounds. [48 sc per round]
R22: Working in BLO, (2 sc, 1 dec, 2 sc) rep 8 times. [40 sc]
R23: Working in BLO, (3 sc, 1 dec) rep 8 times. [32 sc]
R24: Working in BLO, (1 sc, 1 dec, 1 sc) rep 8 times. [24 sc]

Stuff the Acorn Before Closing
Stop here and stuff the body firmly with fiberfill.
Work enough stuffing into the acorn to help it hold its shape, but make sure the body does not become distorted. This is the last convenient point in the pattern for adding the stuffing before the opening becomes smaller.
R25: Working in BLO, (1 sc, 1 dec) rep 8 times. [16 sc]
R26: Working in BLO, work 8 dec. [8 sc]
Finishing: Fasten off. Weave the yarn tail through the remaining front loops of the 8 stitches to cinch the hole closed tightly. Weave in the end.

Add the Textured Acorn Cap Rim
Using Dark Brown yarn, turn the acorn upside down and attach your yarn to the first exposed Front Loop left behind from Round 19.
Pattern: (ch 3, sl st into the next stitch) rep around the entire front loop ridge.
This creates the decorative, textured “bumpy” rim around the acorn cap.
Finishing: Slip stitch into the starting stitch, fasten off, and weave all ends into the inside of the cap.

Crochet the Stem
Continue with Dark Brown yarn.
R1: Create a magic ring, work 6 sc into the ring. [6 sc]
R2: (1 sc, 1 inc) rep 3 times. [9 sc]
R3: Work 1 inc, 7 sc, 1 inc. [11 sc]
R4: Work 1 sc in each st around. [11 sc]
R5: Work 4 sc, 1 dec, 5 sc. [10 sc]
R6: Work 1 sc in each st around. [10 sc]
R7: Work 4 sc, 1 dec, 4 sc. [9 sc]
Finishing: Fasten off, leaving a long tail for sewing.
Make the Optional Feet
Make 2 feet/shoes using Green yarn.
R1: Chain 6. Starting in the 2nd chain from the hook: 4 sc, 3 sc in the last chain. Now working along the opposite side of the chain: 3 sc, 1 inc. [12 sc]
R2: (1 inc, 3 sc), then 3 inc, (3 sc, 2 inc). [18 sc]
R3: Working in BLO, work 18 sc around. [18 sc]
R4: Work 5 sc, 3 dec, 7 sc. [15 sc]
R5: Work 2 sc, 5 dec, 3 sc. [10 sc]
R6: Work 2 sc, 3 dec, 2 sc. [7 sc]
Stop and lightly stuff the foot with fiberfill.
R7: Work 2 sc, 1 dec, 3 sc. [6 sc]
R8: Work 1 sc in each st around. [6 sc]
R9: Work 1 sc, 1 dec, 3 sc. [5 sc]
Finishing: Fasten off, leaving a long tail for attaching to the body.
Add the Face and Finish the Acorn
Attach the Stem
Using the long yarn tail left on the stem, sew or glue the stem directly onto the top center of the dark brown acorn cap.
Add the Keychain
Loop your metal keychain ring directly through the top center of the stem, securing it firmly.
Place the Eyes and Smile
Position the 6 mm safety eyes on Round 4 of the light brown body, counting down from the textured edge of the cap. Space them exactly 3 stitches apart.
If using washer-backed safety eyes, insert them before closing the head during R26. If using glue-on eyes, adhere them now.
Using black embroidery floss, sew a small curved smile centered directly below the eyes. If desired, use a tiny dot of craft glue under the curve of the smile to keep it neatly in place.
Attach the Feet
Pin the two green feet onto Round 5 at the bottom base of the acorn body, spacing them about 4 stitches apart.
Sew them securely in place for stability.

Give Your Acorn Its Final Use
Once the stem, face, and optional feet are secure, this little acorn can stay as a pocket-sized plush or become a functional bag charm with its keychain ring.
For a classic mini acorn ornament, simply leave the feet off and skip the keychain hardware. If you want a much softer, larger version, use velvet or plush yarn with a larger hook.