
Add a pocket-sized penguin to your keys or backpack with this cute crochet charm, featuring a pointed black hood, bright beak, and tiny wings and feet.
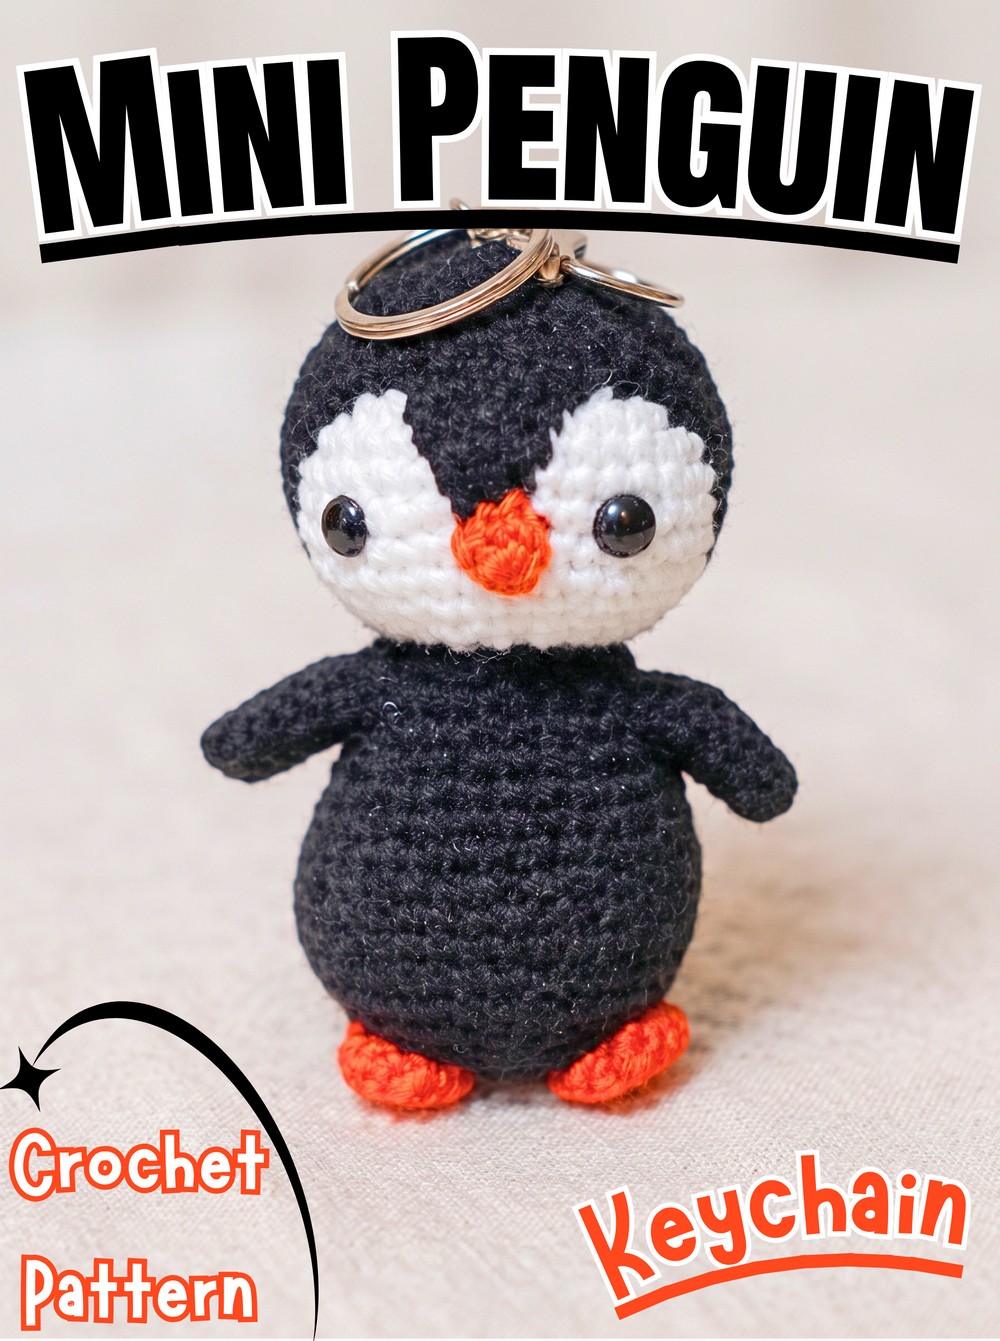
Small enough to carry every day, this mini crochet penguin combines classic black, white, and orange yarn into an instantly recognizable little character. Its pointed hood, round face, and tiny flippers give it plenty of personality, while its compact size makes it especially suitable for decorating keys, bags, or backpacks.
Inside, you’ll find instructions for shaping its head, creating the pointed forehead detail, and crocheting its body, wings, beak, and feet. You’ll also learn how to position its safety eyes, neatly join the crochet pieces, and securely attach keychain hardware for a finished charm.
Credit Hooks & Needles By Mita
Materials & Tools
Yarn
DK or sport-weight acrylic/cotton yarn in three colors:
- White: Head base
- Black: Hood/cap, body, and wings
- Orange: Beak and feet
Crochet Hook
- 2.0 mm crochet hook
Notions & Hardware
- 8 mm safety eyes (1 pair with safety washers)
- Split keyring with short chain and jump ring
- Tapestry/yarn needle
- Polyester fiberfill stuffing
- Stitch markers (or scrap yarn/pins)
- Sharp yarn scissors
- Ball-head pins for assembly placement
Finished Size
Approximately 2.5 to 3 inches (6.5–7.5 cm) in height when worked with a 2.0 mm hook and DK yarn.
Customization Ideas
- Color Variations: Replace classic black with navy blue, pastel pink, lilac, or mint green for a baby penguin or fairy-tale look.
- Blush Marks: Add a tiny pink yarn stitch beneath each eye for rosy cheeks.
- Mini Scarf: Crochet a simple chain scarf using 35 chains, fasten off, and wrap it around the neck seam.
- Extra Decoration: Attach a small pom-pom or crochet bow to the top between the ears/head cap.
Abbreviations
All terms follow standard US crochet terminology.
- MR: Magic Ring (Magic Circle)
- ch: Chain stitch
- sc: Single crochet
- inc: Single crochet increase (2 sc worked into the same stitch)
- dec: Invisible decrease (insert hook through front loops only of next 2 stitches, yarn over, pull through 2 loops, yarn over, pull through remaining 2 loops)
- sl st: Slip stitch
- st(s): Stitch(es)
- [#]: Stitch count at the end of the round/row
- (…) × #: Repeat the bracketed instruction the designated number of times

Mini Crochet Penguin Keychain Pattern
Crochet Head
Use white yarn and a 2.0 mm hook. Work in continuous spiral rounds. Do not join with a slip stitch at the end of each round unless directed.
Round 1: Make a magic ring, work 6 sc into the ring. Pull tight to close [6 sts].
Round 2: Work 2 sc in each st around (inc in all 6 sts) [12 sts].
Round 3: (1 sc, inc in next st) × 6 [18 sts].
Round 4: 1 sc, inc, (2 sc, inc) × 5, 1 sc in the last st [24 sts].
Round 5: (3 sc, inc in next st) × 6 [30 sts].
Round 6: 2 sc, inc, (4 sc, inc) × 5, 2 sc in the last 2 sts [36 sts].
Rounds 7-12 (6 rounds): 1 sc in each of the 36 sts around [36 sts per round].

Insert Safety Eyes
Place both safety eyes before beginning decreases.
- Count down 10 rounds from the crown.
- Position the two 8 mm safety eyes between Rounds 10 and 11.
- Space them approximately 7 to 8 stitches apart, with 4 stitches out to each side from the marked front center.
- Secure firmly on the inside with the washer backings before continuing.
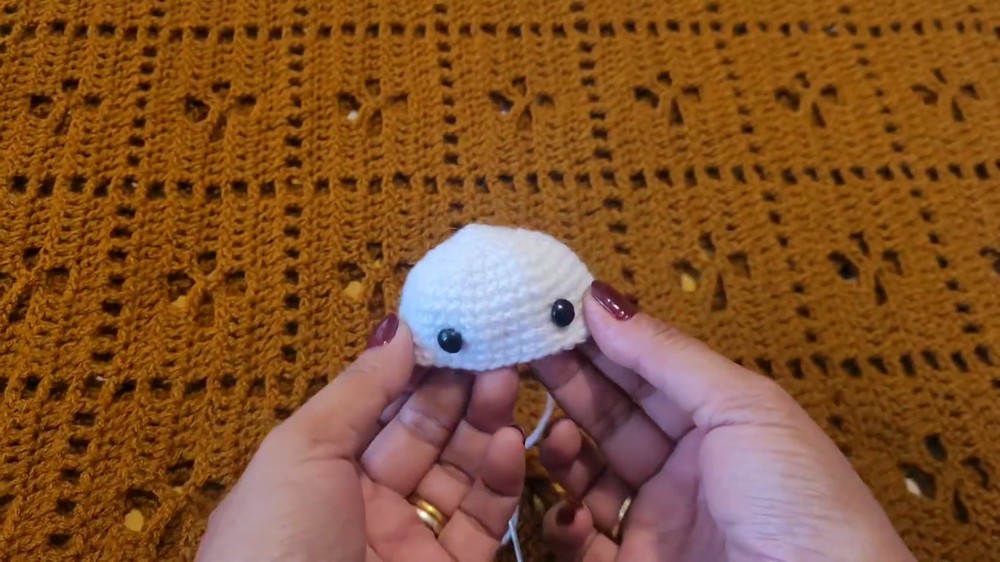
Round 13: 2 sc, dec, (4 sc, dec) × 5, 2 sc in the last 2 sts [30 sts].
Round 14: (3 sc, dec) × 6 [24 sts].
Round 15: 1 sc, dec, (2 sc, dec) × 5, 1 sc in the last st [18 sts].
Finishing: Make 1 sl st into the following stitch. Cut yarn, leaving a short tail. Stuff the head firmly with fiberfill, ensuring a smooth, round ball shape.
Eye placement tip: Mark front center before inserting safety eyes. This makes it easier to keep both eyes evenly spaced and position the pointed hood peak between them later.

Crochet Head Cap
Use black yarn and a 2.0 mm hook. Work in continuous spiral rounds, finishing with turned short rows to form the widow’s peak forehead point.
Round 1: Make a magic ring, work 6 sc into the ring [6 sts].
Round 2: Inc in each st around [12 sts].
Round 3: (1 sc, inc in next st) × 6 [18 sts].
Round 4: 1 sc, inc, (2 sc, inc) × 5, 1 sc in the last st [24 sts].
Round 5: (3 sc, inc in next st) × 6 [30 sts].
Round 6: 2 sc, inc, (4 sc, inc) × 5, 2 sc in the last 2 sts [36 sts].
Rounds 7-12 (6 rounds): 1 sc in each of the 36 sts around [36 sts per round].
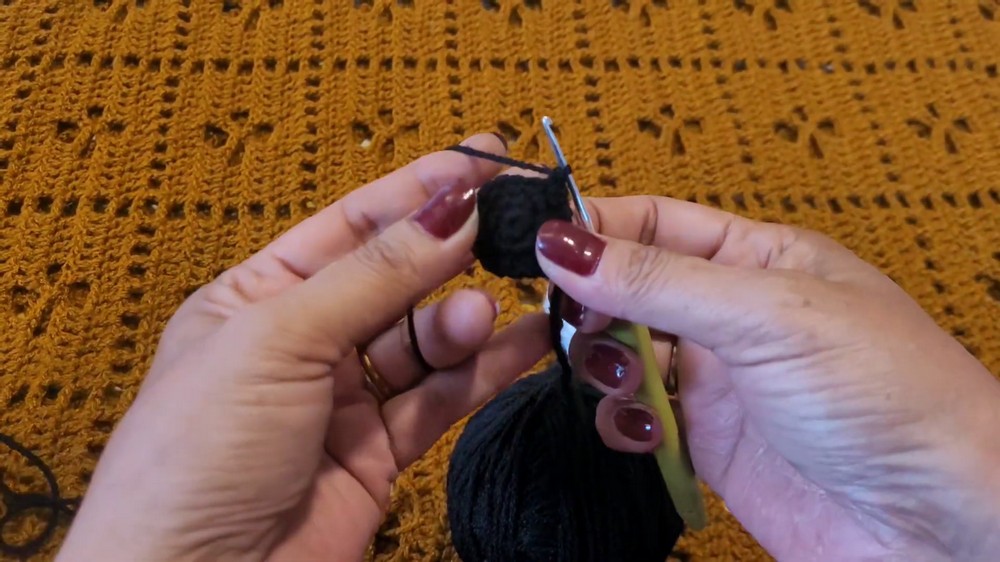
Shape Center Forehead Peak
Work this section in turned rows.
- Count 16 stitches around the rim from the ending point.
- Insert hook into the 17th stitch, join black yarn, and ch 1.
- Work 1 sc into the same stitch and 1 sc in each of the next 5 sts; turn [6 sts total].
Row 1: Skip the first st, sc in next 5 sts; turn [5 sts].
Row 2: Skip the first st, sc in next 4 sts; turn [4 sts].
Row 3: Skip the first st, sc in next 3 sts; turn [3 sts].
Row 4: Skip the first st, sc in next 2 sts; turn [2 sts].
Row 5: Skip the first st, sc in the last st [1 st].
Finishing: Fasten off, leaving a long tail for sewing the hood onto the white head.
Peak shaping tip: Keep each row turned in the same direction and follow the supplied skip-first-stitch instructions. This gradually narrows the forehead section into its pointed shape.
Crochet Body
Use black yarn and a 2.0 mm hook. Work from the base upwards in continuous spiral rounds.
Round 1: Make a magic ring, work 6 sc into the ring [6 sts].
Round 2: Inc in each st around [12 sts].
Round 3: (1 sc, inc in next st) × 6 [18 sts].
Round 4: (2 sc, inc in next st) × 6 [24 sts].
Round 5: (3 sc, inc in next st) × 6 [30 sts].
Round 6: (4 sc, inc in next st) × 6 [36 sts].
Rounds 7-10 (4 rounds): 1 sc in each of the 36 sts around [36 sts per round].
Round 11: (10 sc, dec) × 3 [33 sts].

Round 12: 1 sc in each of the 33 sts around [33 sts].
Round 13: (9 sc, dec) × 3 [30 sts].
Round 14: 1 sc in each of the 30 sts around [30 sts].
Round 15: (8 sc, dec) × 3 [27 sts].
Round 16: (7 sc, dec) × 3 [24 sts].
Round 17: (6 sc, dec) × 3 [21 sts].
Round 18: (5 sc, dec) × 3 [18 sts].
Finishing: Fasten off, leaving a long tail for joining to the head. Stuff the body firmly and evenly with fiberfill.
Stuffing tip: Add fiberfill in small portions and distribute it around the body rather than packing it into one spot. Keep the neck opening accessible for joining to the head.
Crochet Wings
Make 2 using black yarn and a 2.0 mm hook. Work in continuous spiral rounds. Do not stuff.
Round 1: Make a magic ring, work 6 sc into the ring [6 sts].
Round 2: (1 sc, inc in next st) × 3 [9 sts].
Round 3: 1 sc in each of the 9 sts around [9 sts].
Round 4: (2 sc, inc in next st) × 3 [12 sts].
Round 5: (3 sc, inc in next st) × 3 [15 sts].
Round 6: 1 sc in each of the 15 sts around [15 sts].
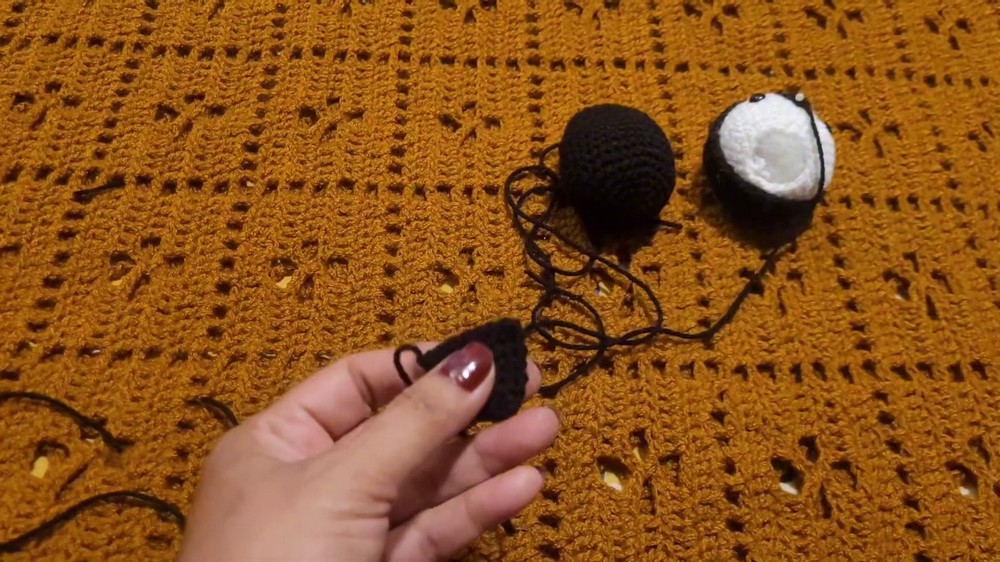
Close Wing Opening
Flatten the top opening together. Insert hook through both the front and back loops of opposite sides simultaneously, and work 7 sc straight across to close the opening [7 sts].
Finishing: Fasten off, leaving a tail for attachment. Repeat for the second wing.
Closing tip: Match both sides of the opening evenly before working through them. This keeps the flattened edge neat and makes it easier to sew each wing against the body.
Crochet Beak
Use orange yarn and a 2.0 mm hook. Work in continuous spiral rounds. Do not stuff.
Round 1: Make a magic ring, work 6 sc into the ring [6 sts].
Round 2: 1 sc in each of the 6 sts around [6 sts].
Finishing: Work 1 sl st into the next stitch. Fasten off, leaving a sewing tail.

Crochet Feet
Make 2 using orange yarn and a 2.0 mm hook. Work in continuous spiral rounds. Do not stuff.
Round 1: Make a magic ring, work 6 sc into the ring [6 sts].
Round 2: (1 sc, inc in next st) × 3 [9 sts].
Rounds 3-4 (2 rounds): 1 sc in each of the 9 sts around [9 sts per round].
Close Feet
Flatten the opening flat. Insert hook through both opposite layers simultaneously and work 4 sc across [4 sts].
Finishing: 1 sl st into the corner. Fasten off, leaving a tail for sewing. Repeat for the second foot.
Assembly
Attach Hood to Head
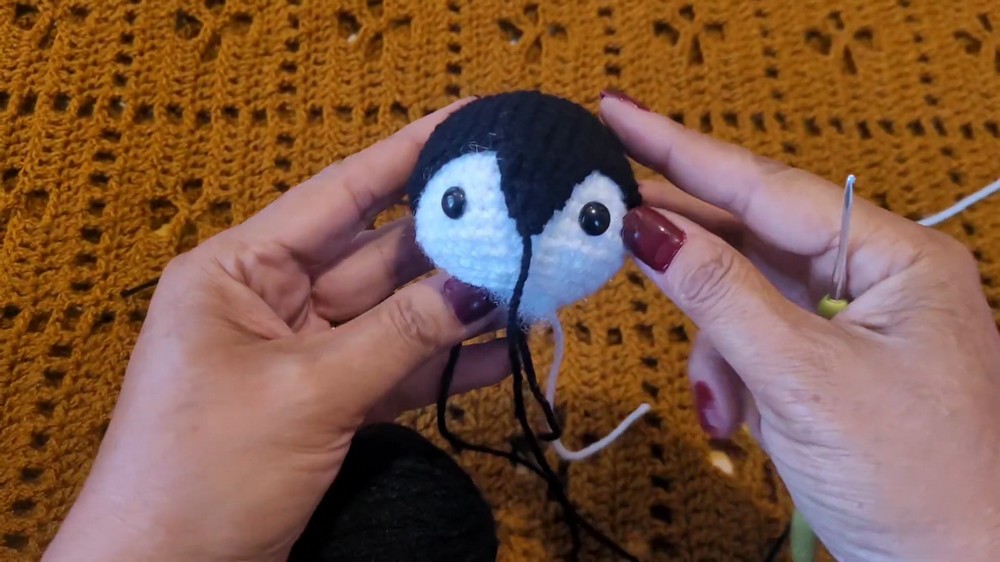
- Fit black head cap over stuffed white head.
- Align triangular peak directly in center of face, pointing downward midway between the two eyes.
- Pin peak and outer circumference in place.
- Using yarn needle and long black tail, whipstitch neatly along rim and around peak into white head surface.
- Knot and hide yarn end inside the base.
Alignment tip: Check the face from the front before sewing around the entire cap. Keep the downward point centered between the eyes so it does not lean toward either side.

Attach Beak
- Center beak horizontally right between the eyes.
- Position it so its top edge slightly overlaps the bottom point of black hood peak.
- Pin in place and stitch through each outer loop into the white fabric.
- Knot securely and pull excess yarn through the bottom head opening.
Join Head and Body
- Align open rim of body (18 stitches) with neck opening of head (18 stitches).
- Ensure face points straight forward relative to body base.
- Using long tail from body, whipstitch stitch-by-stitch around entire perimeter, pulling snugly so seam is tight and invisible.
- Before taking final 3–4 stitches, add a small extra pinch of fiberfill to prevent a floppy neck.
- Close completely, knot, and weave in.
Neck support tip: Keep head and body aligned while sewing. Check the penguin from the front before closing the final stitches, and add the extra fiberfill at the neck as instructed.
Attach Wings
- Position each wing along sides of body approximately 2 rounds below neck seam line.
- Sew flattened 7-sc edge flat against body so wings lay downward along torso.
- Fasten off and bury tails.
Attach Feet
- Turn penguin upside down.
- Position two feet symmetrically at flat bottom of body around Round 2 of base, pointing outward slightly.
- Sew 4-sc seam of each foot firmly into bottom stitches.
- Knot and bury ends.
Placement tip: Pin both feet before sewing. Check their spacing from the front and underside so they sit evenly and do not pull the body to one side.
Attach Keychain Hardware
- Thread a piece of black yarn onto tapestry needle.
- Insert into top-center of head hood and bring needle out through desired anchor point.
- Loop through bottom jump ring of keychain fixture 3 to 4 times, pulling taut.
- Wrap thread securely, tie a tight double knot flush against stitches, and feed remaining tails deep into head before clipping.
Hardware tip: Check that yarn passes securely through the jump ring and that the attachment does not loosen when gently tugged.

Final Details
Once all pieces are sewn in place, inspect facial alignment, wing placement, and foot positioning. Hide any remaining yarn tails inside the crochet fabric and trim excess yarn neatly.
For an extra decorative touch, add pink blush stitches beneath the eyes, wrap a tiny chain scarf around the neck seam, or attach a small pom-pom or bow to the top. Your mini penguin is now ready to decorate keys, backpacks, or bags.


