Looking for a playful way to decorate handmade items? This 3D crochet penguin appliqué combines a white base, blue shaping, tiny orange feet, and a dimensional beak.
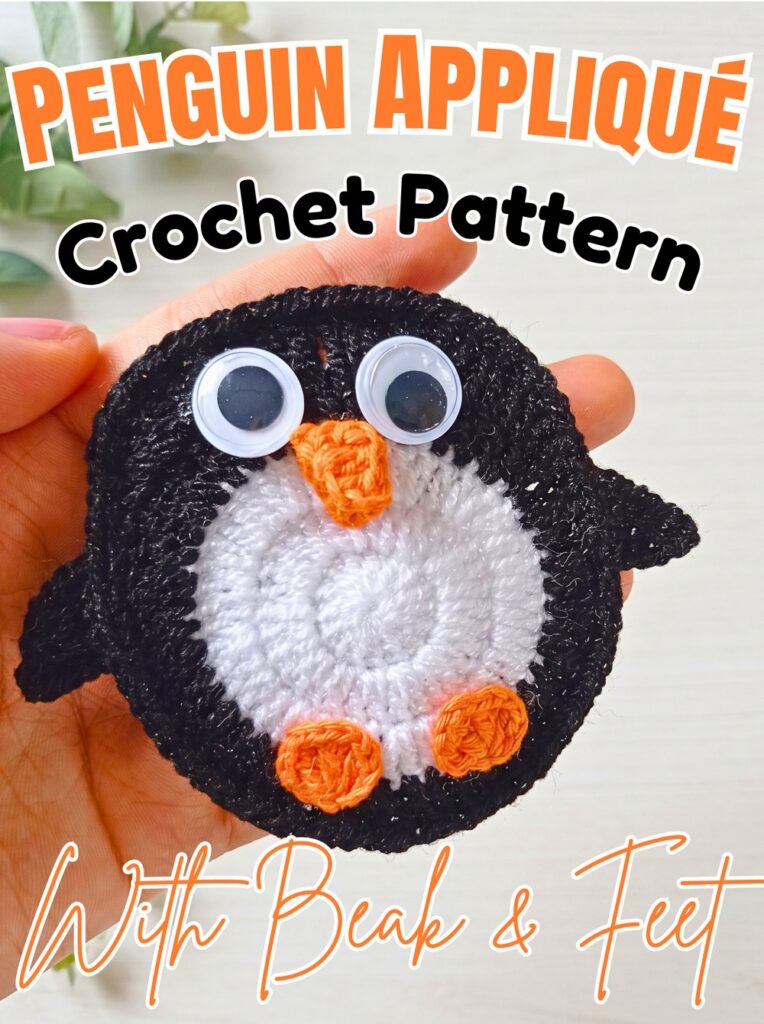
Small crochet appliqués add personality to blankets, bags, clothing, and handmade gifts without requiring a full amigurumi toy. This penguin uses simple stitches and contrasting colors to create a recognizable shape, while its raised beak adds extra character.
This crochet tutorial explains how to shape the penguin, finish its border, and create separate feet, flippers, and a 3D beak. You’ll also learn how to position each crochet piece for a neat, balanced finish.
Credit Danis crochet
Materials & Tools
- White Yarn: Approximately 1 mm thick or similar sport-weight thread for the base.
- Blue Yarn: Approximately 1 mm thick for the head, upper body, flippers, and border.
- Orange or Gold Yarn: For the beak and feet.
- Crochet Hook: 2.0 mm.
- Tapestry Needle: Fine-point needle for sewing small pieces.
- Scissors: For trimming yarn.
- Googly Eyes: Small eyes with sew-through holes or flat backs.
Finished Size & Customization
This penguin is designed as an appliqué rather than a stuffed toy, making it suitable for decorating garments, blankets, bags, and other crochet projects.
Blue yarn makes the stitches easy to distinguish in video demonstrations, but black yarn can be substituted for a more traditional penguin appearance. Keep white yarn for the base and orange or gold for the beak and feet to maintain clear color contrast.
Pattern Abbreviations
- ch: Chain
- sl st: Slip stitch
- sc: Single crochet
- hdc: Half double crochet
- dc: Double crochet
- dtr: Double treble crochet
- inc: Increase; work 2 stitches into the same stitch or space
- st(s): Stitch(es)

Step-by-Step Crochet Instructions
Step 1: Crochet the White Base Circle
Begin with the white base circle used in the original pattern series. This foundation provides the lower body and the white section of the penguin’s front.
Rounds 1–3: Work 3 rounds of double crochet using white yarn.
Keep your tension consistent so the circle lies flat. A base that curls or cups excessively may make it harder to position the blue upper section neatly.
Round 4: Change to blue yarn and work 1 round of double crochet.
This blue round creates a transition between the white base and the penguin’s upper body.
Check your work: Lay the circle on a flat surface. The base should remain reasonably flat, with the white and blue rounds clearly visible.

Step 2: Shape the Blue Head and Upper Body
The next section forms the penguin’s rounded blue head and upper body. Work across the upper curve of the base, following the stitch sequence provided.
With blue yarn attached, or rejoined using a chain if the yarn was cut, ch 1.
Work the following sequence in order:
- Work 1 sc in the next stitch.
- Work 1 hdc in the following stitch.
- Work 1 dc inc in the next stitch by placing 2 dc in the same stitch.
- Work 1 dc in each of the next 2 stitches.
- Work 1 dc inc in the next stitch.
- Repeat the sequence (2 dc, 1 dc inc) across the top curve until you have completed a total of 6 increases.
- Work 1 hdc in the next stitch.
- Work 1 sc in each of the final 2 stitches.
Finish with ch 1, cut the yarn, pull the tail through, and secure it on the back.
Teaching tip: The smaller stitches at the beginning and end help transition between the curved upper section and the wider middle area. Keep the stitch order consistent to maintain the intended outline.
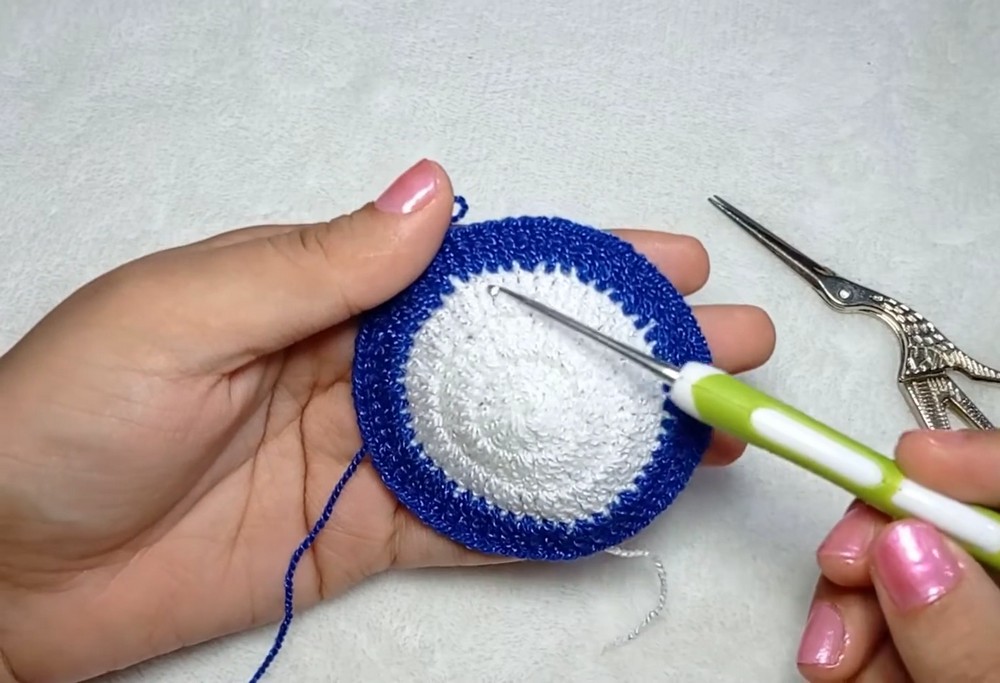
Step 3: Add a Blue Border
A neat border helps define the outside edge and gives the separate pieces a more finished appearance.
Join blue yarn in any stitch around the perimeter.
Ch 1, then work a loose round of sc around the entire circle, placing stitches evenly along the edge.
When working along the sides of taller stitches, space your sc carefully rather than forcing too many into one spot. This helps prevent rippling.
Helpful tip: Keep your tension relaxed. If the border pulls inward or puckers, try a slightly larger hook for this round.
Join with a sl st, fasten off, and weave in the ends on the reverse side.

Step 4: Make Two Orange Feet
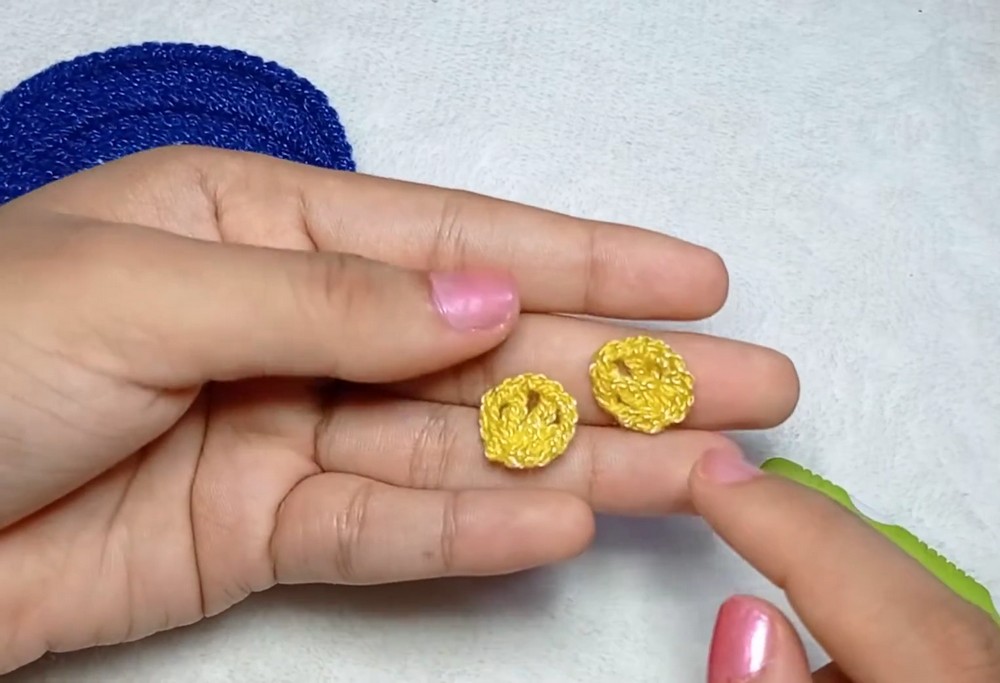
The feet are made separately using small chain loops and double crochets worked into a magic ring.
Using orange or gold yarn:
- Make a magic ring and ch 1 to secure the starting point.
- Ch 3.
- Work 1 dc into the magic ring.
- Repeat [ch 2, 1 dc into the magic ring] twice.
- Ch 3, then work 1 sl st into the magic ring.
- Ch 1, cut the yarn, and pull through completely.
Pull the short tail to close the ring tightly. Secure the back with a knot and trim excess yarn.
Make a second matching foot.
Result check: Each foot should have three small projecting sections that resemble toes. Compare the two pieces before attaching them so they look similar in size.
Step 5: Form the Three-Dimensional Beak
The beak uses two small crocheted triangular sections folded together to create a raised peak.
Using orange or gold yarn, make a slip knot and ch 4, then add 1 chain for turning.
Work back along the chain:
- Count 3 chains from the hook and work 1 hdc.
- Work 1 dc into the second chain.
- Work 1 dc into the first chain.
This completes the first triangular half.
Repeat the same sequence beside the first section: ch 4, add 1 turning chain, work 1 hdc into the third chain from the hook, 1 dc into the second chain, and 1 dc into the first chain.
Fold the two halves together to form a small three-dimensional peak. Join the corner with 1 sl st, then ch 1 to secure the shape. Hide the yarn tails at the back.
Teaching tip: Avoid flattening the folded sections when securing them. The raised center is what gives the beak its three-dimensional appearance.

Step 6: Crochet Two Blue Flippers
The flippers create the penguin’s side wings. Each begins with a chain and uses taller stitches near the outer tip to form a tapered shape.
Using blue yarn, make a slip knot and ch 8.
Identify the seventh chain from the hook, using your finger or a stitch marker to keep track of its position. Ch 3 more, then work the following stitches into the specified foundation chains:
- Work 1 dtr into the marked seventh chain.
- Work 1 dtr into the sixth chain.
- Work 1 dtr into the fifth chain.
- Work 1 dc into the fourth chain.
- Work 1 dc into the third chain.
- Work 1 hdc into the second chain.
- Work 1 sl st into the last chain.
Ch 1, turn the work, and crochet a row of sc along the opposite side of the chain backbone. This return row helps the flipper hold its shape and gives the edge a cleaner finish.
Fasten off, leaving a long tail for sewing. Make a second flipper using the same instructions.
Check the shape: The taller stitches should create a tapered outer section, while the smaller stitches form a narrower end. Keep both flippers oriented in matching directions when preparing to attach them.

Step 7: Attach the Raised Beak
Position the beak at the central transition line where the white base meets the blue upper-body shaping.
Sew or glue only the back edge of the beak so its front remains raised. If sewing, use small, secure stitches through the back of the beak and the appliqué base.
Placement check: View the penguin from the front. The beak should sit centrally rather than leaning toward either side.
Step 8: Position the Eyes
Place the two googly eyes just above the beak, slightly to either side.
Check their spacing before securing them. Even placement helps the penguin’s face look balanced.
If using sew-through eyes, stitch them firmly with fine sewing thread or matching yarn. For flat-backed eyes, use an adhesive suitable for the materials and intended use.

Step 9: Attach the Feet
Position the two orange feet along the bottom of the penguin, allowing them to overlap the lower white and blue border slightly as described in the original pattern.
Arrange them evenly on either side of the centerline, then sew or glue them securely to the base.
Helpful tip: Place both feet before fastening either one completely. This makes it easier to adjust the spacing and keep them level.
Step 10: Sew on the Flippers
Position one blue flipper on each side of the body. Angle them slightly downward rather than pointing straight outward.
Use the long yarn tails to sew each flipper securely to the base. Take small stitches along the attachment edge, keeping the seam neat on the front and back.
Final check: Look at the appliqué from the front to confirm that the flippers, feet, eyes, and beak are balanced. Adjust any piece before weaving in its remaining yarn tail.
Finishing
Weave all loose yarn ends securely into the reverse side of the appliqué. Trim excess yarn only after the ends are safely tucked away.
Your 3D crochet penguin appliqué is ready to decorate a blanket, bag, garment, or another handmade item. Its contrasting colors, raised beak, and little flippers give it a playful finish without requiring a stuffed body.