Looking for an adorable handmade souvenir? Learn how to crochet this petite panda keychain with white body panels, black details, tiny feet, and mini bear backpack.
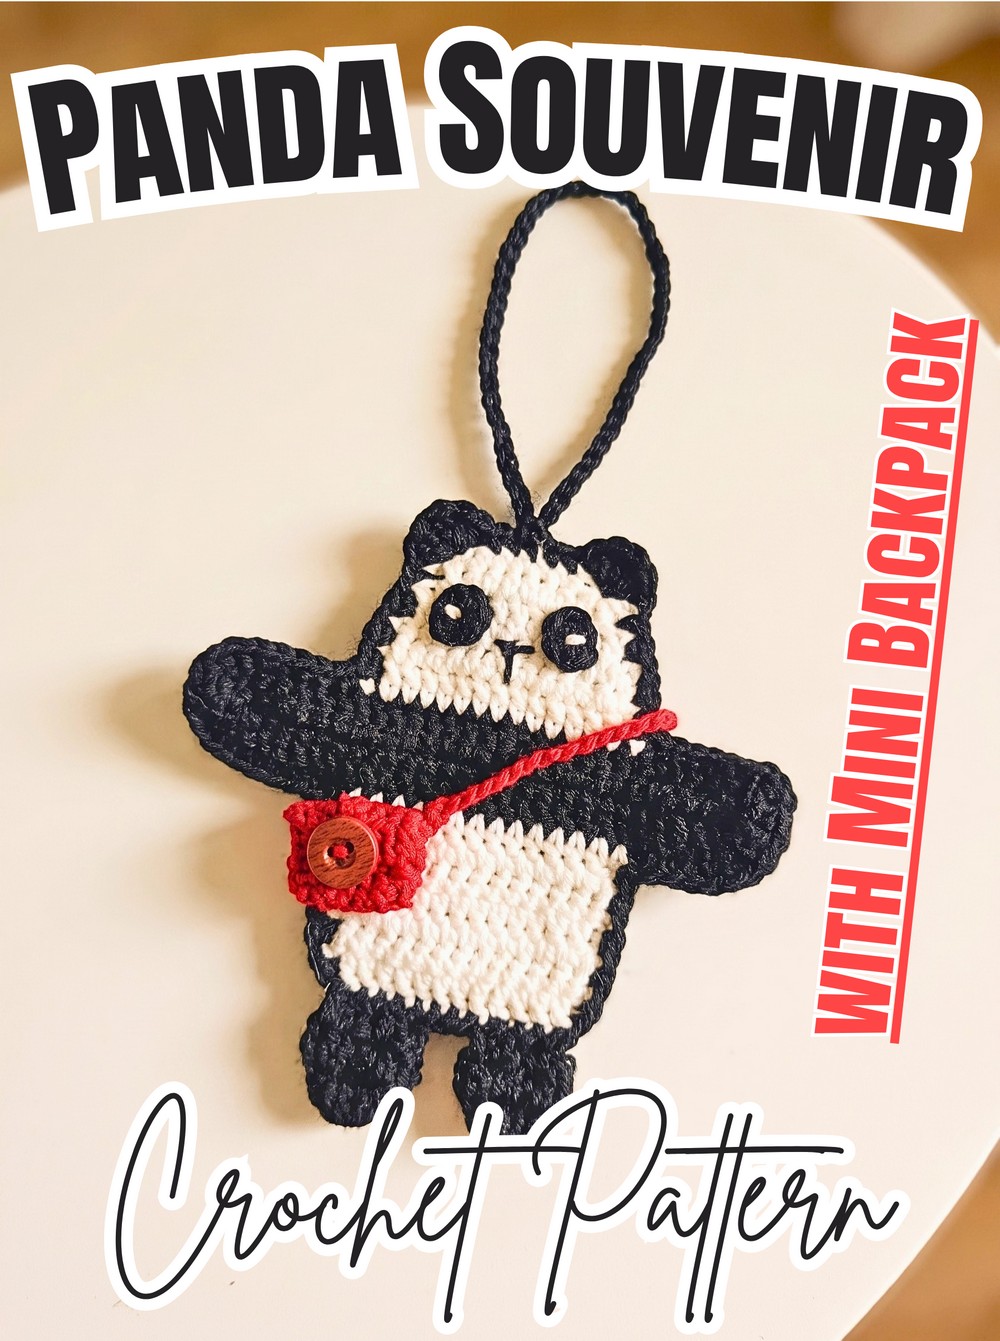
A panda keychain is the kind of small crochet piece that can turn a simple bag charm into something much more personal. With its black-and-white panda details, tiny feet, and mini backpack, this design has plenty of character despite its compact size.
The pattern brings those details together through separate crocheted panels, eyes, feet, and a miniature bag before everything is assembled into the finished keychain. It is also easy to personalize with different accent colors or a shorter or longer hanging strap, making the finished charm suitable for your own keys, a favorite bag, or a handmade gift.
Credit DIY Maycraft
Materials & Tools Needed
- Yarn: Poly Cherry yarn or equivalent polyester/cotton blend yarn in:
- Black for base and limbs
- White for head and body panels
- Accent color of your choice for mini bear bag
- Crochet Hook: 4/0 Tulip hook, approximately 2.5–2.6 mm or US C/2–D/3 depending on regional sizing
- Notions: Stitch markers, yarn needle, lighter for securing synthetic yarn ends
- Hardware: Small keychain ring or lobster claw clasp
Finished Size & Customization
Finished keychain measures approximately 3–4 inches tall, depending on yarn and tension.
You can personalize mini backpack with pastel or bright contrasting shades. Adjusting ch 50 changes hanging-loop length, while cotton yarn paired with smaller hook can create tighter, more solid fabric.
Pattern Abbreviations
- ch / chs: Chain / Chains
- sl st: Slip stitch
- sc: Single crochet
- dc: Double crochet
- inc: Increase
- dec: Decrease — double crochet decrease / 2 double crochets worked together as one
- st / sts: Stitch / Stitches
- rep: Repeat
- Rnd / Row: Round or Row indicator

Step-by-Step Crochet Panda Souvenir Keychain Process
Build Black Base
Begin with black yarn to create oval foundation that supports both white head and body sections.
Step 1: Make slip knot and chain 30 ch.
Step 2: Skip 3 chains from hook. In next chain, work 4 dc into same stitch. Place stitch marker in 4th dc.
Step 3: Work 25 dc across next 25 chains.
Step 4: In final chain, work 5 dc into same loop. Place stitch markers in both 1st dc and 5th dc of this group.
Step 5: Work 25 dc along opposite side of foundation chain back toward beginning.
Step 6: Join with sl st into 3rd chain of initial turning chains. ch 1, fasten off, and carefully seal synthetic yarn end with lighter.
What to Check: Keep both rounded ends clearly defined. Markers placed around first and final 5-dc groups will help locate later white sections and joining points.

Shape White Head Panel
Switch to white yarn and locate starting point by counting 5 stitches backward from marker opposite ending point.
Row 1: Attach yarn with slip knot, ch 2 for height only, then work 15 dc.
Row 2: ch 2, turn. Skip first stitch, work 12 dc, then work dc dec across final 2 stitches [13 sts].
Row 3: ch 2, turn. Skip first stitch, work 10 dc, then work dc dec across final 2 stitches [11 sts].
Row 4: ch 2, turn. Work 8 dc, then work dc dec across final 2 stitches [9 sts].
ch 1, fasten off, and secure end with lighter.
Why These Decreases Matter: Each row becomes narrower toward upper section, creating tapered head shape rather than keeping panel width constant.
Form White Body Panel
Turn piece over and rotate it toward lower body section. Count 5 stitches from marker to locate starting position.
Row 1: Attach white yarn, ch 2, and work 15 dc.
Row 2: ch 2, turn, work 15 dc across.
Row 3: ch 2, turn, work 15 dc across.
Row 4: ch 2, turn. Skip first stitch, work 12 dc, then work dc dec across final 2 stitches [13 sts].
Row 5: ch 2, turn. Skip first stitch, work 10 dc, then work dc dec across final 2 stitches [11 sts].
ch 1, fasten off with lighter.
Panel Check: Head and body sections should remain clearly identifiable before joining. Make two identical head/body panels using same instructions.

Crochet Two Black Feet
Work feet separately before final body joining.
Rnd 1: Create Magic Ring, ch 3, and work 11 dc inside ring. Pull short tail to tighten center and join with sl st in 3rd starting chain.
Rnd 2: ch 3, work 1 dc in every stitch around. Join with sl st.
ch 1, leave slightly long sewing tail, and fasten off with lighter.
Repeat to make 2 feet.
Before Moving On: Keep sewing tails long enough to attach feet securely to lower body. Avoid trimming them flush.
Make Panda Eye Pieces
Using black yarn, create one circular eye piece, then repeat for second eye if desired according to assembly placement.
Rnd 1: Create Magic Ring, ch 1, and work 6 sc inside ring.
Pull tail tightly to close ring. Join with sl st into first sc and fasten off with lighter, leaving sewing tail.
Shape Check: Each eye piece should lie flat enough to sew neatly onto white head section.
Create Mini Bear Backpack Base
Use chosen accent color.
Step 1: Make slip knot and chain 16 ch.
Step 2: Skip 3 chains from hook and work 4 dc into next chain.
Step 3: Work 11 dc across previous 11 chains.
Step 4: Work 5 dc into end chain.
Step 5: Work 11 dc along opposite side of foundation chain and join with sl st.
Rounds 2–6: ch 3, work 1 dc in every stitch around, joining each completed round with sl st.
Fasten off at end of Round 6.

Backpack Check: Keep each round joined neatly so bag maintains compact tubular shape for later flap and straps.
Add Backpack Flap and Straps
Attach yarn at back opening edge.
Row 1: ch 2, work 11 dc across.
Row 2: ch 2, turn, work 11 dc.
Row 3: ch 2, turn. Work dc stitches, make 3-ch loop by skipping 3 stitches below to form buttonhole/opening, then finish with 4 dc.
Row 4: ch 1, turn, work 11 sc across. Slip stitch into edge corner and fasten off.
For straps, attach yarn at base corner, chain 20 ch, join with sl st to base, and fasten off.
Repeat strap on opposite side.
What to Check: Both straps should have matching chain lengths and connect back to corresponding lower corners.
Join Panda Body and Create Hanging Strap
Place two completed head/body panels back-to-back.
Join outer edges using sc, working 2 sc per row along straight side edges.
When reaching top corner:
- Work 5 dc into that single stitch to form ear/hand shape.
- Skip 1 stitch.
- Work 3 sc into next stitches.
- Chain 50 ch to form long hanging strap.
- Join back to first chain with
sl st. - Work 2 sc in next 2 stitches.
- Skip 1 stitch.
- Work 5 dc into corner stitch.
- Continue joining remaining perimeter with sc.
- Shape increases around bottom base.
- Slip stitch to finish and fasten off.
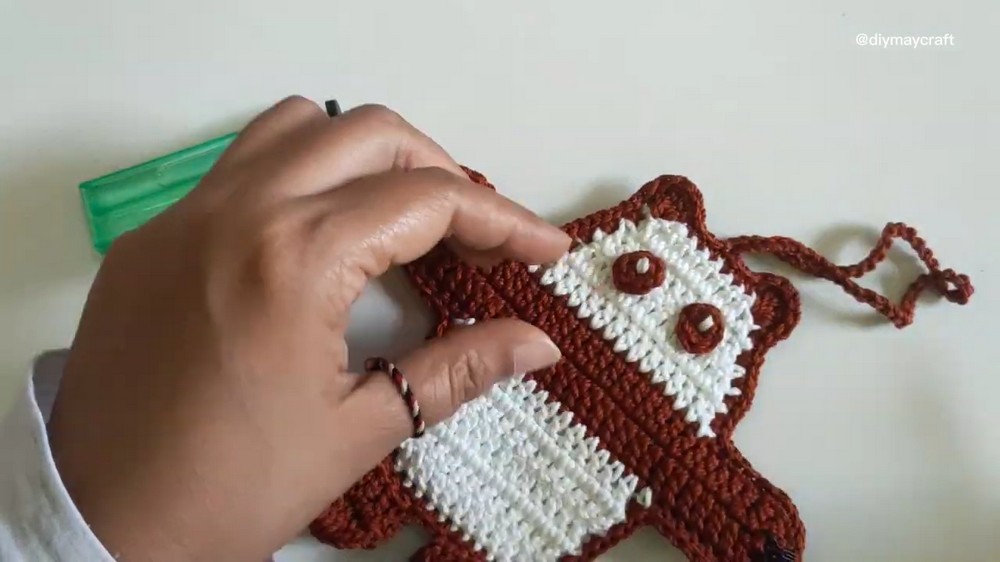
Why This Stage Matters: Joining panels encloses panda body while simultaneously creating its outer silhouette, corner shaping, and long keychain loop.
Watch Your Edges: Keep both panels aligned while working around perimeter. Misaligned edges can make finished panda twist or create uneven sides.
Attach Feet and Eyes
Sew circular black eye pieces onto white head section.
Next, attach both crocheted feet securely to bottom body section using their reserved sewing tails.
Placement Check: Compare both eyes before final stitching so their height and spacing remain balanced. Position feet evenly along lower body.
Secure Keychain Hardware
Attach small metal keyring or lobster claw clasp to top strap/hand area using sewing thread or jump rings.
Hardware Check: Pull gently on connection to make sure ring or clasp is firmly anchored before using panda as bag charm or keychain.
Add Mini Bear Backpack
Place completed mini bear backpack against back of panda body.
Use yarn tails to tack backpack securely in place.
Final Position Check: Backpack should sit centered enough on back section, with straps positioned evenly on both sides.
Finishing
Weave in every remaining loose yarn end securely. For synthetic yarn, lightly melt suitable ends with lighter where needed to reduce fraying.
Once all joins, feet, facial pieces, backpack, and hardware have been checked, your Crochet Panda Souvenir Keychain is ready for keys, bags, or gifting.