
Bring this sweet yellow character to life with a simple amigurumi crochet pattern featuring floppy ears, a tiny brown beret, and an embroidered smile.
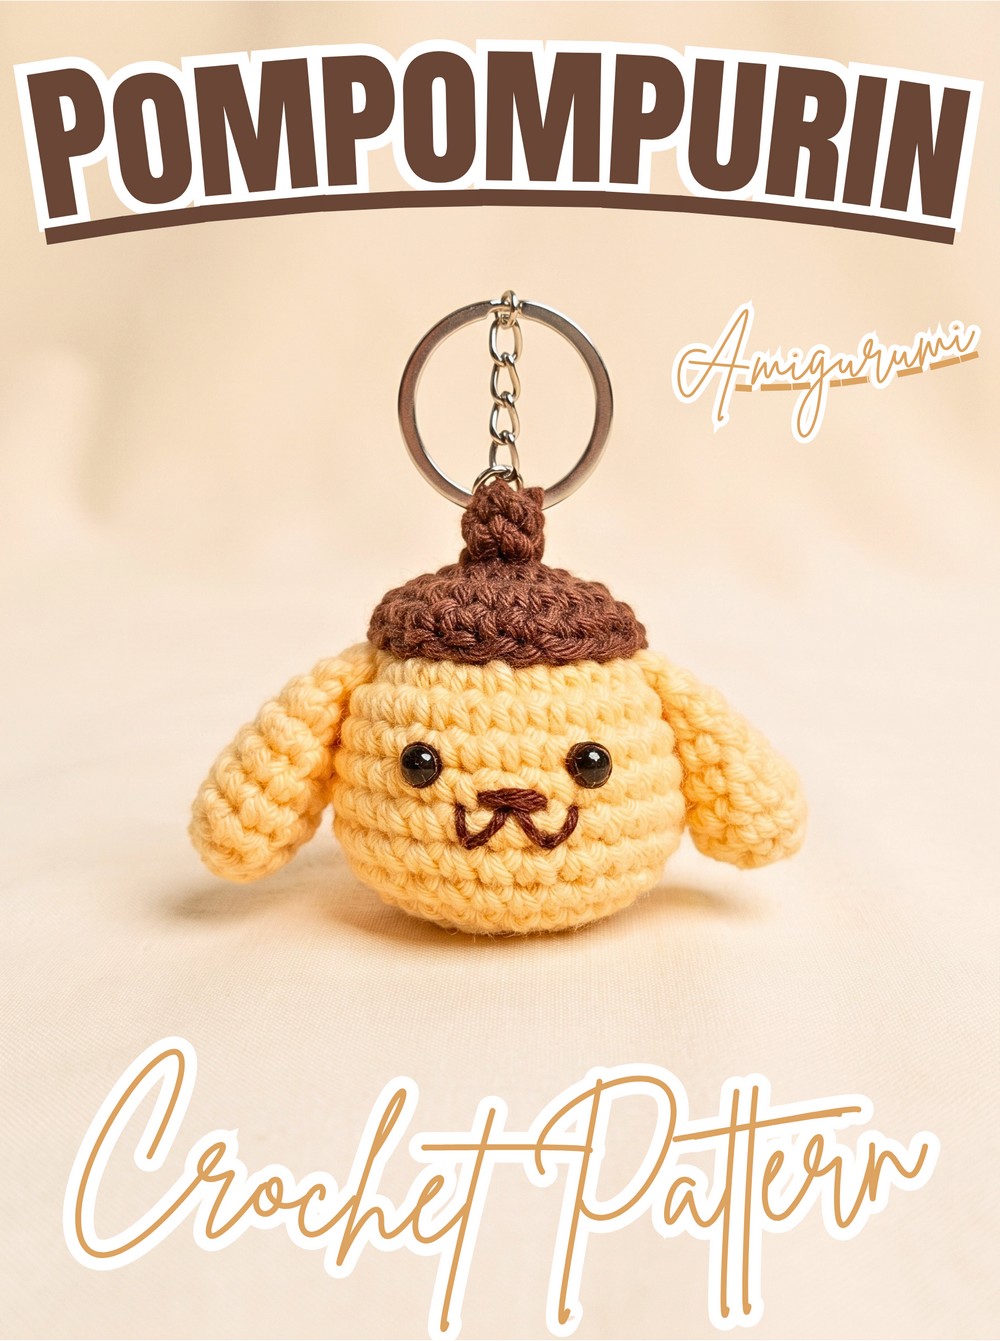
Golden-yellow yarn gives this crochet Pompompurin amigurumi its familiar soft look, while the little dark brown beret and floppy ears bring out its character. This crocheted figure makes a cute handmade keepsake or a thoughtful gift for anyone who enjoys character-inspired crochet.
Begin with the head and body, then make two matching ears and a small beret before adding the facial embroidery. The pattern uses basic single crochet stitches, increases, decreases, and a short FLO section, with safety eyes placed before closing the body.
Credit Tedzukurida
Materials & Tools Needed
- Yarn: Milk Cotton yarn (5-ply) in Light Yellow / Banana Yellow for the main body and Dark Brown (ply/thread yarn) for the beret and facial features.
- Crochet Hook: 3.00-3.50 mm crochet hook.
- Notions: 6mm safety eyes, stitch markers, tapestry needle for sewing, and polyester fiberfill for stuffing.

Pattern Abbreviations & Terminology
- MR: Magic Ring
- ch: Chain
- sc: Single Crochet
- inc: Increase (work 2 sc in the same stitch)
- dec: Decrease (work 2 sc together)
- FLO: Front Loop Only
- Rnd: Round
- (…) × N: Repeat the instructions inside the parentheses N times

Crochet Pompompurin Pattern
1. Head and Body (Banana Yellow Yarn)
Start with Banana Yellow yarn and make the head and body as one continuous piece, following the rounds below.
- Rnd 1: Work 6 sc in a Magic Ring. Pull tight to close. (6 sts)
- Rnd 2: Work an inc in every stitch around. (12 sts)
- Rnd 3: (1 sc, 1 inc) × 6. (18 sts)
- Rnd 4: (1 sc, 1 inc, 1 sc) × 6. (24 sts)
- Rnd 5 – Rnd 6: sc in each stitch around. (24 sts)
- Rnd 7: (7 sc, 1 inc) × 3. (27 sts)
- Rnd 8 – Rnd 9: sc in each stitch around. (27 sts)
- Rnd 10: (7 sc, 1 dec) × 3. (24 sts)
- Rnd 11: (1 sc, 1 dec, 1 sc) × 6. (18 sts)
- Rnd 12: (1 sc, 1 dec) × 6. (12 sts)

Safety Eye Placement & Stuffing: Insert the 6mm safety eyes between Rnd 6 and Rnd 7, with a spacing of approximately 3 holes apart. Firmly stuff the head/body with polyester fiberfill.
- Rnd 13: Work (dec) × 6 to close. (6 sts) Fasten off, weave the yarn tail through the remaining front loops, and pull tight to seal completely.

2. Ears (Make 2 – Banana Yellow Yarn)
Make two matching ears using Banana Yellow yarn. These pieces will be attached to the upper sides of the head.
- Rnd 1: Work 6 sc in a Magic Ring. (6 sts)
- Rnd 2: (1 sc, 1 inc) × 3. (9 sts)
- Rnd 3 – Rnd 6: sc in each stitch around. (9 sts)
Stuffing: Lightly stuff the tips of the ears with a small amount of polyester fiber.
- Rnd 7: (1 sc, 1 dec) × 3. (6 sts)
- Rnd 8: Flatten the open end of the ear and crochet across through both layers with 3 sc to close. (3 sts)
- Rnd 9: Chain 1, turn, and work 3 sc across. Fasten off, leaving a long tail for sewing.
Repeat these instructions to make the second ear.

3. Brown Beret Hat (Dark Brown Yarn)
Use Dark Brown yarn to crochet the small beret. The third round is worked in Front Loops Only, creating a change in the stitch structure before the final increase round.
- Rnd 1: Work 4 sc in a Magic Ring. (4 sts)
- Rnd 2: sc in each stitch around. (4 sts)
- Rnd 3: Working in Front Loops Only (FLO): (1 sc, 1 inc) × 2. (6 sts)
- Rnd 4: Work (1 inc) × 6 in both loops. (12 sts) Fasten off, leaving a tail for attachment.
Checking the Face Before Sewing Everything in Place
Before permanently attaching the ears and beret, check how the pieces sit together on the head. The ears belong on the upper sides, between Rnd 3 and Rnd 4, while the beret should sit centrally between them.
Look at the face from the front to make sure the two safety eyes appear balanced. Check that the beret does not cover either eye and that both ears sit at a similar height. Once the placement looks right, sew the pieces securely in place.

Assembly & Facial Details
- Attach Ears: Position the two floppy ears on the upper sides of the head between Rnd 3 and Rnd 4. Use the leftover yarn tails to securely stitch them in place.
- Attach Hat: Place the dark brown beret centrally on the top of the head, right between the ears. Sew it down neatly around the base.
- Facial Embroidery: Take Dark Brown thread yarn and embroider Pompompurin’s signature vertical nose and wide stitched smile, positioned centrally between the safety eyes.

Your Pompompurin amigurumi is now complete, with its yellow body, floppy ears, little brown beret, and embroidered expression.