
Create a soft, three-dimensional four-leaf clover with a clever loop-pickup technique, two matching panels, embroidered leaf veins, and a delicate crochet stem.

Sculpted green petals give this little four-leaf clover a rounded, plush look that sets it apart from a traditional flat crochet applique. Its miniature size works beautifully as a lucky charm, bag decoration, or small handmade gift, while the brown embroidered details help define the center and individual crochet leaves.
Rather than crocheting four separate leaves and joining them afterward, this pattern forms all four petals from one central ring using a Tunisian-style loop-pickup and cast-off technique. You’ll make two identical panels, sew them together, add a little stuffing, embroider the crochet leaf veins, and finish with a 20-chain stem.
Credit Nida Catty Official
Materials & Tools Needed
Yarn:
Main Color (MC): Green yarn for the clover petals and stem.
Contrast Color (CC): Brown yarn for the embroidered center and leaf veins.
Crochet Hook: 2.0 mm (2/0).
Other Supplies:
Synthetic fiberfill stuffing.
Tapestry or yarn needle.
Tweezers for inserting stuffing into the individual petals.
Sharp scissors.
Finished Size and Customization The finished clover is designed as a compact, miniature decoration. Its exact size depends on your yarn thickness, hook size, and individual tension. You can use the finished piece as a small lucky charm or bag decoration. The 20-chain stem can also be adjusted to your preferred length.

Pattern Abbreviations
ch: Chain
sl st: Slip stitch
st(s): Stitch(es)
MC: Main Color (Green)
CC: Contrast Color (Brown)
Understanding the Tunisian-Style Petal Technique: Each petal is worked outward from the central foundation ring. Instead of completing ordinary crochet stitches across a row, you pick up several loops onto the hook and then work them off two at a time. This creates the textured, layered shape of each leaf. The first petal begins with a chain of six. You pick up loops along the chain and take another loop from the center ring. The following rows build on the vertical bars of the previous row, while the center ring remains the anchor point for the petal. Some rows include slip stitches or a short chain to change the petal’s shape. Follow the row sequence carefully, especially at the center cleft and outer edge, because these details help define the four individual leaves.
How to Crochet the Four-Leaf Clover:
You will make four petals for the first panel, then repeat the complete pattern to create a second matching panel.
Step 1: Make the Central Foundation Ring
With green yarn, ch 5.
Insert your hook into the very first chain and join with a sl st to form a small ring. Keep the center ring accessible because every petal will be worked from this same opening.
Step 2: Crochet Petal 1Row 1: Build the First Loops
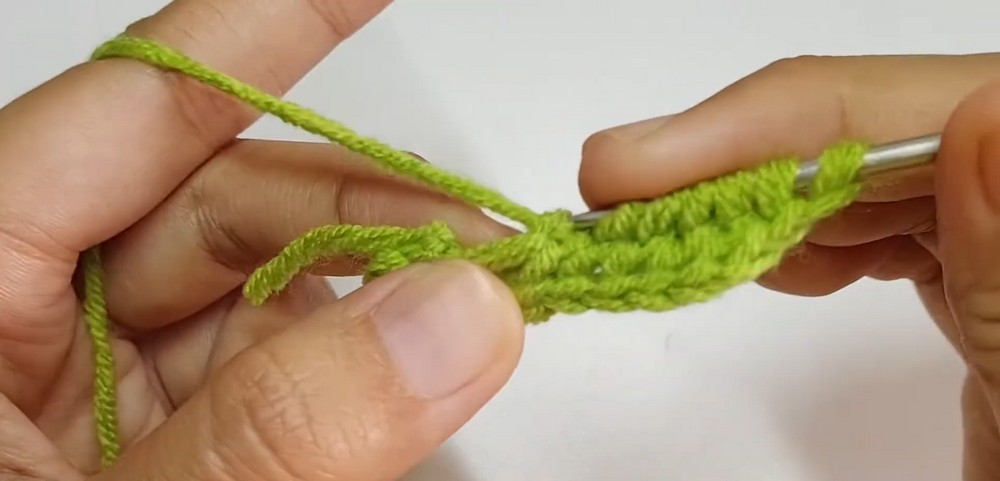
Ch 6.
Insert your hook into the back bumps or side loops along the chain.
Pull up 5 loops across the chain.
Insert the hook directly into the center foundation ring and pull up the 6th loop. You should have 6 loops on your hook.
Yarn over and pull through 2 loops at a time, repeating the cast-off movement as described in the tutorial.
Row 2: Pick Up Loops Along the Front Bars
Ch 1.
Insert your hook through the front vertical bars across the previous row and pick up loops, following the tutorial’s seven-loop pickup sequence.
Insert the hook into the center ring and pull up another loop.
Yarn over and pull through 2 loops at a time across until 1 loop remains on the hook.
Row 3: Continue the Petal Shape
Pick up loops across the previous row, following the seven-loop pickup sequence.
Insert the hook into the center ring and draw up a loop.
Yarn over and pull through 2 loops at a time across the hook. Keep the loops even as you work so the petal maintains a consistent shape.
Row 4: Form the Center Cleft
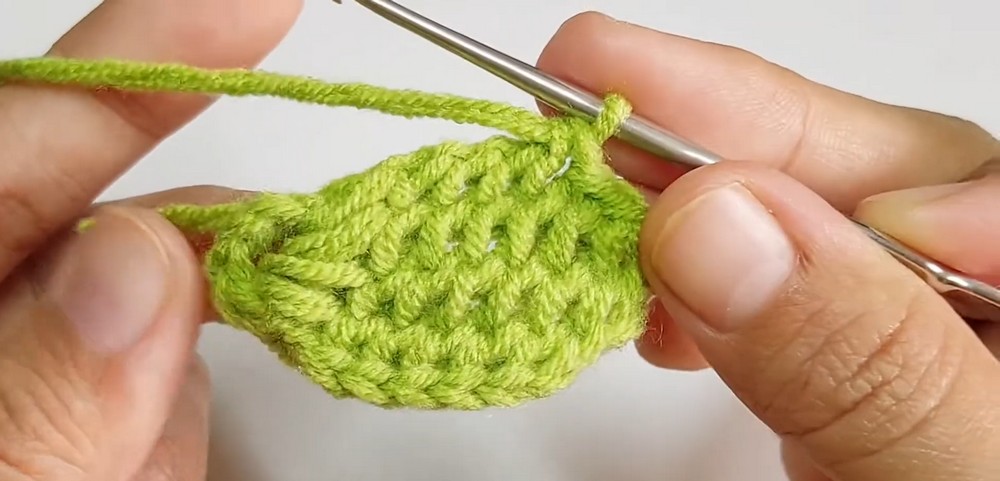
Work slip stitches across the first 2 stitches to create the decrease.
Pick up loops across the row until you have 5 loops on the hook.
Insert the hook into the center ring and draw up another loop.
Cast off by yarning over and pulling through 2 loops at a time across the hook. This shorter section shapes the inner part of the petal near the center of the clover.
Row 5: Build the Second Lobe
Ch 2.
Pick up loops along the chain and down the side, following the seven-loop pickup sequence.
Insert the hook into the center ring and draw up another loop.
Cast off 2 loops at a time across the hook.
Row 6: Continue the Second Lobe
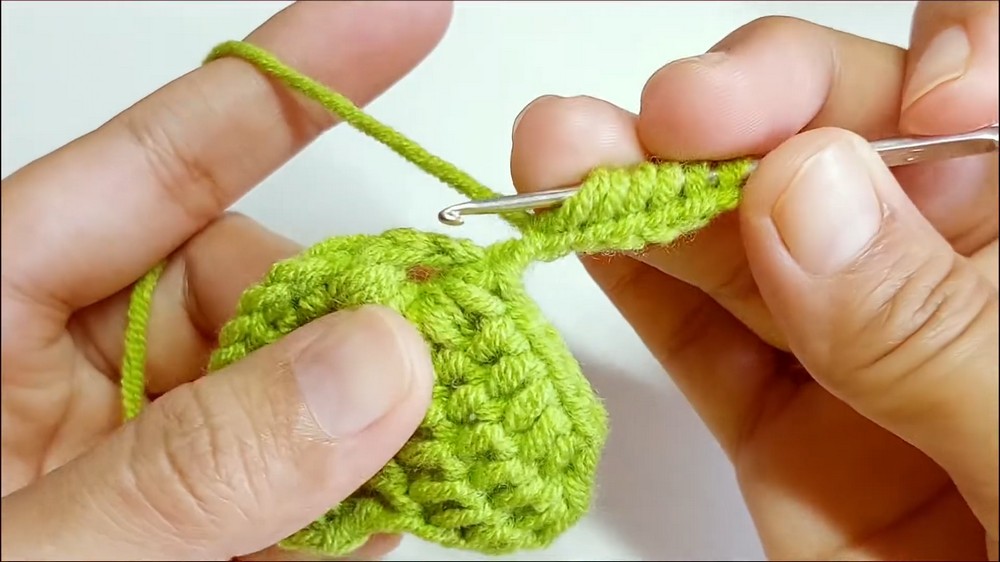
Pick up loops across the previous row, following the seven-loop pickup sequence.
Insert the hook into the center ring and draw up another loop.
Cast off 2 loops at a time across the hook.
Row 7: Final Decrease and Edge Finish
Work slip stitches down the side to shape the outer edge.
Pick up loops across until you have 5 loops on the hook.
Insert the hook into the center ring and draw up another loop.
Cast off 2 loops at a time across.
Work 5 slip stitches evenly down the side of the petal.
Finish by slip stitching directly into the central foundation ring to anchor the petal. The first petal is now complete.
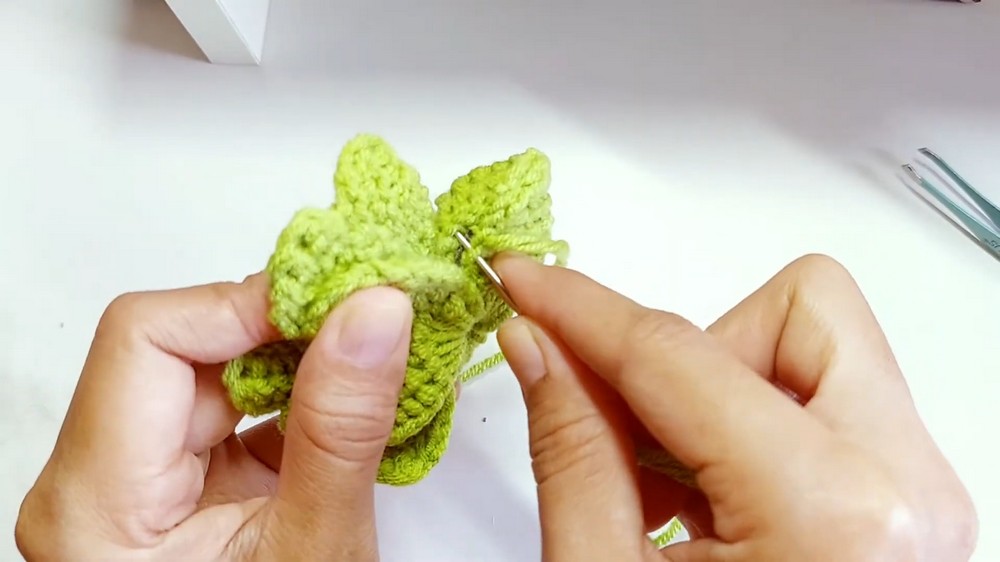
Step 3: Make Petals 2, 3, and 4. Repeat the same seven-row sequence for the remaining three petals, working each one from the same central foundation ring. After finishing the fourth petal:
Slip stitch into the center ring.
Fasten off the yarn.
Weave in the yarn end securely. You now have one complete four-leaf clover panel.
Step 4: Crochet the Second Panel. Make another identical four-leaf clover by repeating the foundation ring and all four petal instructions. Set both panels aside for assembly. They will form the front and back of the stuffed clover.
Joining the Panels and Adding Stuffing
Step 1: Align the Two Clover Pieces
Lay the two clover panels together with their Right Sides facing outward.
Match all four petals so their outlines line up.
Thread your tapestry needle with green yarn.
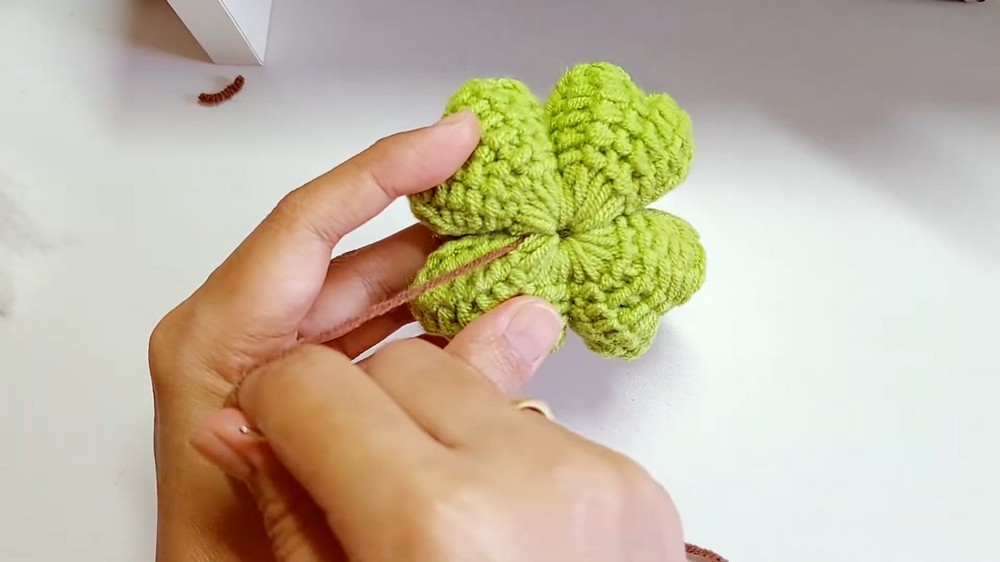
Step 2: Sew Around the Petal Edges
Use green yarn to whipstitch or sew the two panels together along the petal contours.
After sewing around two petals, pause to add stuffing.
Use craft tweezers to gently push synthetic fiberfill into each petal pocket.
Continue sewing around the remaining petals.
Leave a small gap so you can lightly stuff the center of the clover.
Close the remaining opening completely and secure the thread. Add the fiberfill gradually. The petals should feel softly filled and hold their shape without becoming too firm.
Embroider the Center and Leaf Veins. Brown yarn adds the finishing details that make the four leaves easier to distinguish.
Thread your tapestry needle with brown yarn.
Insert the needle through the bottom center of the clover and bring it up through the middle.
Make a tight cross-stitch between the four petals to create defined clefts.
Embroider single running or straight stitches from the center outward through the middle of each petal. These lines form the leaf veins.
Secure the brown yarn and bury the remaining tail inside the clover body. Check that the embroidered lines follow the center of each petal and that the cross at the middle remains neat.
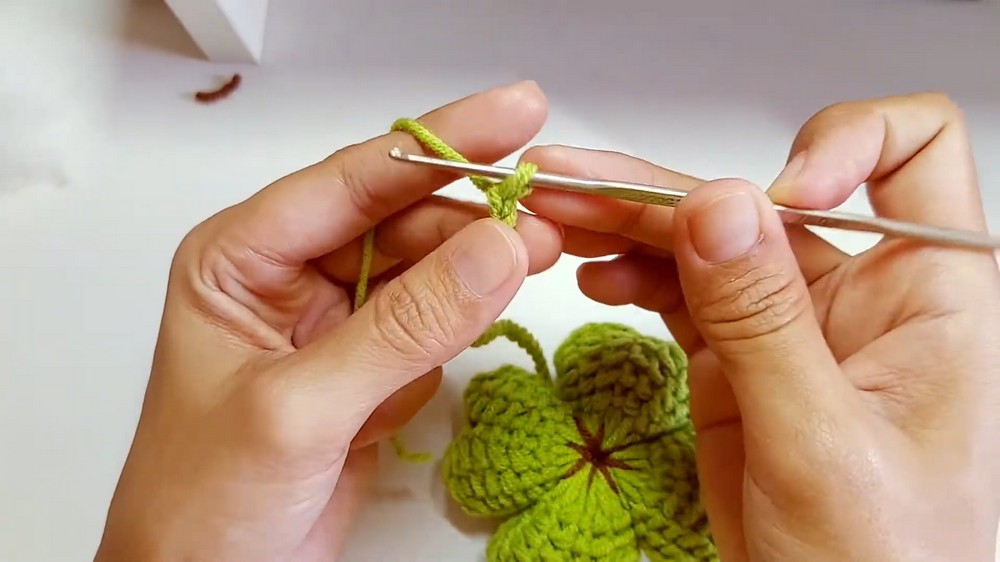
Crochet the Stem. The final stem is made directly from the bottom gap between two petals.
Insert your crochet hook into the bottom gap between two petals.
Join green yarn and ch 20. You can adjust the chain length to your preference.
Cut the yarn and fasten off.
Thread the yarn tail through a tapestry needle.
Pull the tail through the center of the clover and knot it securely inside the body.
Keeping the Four Petals Symmetrical: The four petals share one foundation ring, so their placement and shape affect the overall appearance of the clover. As you repeat the petal sequence, keep the loop tension consistent and check that each new petal sits beside the previous one rather than pulling the center too tightly.
When joining the two panels, match the outer curves before sewing. Add stuffing into each petal pocket in small amounts, paying attention to the tips and the spaces near the center. This helps the finished clover retain four distinct, rounded leaves instead of becoming one tightly packed shape.
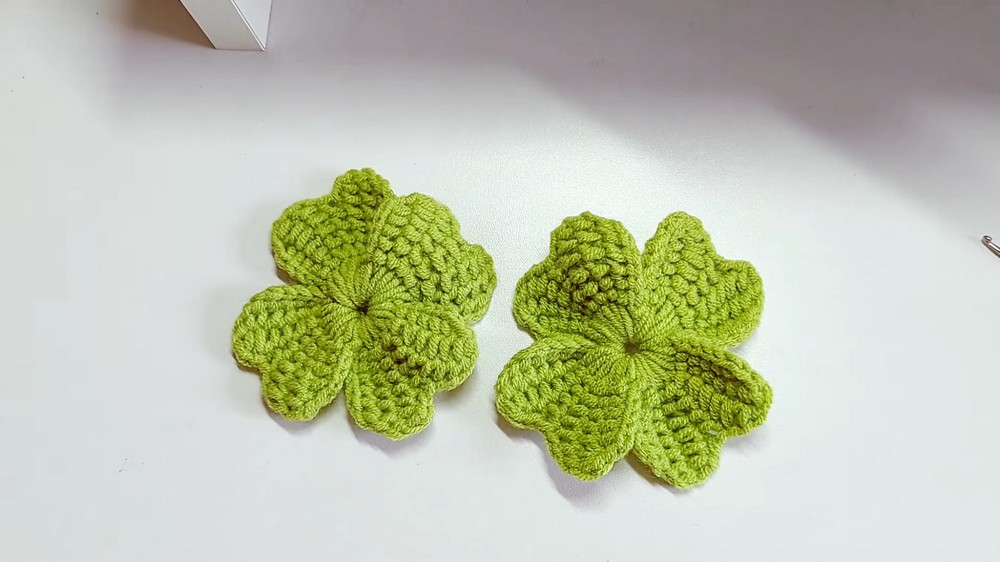
Your Finished 3D Four-Leaf Clover: With the panels joined, the petals stuffed, and the brown vein details embroidered, your miniature four-leaf clover is ready. The chained stem completes its recognizable shape, while the soft filling gives it a rounded finish.
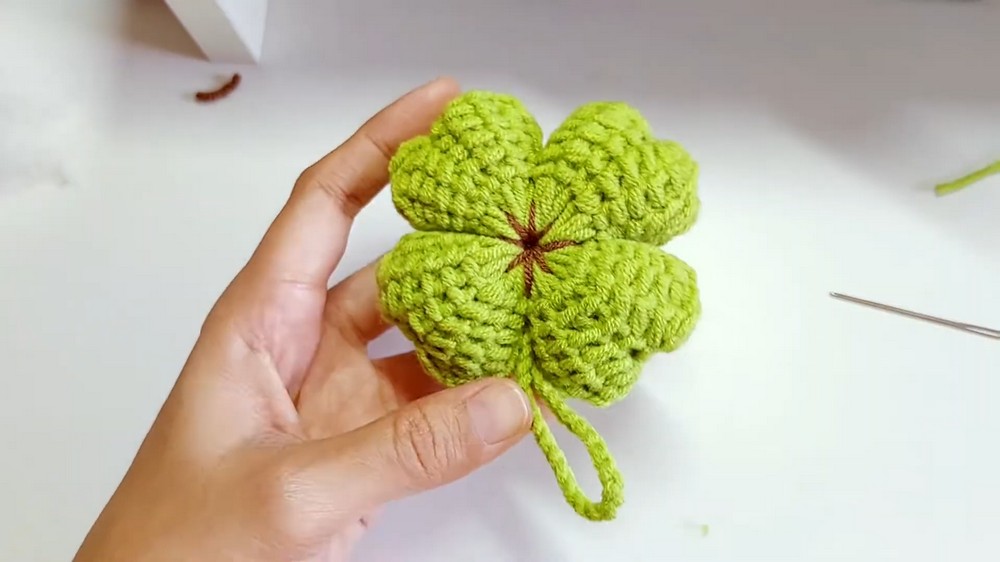
Use it as a little lucky charm, attach it to a bag, or keep it as a handmade seasonal decoration. A second version in a different shade of green can also make a sweet matching pair.