A tiny crochet ghost dressed in a crooked witch hat, playful horn, ruffled hem, and sweet embroidered face turns simple amigurumi stitches into a character full of Halloween personality.
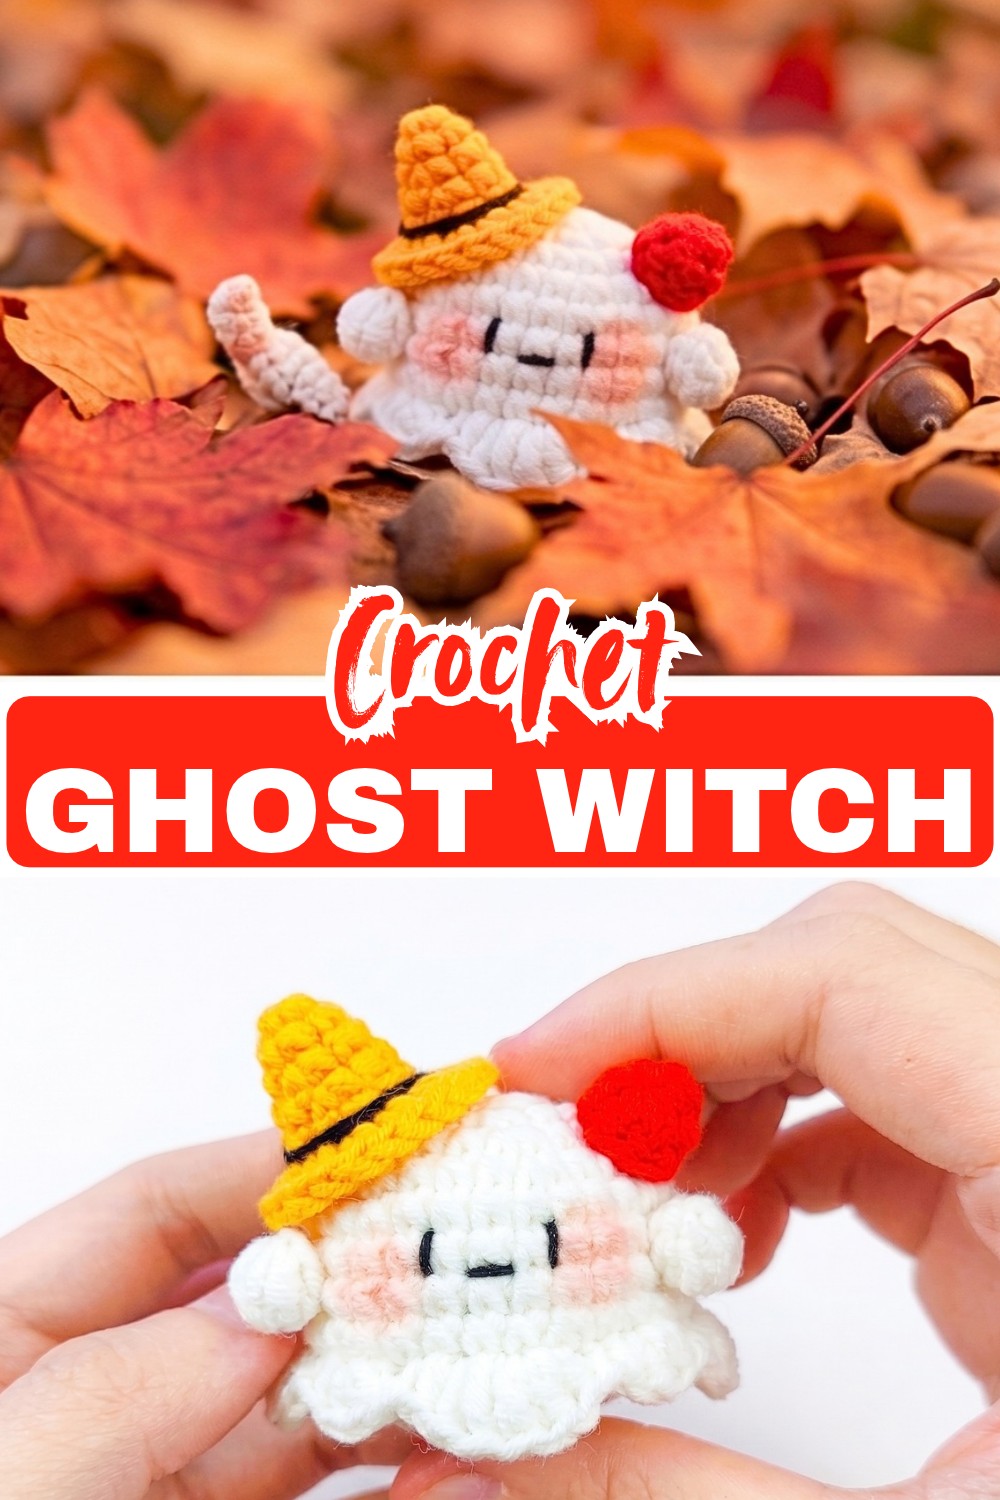
A little personality goes a long way with small amigurumi pieces, and this crochet ghost gets plenty from its mix of details. The soft white body provides a simple base, while the yellow hat, red horn, ruffled hem, and tiny hands give it a playful witchy look. It would sit nicely on a shelf, desk, seasonal display, or Halloween table.
Most of the shaping comes from familiar single-crochet increases and decreases, so the interesting part is knowing when each special detail is created. The exposed loops left around the body are used later for the ruffle, the hat brim is worked separately to give it width, and the stuffing needs to go in before the final opening becomes too small. Keeping those crochet transitions in mind makes the assembly much easier.
Credit Nhi Art Handmade – Lem’n Do
Materials & Tools
- Baby yarn / Fine-weight yarn:
- White – ghost body and hands
- Yellow – witch hat
- Red – horn
- Black – embroidered eyes, mouth, and hat band
- Crochet Hook: 2.0 mm
- Fiberfill stuffing
- Stitch markers
- Embroidery/tapestry needle
- Scissors or thread clippers
- Blush and small makeup brush: Optional
Finished Size & Customization Ideas
The supplied pattern does not give an exact finished measurement. Since the design uses fine-weight yarn and a 2.0 mm hook, the result will be a small amigurumi-style decoration, with the final size depending on your yarn, tension, and hook.
You can personalize the character without changing its basic construction:
- Use purple, orange, green, or black for the witch hat.
- Change the hat angle to give the ghost a different personality.
- Make the embroidered eyes smaller, wider, or more expressive.
- Add pink blush for a softer appearance.
- Change the horn color or omit it for a simpler ghost.
Pattern Abbreviations – US Terms
- MR: Magic Ring
- ch: Chain
- sl st: Slip Stitch
- sc: Single Crochet
- inc: Increase — 2 sc in the same stitch
- dec: Invisible decrease
- hdc: Half Double Crochet
- dc: Double Crochet
- BLO: Back Loops Only
- FLO: Front Loops Only
- Bobble Stitch: 4-dc bobble
- st(s): Stitch(es)

Step-by-Step Crochet Ghost Witch Pattern
Ghost Body
The body is worked from the top downward in white yarn using continuous rounds.
Round 1: Make an MR and work 8 sc into the ring. (8)
Round 2: [1 sc, inc] × 4. (12)
Round 3: [1 sc, inc] × 6. (18)
Round 4: [2 sc, inc] × 6. (24)
Round 5: [3 sc, inc] × 6. (30)
Rounds 6–8: Work 1 sc in each stitch around. (30)
Round 9: [4 sc, inc] × 6. (36)
Why Round 9 Matters
Round 9 creates the widest point of the upper body and, importantly, leaves the foundation for the decorative hem that will be added later. The next round is worked differently specifically so those loops remain available.
Round 10: Working in BLO, [4 sc, dec] × 6. (30)
Reader Tip: Work only into the back loops in this round. The unused front loops from Round 9 should remain visible on the outside. Do not accidentally crochet into them, because those loops will be used later to attach the ruffled hem.
Round 11: [3 sc, dec] × 6. (24)
Round 12: [2 sc, dec] × 6. (18)
Round 13: [1 sc, dec] × 6. (12)

Stuff the body firmly with fiberfill.
At this point, distribute the stuffing around the inside walls rather than packing everything into the center. The opening will become much smaller after the next round, so this is the easiest stage to correct the shape.
Round 14: [dec] × 6. (6)
Fasten off, weave the yarn tail through the remaining loops, pull the opening closed, and hide the end inside the body.
Ruffled Shirt Hem
The ruffle is worked into the exposed front loops of Round 9.
This is why those loops were deliberately left unworked in Round 10. Instead of adding another separate foundation, the pattern uses the existing loops to build the decorative edge directly onto the body.
Join white yarn with a sl st to an exposed front loop.
Ruffle Repeat: Skip 1 sc, work (1 hdc + 2 dc) in the next stitch, work (2 dc + 1 hdc) in the next stitch, skip 1 sc, work 1 sl st, skip 1 sc, work (1 hdc + 1 dc + 1 hdc) in the next stitch, then skip 1 sc; repeat the sequence around for 4 repeats total.
Fasten off and weave in the ends.
How the Ruffle Takes Shape
The wavy edge comes from changing both stitch height and spacing. Groups of hdc and dc push the fabric outward, while the skipped stitches and slip stitches pull parts of the edge inward. That contrast creates the little scalloped, ruffled effect.

Witch Hat
The witch hat is made separately in yellow yarn.
Round 1: Make an MR and work 4 sc into the ring. (4)
Round 2: [1 sc, inc] × 2. (6)
Round 3: [2 sc, inc] × 2. (8)
Round 4: [3 sc, inc] × 2. (10)
Round 5: [4 sc, inc] × 2. (12)
Round 6 — Hat Brim: Working in FLO, ch 2, then work 2 hdc in each stitch around. (24 hdc)
Fasten off, leaving a long tail for sewing.
Why the Hat Changes to FLO
The first five rounds gradually widen the pointed hat. Round 6 needs to spread outward to create the brim, so it is worked through the front loops only. This gives the brim a distinct edge rather than continuing the same narrow shape.
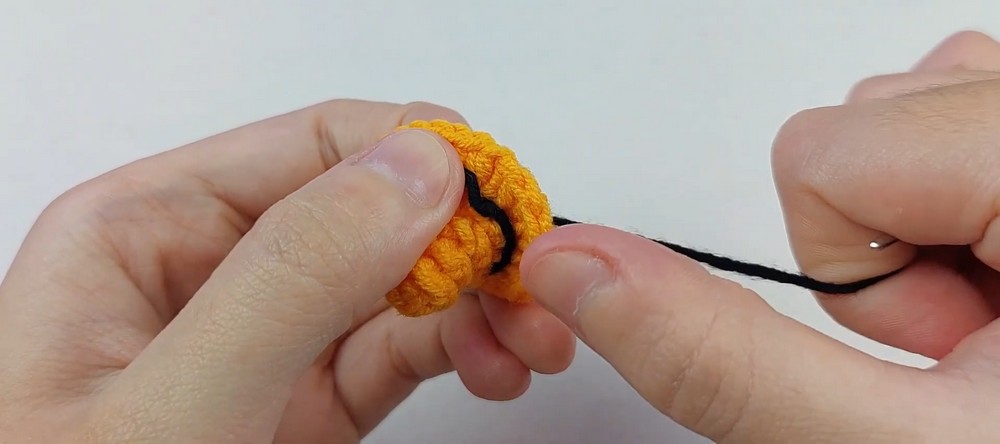
For the hat band, use black embroidery yarn and wrap a thin line around the base of Round 5.
Horn Detail
Make the small horn separately in red yarn.
Round 1: Make an MR and work 4 sc into the ring. (4)
Round 2: Ch 2, [1 hdc, 1 hdc-inc] × 2. (6 hdc)
Fasten off, gently shape the piece into a small horn, and leave a long tail for sewing.
Because this piece is tiny, avoid pulling the stitches excessively tight while shaping it. You want enough structure for the horn to keep its small curved form when attached.
Make 2 Tiny Hands
Make two hands using white yarn.
Hands: In an MR, ch 3, work 1 four-dc bobble stitch, ch 3, then 1 sl st into the ring.
Pull the MR closed to gather the bobble into a compact hand shape. Fasten off, leaving a long tail for sewing.
The bobble gives the hand a little dimension without requiring a separate stuffed piece, which keeps these small details quick to make.
Assembly & Finishing
Attach the Witch Hat
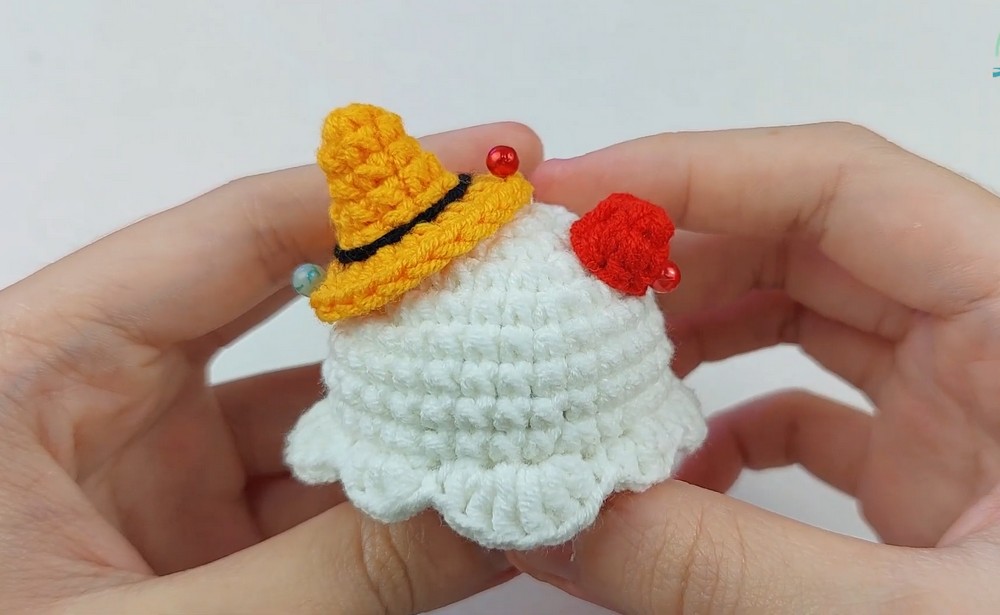
Place the yellow hat slightly tilted on top of the ghost’s head. Before sewing it down, try a few positions to find the angle you like.
Once positioned, sew through the hat and into the head securely using the long yarn tail.
Attach the Horn
Position the red horn beside the hat. Sew it firmly to the head, keeping the attachment stitches small so they are not obvious from the front.
Attach the Hands
Place one tiny hand on each side of the lower body, just above the ruffled hem.
Before sewing, check both sides from the front to make sure they sit at approximately the same height. Then use the remaining yarn tails to secure them.
Embroider the Face
Use black yarn or embroidery thread to add two small horizontal bar-shaped eyes.
Below them, embroider either a small “v” shape or a curved mouth.
The face is one of the details that can noticeably change the character, so it is worth positioning the eyes loosely first and checking the expression before securing the stitches.

Add Optional Blush
For rosy cheeks, lightly apply a small amount of pink blush with a makeup brush.
Keep this subtle-the goal is to add warmth without covering the crochet texture.
Final Finishing
Weave in all remaining yarn ends securely. Adjust the hat, horn, hands, and ruffled hem so everything sits neatly.
Helpful Construction Notes
There are only a few places in this pattern where paying extra attention will save you from having to undo stitches:
- Round 10: Remember that it is BLO because the unused front loops from Round 9 are needed for the ruffle.
- Stuffing: Add the fiberfill before Round 14 closes the body completely.
- Hat brim: The FLO instruction in Round 6 is what allows the brim to spread outward.
- Small pieces: Leave long tails on the hat, horn, and hands because those tails are used for assembly.
- Face placement: Check the expression before permanently securing the embroidery.
These are the points where the construction changes or where a later step depends on something done earlier. The regular increase and decrease rounds can be worked without additional explanation.

Final Result
Once the hat, horn, hands, ruffled hem, and embroidered face are attached, the simple white body becomes a characterful little ghost witch. The combination of a crooked hat and tiny facial details gives it a playful Halloween personality without requiring complicated shaping.
It can be displayed on a shelf, desk, seasonal table, or alongside other handmade Halloween decorations.