A handful of yarn is enough to create two tiny crochet characters with plenty of personality, from a softly ruffled ghost to a recognizable Kaonashi with a simple face and hood.
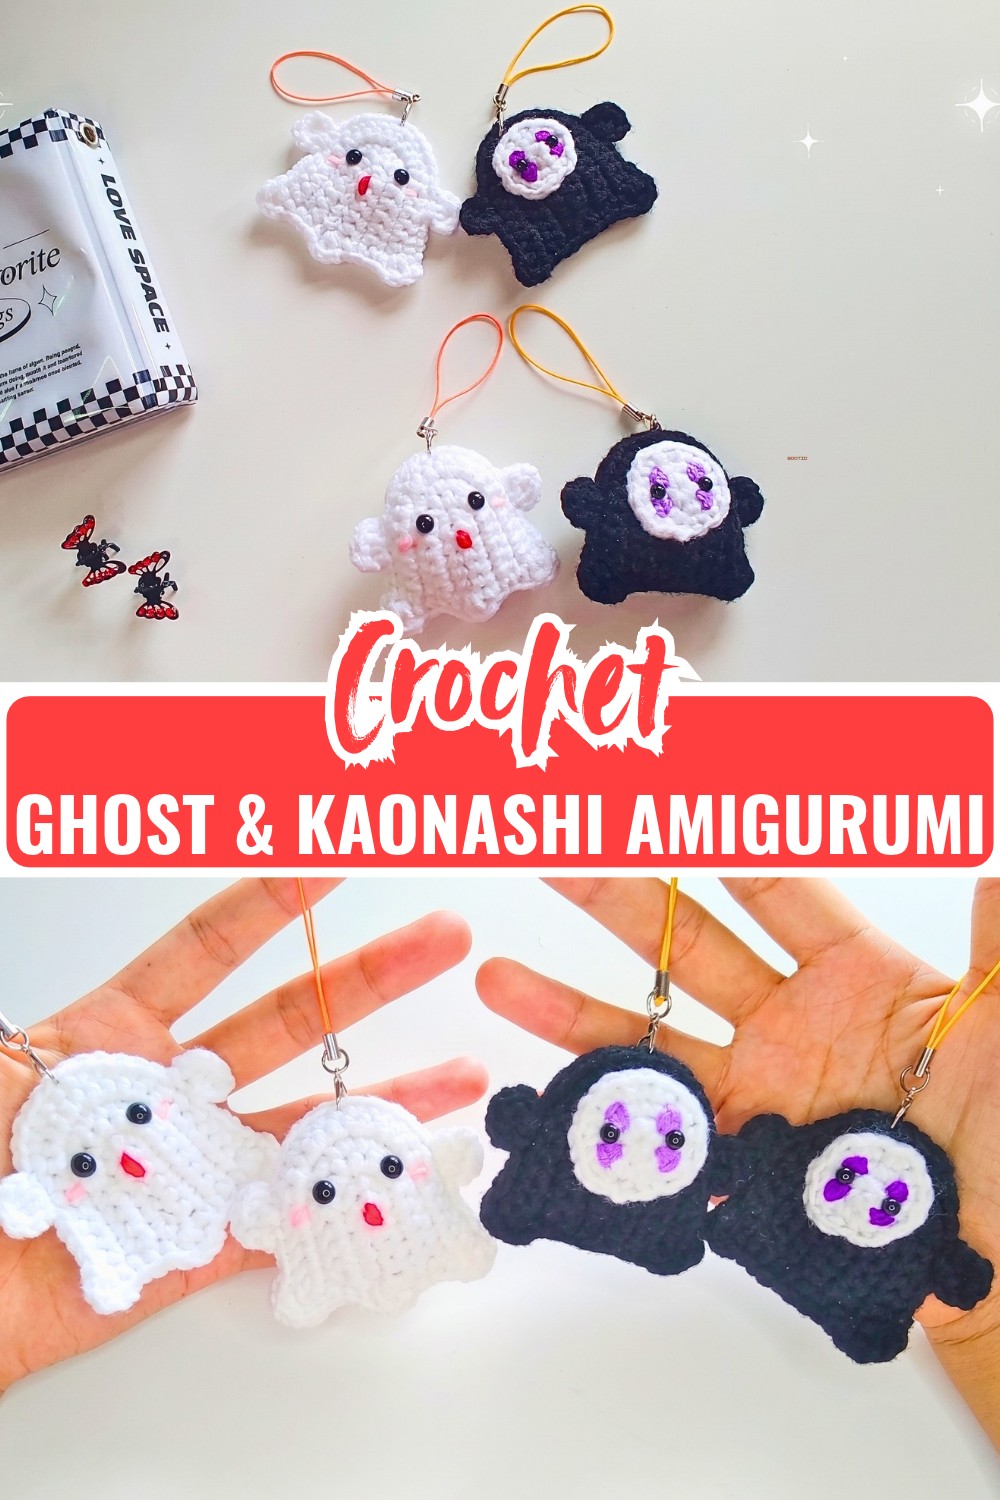
Small crochet characters can be especially enjoyable when the shape comes together quickly. These mini figures keep the construction manageable, while details such as the crochetghost’s ruffled edge, tiny arms, blush, and Kaonashi’s face give each one a distinct personality.
There is also a useful connection between the two designs: both begin with the same body through Row 6. Once that crochet section is complete, the finishing changes create the different characters.
You can leave them flat for lightweight charms or add a little stuffing when you want a softer, more dimensional result.
Credit Mavy Crochet
Materials & Tools Needed
- Yarn: White yarn for the ghost body and Kaonashi, black yarn for Kaonashi’s hood and details, and pink yarn for blush.
- Crochet Hook: 3.0 mm crochet hook.
- Fiberfill: For the stuffed version.
- Face Details: Black felt or small safety eyes, plus white felt for Kaonashi’s face.
- Notions: Tapestry needle, scissors, stitch markers, and fabric glue or hot glue for felt details.
- Keychain Ring: Optional, if you want to turn the finished character into a keychain or bag charm.
Finished Size & Customization Ideas
Using a 3.0 mm hook, the finished characters are approximately 6–8 cm tall, although the final size will vary with your yarn weight and tension.
You can make the characters flat or stuffed. A flat version keeps them lightweight for keychains, ornaments, and bag charms, while a small amount of stuffing gives them a softer three-dimensional shape.
For personalization, change the blush color, embroider the facial details, use felt instead of safety eyes, or add a keychain ring at the top. Making several with different expressions can also give each character its own personality.
Pattern Abbreviations & Terminology
- MR: Magic Ring
- ch: Chain
- sc: Single Crochet
- inc: Increase – 2 sc in the same stitch
- sl st: Slip Stitch
- hdc: Half Double Crochet
- dc: Double Crochet
- st: Stitch
- FO: Fasten Off
US crochet terminology is used throughout.

Before You Begin
The main body is worked in rows, not closed rounds. Because the stitch count changes as increases are added, count your stitches at the end of every row before moving on. This is especially helpful on the early rows, where a missed increase can change the shape of the finished character.
Part 1: Mini Ghost
Ghost Body
The first six rows create the main body. The increases gradually widen the shape so it develops into a little character rather than remaining a straight strip.
Row 1: Ch 1, work 6 sc starting from the 2nd ch from the hook. (6 sts)
Row 2: Ch 1, work 5 sc, 2 inc, then 5 sc. (14 sts)
Row 3: Ch 1, work 6 sc, 2 inc, then 6 sc. (16 sts)
Row 4: Ch 1, work 7 sc, 4 inc, then 5 sc. (20 sts)
Row 5: Ch 1, work 8 sc, [1 inc, 1 sc] 3 times, then 7 sc. (23 sts)
Row 6: Ch 1, work 10 sc, 1 inc, 3 sc, 1 inc, then 8 sc. (26 sts)

Why the increases matter here
The increases are not identical from row to row because they are helping shape the body. As the stitch count grows, the lower portion becomes wider, giving the ghost the silhouette needed for its ruffled sheet-like bottom.
If your piece looks noticeably narrower on one side, check the placement and number of increases before continuing. Correcting the shaping now is easier than trying to compensate after the ruffle is attached.

Ruffled Ghost Base
The final row changes the straight lower edge into the decorative ruffle that makes the ghost look as though it is wrapped in a loose sheet.
Row 7: Ch 1, work 2 dc in the same st, ch 1, 4 sc, then repeat [ch 1, 2 dc in the same st, ch 1, 4 sc] around; join with a sl st to the first st and FO. (Ruffled edge formed)
Weave in the ends securely.
Keep the ruffle loose
The ruffled section needs enough movement to spread around the body. Avoid pulling the chains and double crochets tightly, because firm tension can make the edge look flat instead of wavy.
Ghost Arms
Make two small arms.
- Fold the body in half and mark the center with a stitch marker.
- Count 8 stitches away from the center and insert your hook there.
- Pull the yarn through and ch 1.
- Work 2 dc into the same stitch.
- Ch 2.
- Sl st into the closest stitch and fasten off.
- Repeat on the opposite side.
Positioning the arms
Marking the center before attaching the arms gives you a reliable reference point for both sides. Since the ghost is small, placing one arm only a few stitches higher than the other can make the character look uneven.

Ghost Face Details
Use black yarn or black felt for the eyes.
- Place two small eyes on the upper portion of the body.
- Add tiny pink blush marks beneath them if desired.
- Stitch a small smile underneath the eyes for a softer expression.
For a child-friendly soft version, embroidered facial details are a practical alternative to separate hard pieces.

Part 2: Mini Kaonashi
Kaonashi uses the same body construction as the Ghost through Row 6, so you can follow the Ghost instructions above for those first six rows.
Rows 1–6: Follow the Ghost Body instructions above. (26 sts at the end of Row 6)
The important change comes after Row 6. Instead of finishing with the ghost’s lower ruffle, Kaonashi gets a hood-style edge and a separate face.
Kaonashi Hood Edge
Row 7: Ch 1, work 2 dc in the same st, ch 1, 9 sc, then repeat [dc inc, ch 1, 9 sc] around; join with a sl st and FO. (Ruffled hood edge formed)
The longer sections of sc between the raised portions create a different edge from the ghost’s shorter ruffle. This gives the piece a more hood-like appearance once the face is attached.
Creating Kaonashi’s Face
White Face
Cut a small oval from white felt, or crochet a small oval if you prefer a completely handmade finish.
Place it centrally on the black hood before attaching it permanently.
At this size, even a small change in placement can affect the expression, so checking the position first is worthwhile.
Eyes
Attach two small black felt pieces or safety eyes to the white face.
Mouth
Stitch or draw the thin Kaonashi-style mouth across the lower part of the face.
Keep the facial details simple. The small scale means that too many details can quickly make the face look crowded.

Flat or Stuffed Finish
Flat Version
Leave the character unstuffed and finish the edges neatly. This version is particularly useful for:
- Keychains
- Bag charms
- Ornaments
- Halloween garlands
Stuffed Version
Add a small amount of fiberfill before closing the body.
The goal is to give the character gentle dimension rather than making it tightly packed. Too much stuffing can distort the small body and make the edges lose their intended shape.
Assembly & Finishing
- Check the placement of the eyes, face, and other details before permanently attaching them.
- Add fiberfill if making the stuffed version.
- Secure and close the body.
- Sew the ghost’s arms into their marked positions.
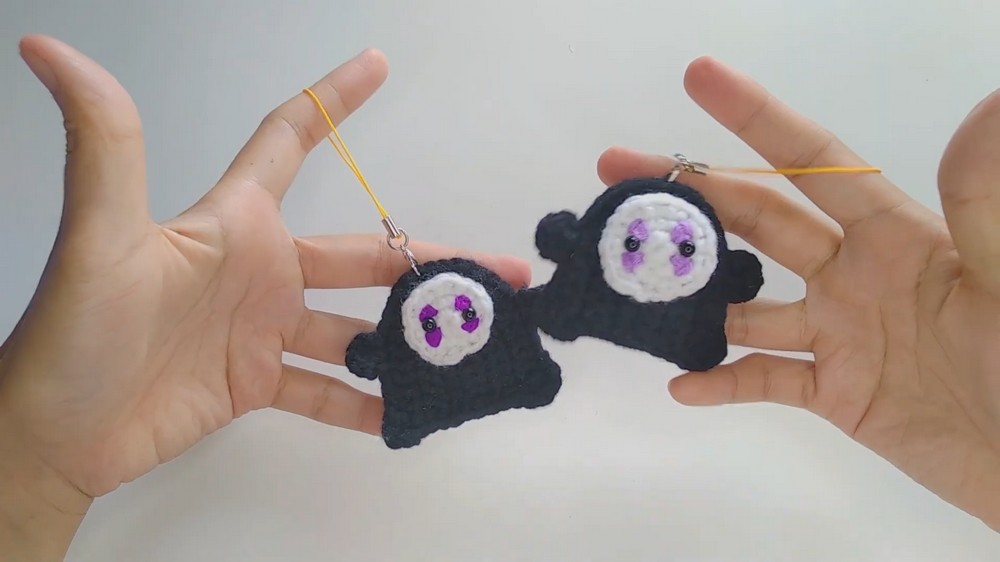
- Attach Kaonashi’s white face to the hood.
- Add the eyes and mouth.
- Add blush where desired.
- Weave in all remaining yarn tails.
- Attach a keychain ring if using the finished character as a charm.
Final security check
Gently test each sewn or glued detail before trimming the remaining yarn. This is particularly useful if the finished character will hang from a bag or keychain, where the small pieces will receive more handling.
Ways to Use the Finished Characters
Their small size makes these characters useful beyond seasonal display:
- Keychains: Add a ring to the top for a lightweight charm.
- Bag Charms: Attach one to a zipper, backpack, or bag handle.
- Desk Decor: Display the ghost and Kaonashi together.
- Halloween Garland: Make several characters and string them along a garland.
- Small Handmade Gifts: Their compact construction makes them easy to make in multiples.
Final Thoughts
What makes these two characters especially useful to crochet is their shared beginning. Once you have worked through the first six rows, you already understand the basic body shape, and the different finishing sections show how small construction changes can create a completely different character.
The ghost gets most of its personality from the ruffled sheet edge, tiny arms, and simple face, while Kaonashi relies on the hood and recognizable facial details. Choose the flat finish for lightweight charms or add a little stuffing when you want a softer figure to display or give as a gift.