Here’s a cheerful crochet scarecrow granny square with straw-like fringe, a floppy brown hat, rosy cheeks, and a stitched smile for cozy fall blankets and Halloween projects.
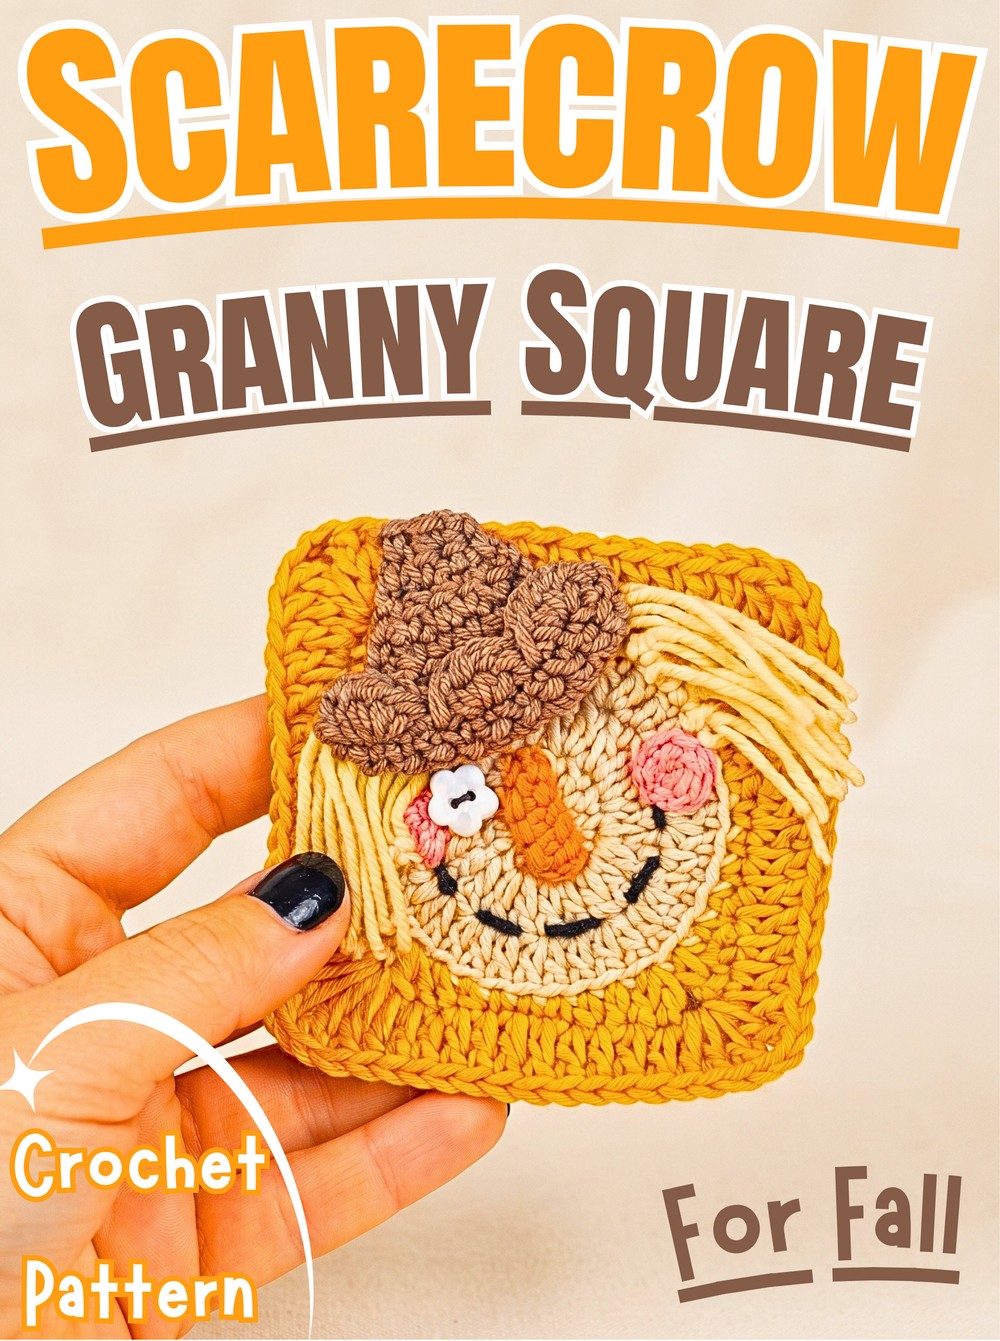
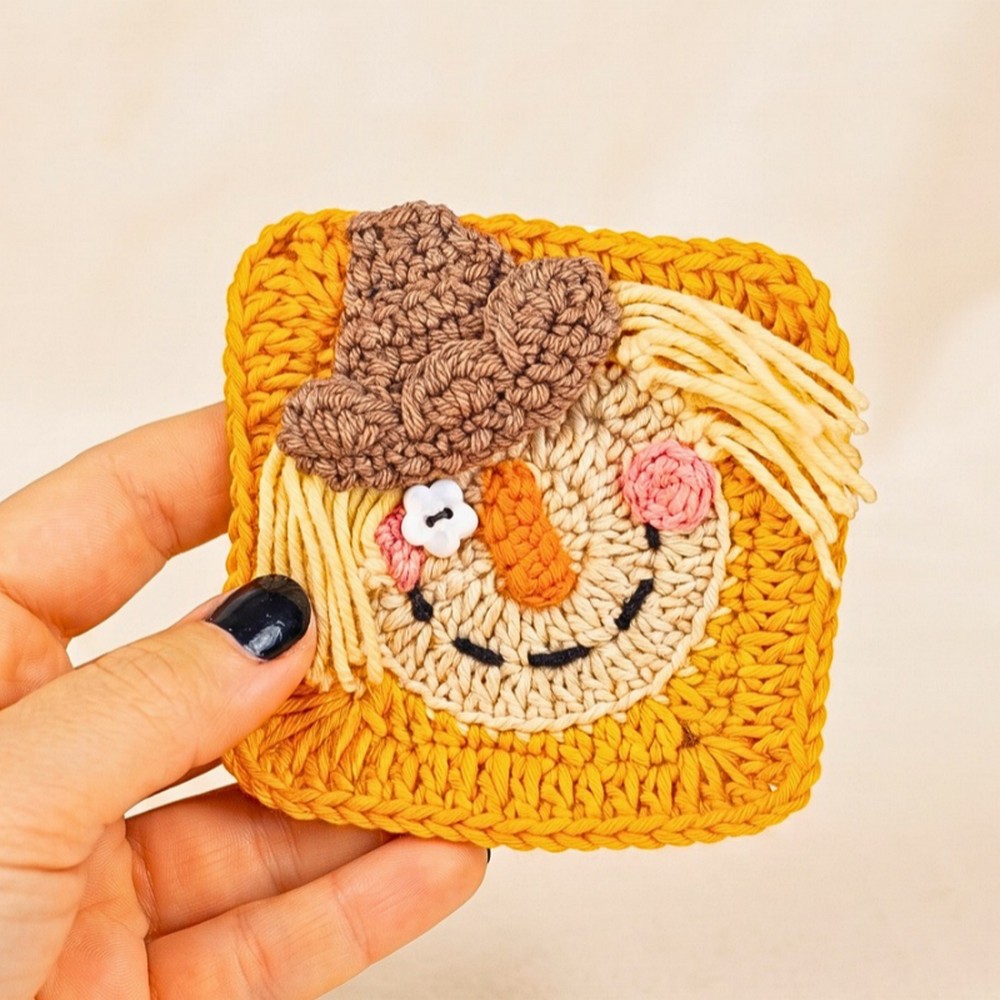
This scarecrow square brings country-style charm to autumn crochet patterns, with a friendly face framed by golden yarn fringe and a rustic hat. Layering small details over a classic square creates a characterful design without crocheting the features directly into the face.
Follow the pattern to crochet the circular face, shape it into a contrasting square, and add the tapered hat, straw hair, nose, cheeks, and embroidered expression. You’ll also find ideas for changing the scarecrow’s look or joining the finished square into seasonal home décor.
Credit Simple Crochet
Materials and Tools Needed
Gather the yarn colors and basic crochet tools before beginning. Medium-weight yarn creates a sturdy square, while consistent tension helps the face lie flat and the corners stay neat.
Beige or cream yarn: Face
Green, purple, or another contrasting color: Square background
Yellow or straw-colored yarn: Hair fringe
Brown yarn: Hat
Orange yarn: Triangle nose
Pink yarn: Cheeks
Black yarn: Smile and facial details
Crochet hook: 3.5-4.0 mm, matched to your yarn and tension
Eyes: Two small black flat buttons or safety eyes
Tapestry or yarn needle
Stitch markers
Sharp scissors
Sewing pins
Finished Size and Customization
The finished square measures approximately 5.5–6 inches (14–15 cm) when made with worsted-weight yarn and a 4.0 mm hook. Your final dimensions may vary with yarn thickness and tension.
Personalize the square to suit your project:
Autumn patchwork: Combine it with pumpkin, ghost, and Frankenstein squares for a seasonal blanket.
Decorative hat: Sew on a tiny sunflower, autumn leaf, or ribbon patch.
Different expressions: Embroider a curved smile, a zigzag mouth, or X-shaped eyes for a primitive country style.
Small finished projects: Join two to four squares for a trick-or-treat tote, fall pillow cover, or seasonal wall hanging.
Pattern Abbreviations and Terminology
The pattern uses US crochet terms.
MR: Magic ring
ch: Chain
sl st: Slip stitch
sc: Single crochet
hdc: Half double crochet
dc: Double crochet
tr: Treble crochet
BLO: Back loop only
Third loop: An additional loop behind the back loop of a stitch; working into it can create a raised ridge
st/sts: Stitch/stitches
sp: Space
inc: Increase; work two stitches into the same stitch
How to Crochet the Scarecrow Granny Square
The square is made in separate parts: a circular face, a contrasting square background, a tapered hat, and small facial appliqués. The hair is attached to exposed loops around the face, giving it a textured fringe.
Part 1: Crochet the Face Circle
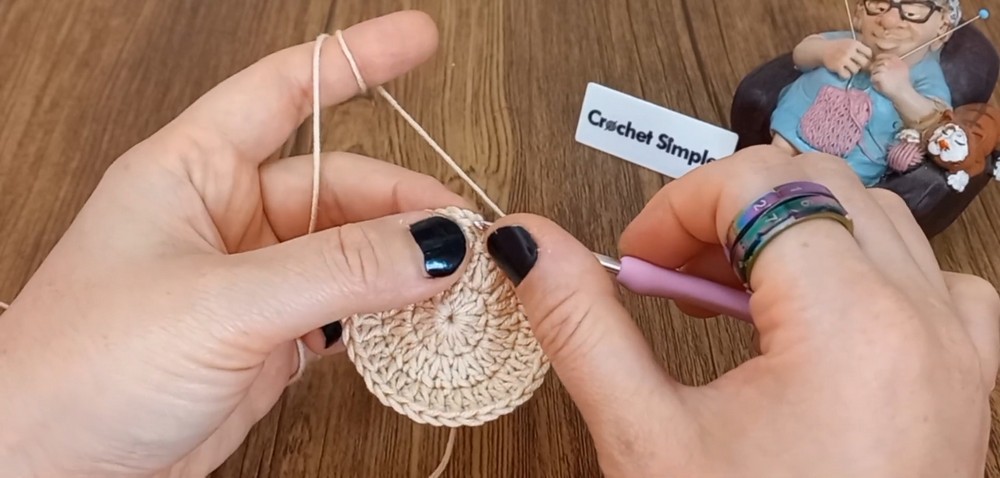
Use beige or cream yarn. These first three rounds create the circular face that will sit inside the square.
Round 1: Make a magic ring and ch 3; this beginning chain counts as one dc. Work 11 dc into the ring. Pull the yarn tail tightly to close the center, then sl st into the third chain of the beginning ch-3. (12 dc)
Round 2: Ch 3, then work 1 dc into the same base stitch. Work 2 dc into each remaining stitch around. Join with a sl st into the third chain of the beginning ch-3. (24 dc)
Round 3: Ch 3, then work 1 dc into the same base stitch and 1 dc into the next stitch. Repeat 2 dc in the next stitch, 1 dc in the following stitch around. Join with a sl st into the top of the beginning ch-3. Fasten off and cut the yarn. (36 dc)
Check that the circle lies reasonably flat before moving on. A tightly pulled center and even stitches help the face sit neatly inside the background.
Part 2: Add the Background and Square Corners
Switch to your chosen background color. This section turns the circular face into a square and creates a raised ridge for attaching the hair fringe.
Round 4: Attach the background yarn with a slip knot in any stitch, working through the back loop and third loop as specified in the source pattern.
Ch 5; this counts as 1 dc and a ch-2 corner space.
Work 2 dc in the next stitch.
Along the side, work 1 hdc in each of the next 2 stitches, 1 sc in each of the next 3 stitches, and 1 hdc in each of the next 2 stitches.
For the corner, work 2 dc in the next stitch, ch 2, then 2 dc in the next stitch.
Repeat the side sequence and corner sequence around the square.
Along the final side, work 2 hdc, 3 sc, and 2 hdc.
Finish with 1 dc into the base of the initial ch-5 space. Join with a sl st into the third chain of the beginning ch-5.
Round 5: Sl st into a corner ch-2 space.
Ch 6; this counts as 1 tr and a ch-2 corner space. Work 2 tr into the same corner space.
Work 1 dc into each stitch along the side until you reach the next corner.
In the corner ch-2 space, work 2 tr, ch 2, and 2 tr.
Repeat across the remaining sides and corners.
At the final corner, work 1 tr into the starting corner space just before the beginning chain.
Join with a sl st into the fourth chain of the beginning ch-6.
Fasten off and weave in all loose ends.
Before continuing: Lay the square on a flat surface and check that the corners are visible and the edges are not curling excessively. Gentle blocking after assembly can help even out the shape.
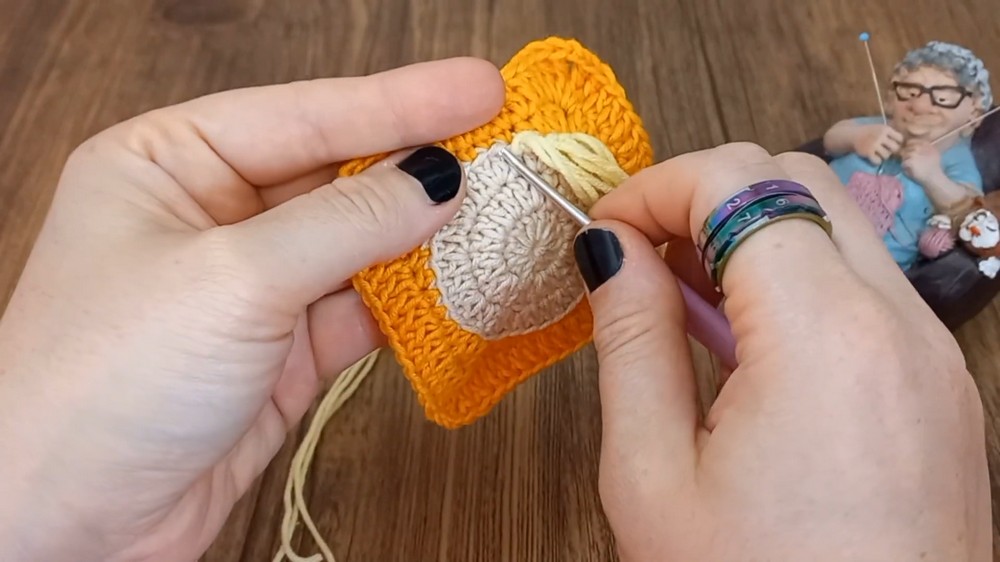
Part 3: Crochet the Slouchy Brown Hat
Use brown yarn and work flat in rows. Skipping stitches at both ends gradually narrows the piece into a tapered hat.
Foundation: Ch 13.
Row 1: Sc in the second chain from the hook and in each chain across. Ch 1 and turn. (12 sc)
Row 2: Skip the first stitch, sc in each of the next 8 stitches, skip 1 stitch, then sc in the final stitch. Ch 1 and turn. (10 stitches)
Row 3: Skip the first stitch, sc in each of the next 6 stitches, skip 1 stitch, then sc in the final stitch. Ch 1 and turn. (8 stitches)
Row 4: Skip the first stitch, sc in each of the next 5 stitches, skip 1 stitch, then sc in the final stitch. Ch 1 and turn. (7 stitches)
Row 5: Skip the first stitch, sc in each of the next 4 stitches, skip 1 stitch, then sc in the final stitch. Ch 1 and turn. (6 stitches)
Row 6: Skip the first stitch, sc in each of the next 3 stitches, skip 1 stitch, then sc in the final stitch. Ch 1 and turn. (5 stitches)
Row 7: Skip the first stitch, sc in each of the next 2 stitches, skip 1 stitch, then sc in the final stitch. Ch 1 and turn. (4 stitches)
Row 8: Skip the first stitch, sc in the next stitch, skip 1 stitch, then sc in the final stitch. Fasten off, leaving a long tail for sewing.
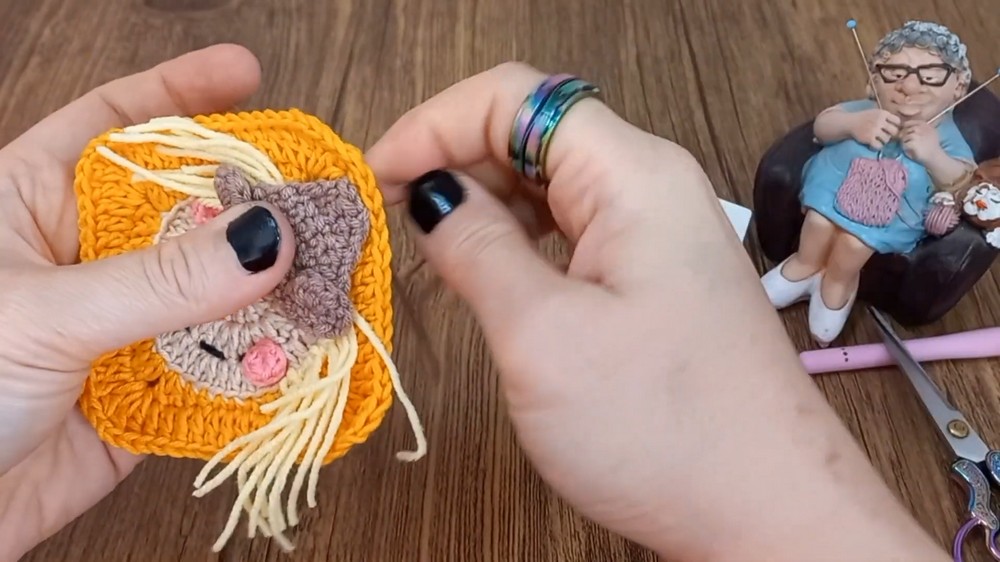
Add the Scalloped Hat Brim
Reattach brown yarn with a sl st at one bottom corner of the hat.
Ch 1 and skip 1 stitch.
Repeat 3 hdc in the next stitch, sl st in the following stitch across the bottom foundation chain to create a scalloped edge.
Fasten off and weave in the starting tail.
The ruffle gives the hat a soft, decorative edge. Keep the scallops facing outward so they remain visible when the hat is placed over the hairline.
Part 4: Make the Facial Appliqués
Triangle Nose
Using orange yarn:
Ch 5.
Work 1 hdc in the second chain from the hook.
Work 1 sc in each of the next 2 chains.
Work 1 sl st in the final chain.
Fasten off, leaving an 8-inch tail for sewing.
This creates a narrow triangular shape. Position it with the point facing upward when attaching it to the face.
Round Cheeks – Make 2
Using pink yarn:
Make a magic ring and ch 1.
Work 5 sc into the ring.
Pull the center closed.
Fasten off, leaving a tail for sewing.
Make two matching circles for rosy cheeks. Keep the yarn tension consistent so both appliqués are similar in size.
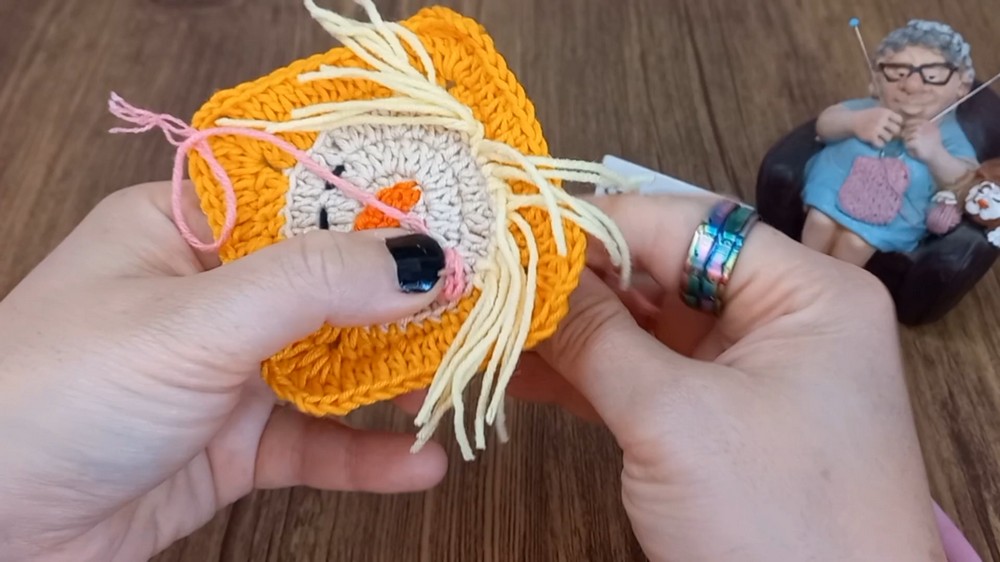
Assemble the Scarecrow Granny Square
Step 1: Attach the Straw Hair
Cut several strands of yellow yarn approximately 3–4 inches (8–10 cm) long.
Insert the hook through the exposed front loops left around Round 3 of the face, focusing on the top and upper sides. Fold one strand in half and pull its center loop through a stitch. Draw both loose ends through that loop and tighten gently to form a lark’s head knot.
Repeat along the hairline, adding enough strands to create a full fringe. Leave the lower face clear so the cheeks and smile remain visible.
Step 2: Sew on the Nose, Smile, Cheeks, and Eyes
Arrange the facial features before sewing them down. Use pins to test the expression and keep the placement balanced.
Nose: Center the orange triangle on the face with its point facing upward. Sew it flat with a tapestry needle.
Smile: Use black yarn to backstitch a gentle curve across the lower third of the face. Add a few short vertical stitches along the curve to suggest rustic scarecrow stitching.
Cheeks: Position one pink circle on either side of the smile, slightly above its corners. Whipstitch both in place.
Eyes: Sew two small black buttons horizontally above the nose, or attach safety eyes according to their package instructions.
Keep the facial features clear of the square’s outer edges so they are less likely to be hidden when squares are joined together.
Step 3: Position and Attach the Hat
Fold the tapered tip of the brown hat slightly to one side for a relaxed, slouchy look.
Place the hat across the top third of the face, with its scalloped brim resting over the roots of the straw hair. Use sewing pins to hold it in place and check that the eyes, nose, and cheeks remain visible.
Using the long brown yarn tail, sew through the hat and the square backing. Secure the edges carefully so the hat stays attached when the square is handled or joined into a larger pattern. Fabric adhesive can be used as an alternative if appropriate for the finished item and its intended care.
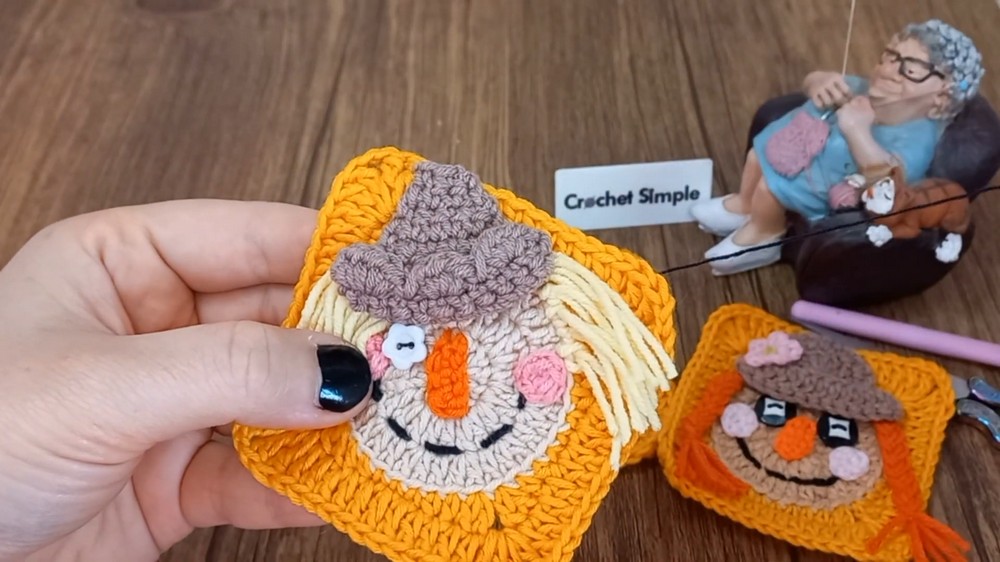
Step 4: Trim and Shape the Fringe
Use sharp scissors to trim the yellow strands into a slightly uneven, tousled hairstyle. A little variation in length gives the scarecrow a rustic character, while trimming away very long strands keeps the face easy to see.
Avoid cutting too close to the securing knots. Check the fringe from the front and sides, then make small adjustments until the hair frames the cheeks evenly.
Finishing and Blocking
Weave in any remaining yarn ends on the back of the square. Lay the finished piece flat and gently shape its corners and sides to even out the dimensions.
If your yarn is suitable for steam blocking, use steam cautiously without pressing the iron directly onto the stitches. Follow the yarn manufacturer’s care guidance, especially if the yarn contains acrylic or other heat-sensitive fibers. Allow the square to cool and dry completely before joining it to other motifs.
Your scarecrow granny square is now ready to become part of an autumn blanket, a fall pillow cover, a trick-or-treat tote, or a seasonal wall hanging. Combining its raised straw fringe, scalloped hat, and embroidered expression with simpler granny squares lets this cheerful character stand out in a handmade fall pattern.