Need a small crochet motif with plenty of personality? These 9 cm cat squares combine simple stitches with three different feline designs.
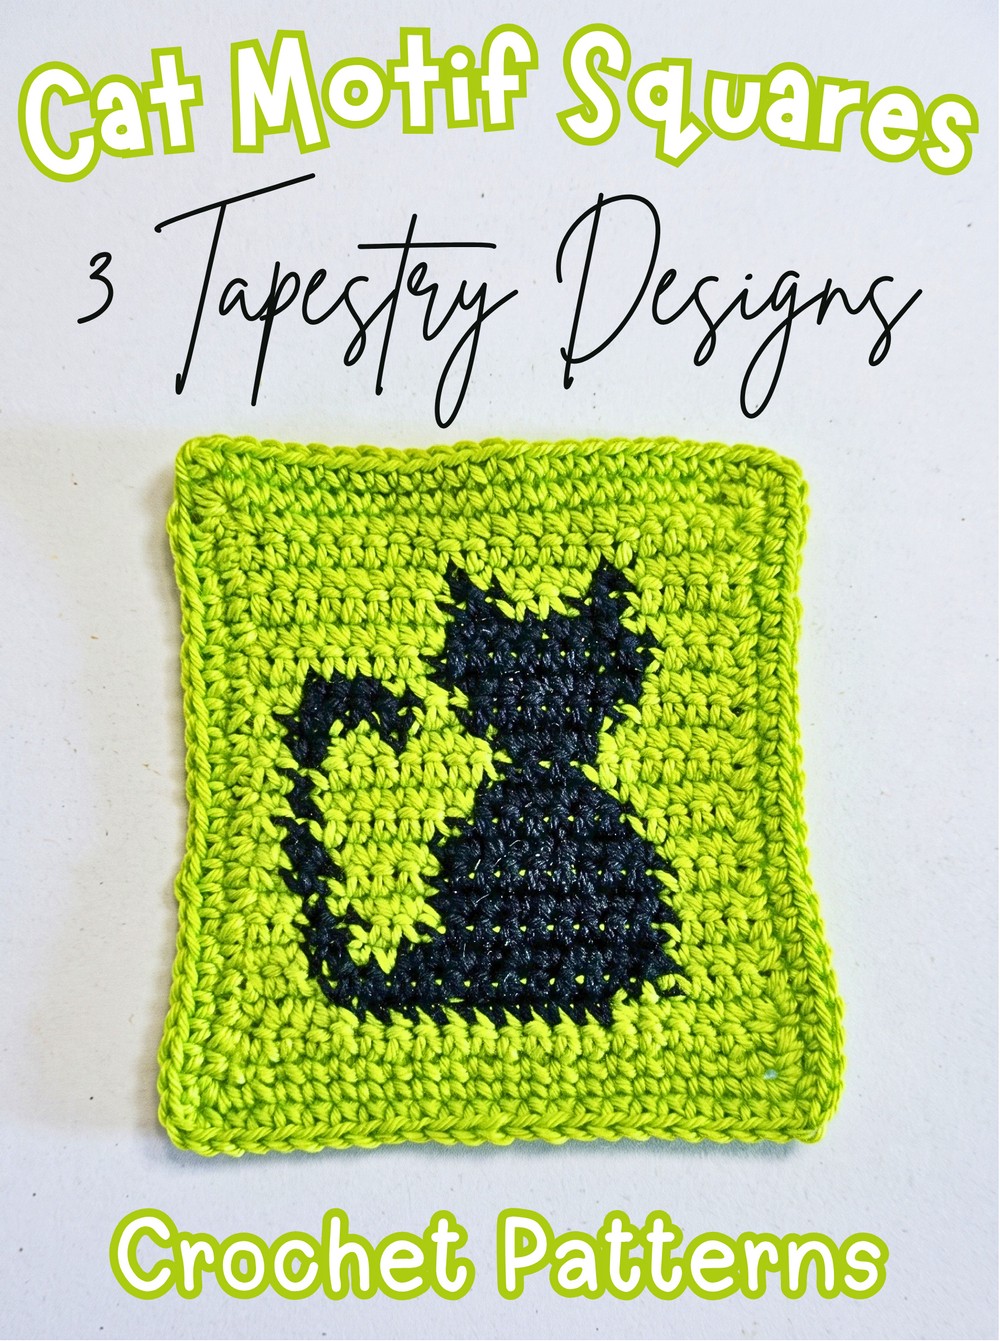
Working simple single crochet into a tiny cat design gives these 9 cm squares much more personality than their size suggests. Three different feline motifs, contrasting cotton colors, and a neat tapestry crochet technique make each square fun to build and easy to combine with the others.
Choosing how many squares to make is part of the appeal here. Mix the three designs, change the color combinations, and arrange the finished crochet pieces for bags, cushion covers, blankets, or cardigans. The tutorial below keeps every row at 21 single crochet stitches while guiding you through the color changes, turning method, border, and invisible finish.
Credit Hook & Loop Crochet Tutorials
Materials & Tools Needed
- Yarn: 100% cotton yarn in two contrasting colors.
- Color A: Background color
- Color B: Cat motif color
- Crochet Hook: 2.0 mm hook, chosen according to the yarn weight
- Tapestry Needle: For joining and weaving in ends
- Scissors: For cutting the yarn
Keep the Colorwork Consistent
Every row across the three designs contains 21 single crochet stitches. Throughout the pattern, carry the unused yarn inside the stitches rather than cutting it whenever the color changes continue.
For a color change, work the last single crochet in the old color until two loops remain on the hook. Pull the new color through those two loops to complete the stitch. This keeps the color transition in the correct place and allows the carried yarn to stay hidden inside the work.
When starting a new row, there is no chain 1. Instead, pull the working loop up slightly, turn the piece, and work the first single crochet directly into the very first stitch. Keeping this turning method consistent helps the edges stay aligned.
Pattern Abbreviations
- ch = chain
- sc = single crochet
- st(s) = stitch(es)
- Color A = Background color
- Color B = Motif color
Choose Your Cat Motif
Each design uses the same basic 21-stitch width but creates a different cat image through its color placement. If you are making several squares, working all three designs gives you more variation when arranging them later.
Cat Design 1
Rows 1-2 – Build the base: With Color A, ch 21 + 1 (22 chains total); starting in the 2nd ch from the hook, work 1 sc in each stitch across for Row 1 (21 sts), then pull up a loop, turn, and work 1 sc in the same first stitch and 1 sc in each stitch across for Row 2 (21 sts).
Row 3: 4 sc Color A, change to Color B and work 14 sc, 3 sc Color A.
Row 4: 4 sc Color A, 11 sc Color A, 1 sc Color A, 2 sc Color B, 3 sc Color A.
Row 5: 2 sc Color A, 2 sc Color B, 2 sc Color A, 10 sc Color A, 5 sc Color A.
Row 6: 5 sc Color A, 9 sc Color A, 3 sc Color A, 2 sc Color B, 2 sc Color A.
Row 7: 2 sc Color A, 2 sc Color B, 4 sc Color A, 8 sc Color A, 5 sc Color A.
Row 8: 5 sc Color A, 7 sc Color A, 5 sc Color A, 2 sc Color B, 2 sc Color A.
Row 9: 3 sc Color A, 2 sc Color B, 5 sc Color A, 7 sc Color A, 4 sc Color A.
Row 10: 4 sc Color A, 6 sc Color B, 5 sc Color A, 2 sc Color B, 4 sc Color A.
Row 11: 5 sc Color A, 2 sc Color B, 6 sc Color A, 4 sc Color B, 4 sc Color A.
Row 12: 4 sc Color A, 3 sc Color B, 6 sc Color A, 2 sc Color B, 6 sc Color A.
Row 13: 6 sc Color A, 3 sc Color A, 6 sc Color A, 2 sc Color B, 4 sc Color A.
Row 14: 3 sc Color A, 4 sc Color B, 5 sc Color A, 2 sc Color B, 7 sc Color A.
Row 15: 7 sc Color A, 2 sc Color B, 4 sc Color A, 6 sc Color B, 2 sc Color A.
Row 16: 2 sc Color A, 6 sc Color B, 4 sc Color A, 2 sc Color B, 7 sc Color A.
Row 17: 2 sc Color A, 1 sc Color B, 4 sc Color A, 2 sc Color B, 4 sc Color A, 6 sc Color A, 2 sc Color A.
Row 18: 2 sc Color A, 2 sc Color B, 2 sc Color A, 2 sc Color B, 5 sc Color A, 2 sc Color B, 2 sc Color A, 2 sc Color B, 2 sc Color A.
Row 19: 3 sc Color A, 4 sc Color B, 6 sc Color A, 1 sc Color B, 4 sc Color A; cut the Color B tail here.
Rows 20–21: With Color A, work 1 sc in each stitch across each row.
Teaching Guide: Keep checking the 21-stitch width as the motif develops. The Color B sections are what create the cat image, so their placement matters more than the appearance of the carried yarn inside the work. After Row 19, Color B is cut because the remaining rows return fully to the background color.

Cat Design 2
Rows 1–2: With Color A, ch 21 + 1 and work 2 full rows of single crochet stitches, keeping 21 sts in each row.
Row 3: 6 sc Color A, 10 sc Color A, 5 sc Color A.
Row 4: 4 sc Color A, 13 sc Color A, 4 sc Color A.
Row 5: 4 sc Color A, 10 sc Color A, 2 sc Color A, 2 sc Color B, 3 sc Color A.
Row 6: 3 sc Color A, 2 sc Color B, 3 sc Color A, 9 sc Color A, 4 sc Color A.
Row 7: 4 sc Color A, 9 sc Color A, 4 sc Color A, 1 sc Color B, 3 sc Color A.
Row 8: 2 sc Color A, 2 sc Color B, 4 sc Color A, 9 sc Color A, 4 sc Color A.
Row 9: 4 sc Color A, 9 sc Color A, 4 sc Color A, 2 sc Color B, 2 sc Color A.
Row 10: 2 sc Color A, 1 sc Color B, 6 sc Color A, 7 sc Color B, 5 sc Color A.
Row 11: 6 sc Color A, 5 sc Color B, 7 sc Color A, 1 sc Color B, 2 sc Color A.
Row 12: 2 sc Color A, 1 sc Color B, 8 sc Color A, 3 sc Color B, 7 sc Color A.
Row 13: 6 sc Color A, 5 sc Color A, 3 sc Color A, 1 sc Color B, 2 sc Color A, 2 sc Color B, 2 sc Color A.
Row 14: 2 sc Color A, 5 sc Color B, 2 sc Color A, 7 sc Color A, 5 sc Color A.
Row 15: 4 sc Color A, 9 sc Color A, 2 sc Color A, 3 sc Color B, 3 sc Color A.
Row 16: 8 sc Color A, 9 sc Color A, 4 sc Color A.
Row 17: 5 sc Color A, 7 sc Color A, 9 sc Color A.
Row 18: 9 sc Color A, 2 sc Color B, 3 sc Color A, 2 sc Color B, 5 sc Color A.
Row 19: 5 sc Color A, 1 sc Color B, 5 sc Color A, 1 sc Color B, 9 sc Color A.
Rows 20–21: With Color A, work 2 full rows of single crochet stitches.
Teaching Guide: This design has several rows where Color A is divided into multiple consecutive sections. Those sections are still worked in the same background color; follow the written sequence without treating each Color A group as a separate color change. Keeping the 21-stitch total intact will help the motif stay centered.
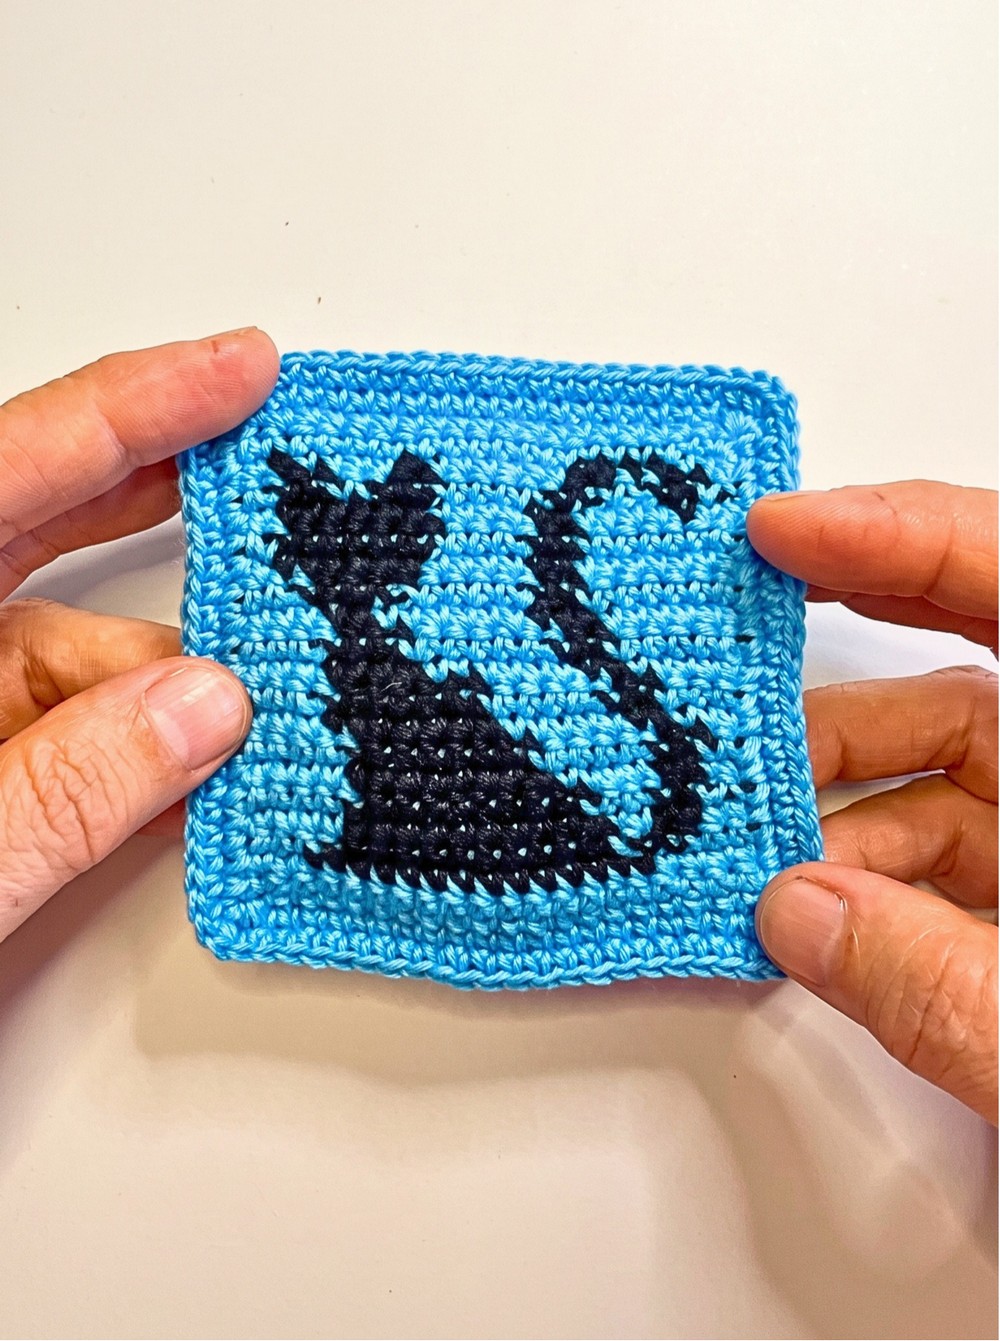
Cat Design 3
Rows 1–2: With Color A, ch 21 + 1; work a row of single crochet stitches, pull up a loop, turn, work 5 sc Color A, change to Color B and work 3 sc, then 4 sc Color A, 3 sc Color B, and 6 sc Color A.
Row 3: 7 sc Color A, 2 sc Color B, 5 sc Color A, 2 sc Color B, 5 sc Color A.
Row 4: 5 sc Color A, 2 sc Color B, 5 sc Color A, 2 sc Color B, 7 sc Color A.
Row 5: 7 sc Color A, 2 sc Color B, 5 sc Color A, 3 sc Color B, 4 sc Color A.
Row 6: 4 sc Color A, 3 sc Color B, 5 sc Color A, 3 sc Color B, 6 sc Color A.
Row 7: 6 sc Color A, 3 sc Color B, 5 sc Color A, 3 sc Color B, 4 sc Color A.
Row 8: 4 sc Color A, 4 sc Color B, 3 sc Color A, 4 sc Color B, 6 sc Color A.
Row 9: 6 sc Color A, 11 sc Color B, 4 sc Color A.
Row 10: 4 sc Color A, 11 sc Color B, 6 sc Color A.
Row 11: 5 sc Color A, 12 sc Color B, 4 sc Color A.
Row 12: 4 sc Color A, 14 sc Color B, 3 sc Color A.
Row 13: 2 sc Color A, 5 sc Color B, 1 sc Color A, 7 sc Color B, 1 sc Color A, 2 sc Color B, 3 sc Color A.
Row 14: 3 sc Color A, 2 sc Color B, 2 sc Color A, 5 sc Color B, 2 sc Color A, 5 sc Color B, 2 sc Color A.
Row 15: 2 sc Color A, 5 sc Color B, 10 sc Color A, 2 sc Color B, 2 sc Color A.
Row 16: 2 sc Color A, 2 sc Color B, 10 sc Color A, 2 sc Color B, 1 sc Color A, 2 sc Color B, 2 sc Color A.
Row 17: 2 sc Color A, 1 sc Color B, 3 sc Color A, 1 sc Color B, 6 sc Color A, 2 sc Color B, 2 sc Color A, 2 sc Color B, 2 sc Color A.
Row 18: 2 sc Color A, 2 sc Color B, 3 sc Color A, 2 sc Color B, 12 sc Color A.
Row 19: 12 sc Color A, 2 sc Color B, 2 sc Color A, 2 sc Color B, 3 sc Color A.
Row 20: 3 sc Color A, 5 sc Color B, 13 sc Color A.
Row 21: With Color A, work 1 sc in each stitch across.
Teaching Guide: This motif builds through larger blocks of Color B in the middle rows, so the cat image becomes more visible as you move upward. Keep the work facing the same direction when reading each row and continue carrying the unused color inside the stitches. The 21-stitch width remains your main check throughout.
Give Every Square a Clean Border
After completing Row 21 of any design, do not tie off. Continue directly into the border using Color A.
Work 1 sc evenly into the sides of each row down the left side, across the bottom chain, up the right side, and across the top. At every corner, place 3 sc into the corner stitch.
The three stitches at each corner give the border enough room to turn without pulling the square inward. As you work around the piece, keep an eye on whether the edges remain flat and the corners stay defined.

Finish the Border Invisibly
When you reach the beginning of the border, cut the yarn and leave a small tail. Thread the tail onto the tapestry needle, skip the first stitch of the border, and pass the needle under both loops of the second stitch. Then take the needle down through the back loop only of the final stitch you made.
This creates a seamless-looking join instead of leaving an obvious raised finishing stitch.
Tidy the Back
Turn the square to the back and use the tapestry needle to weave the starting and ending tails securely back and forth through the stitches. Once the ends are held firmly, trim away the excess yarn.
The tapestry crochet technique keeps the carried yarn hidden inside the stitches, while this final weaving step takes care of the loose tails left at the edges.
Finished Size and Ways to Use the Squares
Each completed square measures approximately 9 cm by 9 cm (3.5 inches by 3.5 inches).
Make as many squares as you need for the item you have in mind. The three cat designs can be mixed together, while changing the two contrasting colors can give the same motifs a completely different look.
Use the squares for bags, cushion covers, blankets, or cardigans, arranging the motifs in a combination that suits the finished item.