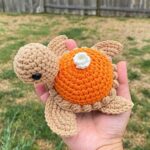
Create a quick and easy crochet acorn amigurumi for fall decor! This fun and simple pattern is perfect for adding a cozy autumn touch to your home.

Soft autumn colors and a classic crochet acorn shape come together in this delightful handmade design that fits perfectly into seasonal decorating. The rounded base, textured cap, and tiny stem give it a natural look while keeping every step simple and enjoyable. As each section comes together, the finished crochet piece begins to capture the cozy spirit of fall.
This crochet pattern turns a few basic materials into a decoration that works beautifully in bowls, garlands, table displays, or thoughtful handmade gifts. The shaping stays easy to follow, while the final assembly brings every detail together for a polished result. By the final stitch, this little crochet autumn favorite is ready to become a charming addition to any seasonal collection.
Credit Hopeful Turns
Materials Needed
- Yarn: Two colors (creamish brown for base, dark brown for cap).
- Stuffing: Poly-fiber stuffing or scrap yarn.
Tools
- Crochet Hook: Size E (3.5 mm) hook (recommended: smaller than the yarn label’s hook size).
- Stitch Marker (or alternative, like a bobby pin).
- Scissors
- Yarn Needle.
Abbreviations & Techniques
- ch: Chain
- sc: Single Crochet
- inc: Increase (2 sc in same stitch)
- dec / sc2tog: Decrease (single crochet 2 together)
- sl st: Slip Stitch
- Magic Circle: Adjustable loop to start in the round
- Continuous Rounds: Work without slip stitching between rounds
- Front Loops Only: For securing closed edges.

Pattern Overview & Making Process
The pattern begins by crocheting the acorn base with creamish brown yarn. A magic circle forms the center, followed by increase rounds to build the shape and several even rounds to add height. The base is gradually stuffed before the opening is closed tightly, creating a smooth and rounded finish.
Next, the cap and stem are made with dark brown yarn. The stem is formed first using chains and slip stitches, then the cap is worked in continuous rounds with increases and a small decrease round to create its curved shape. A long yarn tail is left at the end to make assembly easier.
To finish, the cap is turned right side out and placed over the stuffed base for a snug fit. It can be sewn securely in place or left removable, depending on your preference. Once assembled, the completed acorn is ready to display on its own or pair with other fall-themed handmade decorations.
Step-by-Step Pattern Instructions
Part 1: Acorn Base (Creamish Brown Yarn)
Round Instructions
- Round 1: Start with a magic circle.
- Ch 1, then work 6 sc into the magic ring. (6 stitches)
- TIP: Do not fully tighten the loop yet.
- Round 2: Increase round.
- Work 2 sc in each stitch around. (12 stitches)
- Now pull the magic circle tightly closed.

- Round 3: Simple round.
- Work 1 sc in each stitch around. (12 stitches)
- Flip the piece so the correct side faces out.
- Round 4: Increase round.
- Repeat [1 sc, 2 sc in next stitch] six times. (18 stitches)
- Rounds 5-7: Build height.
- Work 1 sc in each stitch around for 3 rounds. (18 stitches per round)

- Round 8: Begin decreasing.
- Repeat [1 sc, 1 dec (sc2tog)] six times. (12 stitches)
- Start adding stuffing to the piece.
- Round 9: Close the base.
- Work 6 decreases (6 dec) in a row. (6 stitches)
- Cut a long tail and use a yarn needle to thread the tail through the front loops of the last 6 stitches.
- Pull the tail tight to close the hole, tie securely, and weave in the yarn end.

Part 2: Acorn Cap with Stem (Dark Brown Yarn)
Stem Formation
- Begin with a slip knot and ch 6.
- Skip the 1st chain, then sl st into the remaining 5 chains.
- Ch 3, and then sl st into the first chain to form a small ring.

Acorn Cap
- Round 1: Starting in the ch-3 circle:
- Ch 1, then work 6 sc into the circle. (6 stitches)
- Round 2: Increase round.
- Work 2 sc into each stitch around. (12 stitches)
- Round 3: Increase round.
- Repeat [1 sc, 2 sc in next stitch] six times. (18 stitches)
- Round 4: Slight decrease.
- Repeat [4 sc, 1 dec] three times. (15 stitches)
- Round 5: Simple round.
- Work 1 sc in each stitch around. (15 stitches)
- Slip stitch into the next stitch, then leave a long yarn tail for assembly.

Part 3: Assembly
- Flip the Cap: Insert your hook into the center and gently pull the stem out to flip the cap right-side out.
- Place the cap over the stuffed base, adjusting to ensure a snug fit.
- Optional:
- Sew the cap’s edge to the base using the long dark brown yarn tail for a secure attachment.
- Or leave the cap removable by skipping the sewing step.

Customization & Variations
- Removable Cap: Skip sewing to make the cap detachable.
- Yarn Choice: Use any texture or weight (adjust hook size accordingly).
- Stuffing Substitute: Use scrap yarn instead of stuffing for a thrifty alternative.
Optional Add-Ons
- Crochet oak leaves to create an autumn-themed set.
- Use embroidery to embellish with textures or small designs on the cap.