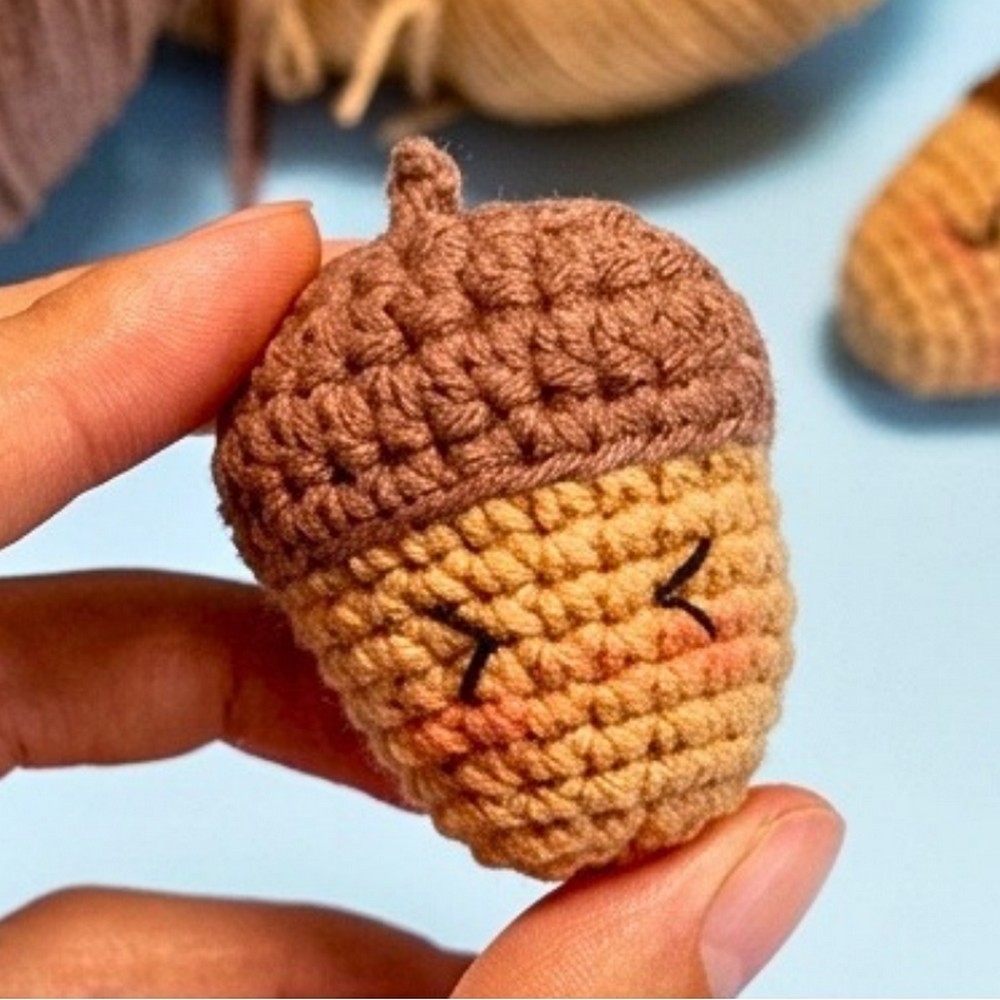
Love tiny autumn crochet? This 2-inch acorn amigurumi turns simple continuous rounds into a sweet woodland decoration, keychain, or no-sew seasonal gift.
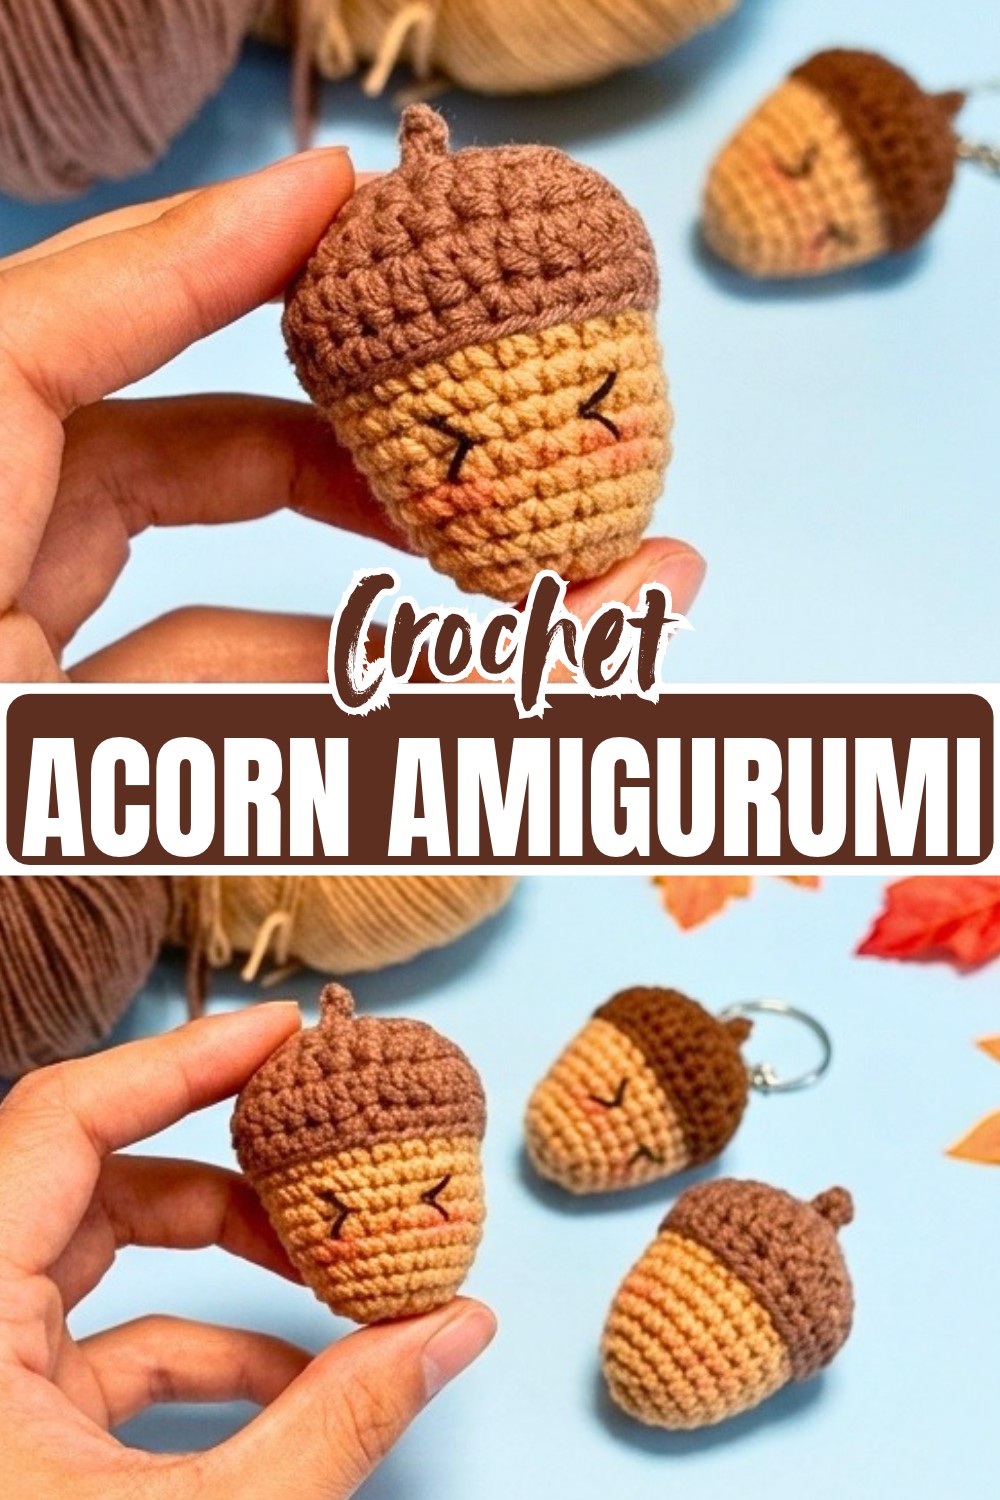
Small enough to fit in the palm of your hand, this crochet acorn gets its character from the contrast between a dark textured cap and a light brown body. The cap and body are worked together, so there is no separate crochet piece to sew onto the acorn later.
As you work through the pattern, you’ll learn how to create the cap, change colors directly into the body, form the overlapping cap edge with BLO stitches, and shape the crochet acorn with simple decreases. A little embroidery at the end can turn the same acorn into a cheerful character, or you can leave the face off for a more natural woodland look.
Credit ToysByValerie
Materials and Tools
- Sport weight yarn, such as YarnArt Jeans 50g/160m
- Dark Brown for the acorn cap and stem
- Light Brown or Beige for the acorn body
- 2.5 mm or 3.0 mm crochet hook
- Polyester fiberfill or similar stuffing
- Black embroidery thread for the face
- Optional pink yarn or cosmetic blush for the cheeks
- Keychain ring and attachment chain
- Yarn needle
- Stitch marker
- Scissors
Finished Size and Ways to Use It
The finished acorn is approximately 2–2.5 inches tall, although the final size will vary with your yarn and hook.
Its small size makes it especially useful for:
- A handmade autumn keychain
- Seasonal garlands
- Thanksgiving table scatter
- Small fall gifts
- Rustic woodland displays
For a more realistic acorn, simply leave off the embroidered eyes, mouth, and cheeks.
Pattern Abbreviations
- mc: Magic circle
- ch: Chain
- sc: Single crochet
- ss: Slip stitch
- inc: Increase – 2 sc in the next stitch
- dec: Decrease – sc 2 stitches together, preferably using an invisible decrease
- hdc: Half double crochet
- BLO: Back loop only
- ( ): Total number of stitches at the end of the round
Crochet the Acorn Cap
Begin with Dark Brown yarn.
This piece is worked in continuous rounds, so place a stitch marker in the first stitch of each round and move it upward as you work. There are no joining slip stitches between the rounds.
Round 1: Make a magic circle and work 6 sc into the mc. (6 sts)
Round 2: Inc in each stitch around. (12 sts)
Round 3: (1 sc, 1 inc) repeat 6 times around. (18 sts)
Round 4: (2 sc, 1 inc) repeat 6 times around. (24 sts)
Rounds 5–6: Sc in each stitch around for 2 rounds. (24 sts each round)
Change From Cap to Body
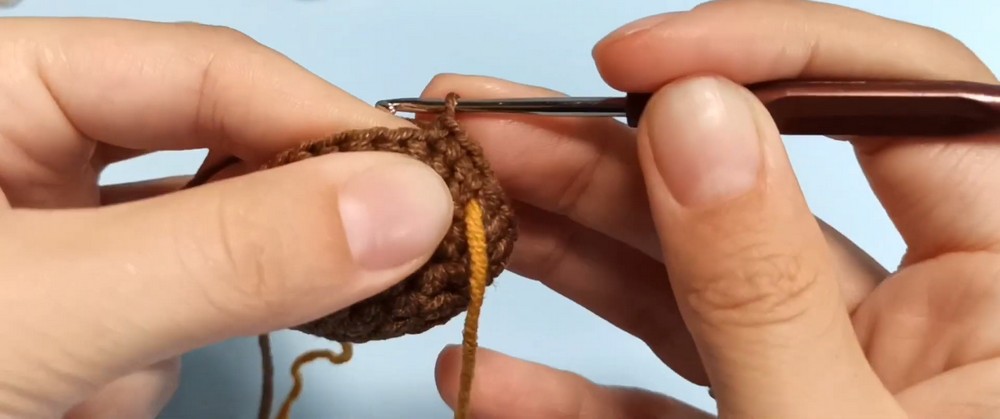
At the end of Round 6, make a seamless color change to Light Brown.
Do not fasten off the dark brown yarn. The light brown acorn body will continue directly from the cap, which is what gives this pattern its simple no-sew transition.
Create the Acorn’s Overlapping Cap Edge
The next round is where the two sections begin to look distinctly like an acorn.
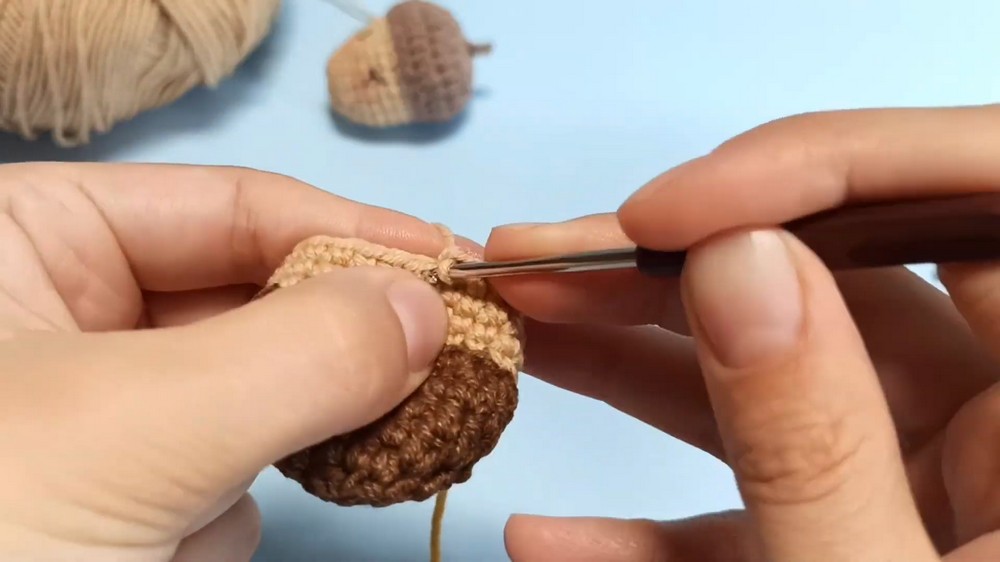
Round 7: Working in BLO, sc in each stitch around. (24 sts)
Working into the back loops here creates a defined ridge between the dark cap and light body. It also gives the cap edge a slightly overlapping appearance rather than making the color change look like a simple straight stripe.
Continue the Acorn Body
Rounds 8–11: Working through both loops, sc in each stitch around. (24 sts each round)
The body will remain the same width through these rounds before the decreases begin narrowing it toward the bottom.
Round 12: (2 sc, 1 dec) repeat 6 times around. (18 sts)
Round 13: (1 sc, 1 dec) repeat 6 times around. (12 sts)
Stuff Before the Opening Gets Small
Pause after Round 13 and fill the acorn with fiberfill.
Push the stuffing into the lower part of the body first, then add enough to give the acorn a firm, rounded shape. It is much easier to distribute the stuffing now than after the opening has narrowed further.
The body should feel plump without stretching the stitches so much that the stuffing becomes visible.
Finish the Bottom
Round 14: Sc in each stitch around. (12 sts)
Round 15: Dec around 6 times. (6 sts)
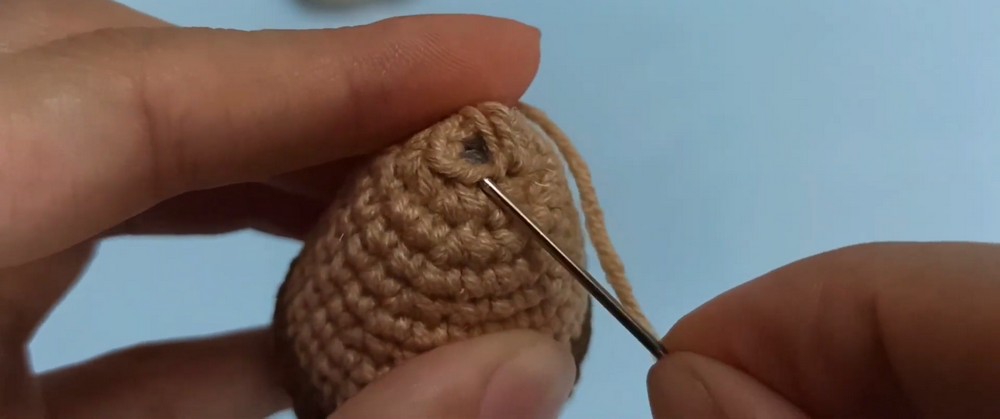
Fasten off, leaving a long yarn tail.
Thread the tail onto your yarn needle and weave it through the front loops of the remaining 6 stitches. Pull the yarn firmly to close the opening completely.
Weave the remaining tail inside the acorn and secure it.
Add the Little Acorn Stem
The stem is worked directly onto the center of the dark brown cap rather than crocheted as a separate piece.
Attach the Dark Brown yarn to the center top of the cap, right in the middle of the Round 1 magic circle.
Step 1: Ch 4.
Step 2: Starting in the second chain from the hook, work 1 ss in each of the 3 chains back toward the cap.
Step 3: Ss into the original starting space on the cap to secure the stem.
Fasten off.
Pull the yarn tails through to the inside of the cap using your hook or yarn needle. Tie them securely, then hide the ends inside the stuffing.
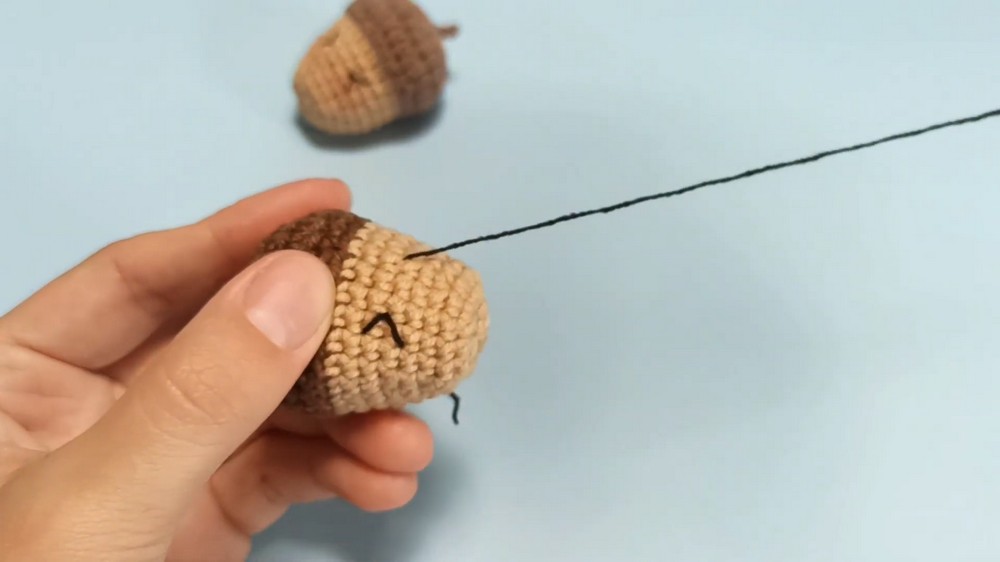
Check the Stem Before Moving On
Look at the acorn from the front and top. The stem should sit directly over the center of the cap rather than leaning toward one side. Because it is only a few stitches long, even a small shift is noticeable on such a tiny piece.
Give Your Acorn a Friendly Face
The face is optional, so decide whether you want a character-style acorn or a more natural decoration before adding the embroidery.
Embroidered Eyes
Using black embroidery thread, stitch two small vertical lines between Rounds 9 and 10 of the body.
Leave approximately 3 stitches between the eyes and pass over each line 2–3 times so the eyes look clear and substantial.
Tiny Smile
Using the same black thread, stitch a small V-shaped smile directly below the eyes.
Keep the stitches short—the face is tiny, so a few simple stitches are enough.
Rosy Cheeks
For a soft, playful finish, add a tiny amount of cosmetic blush with a cotton swab just outside and slightly below the eyes.
If you prefer an entirely crocheted or embroidered finish, use pink yarn to make two small cheek marks instead.
Turn It Into an Acorn Keychain
Once all the yarn ends are secure, attach the hardware to the dark brown cap.
Use a metal keyring with its attachment chain. Position the attachment point just to the side of the crocheted stem and secure it through the cap stitches.
If needed, use a yarn needle to help open a stitch enough to pass the attachment through without stretching the surrounding stitches.
Before using the acorn as a keychain, make sure the hardware is firmly attached and that the yarn tails are completely secured inside.
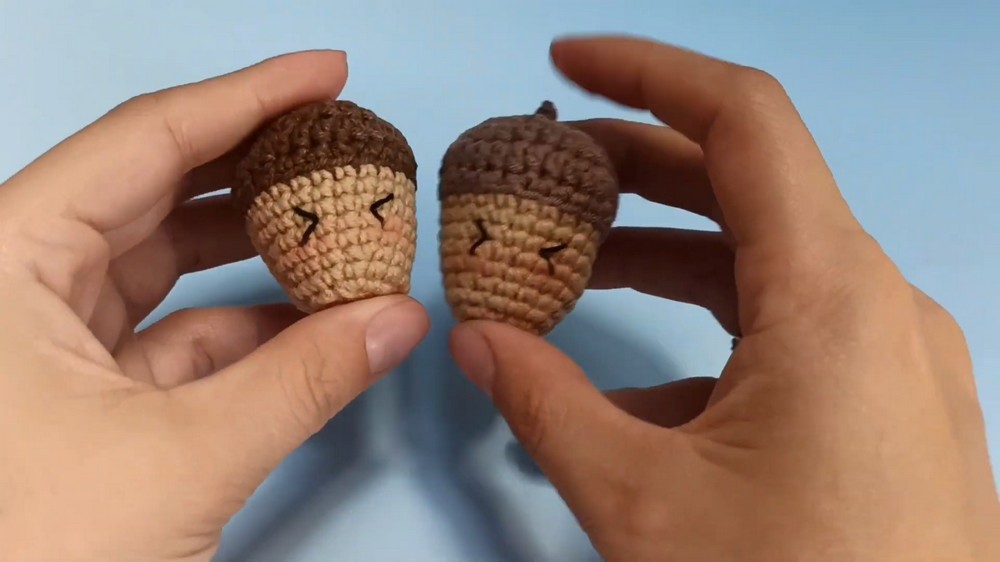
Choose the Look You Want
One of the nicest things about this tiny acorn is that the same pattern can give you two very different finishes.
Leave off the face and use natural brown and beige shades for a rustic autumn accent. Add the eyes, smile, and cheeks when you want a playful woodland character for a keychain, gift, or seasonal garland.
Because the cap and body are worked continuously, the finished acorn already has its defining shape before any extra decoration is added. That makes the final details optional rather than essential to the design.