Need a palm-sized crochet axolotl with rosy gills, a pointed tail, safety eyes, and a sweet embroidered face using simple amigurumi rounds.
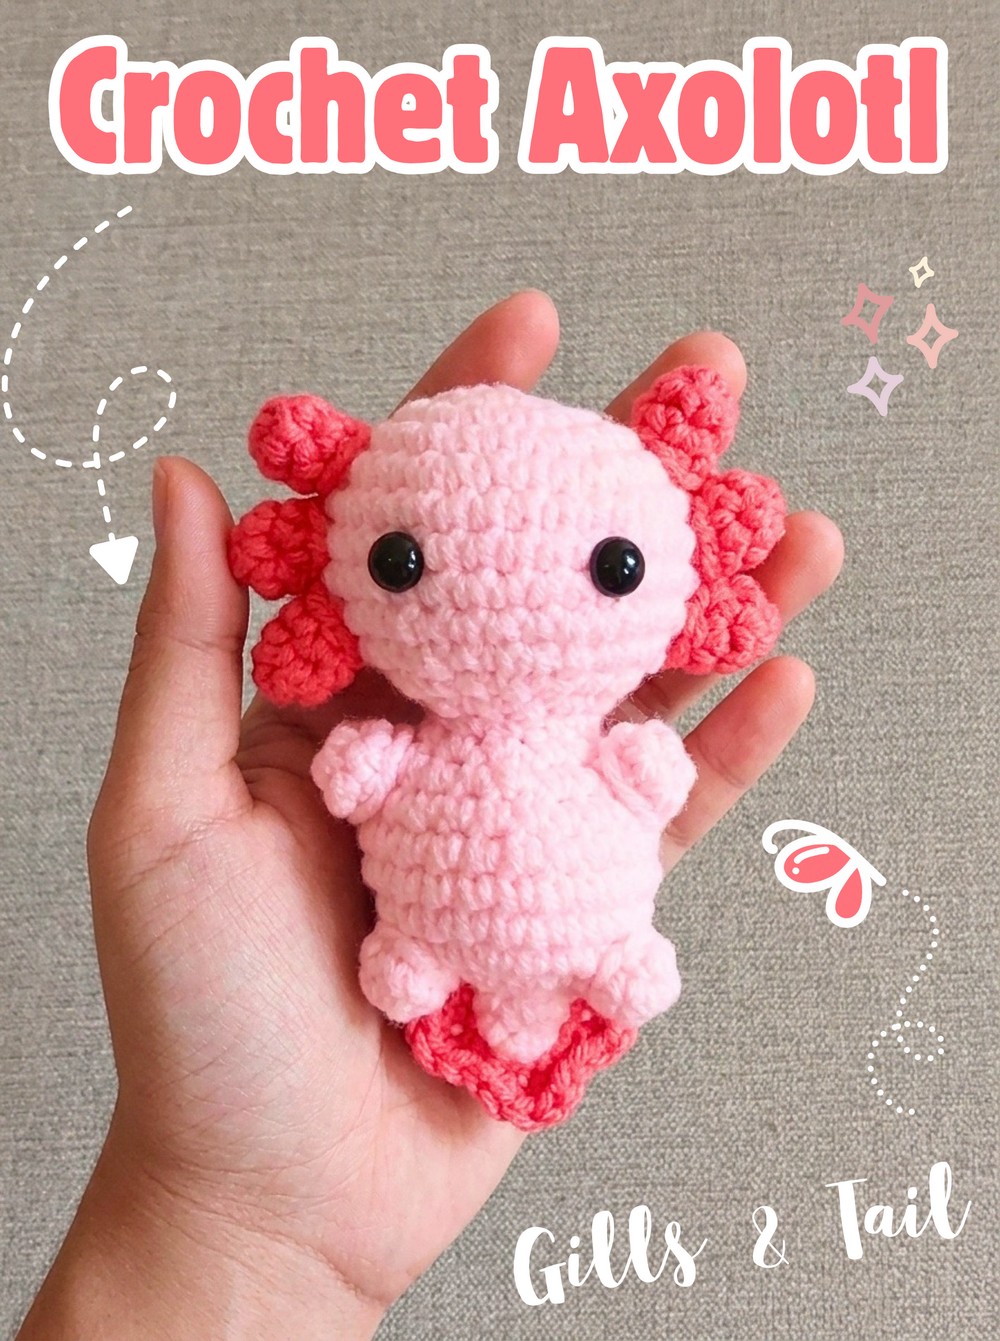
Those little side gills and rounded body are what give a crochet axolotl its unmistakable look. Worked in light pink with watermelon-pink details, this amigurumi has a soft, playful shape that is easy to customize once the basic crochet pieces are finished.
The pattern takes you through the head, tapered body, six unstuffed gills, four small limbs, and the tail detail before bringing everything together. Along the way, you’ll also see exactly where to place the safety eyes, how firmly to stuff the pieces, and how to position the parts so the finished crochet axolotl sits neatly.
Credit Tedzukurida
Materials & Tools Needed
- Yarn: Milk Cotton Yarn in Light Pink for the main body and Watermelon Pink for the gills and tail detail
- Crochet Hook: 3.00 mm
- Safety Eyes: 8 mm
- Thread/Floss: Black embroidery floss for the mouth
- Stuffing: Fiberfill
- Tools: Yarn stitch marker, sewing needle, thread, and scissors
Finished Size & Customization
Using milk cotton yarn with a 3.00 mm crochet hook creates a classic palm-sized amigurumi axolotl.
For a much larger, extra-plush version, you can substitute super bulky velvet or chenille yarn and use a larger hook, such as a 5.00 mm or 6.00 mm hook. The pattern proportions remain the same while the finished axolotl becomes considerably larger and softer.
Pattern Abbreviations
- MR: Magic Ring
- Rnd: Round
- Ch: Chain
- Sc: Single Crochet
- Inc: Increase – 2 sc in the same stitch
- Dec: Decrease – crochet 2 stitches together
- Slst: Slip Stitch
- FO: Fasten Off
- (…): Total stitch count at the end of the round
- (…) x N: Repeat the sequence in parentheses N times

Part 1: Crochet the Components
Crochet the Head
Work the head in Light Pink.
Rnd 1: 6 sc in MR. (6)
Rnd 2: (Inc) x 6. (12)
Rnd 3: (Sc, inc) x 6. (18)
Rnd 4: (2 sc, inc) x 6. (24)
Rnd 5: (3 sc, inc) x 6. (30)
Rnd 6: (4 sc, inc) x 6. (36)
Rnd 7–11: Sc all around. (36)
Rnd 12: (4 sc, dec) x 6. (30)
Rnd 13: (3 sc, dec) x 6. (24)
Rnd 14: (2 sc, dec) x 6. (18)
Finishing: Slst into the next stitch. FO, leaving a long tail for sewing. Stuff the head firmly.
Place the Safety Eyes Carefully
Insert the 8 mm safety eyes between Rnd 8 and Rnd 9, leaving 6 stitches between them.
Before securing the backs, check the head from the front. Both eyes should sit on the same horizontal level and remain centered rather than drifting toward either side.
Teaching Guide: Use the Rounds as Your Positioning Guide
When counting the six stitches between the eyes, count the stitches themselves rather than the spaces between them. Taking a moment to verify the placement before attaching the backs is worthwhile because the gills will later frame both sides of the face.
Crochet the Body
Work the body in Light Pink, starting from the bottom and moving upward.
Rnd 1: 6 sc in MR. (6)
Rnd 2: (Sc, inc) x 3. (9)
Rnd 3: Sc all around. (9)
Rnd 4: (2 sc, inc) x 3. (12)
Rnd 5: (Sc, inc) x 6. (18)
Rnd 6: (2 sc, inc) x 6. (24)
Rnd 7: (3 sc, inc) x 6. (30)
Rnd 8–11: Sc all around. (30)
Rnd 12: (3 sc, dec) x 6. (24)
Rnd 13: Sc all around. (24)
Rnd 14: (2 sc, dec) x 6. (18)
Rnd 15: Sc all around. (18)
Finishing: Slst into the next stitch and FO. Stuff the body firmly, making sure the bottom point holds its shape.

Keep the Body Point Defined
The first rounds create the pointed bottom of the body, so avoid overstuffing that area until you are happy with its shape. Add fiberfill gradually and press it into the narrow point so the tip remains distinct.
The body should be firm enough to support the axolotl when it is sitting, but the stitches should not be stretched so far that the stuffing becomes visible.
Make the Arms and Legs
Make 4 pieces in Light Pink.
Rnd 1: 5 sc in MR. (5)
Rnd 2–4: Sc all around. (5)
Finishing: Slst, FO, and leave a tail for sewing. Do not stuff.
Keep these pieces unstuffed so they can be flattened and sewn neatly against the body.

Make the Gills
Make 6 pieces in Dark Pink.
Rnd 1: 4 sc in MR. (4)
Rnd 2: (Sc, inc) x 2. (6)
Rnd 3: Sc all around. (6)
Finishing: Slst, FO, leaving a tail for sewing. Flatten the pieces; do not stuff.
Flattening the gills before attaching them gives you a wider base for sewing and helps them fan outward instead of appearing like small tubes.

Crochet the Tail Fin Detail
Work the tail fin in Dark Pink.
Row 1: Ch 15.
Row 2: Starting in the second chain from the hook, work: (Slst, 2 sc in next st, slst) across the chain to create the ruffled look.
Finishing: FO, leaving a long tail for sewing.
Part 2: Assemble and Sew the Axolotl
1. Join the Head and Body
The direction of the body is important here: the pointed end must face exactly backward.
Align the 18 stitches of the head’s neck opening with the 18 stitches of the body. Pin the pieces together so the face looks straight ahead while the pointed body end angles toward the back.
Using the long tail from the head, whip stitch through both loops of the body and head all the way around. Before closing the final stitches, add a final small amount of stuffing if needed, then pull the seam closed securely.
Teaching Guide: Check the Direction Before Sewing
Do not rely only on the shape of the pieces when pinning them together. Look at the axolotl from the front and confirm that the face is pointing forward and the pointed body section is behind it.
This small check prevents a frustrating assembly mistake that is much harder to correct after the entire neck seam has been sewn.
2. Attach the Gills
The gill placement creates much of the recognizable axolotl appearance.
Take three Dark Pink gills and pin them to one side of the head, beginning just behind the eye on Rnd 9. Angle them slightly backward and keep the three pieces close together so they form a vertical fan.
Sew them securely around their flattened bases using a whip stitch. Repeat the same placement on the opposite side of the head with the remaining three gills.
Get the Gill Fan Even
Before sewing each set permanently, look at the head straight from the front. The three gills on each side should read as a group rather than being spread too far apart.
Matching the angle and starting position on both sides will make the finished face look more balanced.
3. Sew the Arms and Legs
For a sitting posture, pin the two arms to the upper sides of the body, exactly one round below the neck seam. Sew their flattened openings directly to the body.
Pin the two legs to the lower front sides of the body, around Rnd 6 from the bottom, with the legs pointing slightly outward.
Sew them securely in place and check that the axolotl can balance on its bottom point and legs.
4. Attach the Tail Fin Detail
Pin the Dark Pink ruffled tail piece beginning at the very bottom tip of the body. Run it vertically up the center of the back for approximately 8 rounds.
Using its long yarn tail, sew the fin firmly along the center line of the back.
5. Embroider the Face
Thread the black embroidery floss onto your needle. Insert the needle from the back of the neck so the knot remains hidden inside.
Bring the needle out exactly between the eyes, one round below them, and embroider a small, shallow V-shaped smile across approximately 2–3 stitches.
Tie off and hide the thread tails inside the body.
Final Face Check
Hold the finished axolotl at eye level and check the face before trimming any remaining tails. The eyes should be level, the smile should sit centrally beneath them, and the gills should frame the head evenly.

With the limbs positioned slightly outward and the tail fin running neatly down the back, the completed axolotl should have the rounded, seated shape that makes this little amigurumi so charming.