Create a spooky yet adorable spider and web with this simple crochet project! Perfect for Halloween decor, this design combines charm and practicality.
Ideal for beginners and crochet enthusiasts alike, the spider and web are customizable to fit any theme or color scheme you need.

This crochet spider and web are perfect for Halloween decorations, party props, or even gifting. With its sturdy design and playful appearance, the web exhibits durability, while the spider’s intricate legs add character.
Use it as wall decor, table accents, or pair it with other crafts for fun versatility.
Materials and Preparation
To start, gather the following materials:
- Yarn for the web: White or other spooky colors (cotton DK weight is recommended).
- Yarn for the spider: Black yarn works best, but feel free to experiment with other colors.
- Crochet hooks:
- 4mm crochet hook for the web
- Same size or slightly smaller for the spider (to keep it tight).
- Other tools:
- Yarn needle (for weaving in ends and attaching the spider)
- Scissors
- Optional: Stitch markers for ease in larger rounds.
Abbreviations and Notes
Here are the abbreviations used in the pattern:
- CH = Chain
- SC = Single Crochet (US) / Double Crochet (UK)
- DC = Double Crochet (US) / Treble Crochet (UK)
- DTR = Double Treble Crochet (US) / Triple Treble Crochet (UK)
- SL ST = Slip Stitch
- YO = Yarn Over

Important Notes:
- This pattern uses US terminology, so adjust based on your preferences.
- The pattern alternates between rows and rounds for the spider’s web. Adjust your tension to ensure even rows.
Gauge, Approximate Size, and Pattern Notes
- Gauge: Precision isn’t critical for this pattern; it’s more about consistent tension.
- Approximate Size (based on DK-weight yarn and a 4mm hook):
- Web: Can be adjusted (tutorial covers increases step-by-step). Basic size starts at ~8 inches in diameter.
- Spider: Approximately 2–3 inches across, including the legs.
- Techniques Included:
- Magic circle (for a neat start).
- Increasing in rounds (for the web).
No gauge swatch is necessary for this project.
Step-by-Step Pattern
Part 1: Crochet the Spider Web
Step 1: Begin with a Magic Circle
- Using your white yarn, create a magic circle (MC).
- CH 2 (counts as first DC), followed by 7 DC into the MC.
- Pull the MC tight and SL ST to the top of the CH 2.
You now have a small circle with 8 evenly spaced stitches.
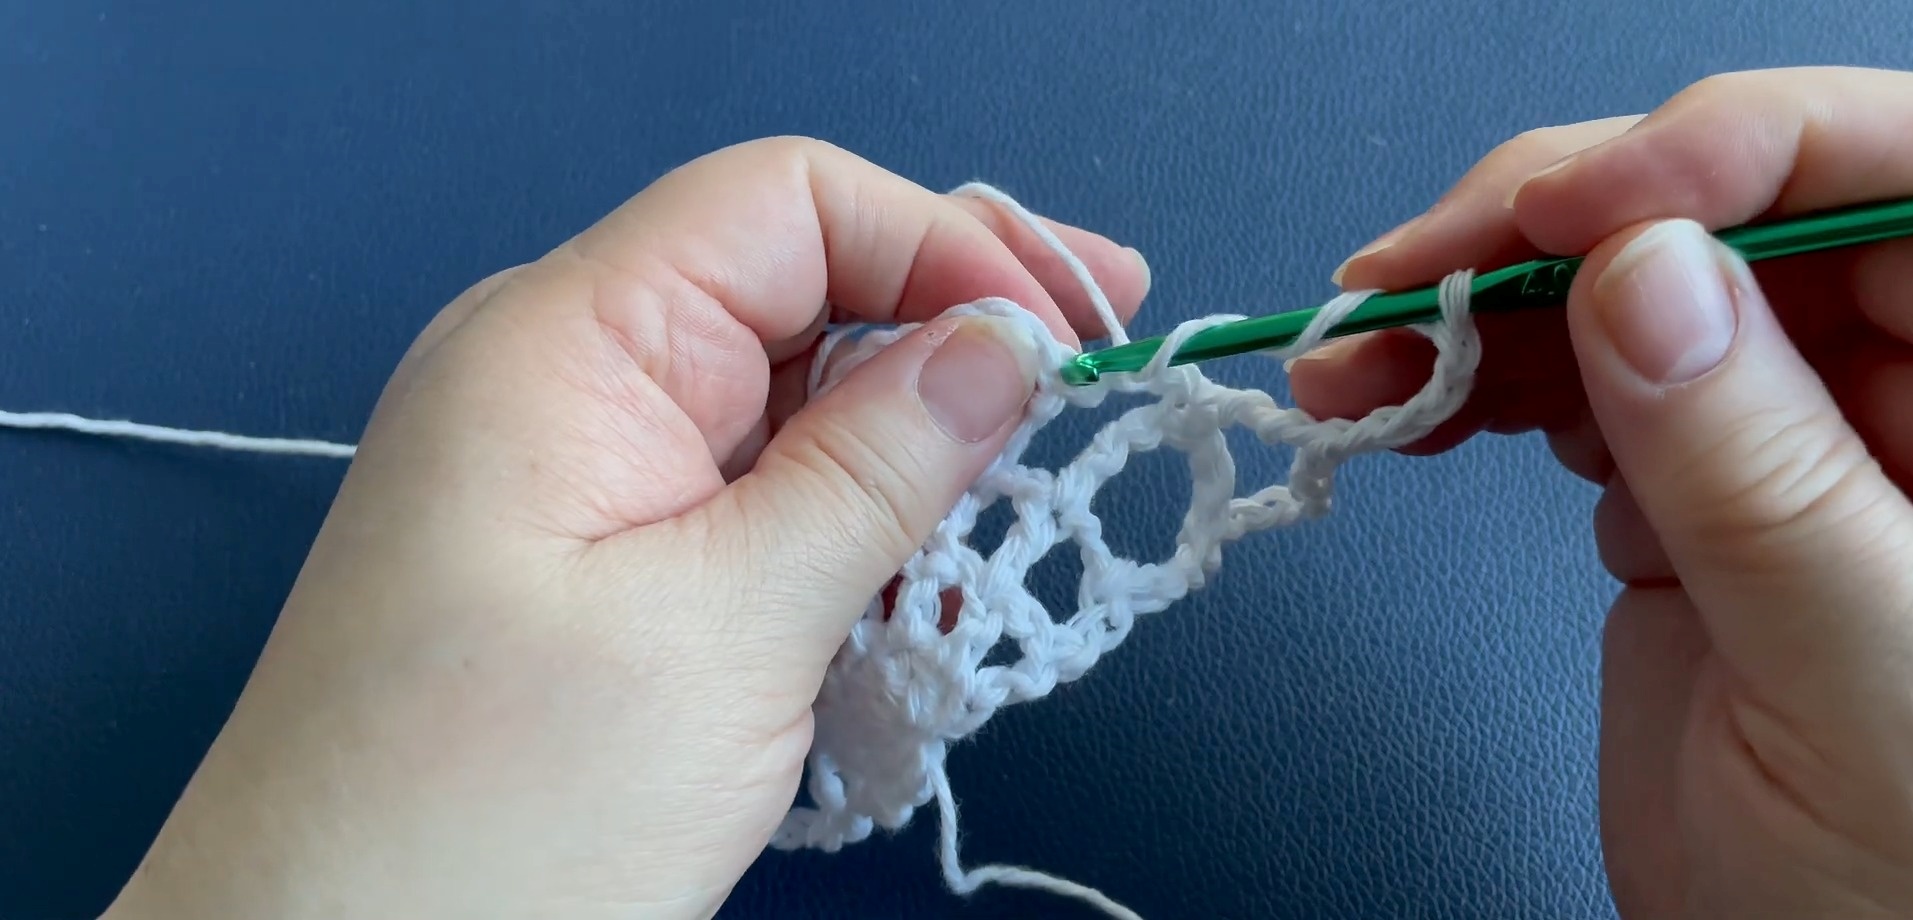
Step 2: Begin Row 1
- CH 2 (counts as first DC), then CH 1 (forms the chain space).
- (DC in the next stitch, CH 1) repeat this sequence in each stitch around.
- Join with a SL ST to the second chain of the first DC.
Step 3: Begin Increasing with Rows
Increase progressively to grow your spider web:
- Row 2: CH 2, CH 2 (chain space increases), (DC in next stitch, CH 2) repeat around. (8 spokes formed).
- Row 3: Increase CH between posts. (3 CH this round, 4 CH the next, etc.)
- Continue as large as desired: Increase CH chain spaces by 1 in each subsequent row for a gradual web effect.
Tip: Keep your magic circle pulled taut as you work to maintain the web’s tension.

Part 2: Crochet the Spider
Step 1: Crochet the Body
- Create a magic circle with black yarn.
- CH 2, followed by 12 DC into the MC.
- Pull the MC closed tightly.
- SL ST to the top of the first DC to close the circle.
You now have the spider’s body, a small circle.

Step 2: Form the Spider’s Head
- CH 2. DC into the same stitch as the chain.
- DC into the next stitch.
- SL ST into the following stitch.
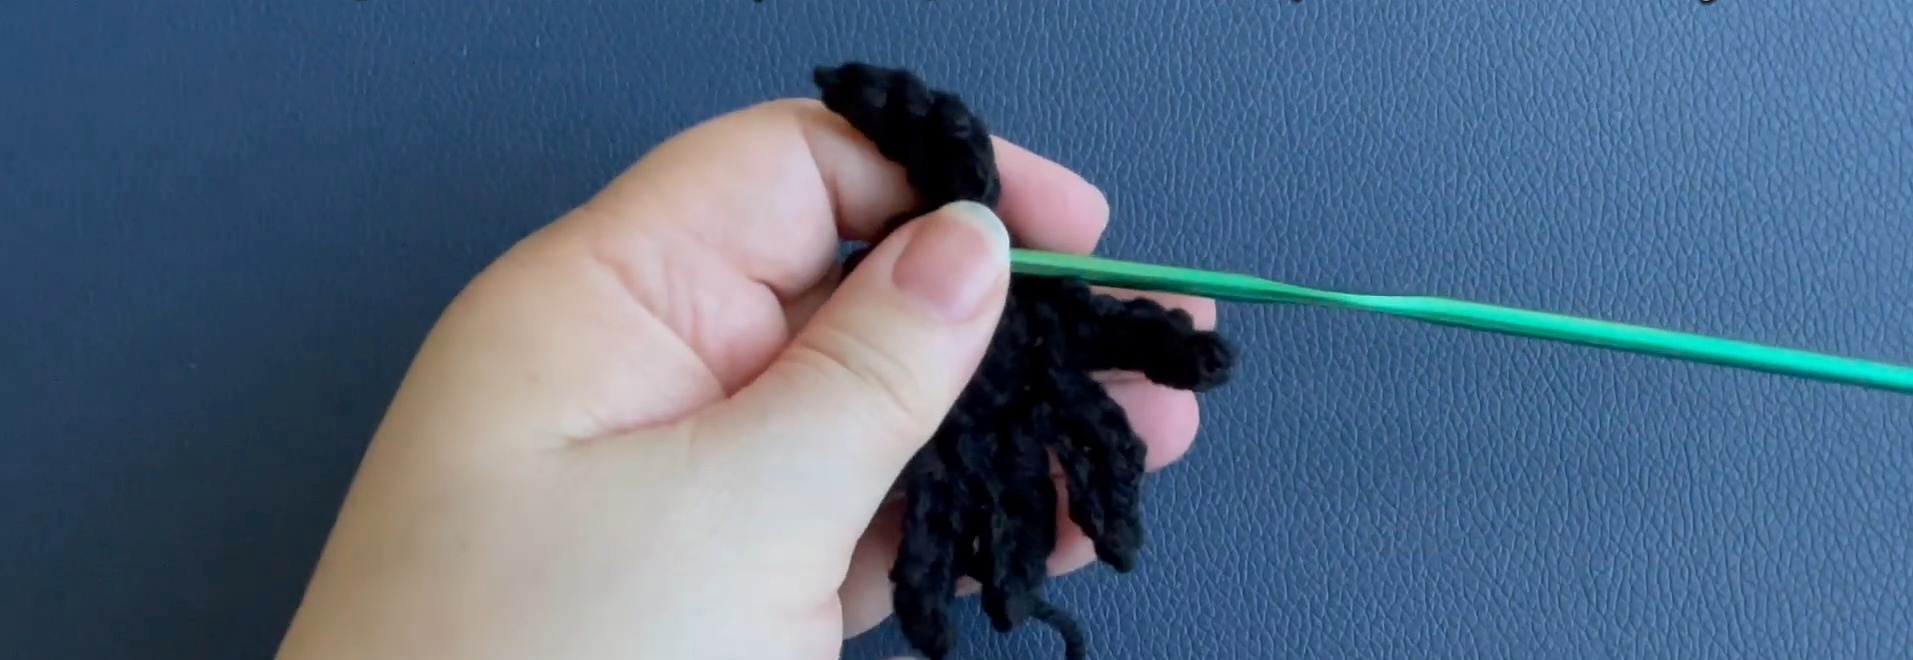
Step 3: Add the Spider’s Legs
Here’s how to create the legs:
- SL ST into the next stitch.
- CH 6 (front leg, make slightly longer).
- SC into the second CH from the hook.
- SC into the next 2 stitches.
- Add 2 SC in the next CH (creates a “bend” in the leg).
- SC in the last CH and SL ST back to the original stitch.
Repeat this process for three additional legs down one side of the spider.
Step 4: Mirror the Legs on the Opposite Side
- Skip to the opposite side of the starting MC.
- Work a symmetrical set of 4 legs. Tip: Turn the spider gently to get the leg bends facing outward.
Step 5: Add Eyes (Optional)
- Thread a needle with white yarn.
- Add small stitches to the spider’s head to create “eyes.”

Finishing the Project
- Attach the spider to the web, or leave it as a standalone applique.
- Use long yarn tails or hot glue to secure the web and spider to wreaths, walls, or other Halloween decorations.
Key to Success
- Use a 4mm crochet hook for a fine and neat finish.
- Master the magic circle technique for the web base.
- Follow the step-by-step chain increases to get the spider web’s symmetry.
- Adjust leg sizes and shapes to add personality to your spider.
- Securely weave in the ends to ensure durability.
- Customize colors to match your Halloween theme or personal preference.
Conclusion:
Crocheting this spider and web is an enjoyable and creative way to add Halloween charm to your home. With clear steps and options to customize the design, it’s a fun project suitable for all skill levels. Give it a try and craft your own spooky yet adorable masterpiece!