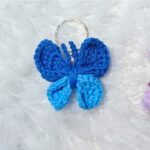
Want to make a tiny crochet bow with big charm? This easy tutorial shows you how to turn simple stitches into a cute keychain for bags, keys, or lanyards.

This crochet bow keychain brings classic bow charm into crochet without requiring complicated shaping. With basic crochet stitches and simple folding, you can create something small enough for everyday use while still giving it plenty of personality. Crochet makes it easy to explore different yarn textures and colors, so each bow can suit your own style.
If you enjoy making useful little accessories, this crochet design offers plenty of room for customization. Try velvet or chenille yarn for plush texture, pastel or metallic threads for a polished look, or switch from keychain hardware to a brooch pin for another way to wear your finished bow.
What You Will Make
Finished size is approximately 2 to 3 inches wide, keeping this bow compact and lightweight for keys, bags, or lanyards.
The design begins with one rectangular crocheted piece. Instead of shaping individual bow sections, you create pleats by folding both outer edges toward center. Wrapping yarn around the pinched middle then gives bow its defined center band.
Yarn and Hook Choices
Use lightweight or medium-weight yarn, such as 4-ply milk cotton or DK yarn, in your preferred bow color.
Choose either 3.0 mm or 4.0 mm crochet hook, matched to your yarn weight.
For finishing and attachment, keep these notions nearby:
- Tapestry needle for weaving in ends
- Scissors
- Keychain ring, clasp, or jump ring finding
Pattern Abbreviations
Keep these terms handy while following instructions:
- Ch: Chain stitch
- Sl st: Slip stitch
- Sc: Single crochet
- Hdc: Half double crochet
- St(s): Stitch(es)
- FO: Fasten off

Build the Rectangular Bow Body
Create the Foundation Loop
Begin by making slip knot on your hook, leaving 6 inches of yarn tail.
Work 21 chains for your foundation. If you want different bow width, adjust chain length according to desired finished size.
Join chain into round by working slip stitch into very first chain stitch. Take care not to twist chain before joining.
Alternative: If you prefer constructing flat panel, work back and forth in rows instead of joining foundation chain into round.
Work Basic Stitches Evenly
Chain 1; this chain does not count as stitch.
Work 1 sc or 1 hdc into each stitch all around foundation loop.
Join with slip stitch to top of first stitch.
Continue working evenly spaced rows or rounds of basic stitches until rectangular piece reaches desired thickness for bow.
The important visual checkpoint here is simple: you want one rectangular crocheted piece that can be folded inward from both outer edges. Keep your rows or rounds even enough for clean pleating during assembly.
Fasten Off With Long Tail
When rectangular piece reaches desired thickness, fasten off.
Cut yarn while leaving 10-12 inches of yarn tail. Pull yarn tight to secure.
Keep this long tail available because it will become part of bow assembly rather than being trimmed away immediately.
Turn Rectangle Into Bow Shape
Fold Both Sides Toward Center
Take finished rectangular piece and bring both outer edges inward toward exact center.
Overlap edges slightly to form crisp center pleats resembling bow shape.
Check center before wrapping yarn. Both sides should gather toward middle so bow has recognizable left and right sections.
Wrap Center With Long Tail
Use long yarn tail left from fastening off.
Wrap it tightly around pinched center multiple times. Keep wraps close together so they form neat, defined center band.
This wrapped section holds folded shape together while giving center of bow its finished appearance.
Secure Back of Bow
Pass tapestry needle and yarn tail securely through back wraps.
Tie firm knot, then weave in all remaining loose ends cleanly on back side.
Attach Keychain Hardware
Choose your preferred finding: metal keychain ring or lobster clasp.
Secure hardware through back loops of center band or attach it through small chain loop.
Check attachment point before using finished bow so hardware sits securely against center band.
Give Your Bow Its Own Look
Once basic bow shape is familiar, yarn choice can completely change its character without changing core assembly.
- Velvet or chenille yarn: Creates plush, chunky bow texture.
- Pastel threads: Gives bow soft, delicate styling.
- Metallic threads: Adds chic, polished detail.
- Brooch pin: Replace keychain ring with brooch pin so bow can be worn as hair clip or clothing accessory.
These options let same bow concept move beyond keys and become another small handmade accessory.