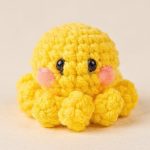
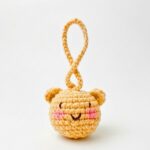
Give your keys or bag a cuddly winter touch with this tiny crochet polar bear, complete with rounded ears, a sweet embroidered face, and a soft white finish.

little polar crochet bear keychain makes an adorable handmade accessory for backpacks, purses, and zipper pulls. Its white rounded head, tiny folded ears, and simple black nose create a recognizable bear face without needing a separate body, making it a lovely choice for small gifts or animal-themed crochet collections. You can also adjust the yarn thickness to make a slightly larger plush bear while keeping its charming features.
This tutorial walks you through crocheting the ears, shaping the head from a magic ring, and making a small muzzle that adds dimension to the face. You will also learn where to position the safety eyes, how to close the stuffed head neatly, and how to attach the keychain hardware securely. Helpful placement checks make assembly easier and help the finished crochet bear look balanced.
Credit: Blossom Crochet Accessories
Materials & Tools Needed
- Yarn: Sport- to DK-weight yarn in white, preferably a cotton/polyester blend or acrylic.
- Black Yarn: A small amount for embroidering the nose and mouth.
- Crochet Hook: 1.75 mm.
- Safety Eyes: One pair of small safety eyes, approximately 4–5 mm.
- Stitch Marker: To mark the first stitch of each continuous round.
- Tapestry Needle: For sewing the pieces together and embroidering the face.
- Scissors: For cutting the yarn.
- Fiberfill Stuffing: To fill the head and add a little volume to the muzzle.
- Keychain Hardware: A jump ring and keychain ring or clasp.
- Round-Nose Pliers: For opening and closing the jump ring.
Finished Size & Customization Ideas
Finished Size: Approximately 2.5-3 inches, depending on yarn, hook, and tension.
Customization Ideas
- Make a Larger Bear: Try slightly thicker yarn, such as lightweight velvet yarn or DK cotton, with a 2.0-2.25 mm hook. Check the fabric as you work because thicker yarn and a larger hook will change the finished size.
- Add a Soft Pink Detail: Place a tiny pastel pink felt detail behind the safety eyes for a different look, ensuring it is securely attached and does not interfere with the eye fastenings.
- Change the Expression: Embroider small eyelashes or adjust the embroidered mouth to give the bear a slightly different expression.

Pattern Abbreviations & Terminology
- MR: Magic Ring
- ch: Chain
- sc: Single Crochet
- inc: Increase – work 2 single crochets into the same stitch
- dec: Invisible Decrease – work 2 stitches together through the front loops only
- sl st: Slip Stitch
- st/sts: Stitch/Stitches
- Rnd/Rnds: Round/Rounds
- ( ): Repeat the instructions inside the parentheses for the indicated number of times
The pattern uses US crochet terminology. The ears, head, and muzzle are worked in continuous rounds unless the instructions specify joining with a slip stitch.
Step-by-Step Crochet Instructions
1. Crochet the Ears (Make 2)
Use white yarn to make two matching ears. These small pieces will be folded slightly at the base before being sewn onto the head.
Round 1: Make a magic ring and work 6 single crochets into the ring. Pull the ring closed. Stitch Count: 6 stitches
Round 2: Work 1 increase in every stitch around. Place a stitch marker in the first stitch of the round. Stitch Count: 12 stitches
Round 3: Repeat (1 sc, 1 inc) around. Stitch Count: 18 stitches
Rounds 4-6: Work 1 single crochet in every stitch around for three rounds. Stitch Count: 18 stitches per round
To finish, join with a slip stitch in the first stitch. Cut the yarn, leaving a long tail of approximately 6-8 inches for sewing. Make a second identical ear.
Teaching Guide – Keep Both Ears the Same Size
Use a stitch marker to help track the beginning of each round, especially while working the increases. After Round 3, you should have 18 stitches. The next three rounds keep that count unchanged, giving the ears their finished shape without further widening.
Before sewing, compare both ears side by side. Check that they have the same number of rounds and a similar shape. Leave the long yarn tails intact because you will use them to attach the ears to the head.

2. Crochet the Head
The head is worked from the top down in continuous rounds using white yarn. Increases widen the top of the head, straight rounds create its fuller shape, and decreases close the lower opening.
Round 1: Make a magic ring and work 6 single crochets into it. Stitch Count: 6 stitches
Round 2: Work 1 increase in every stitch around. Place a stitch marker in the first stitch. Stitch Count: 12 stitches
Round 3: Repeat (1 sc, 1 inc) around. Stitch Count: 18 stitches
Round 4: Repeat (2 sc, 1 inc) around. Stitch Count: 24 stitches
Round 5: Repeat (3 sc, 1 inc) around. Stitch Count: 30 stitches
Round 6: Repeat (4 sc, 1 inc) around. Stitch Count: 36 stitches
Round 7: Repeat (5 sc, 1 inc) around. Stitch Count: 42 stitches
Rounds 8-12: Work 1 single crochet in every stitch around for five rounds. Stitch Count: 42 stitches per round
These rounds create the main height of the head. Keep the stitch marker moving up as you finish each round so you do not lose track of the continuous spiral.
Round 13: Repeat (5 sc, 1 dec) around. Stitch Count: 36 stitches
Round 14: Repeat (4 sc, 1 dec) around. Stitch Count: 30 stitches

Position the Safety Eyes
Insert the pair of 4-5 mm safety eyes between Rounds 10 and 11, approximately 10 stitches apart. Check the position from the front before securing the backings.
Teaching Guide – Check the Face Placement Before Closing the Head
Place the head with the beginning of the rounds at the top and look straight at the front. The eyes should sit at the same height, with a similar amount of space on either side of the center line. If necessary, adjust their positions before securing the backings.
Safety eyes may pose a choking hazard for young children. If the finished keychain is intended for a young child, consider securely embroidered eyes instead.
Round 15: Repeat (3 sc, 1 dec) around. Stitch Count: 24 stitches
Begin filling the head firmly with fiberfill. Add small amounts at a time, spreading the stuffing evenly so the head keeps a rounded shape.
Round 16: Repeat (2 sc, 1 dec) around. Stitch Count: 18 stitches
Continue adding stuffing as you work the decreases. Make sure the head remains evenly filled without stretching the stitches open.
Round 17: Repeat (1 sc, 1 dec) around. Stitch Count: 12 stitches
To close the head, work 1 slip stitch into the first stitch and cut the yarn, leaving a tail. Thread the tail through a tapestry needle and pass it through the front loops of the remaining 12 stitches. Pull the yarn tight to close the opening, then hide the yarn end inside the head.

Teaching Guide – Close the Opening Neatly
Pass the yarn through each of the 12 remaining front loops before pulling it closed. Draw the tail gradually rather than yanking it suddenly, which helps the stitches gather evenly. If a small opening remains, check that every front loop was caught by the needle. Once the opening is secure, weave the yarn tail inside the head.
3. Crochet the Snout (Muzzle)
The muzzle is worked separately in white yarn. It forms a small rounded piece that sits beneath the eyes and provides a raised surface for the embroidered nose and mouth.
Round 1: Make a magic ring and work 6 single crochets into it. Stitch Count: 6 stitches
Round 2: Work 1 increase in every stitch around. Stitch Count: 12 stitches
Round 3: Repeat (1 sc, 1 inc) around. Stitch Count: 18 stitches
Round 4: Work 1 single crochet in every stitch around. Stitch Count: 18 stitches
Join with a slip stitch in the first stitch. Cut the yarn, leaving a long tail for sewing.
Teaching Guide – Keep the Muzzle Lightly Rounded
The muzzle is a separate piece, so it can be positioned before it is permanently sewn on. Keep its 18-stitch final round even and avoid pulling the edge too tightly when joining. The small amount of stuffing added during assembly will give the muzzle a gentle three-dimensional shape without making it bulky.

Assembly: Put the Polar Bear Together
1. Attach the Ears
- Take one ear and gently fold or pinch its base inward so it curves slightly.
- Position the ear on one top side of the head, around Rounds 3–6 measured from the top center.
- Use the long yarn tail to sew the folded base securely to the head, passing the needle through the ear and into the head stitches.
- Repeat with the second ear on the opposite side.
Teaching Guide – Match the Ear Positions
Before sewing, pin or hold both ears in place and view the head from the front. Check that they sit at a similar height and angle. The slight inward fold helps shape each ear, but the two ears should still look balanced. Sew through several stitches at each base so the ears remain secure when the keychain is handled.
2. Attach the Snout
- Position the muzzle centrally below the safety eyes.
- Use pins or a small temporary stitch to hold it in place while checking the position from the front.
- Whipstitch around the perimeter of the muzzle, leaving a small opening before finishing.
- Add a tiny pinch of fiberfill through the opening to give the muzzle a little volume.
- Sew the remaining opening closed.
- Secure the yarn tail and hide it inside the head.
Teaching Guide – Check the Muzzle Before Closing
The muzzle should sit below the eyes, with its center aligned between them. Check the placement from straight ahead before sewing the final section. A small amount of stuffing is enough to lift the muzzle slightly; too much can make it bulky or pull the sewn edge away from the head.
3. Embroider the Nose and Mouth
Use black yarn and a tapestry needle to add the bear’s facial details.
- Thread the needle with black yarn and secure the tail with a small knot or an anchor stitch on the inside where it will be hidden.
- On the upper portion of the muzzle, stitch a small inverted triangle for the nose.
- Repeat the embroidery stitches across the same area until the triangle is filled and looks neat.
- From the bottom point of the nose, move down approximately one round and stitch a short vertical line for the mouth. The source places this line around 1–2 rows below the nose.
- Anchor the black yarn securely on the inside and weave in the remaining end.
Teaching Guide – Build the Nose Gradually
Start with a small outline for the inverted triangle, then fill it with additional stitches. This helps you control the width and keep the nose centered. Add the short mouth line only after the nose is complete so you can judge its direction and length. Keep the embroidery snug, but do not pull hard enough to distort the white muzzle.

4. Attach the Keychain Hardware
- Locate the exact top center of the bear’s head.
- Use round-nose pliers to open the jump ring carefully.
- Pass the ring through a secure point at the top center, making sure it catches the crochet fabric rather than only a loose yarn strand.
- Attach the keychain ring or clasp.
- Use the pliers to close the jump ring securely.
Teaching Guide – Secure the Attachment Point
Before closing the jump ring, check that it passes through a strong section of the crochet fabric at the top center. Avoid attaching it to a loose tail or a single exposed strand. Close the ring fully so there is no visible gap through which the keychain hardware could slip.
Finishing Your Polar Bear Keychain
- Check that both ears are firmly sewn in place.
- Make sure the muzzle is secure and the black embroidery ends are hidden.
- Confirm that the head opening is fully closed and the stuffing is not visible.
- Check that the jump ring is closed and the clasp moves freely.
- Gently shape the head and ears with your fingers so the bear has a neat, rounded appearance.
Your polar bear keychain is ready to clip onto keys, a backpack, or a zipper pull. It also makes a sweet handmade gift for someone who loves small amigurumi animals.
Helpful Finishing Tip: Because this is a small accessory that may be pulled or handled often, check the sewn pieces and keychain attachment periodically. Keep small hardware and safety eyes away from young children.