Create a spooky-cute crochet heart spider with a purple heart center, black edging, a shaped spider base, and embroidered legs and body details.
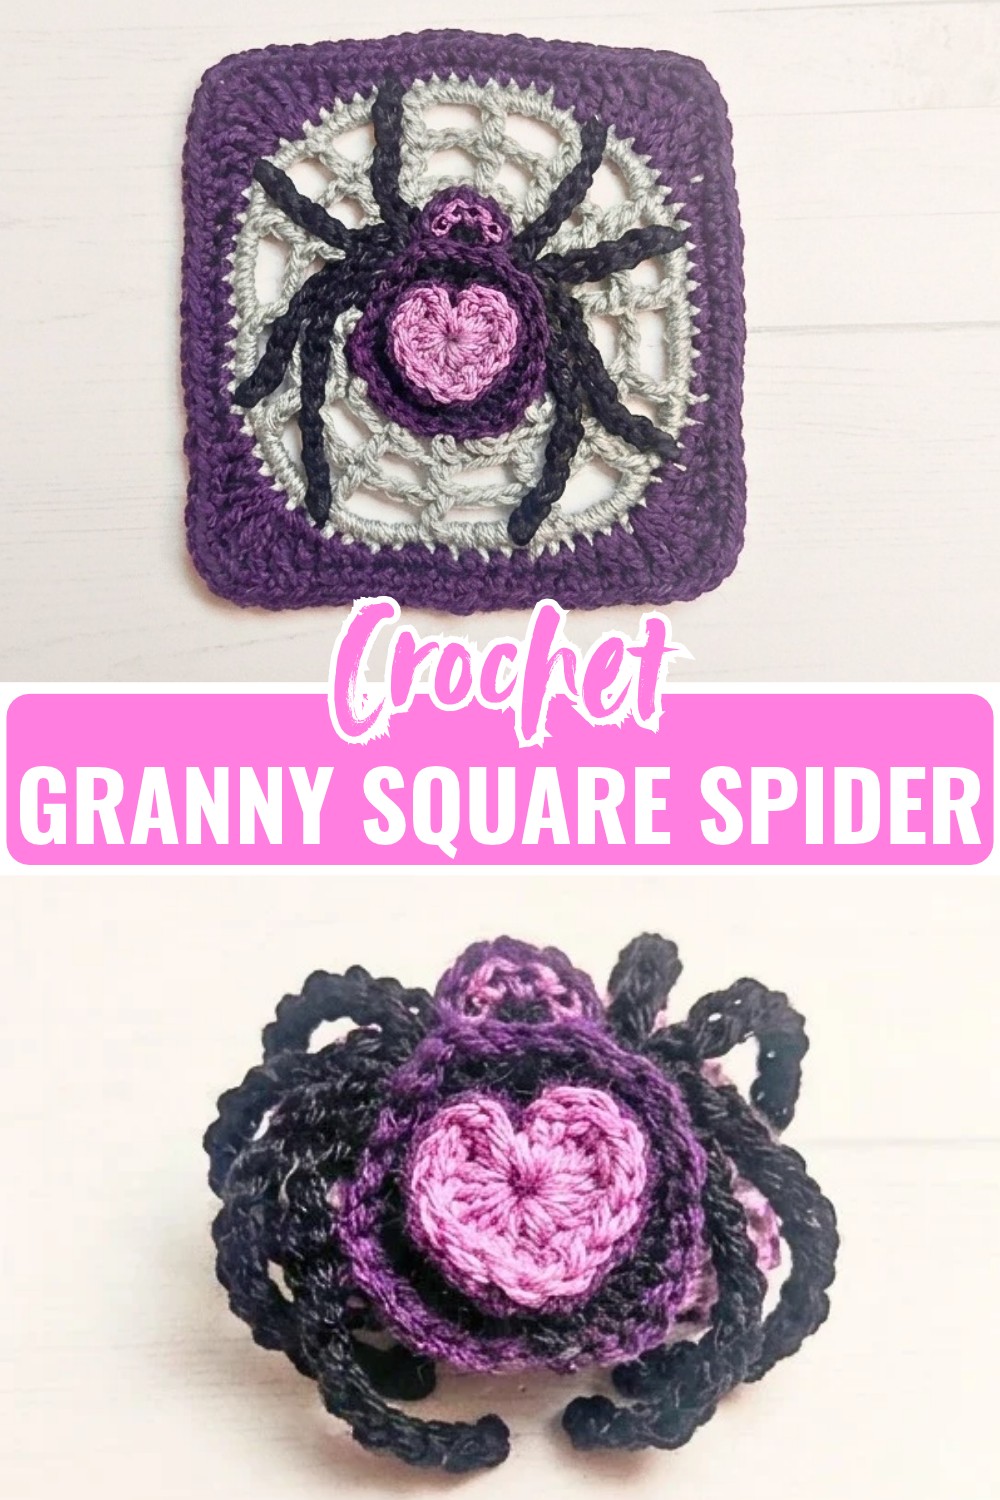
A heart and a spider might sound like an unusual combination, but the two shapes come together beautifully in this playful crochet design. The purple heart gives the center a soft, recognizable shape while the black crochet edging turns it into a fun spider-inspired piece.
The most interesting part comes after the crochet heart is finished. A second layer is worked around its edges to create the black base, then embroidery adds the spider’s decorative details and outward-reaching legs. You can use different yarn weights and colors to give the finished piece a completely different personality.
Credit Weaving Wyrd Studio
Materials Needed
- Yarn or Thread: Any weight can be used, including worsted-weight cotton, silk/cotton blend, size 3 yarn, or classic size 10 crochet thread
- Colors: Purple for the heart, Black for the spider base, and a contrasting shade such as Plum for embroidery
- Crochet Hook: Choose a size appropriate for your yarn or thread; the tutorial uses a US size E / 4.25 mm hook
- Yarn needle
- Scissors

How to Make the Heart
The purple heart is the focal point, so take your time with the center and the chain spaces that create its distinctive shape.
Step 1: Using the main heart color, start with an adjustable/magic ring, make a slip stitch, and chain 3.
Step 2: Work 3 double crochets into the ring.
Step 3: Work 3 half double crochets.
Step 4: Chain 1, work 1 double crochet, and chain 1 again.
Step 5: Work 3 half double crochets.
Step 6: Work 3 double crochets.
Step 7: Chain 3 and finish with a slip stitch into the ring.
Step 8: Pull the magic ring tight to close the center. Fasten off and weave in the ends.
Heart Shape Check: When the ring is tightened, the stitches should settle into the two rounded upper sections and pointed lower section of the heart. If the center remains loose, tighten the magic ring before moving on.

Add the Black Spider Base
The black edging is worked around the heart, using the back loop to create the base that will later become the spider shape.
Step 1: Attach Black yarn with a slip stitch in the back loop of the first chain of the last chain-3 segment at the top right of the heart.
Step 2: Work 1 single crochet in the same stitch, working in the back loop only for this round.
Step 3: Work 1 half double crochet in the next chain.
Step 4: Work 1 double crochet directly into the center point of the heart.
Step 5: Work 1 half double crochet in the second chain of the first chain-3 segment.
Step 6: Work 1 single crochet in the third chain.

Step 7: Continue around the heart in the back loop only: work 2 single crochets, 2 half double crochets, and 2 double crochets, skip the chain-1 spaces as you go, and mirror the stitches up the opposite side.
Back-Loop Check: Keep the hook in the back loop as instructed while working around the heart. This preserves the front loops and helps define the edge of the black layer.
Round 2: Shape the Spider Base
The second round expands the black edging and gives the outer shape more structure.
Round 2: Chain 1, then work 3 single crochets followed by an increase (2 single crochets in one stitch). Repeat (3 single crochets, increase) all the way around. (21 sts)
Join with a slip stitch.
Count Check: You should have 21 stitches at the end of this round. Checking the count here is worthwhile because the next decorative section depends on the stitches being positioned correctly around the base.

Begin the Spider Embellishment
The next stitches create the raised spider-head or embellishment detail on the black base.
Step 1: Chain 1 and skip the next stitch.
Step 2: Work 5 double crochets into the back loop of the same stitch.
Step 3: Skip the next chain and finish with a slip stitch.
This creates the raised crocheted detail that becomes part of the spider’s head/embellishment.

Embroider the Spider Details
Once the crochet base is complete, the contrasting yarn brings the spider design to life.
Use a yarn needle and your contrasting color, such as Plum, to embroider decorative details onto the spider’s body and head. Basic chain stitches are used for these details.
Detail Placement: Keep the embroidery stitches neat and secure, but avoid pulling the yarn too tightly. The crochet fabric should remain flat rather than puckering around the embroidered lines.
Add the Spider Legs
The legs are embroidered outward from the body using the same basic chain-stitch technique.
Use the contrasting yarn and yarn needle to create the spider legs, extending them outward from the body. Anchor the legs neatly along the back of the crochet fabric as you work.
Leg Check: Before securing all the ends, look at the spider from the front and check that the legs spread outward naturally. Adjust their placement while the embroidery is still easy to reposition.
Finishing the Heart Spider
With the purple heart framed by the black crochet layer and the contrasting chain-stitch embroidery in place, the design takes on its final spider character. The small heart center keeps it playful, while the dark edging and embroidered legs give it the spooky detail that makes this piece stand out.

Troubleshooting
Heart does not look defined: Make sure the magic ring is pulled firmly closed after completing the heart. A loose center can make the upper curves and bottom point look less distinct.
Black edging looks uneven: Check that you are consistently working into the back loop only where instructed. The stitch sequence around the heart also needs to mirror from one side to the other.
You cannot find the center point: The 1 double crochet worked directly into the center point is important for the heart’s lower point. Check the original heart stitches and chain spaces before continuing around the opposite side.
Round 2 has the wrong stitch count: The repeat is 3 single crochets, increase, and the completed round should contain 21 stitches. If your count is different, check the increases before starting the next embellishment.
Embroidered legs look uneven: Lay the crochet piece flat and position the legs visually before securing the embroidery ends. This makes it easier to keep the legs balanced around the spider body.