Learn this simple crochet stitch and create a strong foundation for your favorite handmade design.

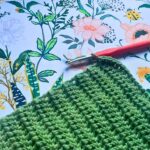
Single crochet is a simple stitch that helps beginners take their first confident steps into handmade creations. This essential technique creates a neat and sturdy fabric that works beautifully for amigurumi, scarves, blankets, accessories, and home décor pieces. Learning this basic stitch makes many crochet patterns easier to understand and follow.
With a few easy movements, single crochet teaches better control of the hook and yarn while creating a clean square shape. This small yet important stitch becomes a trusted skill that supports many crochet designs and helps beginners start new creations with confidence.
Credit Aster Crochet
Materials & Tools Needed:
To get started, you’ll need the following materials:
- Yarn: Lion Brand’s “Pound of Love”
- Hook: 6mm crochet hook (as recommended on the yarn packaging)
- Other tools: Scissors and optional stitch markers or safety pins for easier tracking.
Gauge:
Gauge is not mentioned in the tutorial but is typically determined by your tension and materials. Practice maintaining an even tension by crocheting a small swatch first.
Pattern Notes:
- This tutorial will teach you how to single crochet (sc) and create a simple square.
- The stitch count per row depends on the number of chains you start with.
- If you’re worried about losing stitches in the first or last rows, stitch markers will help you stay on track.
Key Features & Techniques:
- Core focus: Learning and practicing the single crochet (sc) stitch.
- Working in rows: Crochet starts with a foundation chain and moves row by row.
- Optional use of markers: Helps track the first and last stitch for clean, consistent edges.
Summary of Construction:
- Learn how to make a slipknot and a foundation chain to start your design.
- Skip the first chain and work the single crochet stitch into the second chain from the hook.
- Carry on working single crochet stitches in subsequent rows.
- Turn your work after completing each row, chaining 1 stitch before starting the next row.
- Use stitch markers to keep track of the first and last stitch in each row to ensure consistent edges.
- Finish off the design by chaining once, cutting the yarn, and weaving in the ends.

Pattern Overview & Making Process:
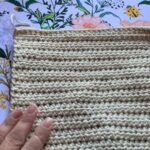
This tutorial starts by making a slipknot and a foundation chain of 32 stitches. The first single crochet row is created by skipping the first chain and working one single crochet into each chain until the end, resulting in 31 single crochets.
For the next rows, the hook is inserted into each stitch from the previous row to create single crochet stitches across the row. A chain 1 is made after each row, then the work is turned before continuing the same process until the square reaches the preferred size.
To complete the square, the final stitch is finished with a chain 1, and the yarn is cut and secured by pulling the tail through the last loop. The remaining ends can be woven in to complete the single crochet piece.
Step-by-Step Pattern Instructions:
Round 1:
- Make a slipknot and chain 32 stitches for a total of 31 single crochets (SC) at the end.
- Skip the first chain from the hook; work your first sc into the second chain.
- Continue placing one sc in each chain till the end. Chain 1, turn your work.

Round 2:
- Insert your hook into the first stitch of the row below, draw up a loop, and complete a single crochet (sc).
- Repeat across the row, making one sc in each stitch below. Chain 1 and turn.

Rounds 3–X:
- Repeat the process described in Round 2 until you’ve reached your desired size!
- Optional: Use stitch markers/safety pins in the beginning and end stitches for accuracy.

Final Steps:
- Complete your last stitch on the final row, chain 1, and cut your yarn.
- Pull the tail through the last loop to secure. Optional: Knot or weave in the ends for a polished finish.
Customization Options:
- Colors: Experiment with different yarn shades for a striped or color-blocked design.
- Size: Adjust the stitch count in your foundation chain to increase or decrease the size of your final piece.
- Stitch markers or safety pins: Use these to help keep your ends straight by marking the first and last stitch in each row.
- Other yarn types: Swap out Pound of Love for textured, sparkly, or lightweight yarns to create unique variations of your pattern.

Troubleshooting & Suggestions:
- Problem: If your edges are uneven or you’re losing stitches, use stitch markers in the first and last stitches of each row.
- Problem: Curling edges? Don’t worry! This is common for a work-in-progress. It’ll even out as the piece grows.
- Consistency tip: Check your tension regularly to avoid overly tight or loose stitches.
- Creative ideas: Experiment with different yarn colors for a striped look or add an edge decoration like a scalloped border!
Pattern Variations & Modification Ideas:
- Use as a foundation: This simple single crochet square can serve as a base for larger designs like scarves, blankets, or even small amigurumi figures.
- Add texture: Experiment with alternating single crochet and other stitches to create unique patterns.
- Edge finishing: Crochet a border around the edges once the square is complete for a polished look!
Conclusion & Final Notes:
Congratulations on mastering the single crochet stitch! Whether you’re creating a cozy scarf, blanket, or amigurumi design, the single crochet is a versatile stitch that forms the foundation of countless patterns. Practice this stitch until it feels natural, and you’ll be ready to tackle even more complex crochet adventures.