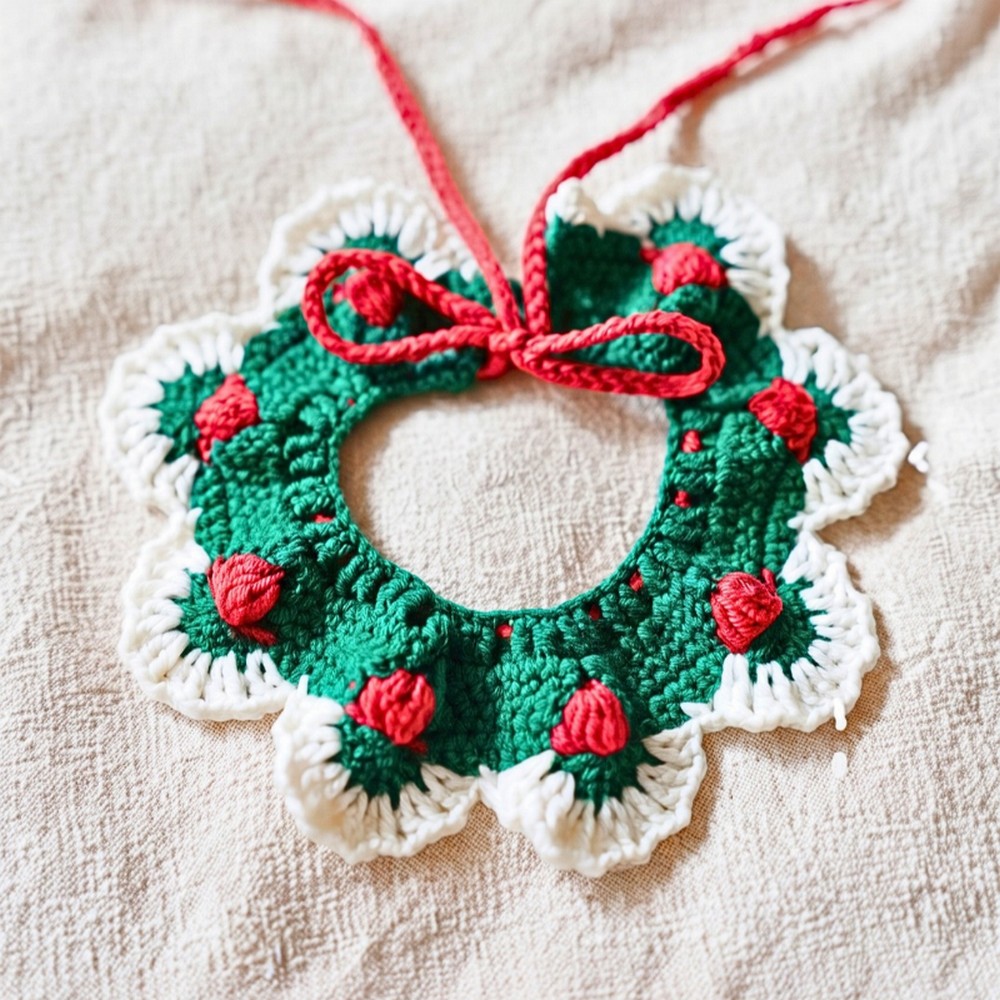
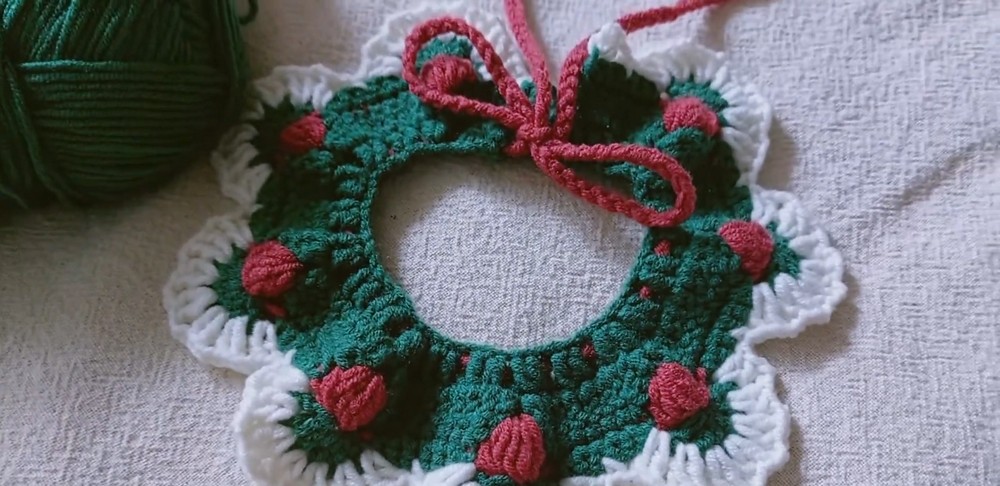
Add Christmas charm to your cat’s crochet collar with raised red berries, green scallops, and delicate white lace, finished with a long adjustable tie for a flexible fit.
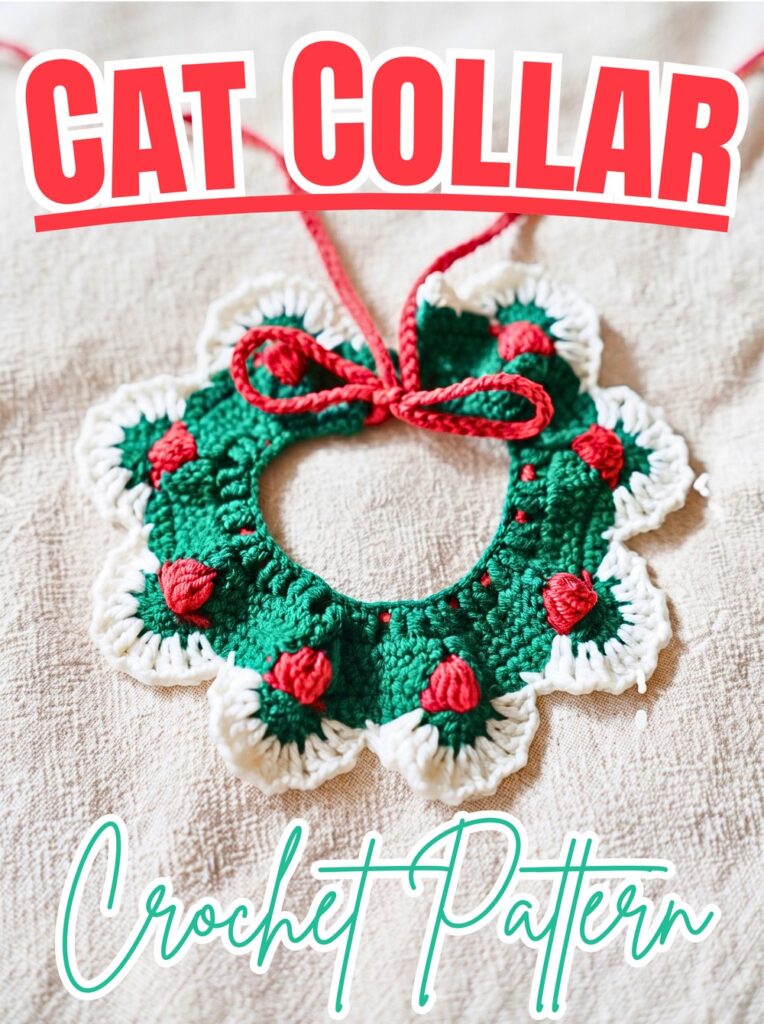
Green crochet forms a soft collar base, while raised red clusters create berry-like details across its length. White lace edging finishes each scallop with delicate holiday trim, giving the finished crochet collar plenty of Christmas character without relying on complicated stitches.
Sizing starts with chain 62 and can be adjusted in multiples of 14 stitches, making it easier to adapt the crochet collar for different pets. Stitch markers are especially useful here because they identify berry clusters and important row positions as scallops and lace edging are added.
Credit Nida Catty Official
Materials & Tools Needed
- Yarn: Light or medium weight yarn in 3 Christmas colors: Green for main collar, Red for berry clusters and tie, and White for edging.
- Crochet Hook: Hook suitable for chosen yarn, typically 3.0 mm or 4.0 mm.
- Stitch Markers: Safety pins or crochet stitch markers. These are highly recommended for tracking row ends and cluster tops.
- Scissors
- Yarn Needle: For weaving in loose ends.
Finished Size & Customization
Base pattern begins with 62 chains.
To resize collar length, add or remove chains in multiples of 14 stitches. Use fewer chains for smaller kittens and more chains for larger pets.
Fastening tie uses 150 chains. Add or remove chains according to desired bow-string length.
Because this collar is worn around an animal’s neck, check fit carefully before use. Collar should sit comfortably without restricting breathing, swallowing, or normal movement. Supervise wear and remove collar if your cat shows discomfort or tries to chew it.
Pattern Abbreviations & Terminology
- ch – Chain
- sc – Single Crochet
- dc – Double Crochet
- inc – Increase, 2 stitches in same stitch
- cl – Cluster / Bobble Stitch; 6-dc cluster worked in one space
- st(s) – Stitch(es)
- sl st – Slip Stitch
6-dc Cluster
Yarn over, insert hook, pull up loop, yarn over and pull through 2 loops. Repeat this process 6 times in the same space until 7 loops remain on the hook. Yarn over and pull through all 7 loops to complete cluster.
Green Collar Base Pattern
Row 1: Foundation & First Increases
Using Green yarn, ch 62. Place stitch marker on 62nd chain.
Ch 3, counting as first dc. Work 1 dc into each of the next 5 chains, giving 6 dc total including the turning ch-3. In the 7th chain, work inc by placing 2 dc into the same chain. Work 1 dc in each of the next 6 chains, then 2 dc in the next chain.
Continue repeating [6 dc, 1 inc] across the row. Finish with 1 dc in final chain.
Keep increases evenly spaced. Each increase becomes part of shaping used later for red berry clusters, so consistent placement now makes following rows easier to read.
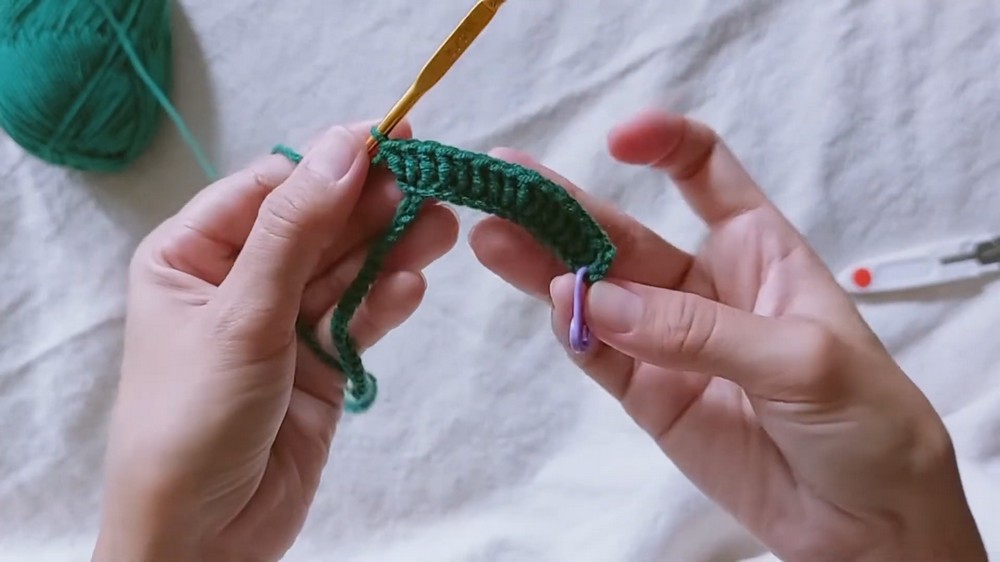
Row 2: Expanding Base
Ch 3 and turn.
Work 1 dc into each of the next 5 sts, giving 6 dc including turning ch-3. Over next 2 stitches, which sit above the increase from Row 1, work 2 dc in first stitch and 2 dc in second stitch.
Continue across the row by working 1 dc in the next 6 sts, followed by 2 dc in the next st and 2 dc in the following st. Repeat this sequence across the entire row.
Finish with 1 dc into the 3rd chain of the turning chain from Row 1.
These paired increases create wider spaces that will later hold red berry clusters. If stitch markers are helpful, mark increase groups so you can quickly identify each cluster position.
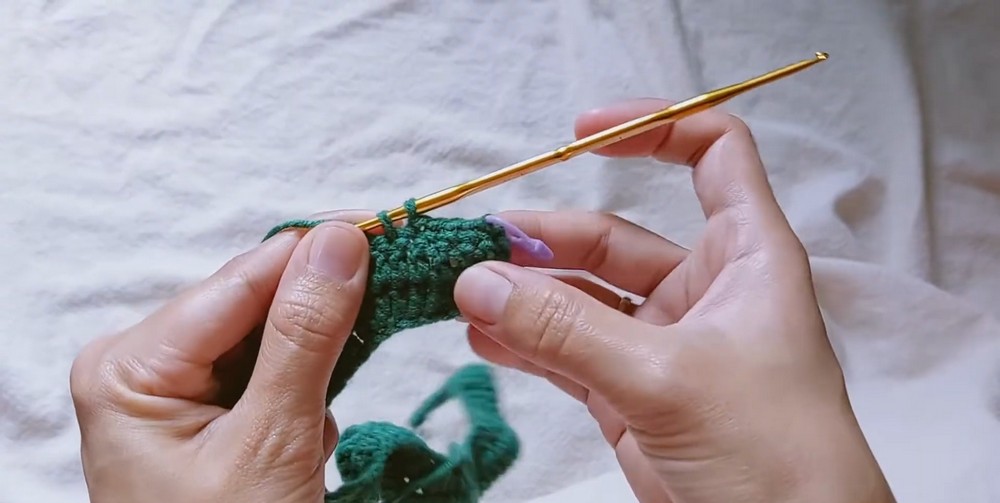
Red Berry Clusters
Row 3: Berry Detail
Ch 1 and turn. Place stitch marker in ch-1 to mark row beginning.
Work 1 sc into each of the next 5 sts. On final pull-through of 5th sc, change to Red yarn and gently secure Green yarn.
With Red yarn, ch 1. Locate center gap between two double-increases from Row 2 and work 1 6-dc cluster into that gap. Yarn over, insert hook, pull up loop, yarn over and pull through 2 loops; repeat 6 times in same space until 7 loops remain on hook, then yarn over and pull through all 7 loops.
Ch 1 to lock cluster. Place stitch marker through top of red cluster.
Switch back to Green yarn and carry it along the back.
Work 1 sc in next 6 sts. On final pull-through of 6th sc, change to Red. Ch 1 and work another 6-dc cluster into center gap of next increase group. Ch 1 to lock cluster, mark cluster top, then switch back to Green.
Continue this sequence across the row. Finish with 6 sc in Green, placing final sc into top of turning chain.
Each marked red cluster will become the center of one scallop during the next row. Keeping markers in place makes those attachment points much easier to find.
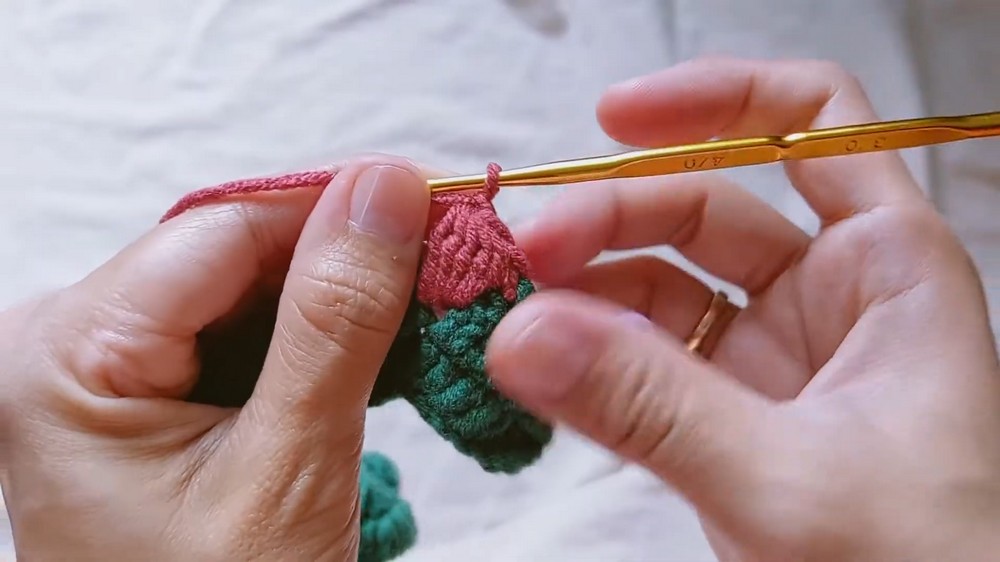
Green Scallop Bases
Row 4: Building Shells
Ch 1 and turn. Place stitch marker in ch-1.
Work 1 sc into each of next 5 sts, giving 6 sts total.
Remove marker from top of first Red cluster. Work 6 dc directly into marked stitch at top of red berry.
Work 1 sc into each of next 6 sc sts, then work 6 dc into top of next Red cluster.
Continue repeating this sequence across the row.
Finish with 6 sc, placing final sc into stitch marked at beginning of Row 3.
Six dc worked into each cluster, top spread outward to form scalloped curves. Check that each shell is centered over its Red berry; this alignment creates clean repeating collar detail.
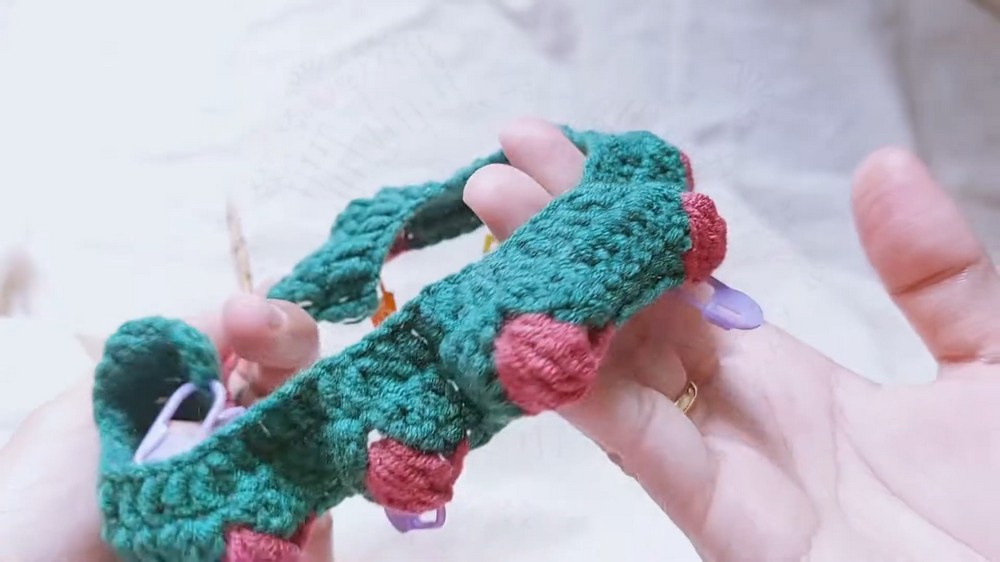
White Lace Edging
Row 5: Scalloped Lace
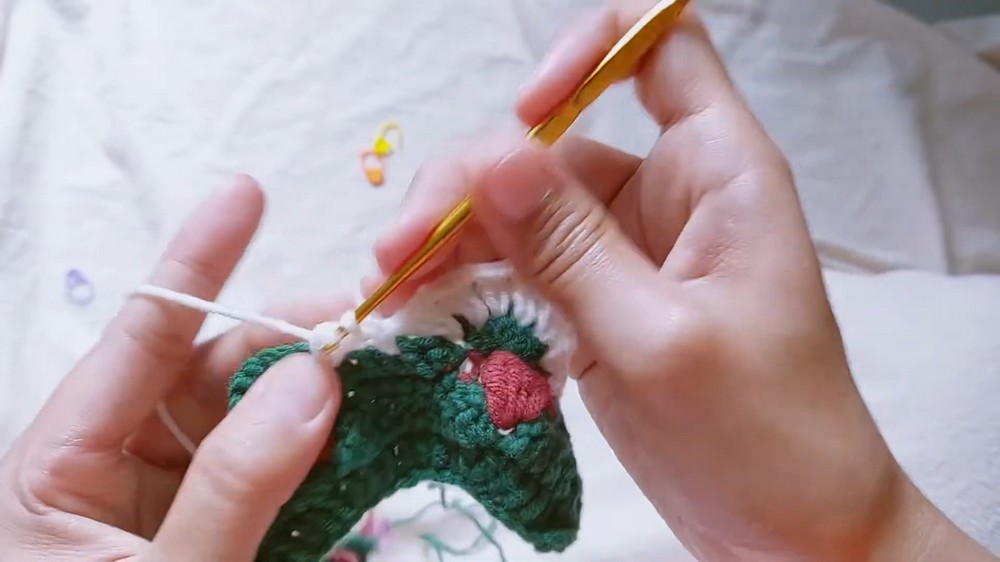
Before completing final sc of Row 4, change to White yarn.
Ch 3 and turn. Work 1 dc into same stitch at base of ch-3.
Skip 2 sts and work 1 sc into 3rd stitch.
Skip 2 more stitches to reach beginning of first 6-dc shell from Row 4.
Over shell curve, work 2 dc in same stitch, ch 2. Repeat this sequence across shell until you have completed 7 pairs of 2-dc groups, with ch-2 separating each pair.
Skip 2 stitches and work 1 sc into the 3rd stitch, positioned at the center of the green sc block.
Skip 2 stitches and repeat scalloped shell sequence over next shell: 7 pairs of 2-dc groups separated by ch 2.
Continue repeating shell and anchor sequences across collar.
At row end, skip 2 sts, work 1 sc. Skip 2 sts, then work 2 dc into final stitch. Fasten off and cut White yarn.
As you work across each shell, keep 7 pairs visible before moving to the next anchor. Even spacing gives White edging its repeating lace rhythm and prevents one side from becoming fuller than another.
Add Adjustable Red Tie
Using Red yarn, make a slip knot and ch 150.
For longer bow strings, add chains; for shorter strings, use fewer.
Fasten off and pull tail tight to secure. Small knots can be added at chain ends to reduce unraveling.
Using yarn needle, weave long Red chain in and out through first row, passing through base of Green double crochets.
Center tie before wearing so both ends hang evenly.
Final Finishing
Weave in all loose Green, Red, and White yarn ends with yarn needle. Work tails securely through back side of stitches, then trim excess.
Before putting collar on your cat, check that:
- Red berry clusters remain centered inside Green scallops.
- White lace edging lies flat.
- Tie moves smoothly through first row.
- No loose yarn tails remain exposed.
- Collar fits comfortably without being tight.
- Cat cannot easily chew or become caught in loose decorative parts.
This three-color collar gets its Christmas look from simple repeated shaping: Green increases create spaces for raised Red berry clusters, those clusters become centers for six-dc scallops, and White lace adds final decorative edge. Adjustable foundation and long chain tie also make sizing easier while keeping festive details consistent.