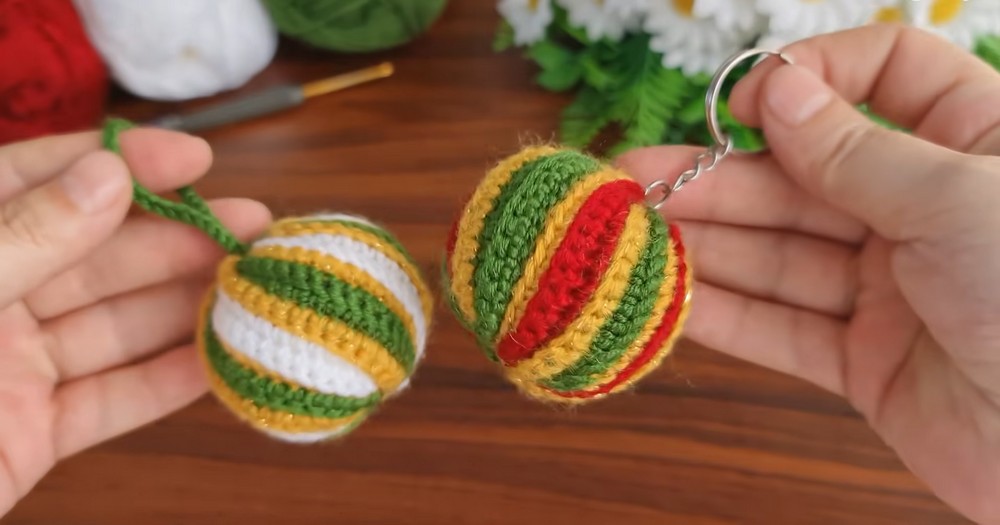
Looking for a Christmas ornament with more texture than a simple crochet ball? This spiral bauble uses flat rows to create diagonal ribbed stripes.
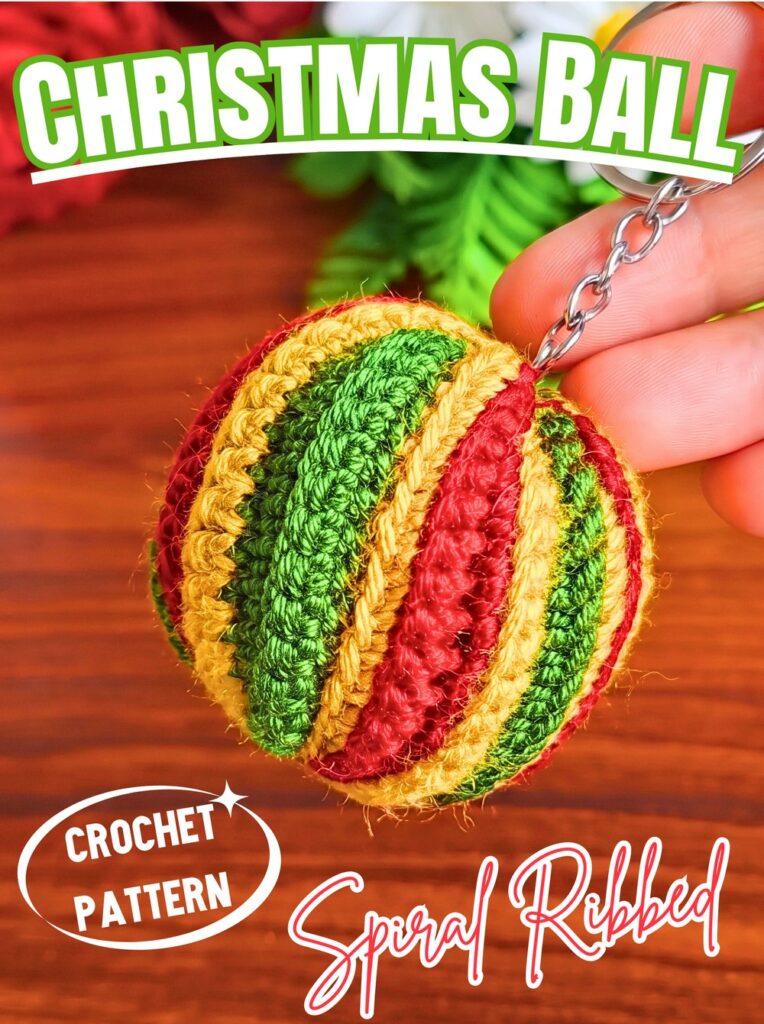
Diagonal stripes wrap around the finished bauble in an unexpected spiral, giving this Christmas crochet ornament rich ribbed texture and eye-catching movement. Green, yellow, and white create cheerful contrast, while rounded shaping gives flat crochet an entirely different final form.
What makes this crochet pattern interesting is its shaping method: short rows gradually create a slanted parallelogram rather than working in rounds. Alternating increases and skipped final stitches keep edges angled, while BLO stitches build raised ribs. Once the finished rectangle is seamed, cinched, and stuffed, those angled stripes naturally twist around the crochet ornament.
Credit Nida Catty Official
Materials & Tools Needed
- Yarn: Fine or DK weight yarn in 3 colors — Green (Color A), Yellow (Color B), and White (Color C)
- Crochet Hook: 2.20 mm Tulip hook used in tutorial
- Stuffing: Polyester fiberfill
- Notions: Scissors and tapestry needle
- Optional Hardware: Metal split keychain ring
Finished Size & Customization
Finished bauble is approximately palm-sized.
For more length, add chains to the foundation chain; for example, use ch 22 instead of ch 18.
For more width, add additional color-block repeats before seaming.
Color combinations can also change overall character. Try traditional red, green, and gold, or create an icy palette with blue, silver, and white.
Pattern Abbreviations & Terminology
- ch: Chain
- sc: Single Crochet
- BLO: Back Loop Only – insert hook only into the back loop to create ribbed texture
- inc: Increase – work 2 single crochets into same stitch
- st(s): Stitch(es)
- sl st: Slip Stitch
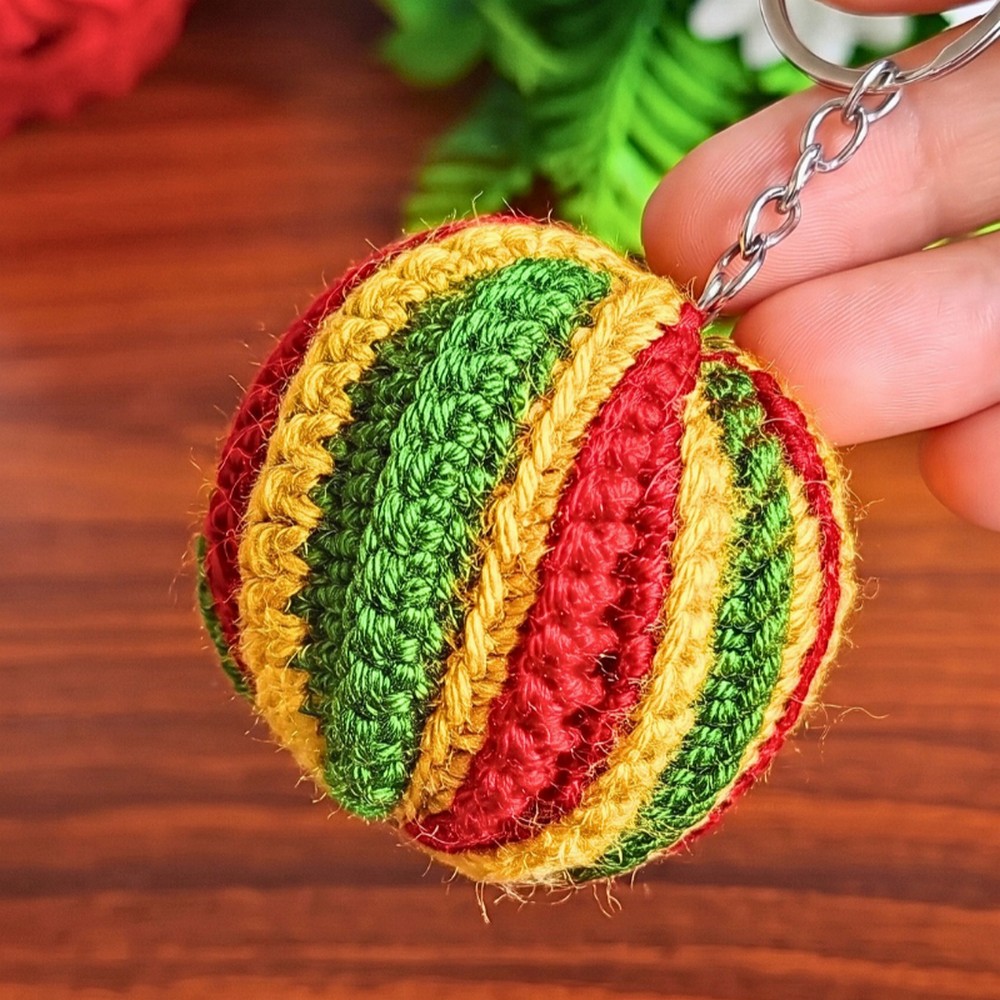
Before Starting: How Spiral Shaping Works
Keep one shaping rule in mind throughout the flat section: top edge always decreases by leaving final stitch unworked, while bottom edge increases by working 2 sc into final stitch.
This repeated imbalance gradually turns the rectangle into a slanted parallelogram. BLO stitches create ribbing at the same time, so diagonal color sections become more defined as rows build.
Flat Ribbed Bauble Pattern
Foundation
With Green yarn (Color A), make a slip knot and ch 18.
Stripe Sequence 1
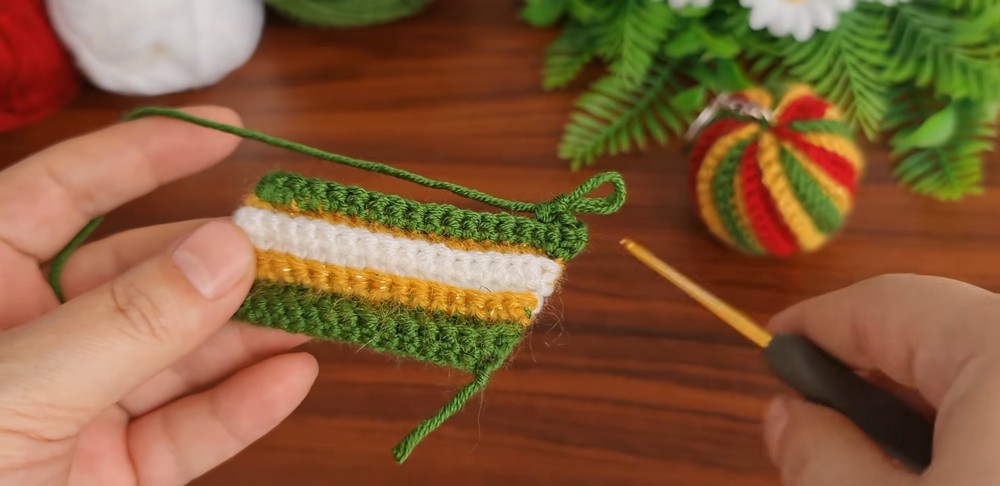
Row 1 – Green: Starting in 2nd ch from hook, work 14 sc. Work 1 sc in each of the next 2 ch. Leave the remaining 1 chain unworked. (16 sc)
Row 2 – Green: Ch 1, turn. Working in BLO for the rest of the pattern, sc in the first 15 sts. Leave last st unworked. (15 sc)
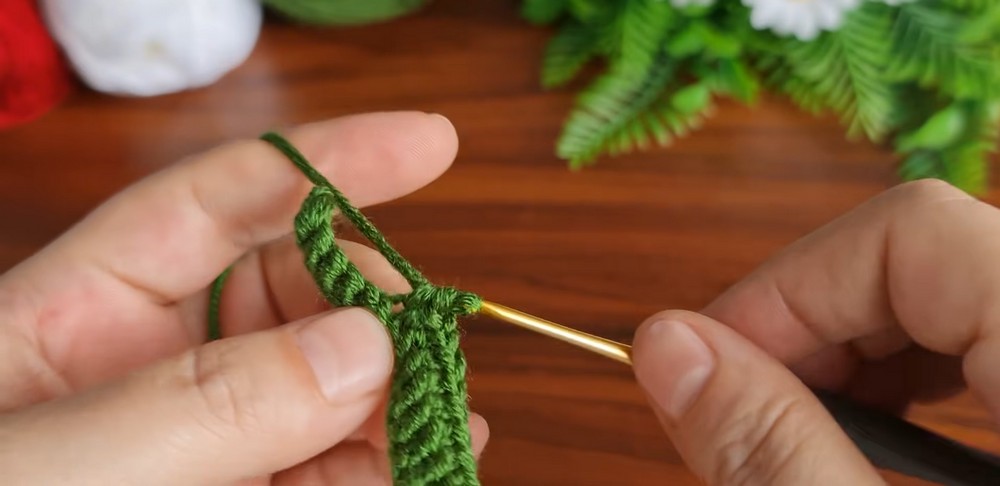
Row 3 – Yellow: Fasten off Green and attach Yellow yarn (Color B). Ch 1, turn. In BLO, work 14 sc. In last st, work 2 sc (increase). (16 sc)
Row 4 – Yellow: Ch 1, turn. In BLO, work 15 sc. Leave last st unworked. (15 sc)
Row 5 – White: Fasten off Yellow and attach White yarn (Color C). Ch 1, turn. In BLO, work 14 sc. In last st, work 2 sc (increase). (16 sc)
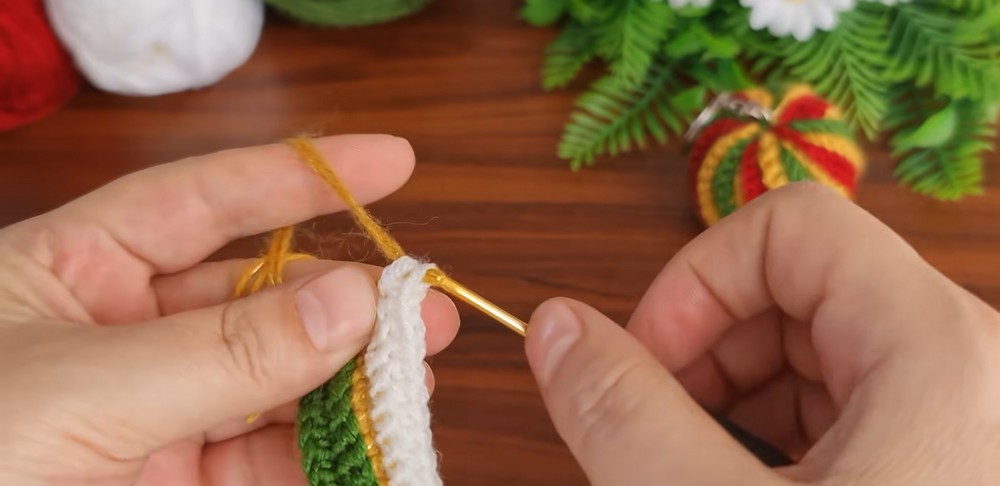
Row 6 – White: Ch 1, turn. In BLO, work 15 sc. Leave last st unworked. (15 sc)
Row 7 – Yellow: Fasten off White and attach Yellow yarn (Color B). Ch 1, turn. In BLO, work 14 sc. In last st, work 2 sc (increase). (16 sc)
Row 8 – Yellow: Ch 1, turn. In BLO, work 15 sc. Leave last st unworked. (15 sc)
Stripe Sequences 2-5
Repeat Rows 1-8 four more times, creating 5 white stripes and 40 total rows.
When repeating Row 1 with Green, follow the same shaping used for odd-numbered shaping rows: change to Green, ch 1, turn, work 14 sc in BLO, then work 2 sc in final stitch as increase. (16 sts)
Continue alternating shaping rows until completing Row 40. Final row is Yellow.
Fasten off, leaving a long Green yarn tail for sewing.
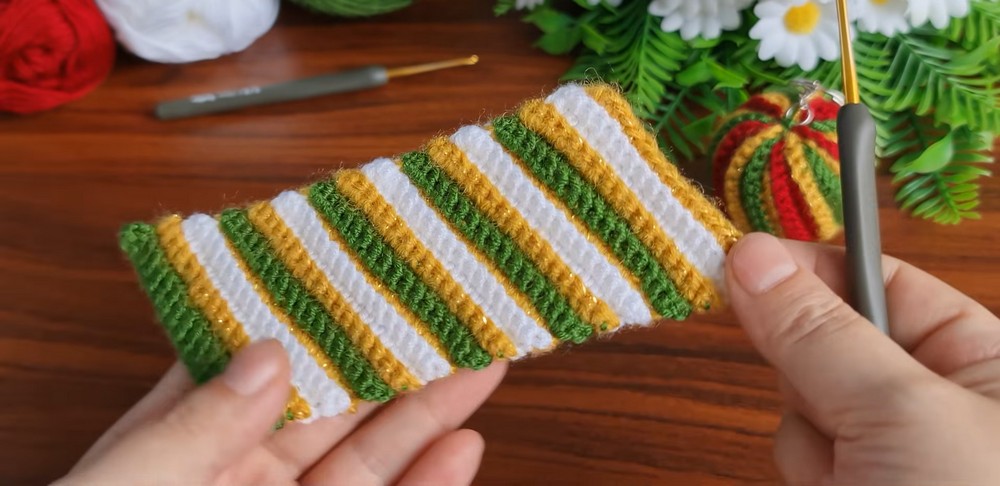
At this stage, the flat piece should resemble a slanted rectangle or parallelogram with distinct ribbed color stripes. This shape is intentional; do not try to straighten or reshape it before assembly.
Assembly & Finishing
1. Seam Flat Piece Into Tube
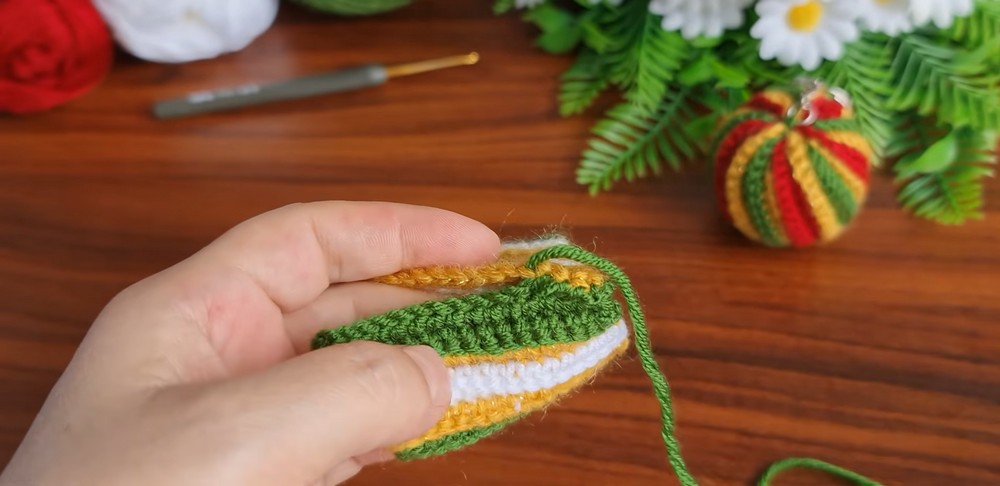
Fold piece in half so Row 1 (Green) meets Row 40 (Yellow).
Using a tapestry needle and the length of Green yarn, sew both edges together. For a less visible seam, whipstitch through back loops of final row and remaining front loops of foundation chain.
After the seam is secure, turn the tube inside out so the seam sits inside.
2. Cinch Top Opening
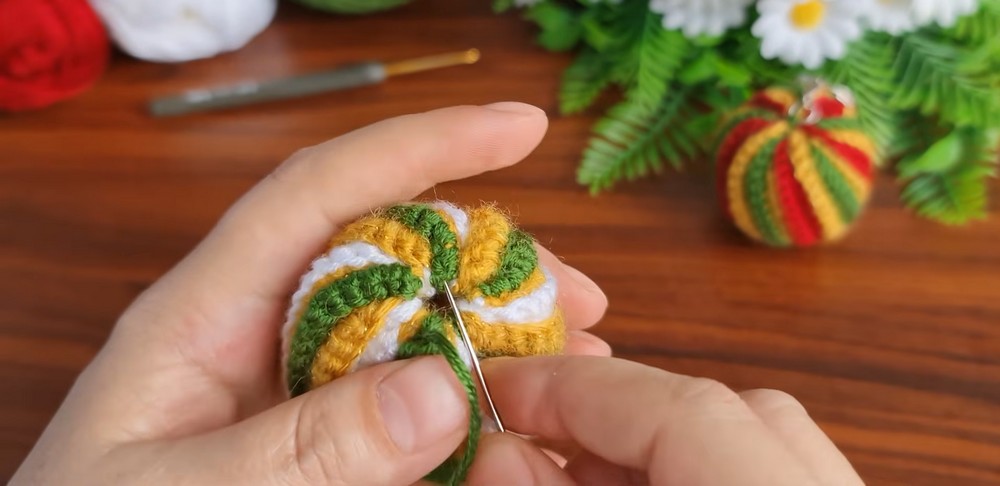
Thread tapestry needle with Green yarn.
Weave needle in and out through stitch edges around top opening, following stepped edge where stitches were left unworked.
Pull yarn firmly to close opening completely, then tie a secure knot.
3. Stuff Bauble
Without cutting yarn, push needle directly through center of cinched top and out through open bottom.
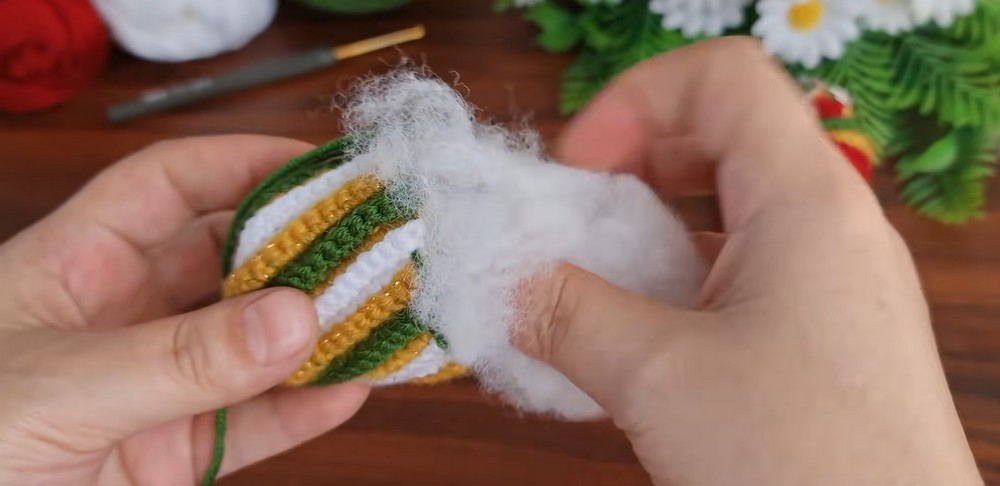
Fill ornament with polyester fiberfill, adding enough stuffing to create rounded shape.
Work stuffing gradually rather than packing everything into one spot. Even filling helps diagonal ribs spread smoothly around finished bauble.
4. Cinch Bottom Opening
Weave tapestry needle in and out around stitches of bottom opening.
Pull yarn tightly to gather opening closed and contain stuffing.
Tie a secure knot, then weave the remaining yarn tail into the center of the bauble to hide it. Trim excess.
5. Add Hanging Loop
Using Green yarn, make a slip knot and ch 30. Fasten off, leaving tails at both ends.
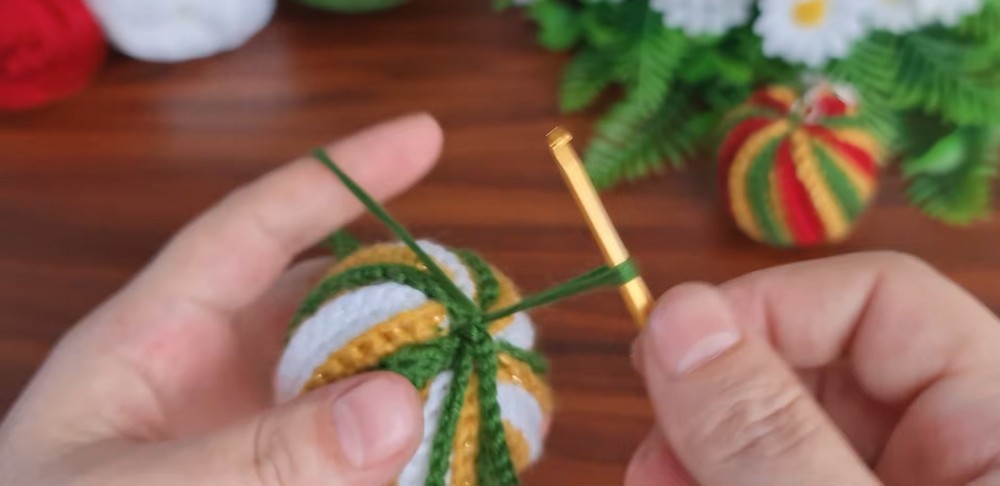
Use a crochet hook or tapestry needle to pull both tails through the top center of the bauble. Tie securely on the inside to create a hanging loop.
For keychain use, attach metal split keychain ring directly to top center instead.
Shape & Stripe Check
Before hanging the finished ornament, gently roll the bauble between hands to distribute stuffing and encourage spiral stripes to sit evenly around the rounded shape.
Check seam remains inside, top and bottom gathers are fully closed, and hanging loop is firmly secured. Diagonal color bands should naturally travel around the bauble rather than sitting as straight horizontal stripes.