Looking for the cutest way to add some Halloween fun to your home or treats? This Crochet Mini Boo Bucket idea is perfect for the spooky season!
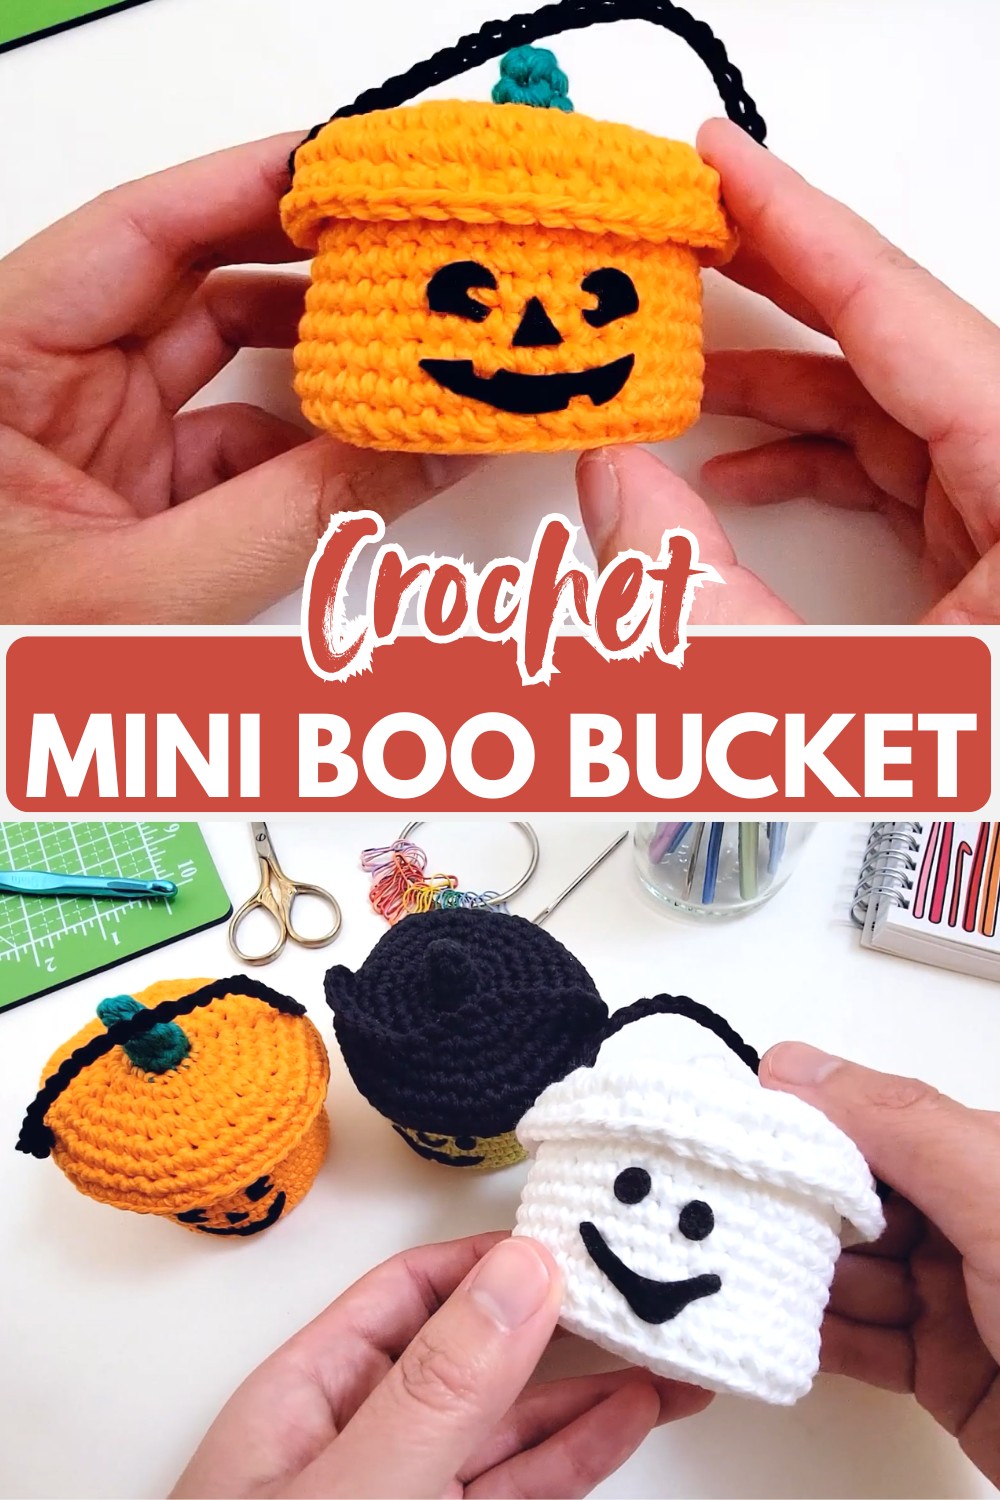
This Mini Boo Bucket is a fun seasonal crochet design that brings a playful Halloween touch to your handmade collection. Its tiny size, removable lid, and character-inspired look make it just as charming on display as it is for holding sweet treats. The clever details become even more enjoyable as each crochet section comes together.
The tutorial builds the bucket one piece at a time, making the process easy to follow from the handle to the final assembly. Simple shaping and neat finishing create a polished result, while different color combinations let the same crochet pattern become a pumpkin, ghost, or witch without changing the overall design.
Credit The Pudgy Rabbit
Design Highlights
- Function: Miniature treat bucket that is decorative and functional.
- Components: Three-piece structure including the bucket, removable lid, and handle.
- Face Details: No-sew face made from felt (secured with glue).
Materials Required
Yarn
- Black (for handle and ghost bucket face)
- Orange (for pumpkin bucket)
- White (for ghost bucket)
- Light Green (for witch bucket)
- Dark Green (for pumpkin bucket top)
Other Materials
- Black Felt: Cut into facial shapes.
- Fabric Glue: To secure felt pieces and yarn ends.
- Optional: Fray Check for clean felt edges.
Tools
- Crochet hook size G/4mm
- Yarn needle
- Stitch marker
- Scissors
Key Techniques
- Single crochet (sc)
- Chain stitch (ch)
- Increase (inc)
- Decrease (dec)
- Working in the round
- Back loop only (BLO)
- Front loop only (FLO)
- Seamless color changes
- Sewing and weaving ends
Finished Size
Fits in the palm of your hand, suitable for holding candy or chocolates.
Abbreviations
ch: chain
sc: single crochet
inc: increase (2 sc in the same stitch)
dec: decrease
st(s): stitch(es)
sl st: slip stitch
( ): number of stitches in round
- * *: set of stitches to be repeated
- rnd: round
- rep: repeat

Pattern Overview & How It’s Made
The pattern begins by crocheting a simple handle with black yarn and leaving long tails for sewing later. The bucket is then worked in continuous rounds, starting from a small base, increasing gradually to form the bottom, and using back loop only stitches before continuing evenly to build the sides.
The lid starts with a small stem made in the chosen stem color. After the stem is completed, the lid expands through a series of increase rounds worked partly in the front loops, grows to its widest point, and then finishes with decrease rounds to create the final shape before fastening off.
To assemble, the handle is sewn securely onto opposite sides of the lid using the yarn tails. Facial features are cut from black felt, optional Fray Check is applied to prevent fraying, and the pieces are glued onto the bucket. The same pattern is finished in different yarn colors to create pumpkin, ghost, or witch versions.
Step-by-Step Pattern
1. Handle
- Step 1: Using Black yarn, ch 25.
- Step 2: Fasten off, leaving long tails for sewing.

2. Bucket Bottom & Body
- Round 1: Ch 2, 6 sc in 2nd ch from hook (6 sts).
- Round 2: Inc in each st around (12 sts).
- Round 3: [1 sc, inc] x 6 (18 sts).
- Round 4: 1 sc, inc, [2 sc, inc] x 5, 1 sc (24 sts).
- Round 5: [3 sc, inc] x 6 (30 sts).
- Round 6: 2 sc, inc, [4 sc, inc] x 5, 2 sc (36 sts).
- Round 7: In BLO, sc in each st around (36 sts).
- Rounds 8–15: In both loops, sc in each st around (36 sts per round).
- Fasten off and weave in ends.

3. Bucket Lid
Stem
- Round 1: Using stem color, ch 2, 3 sc in 2nd ch from hook (3 sts).
- Round 2: 1 sc, inc, 1 sc (4 sts).
- Round 3: Inc in each st around (8 sts).
Lid Expansion
- Round 4: Sc in each st around (8 sts).
- Round 5: In FLO, [1 sc, inc] x 4 (12 sts).
- Round 6: [1 sc, inc] x 6 (18 sts).
- Round 7: 1 sc, inc, [2 sc, inc] x 5, 1 sc (24 sts).
- Round 8: [3 sc, inc] x 6 (30 sts).
- Round 9: 2 sc, inc, [4 sc, inc] x 5, 2 sc (36 sts).
- Round 10: [5 sc, inc] x 6 (42 sts).
- Round 11: 3 sc, inc, [6 sc, inc] x 5, 3 sc (48 sts).
- Round 12: [6 sc, dec] x 6 (42 sts).
- Fasten off and weave in ends.
4. Assembly
- Attach Handle: Place handle ends on opposite sides of the lid and sew securely with yarn tails.
- Facial Details:
- Cut facial shapes (eyes, mouth, etc.) out of black felt.
- Apply Fray Check to felt edges (optional) & glue pieces onto the bucket.

Customization Options
- Switch yarn colors to create different Halloween characters:
- Pumpkin: Orange bucket, Dark Green stem.
- Ghost: White bucket and lid.
- Witch: Light Green bucket with Black lid.
Helpful Troubleshooting
- Tight Starting Stitches: Use a yarn needle to loosen if needed.
- Stem Inversion: Push the center out with the hook to correct shape.
- Felt Fraying: Use Fray Check for cleaner edges.
Final Thoughts
These mini Boo Buckets are perfect for Halloween treats or as festive decor.