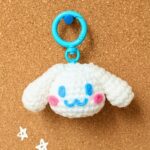
A cute crochet ghost is all you need to add a little Halloween charm to your home, and this 3-in-1 guide shows you how to make three easy styles with simple stitches and beginner-friendly finishing tips.

Halloween decorations don’t always have to be complicated to feel special. A tiny crochet ghost can bring just the right amount of charm to a shelf, desk, mantel, or seasonal display, and this one is especially nice when you want something you can finish without spending hours on detailed shaping. The body uses simple crochet stitches, while the little face and ruffled edge give it plenty of personality.
What I like about this design is that you don’t have to decide on one final look before you start crocheting. Make the basic ghost first, then turn it into a simple decoration, add a loop for a hanging charm, or finish it with a tiny witch hat.
That makes this a handy pattern to keep around when you want a few Halloween pieces that look different without learning three completely different patterns. I’d recommend making the body first and checking the face placement before securing the eyes-on a small piece like this, even a single stitch can change the expression.
Materials & Tools Needed
- Yarn: White worsted-weight/medium 4 yarn or soft plush yarn for the ghost body
- Black yarn or embroidery thread: For the mouth
- Accent yarn: Orange, purple, yellow, or black for optional accessories
- Crochet Hook: 3.5 mm (E-4), or a size suitable for your chosen yarn
- Safety Eyes: 6 mm or 8 mm black safety eyes
- Fiberfill: Polyester stuffing
- Tapestry Needle: For sewing and weaving in ends
- Stitch Marker: Optional, but helpful for continuous rounds
- Scissors
- Pins: Optional, for positioning the arms and accessories
Finished Size & Customization Ideas
The finished ghost measures approximately 3–4 inches (7.5–10 cm) tall when made with worsted-weight yarn.
You can keep the ghost classic in white, use pastel shades for a softer Halloween display, or choose black, purple, or orange accents for the accessories. A thicker yarn and larger hook will make a larger ghost, while lighter yarn will create a smaller version.
For the three finishes, you can leave the ghost plain as a small decoration, add a hanging loop for a charm or ornament, or make the little witch hat for a more playful Halloween look.
Pattern Abbreviations & Terminology
The pattern uses standard US crochet terms.
- MR: Magic Ring
- sc: Single Crochet
- inc: Increase — 2 sc in the same stitch
- dec: Decrease — sc2tog
- FLO: Front Loop Only
- BLO: Back Loop Only
- sl st: Slip Stitch
- ch: Chain
- st(s): Stitch(es)
- [ ]: Total stitch count

Step-by-Step Crochet Instructions
Crochet the Ghost Body
The body is worked from the top down in continuous rounds. If you are new to working in a spiral, place a stitch marker in the first stitch of each round so you can easily see where one round ends and the next begins.
Round 1: Work 6 sc into a MR. [6 sts]
Round 2: Inc in each st around. [12 sts]
Round 3: (1 sc, inc) × 6. [18 sts]
Round 4: (2 sc, inc) × 6. [24 sts]
Round 5: (3 sc, inc) × 6. [30 sts]
Rounds 6–12: Sc in each st around. [30 sts per round]

Add the Face
Before continuing with the decreases, add the safety eyes while the body is still easy to reach.
Insert the 6 mm or 8 mm safety eyes between Rounds 8 and 9, leaving about 4–5 stitches between them. Place the eyes loosely first and look at the ghost from the front before pressing the backs into place.

Embroider a small mouth between the eyes using black yarn or embroidery thread.
Round 13: Working in BLO, (3 sc, dec) × 6. [24 sts]
Round 14: (2 sc, dec) × 6. [18 sts]
Stuffing: Add fiberfill now, working small amounts into the head and body until it feels evenly filled. Avoid packing it too tightly, because overstuffing can make the stitches stretch and change the shape.
Round 15: (1 sc, dec) × 6. [12 sts]
Round 16: Dec × 6. [6 sts]
Fasten off, leaving a yarn tail. Weave the tail through the front loops of the remaining 6 stitches, pull to close the opening, and weave in the end.
Helpful tip: If the face looks slightly different from what you expected, check the eye position before moving on. With a small amigurumi shape, moving an eye by even one stitch can make the expression look noticeably different.

Add the Ruffled Bottom
The ruffle is worked into the unused front loops left from Round 13. This is why Round 13 was worked in BLO—the remaining front loops give you a clean place to attach the decorative edge.
Ruffle Round: Join white yarn with a sl st in the first unused FLO of Round 13, then work (1 sc, 3 dc in next st, 1 sc) around to create the wavy edge; join with a sl st, fasten off, and weave in the ends.
Keep your tension relaxed while making the taller stitches. If you pull the yarn too tightly, the ruffle may curl more than intended.

Crochet the Arms
Make 2 arms.
Round 1: Work 5 sc into a MR. [5 sts]
Rounds 2–4: Sc in each st around. [5 sts per round]
Sl st into the next stitch, fasten off, and leave a long tail for sewing. Do not stuff the arms.
Because these arms are small, leaving them unstuffed keeps them flexible and makes them easier to sew flat against the body.

Choose Your Halloween Style
The basic ghost is now finished. From here, you can choose one of three simple ways to use and decorate it.
Classic Ghost Decoration
Leave the ghost without any additional accessory and attach the arms. This gives you a simple little Halloween decoration that works well on shelves, desks, trays, or a mantel.

Hanging Ghost
To make a hanging version, create a small loop of yarn at the top of the ghost. Secure it through the stitches with several passes of yarn, then knot and weave the ends inside.
For a keychain, attach the loop securely to a metal keyring.
Witch-Hat Ghost
For the third style, add the small witch hat below.
Hat Round 1: Work 4 sc into a MR. [4 sts]
Hat Round 2: (1 sc, inc) × 2. [6 sts]
Hat Round 3: (2 sc, inc) × 2. [8 sts]
Hat Round 4: (3 sc, inc) × 2. [10 sts]
Hat Round 5: Working in FLO, inc in each st around. [20 sts]
Fasten off, leaving a long tail for sewing. Position the hat slightly to one side for a playful look, then stitch it securely to the top of the ghost.
Assembly & Finishing
Attach the Arms
Place one arm on each side of the body between Rounds 9 and 11. Pin them temporarily and look at the ghost from the front before sewing.
Use the yarn tails to stitch each arm securely to the body, then weave the remaining ends inside.
Secure the Face
Check that both safety-eye backs are firmly attached. If you embroidered the mouth, gently pull the ends toward the inside and weave them into the body so nothing is visible from the front.
Finish the Hanging Version
If you are making the hanging style, check the loop before attaching the keyring or hanging it up. It should be firmly secured through several stitches rather than attached to only one loop.
Helpful Tips for a Neat Finish
The most important part of this little ghost is the shaping and placement rather than complicated stitches. Keep the stuffing even, especially around the face, so the eyes sit on a smooth surface.
When sewing the arms and hat, pin everything in place first. This gives you a chance to check the symmetry and expression before making the attachment permanent.
If you want several ghosts to look like a little Halloween group, try changing their expressions or accessory colors rather than changing the whole pattern. The same basic body can then give you several different looks.
Conclusion
Your cute crochet ghost is ready for Halloween! Make it as a simple decoration, turn it into a hanging charm, or add the tiny witch hat for a fun seasonal finish. Since the main shape stays the same, you can easily make several and give each one its own personality.
This is also one of those small crochet designs where the finishing details really matter. Take a moment to position the eyes, check the stuffing, and place the arms before sewing them down, and your little ghost will have a much neater and more expressive finish.