Add storybook charm to your crochet collection with mini Anna, featuring braided brown hair, blue clothing, embroidered eyes, and a tiny pink cape.
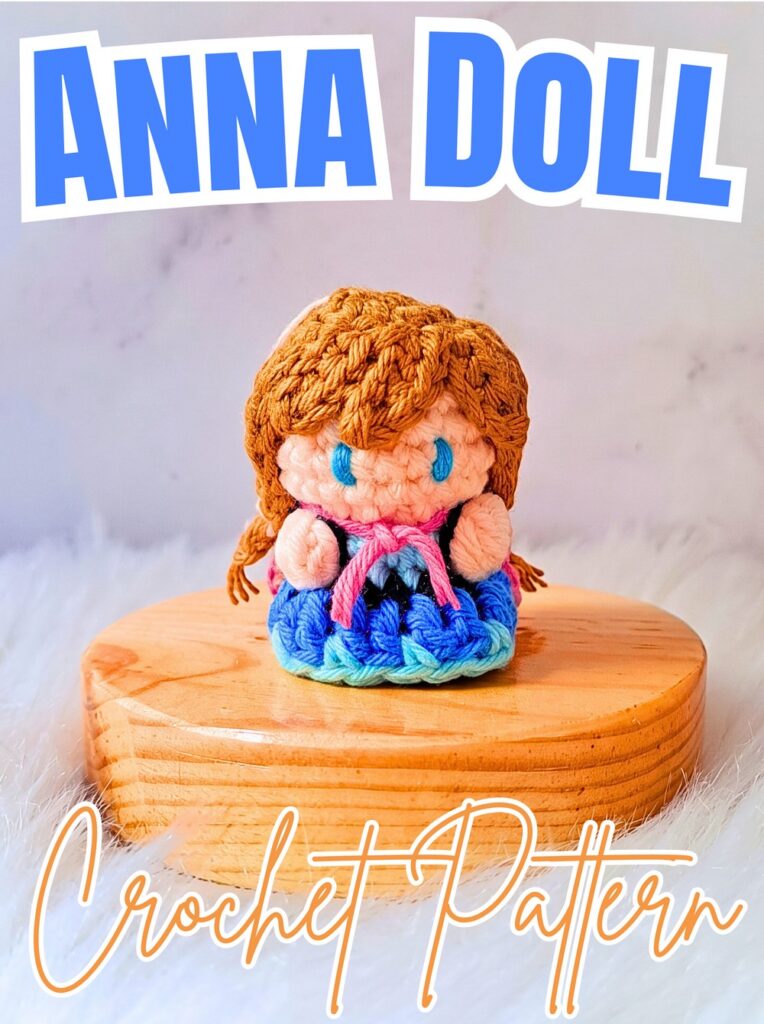
Mini crochet Anna brings a recognizable fairytale look into miniature form through dark brown hair styled in braids, blue clothing, and a carmine-pink cape. This small crochet doll uses contrasting yarn colors and embroidered details to preserve Anna’s character in a compact handmade design, making her suitable as a keychain or bag charm.
Creating this little crochet doll involves more than shaping its body. You’ll crochet the head and torso as one piece, form the blue skirt from leftover front loops, make the hair cap with individual strands, and prepare two pink cape pieces. The finishing guide then brings these details together with braided hair, embroidered facial features, and decorative bodice lines.
Credit Gail Cabreira
Materials & Tools
- Milk cotton yarn, 4-ply: Skin tone, sky blue, blue, black, carmine pink, and dark brown.
- Crochet hooks: 2.5 mm and 3.0 mm.
- Fiberfill stuffing: For shaping the doll.
- Darning needle: For closing the body, embroidery, and finishing.
- Scissors: For trimming yarn.
- Sewing pins: For positioning the hair and cape before securing them.
- Hot glue: An alternative method for attaching the hair cap.
Note: The supplied pattern specifies both 2.5 mm and 3.0 mm hooks, but its individual sections mainly identify the 2.5 mm hook. Follow the hook size specified for each part in your original video where it differs.
Pattern Abbreviations
- MR: Magic ring
- ch: Chain
- sl st: Slip stitch
- sc: Single crochet
- dc: Double crochet
- inc: Increase — work 2 single crochet stitches in the same stitch.
- dec: Decrease — crochet 2 stitches together.
- BLO: Back loops only
- FLO: Front loops only
- BO: Bobble stitch, used for arm details
- Rnd / R: Round / row
- (… ) × N: Repeat the instructions inside parentheses N times.
- [#]: Total stitch count at the end of the round or row.

Step-by-Step: How to Crochet Mini Anna
Step 1: Crochet the Head and Upper Body
Hook: 2.5 mm · Yarn: Skin tone
Anna’s head and body are worked continuously from the top down. Starting with a small ring creates the crown of the head, while gradual increases build its rounded shape.
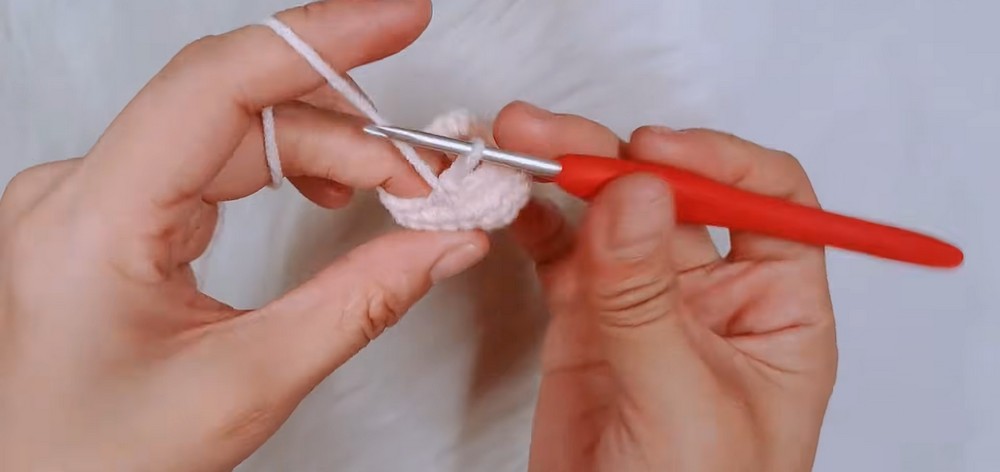
Round 1: Make a magic ring and work 5 single crochet stitches into it. Pull the tail tightly to close the center. Join with a slip stitch into the first stitch and chain 1. (5 stitches)
Round 2: Work 5 increases, placing 2 single crochet stitches into each stitch around. Join and chain 1. (10 stitches)
Round 3: Repeat 1 single crochet and 1 increase five times. Join and chain 1. (15 stitches)
Round 4: Repeat 2 single crochet stitches and 1 increase five times. Join and chain 1. (20 stitches)
Rounds 5–7: Work 1 single crochet in each stitch around for three rounds, joining and chaining 1 after each round. (20 stitches per round)
Teaching tip: Check the stitch count at the end of every round. If the count changes unexpectedly, find the missed or extra stitch before continuing, because the next decrease round depends on the head having the correct shape.
Step 2: Shape and Stuff the Head
Yarn: Skin tone
The next round reduces the opening and creates the rounded head shape before the blue clothing begins.
Round 8: Work 10 decreases around. (10 stitches)
Fill the head firmly with fiberfill, adding small amounts at a time.
Distribute the stuffing evenly so the head remains rounded rather than lumpy.
Why this matters: Stuffing at this stage helps shape the upper part while the opening is still accessible. Avoid packing it so tightly that the stitches stretch apart.
Step 3: Begin the Light-Blue Upper Clothing and Arms
Yarn: Sky blue · Work in BLO
The light-blue round introduces the clothing and forms the first arm details using bobble stitches. Working into the back loops only leaves front loops available for the skirt later.
Change to sky-blue yarn and join with a slip stitch, then chain 1.
Work in the back loops only, repeating 1 single crochet and 1 increase five times. (15 stitches)
Form the arm bobbles in the designated side stitches shown in the original video.
Join and chain 1 at the end of the round.
Important: The source does not specify the exact placement of the first pair of arm bobbles in written form. Use the original video to identify the intended side stitches rather than guessing their position.
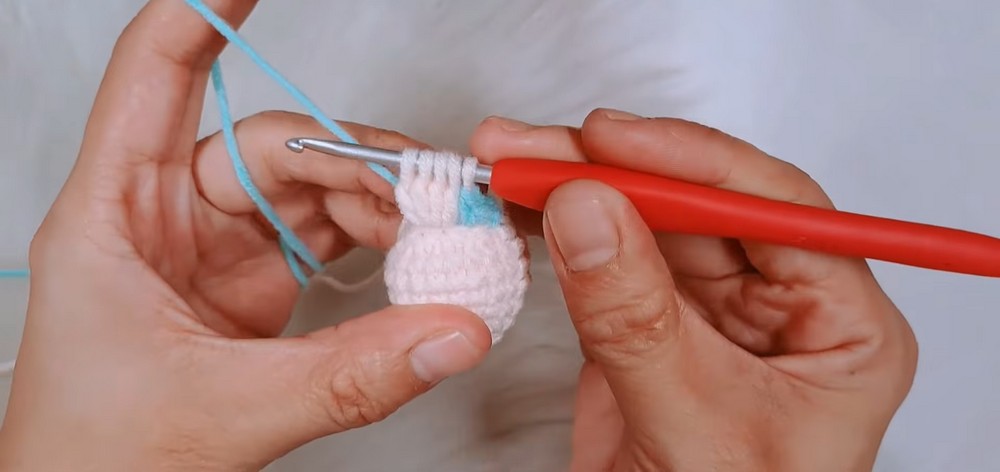
Teaching tip: Keep the unused front loops visible and unworked. They will form the attachment line for the skirt, so crocheting through both loops by mistake can make that later step harder.
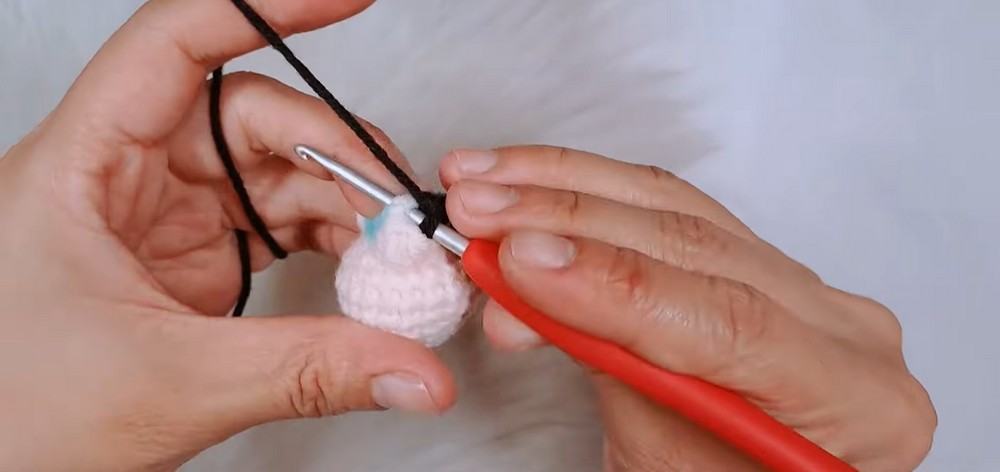
Step 4: Add the Black Clothing Detail
Yarn: Black
The black round creates a contrasting band between the light-blue upper section and the blue lower clothing.
Join black yarn and chain 1.
Work 1 single crochet in each of the 15 stitches around.
Join with a slip stitch and chain 1 to prepare for the next round.
Keep the color change neat at the join. A loose join or an extra stitch can create a visible bump in this narrow section.
Step 5: Crochet the Blue Lower Body and Arm Details
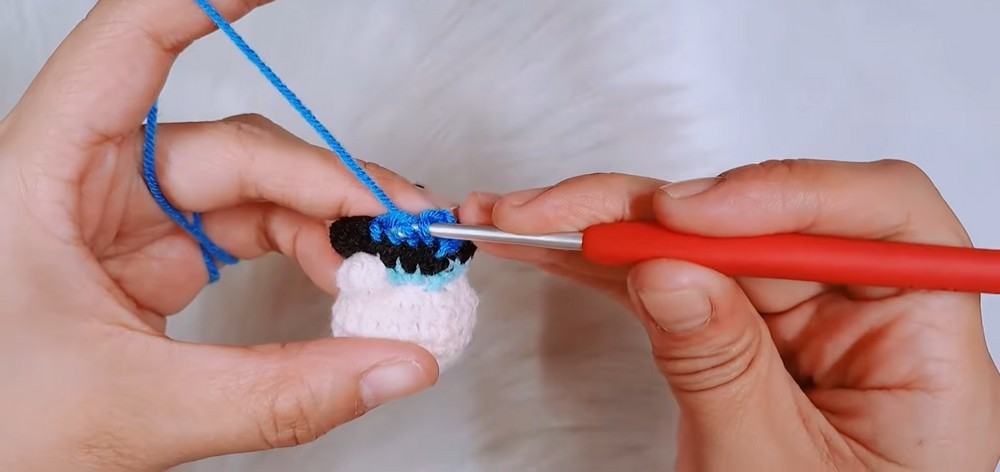
Yarn: Blue · Work in BLO
The blue round continues the clothing and includes another pair of bobble stitches for the arms.
Change to blue yarn, join, and chain 1.
Work in the back loops only: 4 single crochet stitches, 1 bobble stitch, 3 single crochet stitches, 1 bobble stitch, and 6 single crochet stitches. (15 stitches)
Join with a slip stitch and chain 1.
Check your work: The two arm bobbles should sit on opposite sides of the torso. Compare the placement with the earlier arm details before continuing.
Step 6: Decrease and Close the Body
Yarn: Blue
The final body rounds narrow the lower opening and create a compact shape for the miniature doll.
Round 12: Repeat 1 single crochet and 1 decrease five times. (10 stitches)
Add fiberfill to the body, distributing it evenly without stretching the fabric.
Round 13: Work 5 decreases. (5 stitches)
Join with a slip stitch, fasten off, and leave enough yarn to close the remaining opening.
Thread the tail through the remaining stitches with a darning needle and pull firmly to close.
Teaching tip: Before closing, check that the body feels evenly filled and that the clothing colors sit in the intended order. Once the opening is secured, adjusting the stuffing becomes much more difficult.
Step 7: Crochet the Blue Skirt
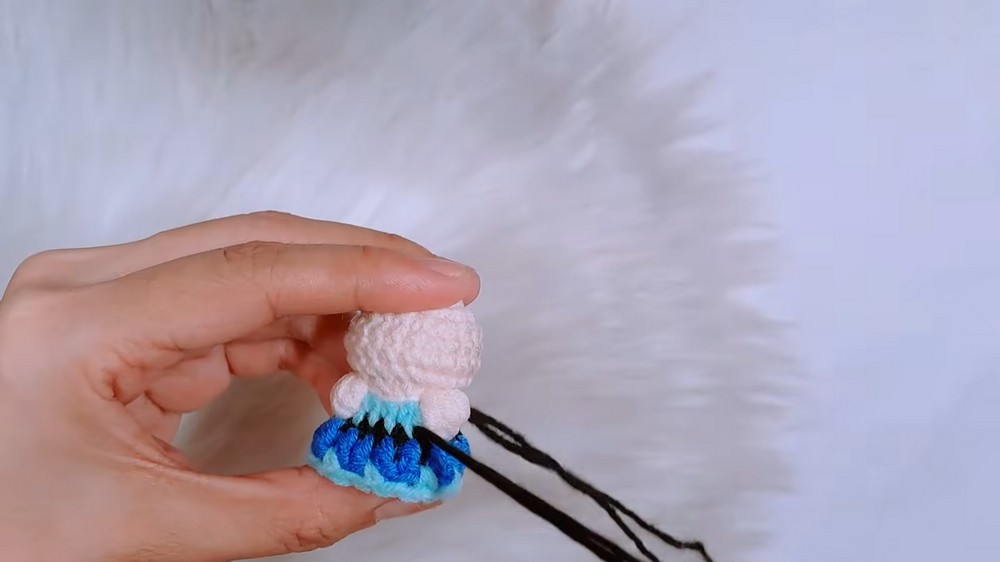
Hook: 2.5 mm · Yarn: Blue · Work into FLO of Round 9
The skirt is crocheted into the front loops left unworked on Round 9. This creates a separate flared section without making the skirt as a detached piece.
Join blue yarn to the front loops of Round 9.
Chain 2; this chain does not count as a stitch.
Repeat the following sequence three times: 4 double crochet stitches and 1 double crochet increase. (18 stitches)
Slip stitch into the first stitch and fasten off.
Why the front loops matter: Working into the reserved front loops gives the skirt a clear attachment line around the torso. Insert the hook into the correct loops all the way around to avoid gaps or uneven sections.
Check the result: Spread the skirt gently with your fingers. The stitches should form a small flared edge rather than twisting around the body.
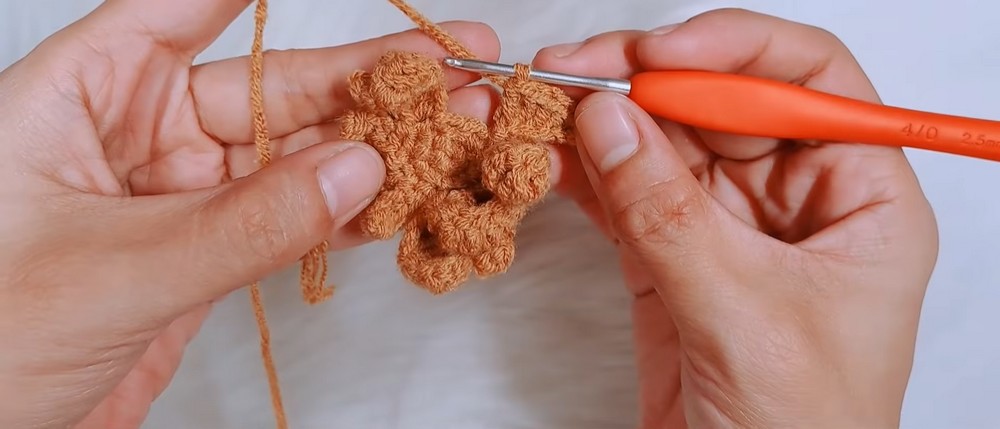
Step 8: Make the Dark-Brown Hair Cap
Hook: 2.5 mm · Yarn: Dark brown
Anna’s hair is made as a small cap with individual strands crocheted directly from its base. Different chain lengths create the varied sections needed for the hairstyle.
Round 1: Make a magic ring and work 5 single crochet stitches into it. (5 stitches)
Round 2: Work 5 increases. (10 stitches)
Continue from the second round to make the nine hair strands in this order:
Strands 1 and 5: Chain 10. Skip 1 chain, work 1 slip stitch, 2 single crochet stitches, and 5 double crochet stitches. Slip stitch into the base.
Strands 2, 3, and 4: Chain 5. Skip 1 chain, work 4 single crochet stitches, then slip stitch into the base.
Strands 6 and 9: Chain 7. Skip 1 chain, work 1 slip stitch, 2 single crochet stitches, and 3 double crochet stitches. Slip stitch into the base.
Strands 7 and 8: Chain 9. Skip 1 chain, work 1 slip stitch and 7 double crochet stitches, then slip stitch into the base.
Teaching tip: Keep track of each strand as you finish it. The different chain lengths are intentional, so making all strands the same length will change the hairstyle.
Step 9: Position and Attach the Hair
Materials: Hair cap, sewing pins, darning needle or hot glue
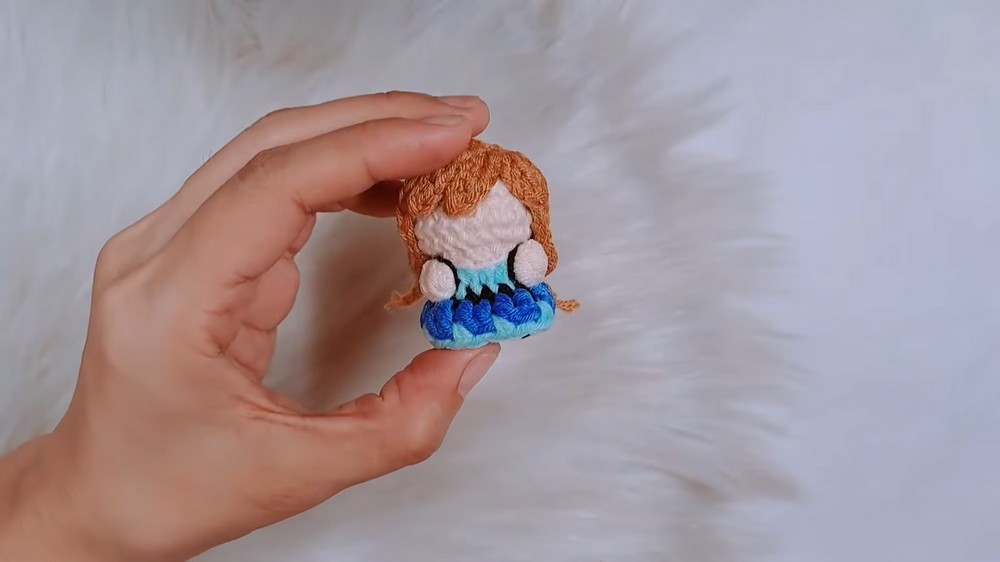
Careful placement helps the hair frame Anna’s face rather than covering it. Pinning the cap before permanent attachment allows you to adjust the hairstyle.
Position the brown hair cap over the top of the head.
Use sewing pins to hold it temporarily in place.
Arrange strands 2, 3, and 4 at the front so they frame the face as shown in the source tutorial.
Check the front and sides before securing the cap.
Attach it with sewing stitches or hot glue, following the method used in the original tutorial.
Braid the side strands and trim their ends neatly.
Safety note: If using hot glue, keep it away from your fingers and work carefully to avoid burns. Sewing is a useful alternative when you prefer not to use glue.
Check the result: The face should remain visible, with the front strands arranged evenly and the side braids sitting neatly against the doll.
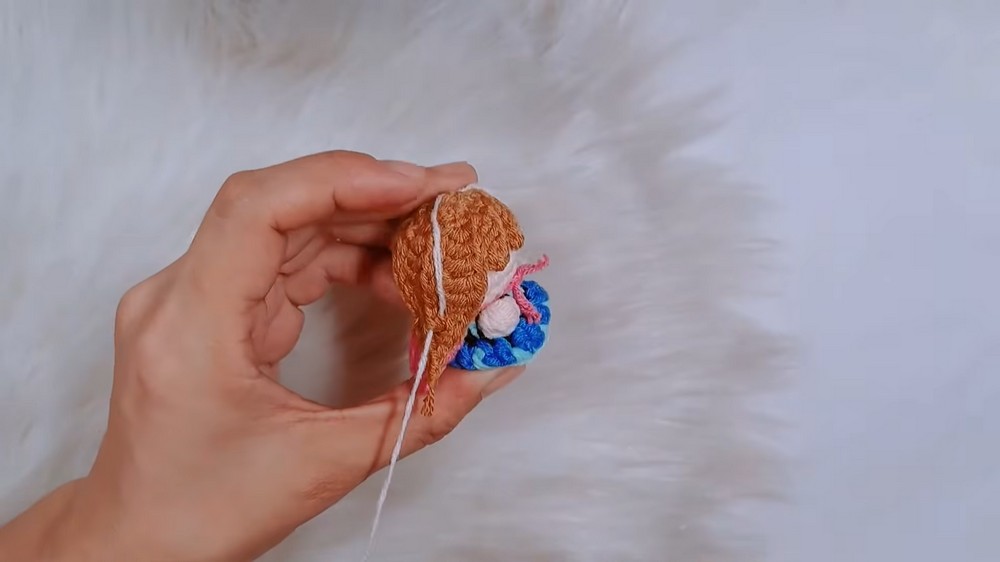
Step 10: Embroider the Bodice and Belt Details
Yarn: Black · Tool: Darning needle
The black embroidery adds definition to the blue clothing and gives the torso its finished costume details.
Thread black yarn through a darning needle.
Embroider the bodice lines around the torso.
Add the criss-cross belt details following the placement shown in the original video.
Secure the yarn ends discreetly inside the clothing.
Teaching tip: Check the design from the front as you work. Keep the embroidered lines balanced on both sides, and avoid pulling the yarn so tightly that it gathers the crocheted fabric.
Step 11: Crochet Two Pink Cape Pieces
Hook: 2.5 mm · Yarn: Carmine pink · Make 2
The cape consists of two matching crocheted pieces that wrap around Anna’s shoulders. Making both pieces with the same stitch sequence helps create a balanced finish.
Make a slip knot and chain 7.
Skip the first chain and work 6 single crochet stitches across.
Row 2: Chain 2, work 1 double crochet in the same stitch, then 4 double crochet stitches and 1 double crochet increase.
Row 3: Chain 2, work 1 double crochet in the same stitch, then 5 double crochet stitches and 1 double crochet increase.
Fasten off.
Repeat the same instructions to make the second piece.
Teaching tip: Keep the first cape piece nearby as a size reference while crocheting the second. Matching their width and length will make it easier to position them evenly around the shoulders.
Step 12: Attach the Cape Around the Shulders
Materials: Two pink cape pieces
The final clothing layer brings the pink accent into the completed design.
Position one cape piece over each shoulder.
Wrap the pieces around the shoulders as shown in the source tutorial.
Bring the front edges together neatly.
Tie or secure the pieces at the front so they stay in position.
Check that the cape sits over the clothing without hiding the embroidered bodice details. Adjust the two sides before securing them permanently.
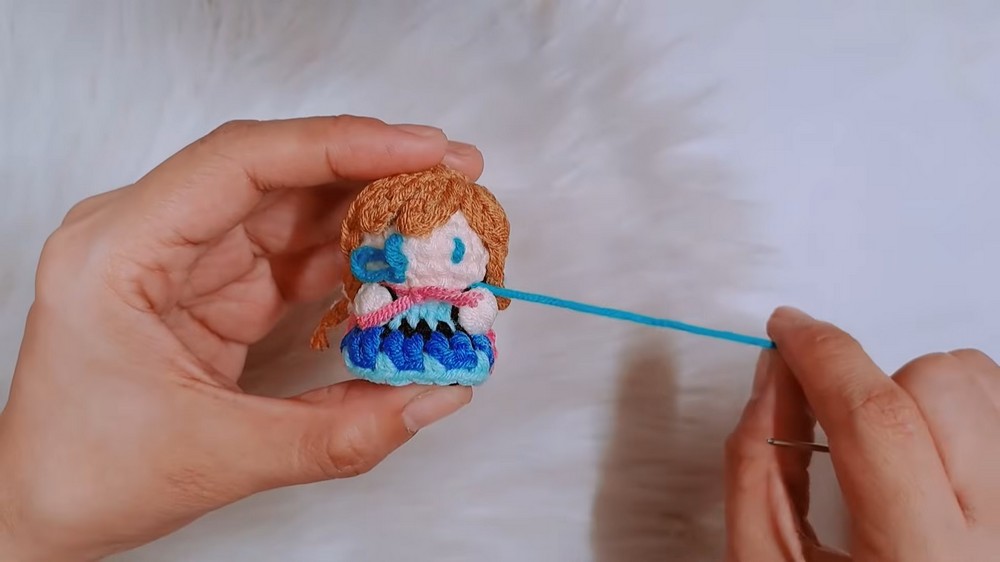
Step 13: Embroider the Eyes and Add Hair Highlights
Yarn: Sky blue, black, and white
The embroidered eyes and light hair highlights add the final recognizable details to Anna’s face and hairstyle.
Use sky-blue and black yarn threads to embroider the eyes, following the placement shown in the original tutorial.
Check that both eyes sit at a similar height and look balanced from the front.
Add white yarn highlights across the top of the brown hair piece.
Secure all embroidery ends and hide them neatly.
Important materials note: White yarn is required for the hair highlights described in the finishing instructions, although it was not included in the original yarn list. Add a small amount of white yarn if you want to reproduce that detail.
Finishing and Customization
Before using the doll as a keychain or bag charm, inspect all joins, embroidered details, braids, and cape attachments. Trim loose yarn ends and check that the stuffing opening is securely closed.
For another princess-inspired variation, change the yarn colors and hairstyle. Ice-blue and white yarn can create an Elsa-inspired palette, while different hair arrangements can give the same basic doll construction a new character.
If you plan to use a keychain fitting, attach it securely to a suitable strong point on the finished doll. The supplied pattern describes the doll as suitable for a keychain or bag charm, but it does not provide a specific hardware attachment method.
Your Mini Anna Doll Is Complete
Your finished Mini Anna combines a compact crocheted body, brown hair with braided side strands, blue clothing, embroidered costume details, and a carmine-pink cape. Careful placement of the hair and facial embroidery helps preserve the character’s identity even at miniature size, while the color changes and layered clothing give the handmade doll its distinctive storybook appearance.