Need tiny fruit-inspired charm with plenty of personality? Crochet two rounded cherries, leafy stems, and sturdy hanging loop for keys, bags, or zippers.
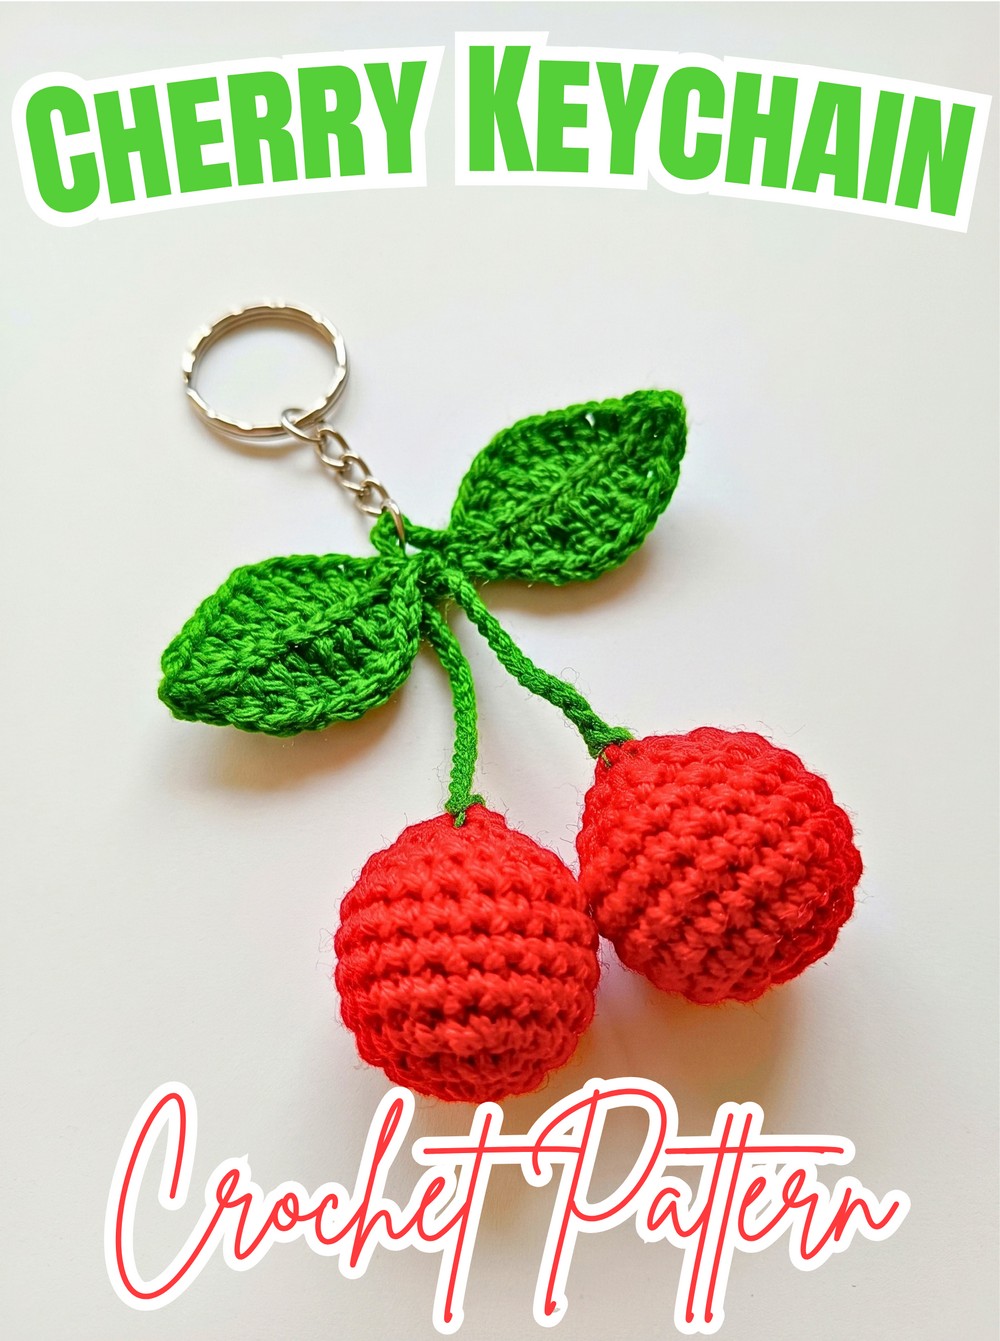
Two plump crochet cherries come together with curved green stems and leafy details, creating petite fruit charm that looks cheerful without taking up much space. Bright red, lemon yellow, or deep burgundy yarn can give this crochet keychain completely different personalities.
What makes this pattern especially fun is how simple shapes turn into one connected accessory. You’ll learn how to shape matching berries, control firmness with stuffing, join different stem lengths, form pointed leaves, and finish with central loop ready for metal keychain hardware.
Credit Erfin R. Tangdilintin
Before You Start
Finished cherry cluster measures roughly 2 inches wide, giving you compact amigurumi piece that works well for keys, bags, or zipper pulls. Classic cherry red keeps traditional fruit look, while lemon yellow and deep burgundy offer playful alternatives.
Stem length can also be changed by adjusting chain counts, although pattern below uses 30 chains for first stem and 13 chains for second stem. Keep these lengths in mind before beginning so both cherries connect with intended hanging shape.
Materials & Tools Needed
- Yarn: Cherry-colored yarn, such as red or yellow, plus green yarn for stems and leaves
- Crochet Hook: 2.0 mm / 2.5 mm crochet hook
- Stuffing: Polyfill fiber stuffing
- Hardware: Metal keychain ring with chain attachment
- Notions: Yarn needle, scissors, and lighter for securing or melting synthetic yarn ends
Pattern Abbreviations & Terminology
- MR: Magic Ring
- ch: Chain stitch
- sc: Single crochet
- hdc: Half double crochet
- dc: Double crochet
- tr / Tr: Treble crochet
- sc2inc: Single crochet increase – 2 sc in same stitch
- sl st: Slip stitch
- st(s): Stitch(es)

Step-by-Step Crochet Cherry Keychain Process
Shape Two Matching Cherry Berries
Begin with cherry-colored yarn and make two identical rounded berries. Building both berries through identical stitch counts helps keep finished pair balanced once stems are connected.
Round 1: Make MR, work 7 sc into ring, then join with sl st into first sc [7 sts].
Round 2: Ch 1, work sc2inc in every stitch around, repeating 7 times for 14 sc total, then join with sl st into first sc [14 sts].
Round 3: Ch 1, work (1 sc, sc2inc) × 7 around for 21 sc total, then join with sl st [21 sts].
Rounds 4–7: Ch 1, work 1 sc in each stitch around for 21 sc, then join with sl st at end of each round [21 sts per round].
Why This Shaping Matters
Rounds 1–3 gradually widen berry from small center into full rounded circumference. Once you reach 21 stitches, stop increasing. Keeping Rounds 4–7 at 21 stitches maintains rounded sides instead of continuing outward.
Check Before Stuffing
After Round 7, look for compact sphere with even stitch placement. If one side looks noticeably flatter or wider, check whether every round contains 21 stitches before moving forward.
Fill and Close First Cherry
Firm stuffing gives each berry enough body to hold its rounded fruit shape.
Stuffing: Firmly fill cherry sphere with polyfill.
Closing: Work series of decreases across remaining opening. Thread yarn tail through yarn needle, weave through front loops, pull tightly to close opening, then hide tail inside [close securely].
How Firm Should It Be?
Fill gradually rather than forcing large amounts of polyfill into opening at once. Cherry should feel firmly supported while still keeping rounded outline. Once stuffing is complete, check shape from several angles before closing.
Repeat for Second Cherry
Repeat exact same cherry instructions to make second identical berry.
Before Moving On:
Compare both cherries side by side. Matching size and firmness will make joined pair look balanced when green stems are added.

Create Stems and Join Both Cherries
Switch to green yarn once both stuffed cherries are finished.
First Stem: Attach green yarn at top center of first cherry, chain 30, secure with knot, leave short tail, then trim tail with scissors and lighter.
Second Stem & Connection: Attach green yarn at top center of second cherry, chain 13, then join this chain into first stem to connect both cherries.
Why Stem Lengths Differ
First stem uses 30 chains, while second uses 13 chains. This difference gives cherry cluster its linked, hanging arrangement. If you want longer or shorter stems in your own version, adjust chain lengths while keeping connection points secure.
Check the Join
Before starting leaves, gently hold both cherries by their stems. Make sure connection feels secure and both berries hang naturally without pulling loose from their attachment points.

Form First Leaf Along Green Chain
Leaves are shaped directly from green foundation chain, with taller stitches creating wider center and tapered stitches bringing each side back toward its base.
Skip 3 chains from hook, then work down one side:
First Side: 1 sc, 1 hdc, 2 dc, 3 Tr, 1 dc, 1 hdc, 1 sc, 1 sl st.
Turn and work along opposite side in mirror order:
Opposite Side: 1 sc, 1 hdc, 1 dc, 3 Tr, 1 dc, 1 hdc, 2 sc, finish with sl st [15:03].
Watch the Stitch Heights
The three treble crochets form taller center section of leaf. Moving back through dc, hdc, and sc gradually lowers edge, helping leaf taper toward its ends. Follow stitch order carefully rather than replacing tall stitches with shorter ones.
Shape Second Leaf
Chain 13 with green yarn, skip 3 chains from hook, and repeat same leaf sequence.
First Side: 1 sc, 1 hdc, 2 dc, 3 Tr, 1 dc, 1 hdc, 1 sc, 1 sl st.
Opposite Side: 1 sc, 1 hdc, 1 dc, 3 Tr, 1 dc, 1 hdc, 2 sc, 1 sl st.
Leaf Shape Check
Lay both leaves flat before continuing. Each should show taller stitches through its middle and gradually shorter stitches toward its edges. This is what gives leafy shape instead of making chain look like simple strip.

Add Center Hanging Loop
With both leaves complete, create central hanging point for hardware.
Center Loop: Chain 4 between leaves, then slip stitch to anchor loop securely.
Fasten off, weave in ends, and use lighter to neatly seal synthetic yarn tails.
Why This Loop Matters
Central ch-4 loop carries keychain hardware, so secure anchoring matters more here than simply hiding yarn ends. Check that loop sits between leaves and does not pull either leaf out of position.
Attach Keychain Hardware
Open jump ring or use split ring from metal keychain hardware. Attach it directly through central ch-4 loop between leaves.
Final Hardware Check
Give hardware gentle pull before attaching keys or other items. Ring should pass cleanly through loop, while leaf cluster remains securely connected to both cherries.
Your crochet cherry keychain is ready to decorate keys, bags, or zipper pulls with its compact pair of stuffed berries, green stems, leafy top, and central hanging loop.