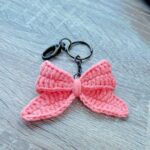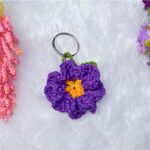
See how two contrasting wings become one tiny Crochet Butterfly Keychain, then add its center strip and ring for charming bags, zippers, or keys.

This crochet butterfly keychain turns two simple wing pieces into one colorful charm with very small yarn use. Crochet details stay manageable, making this design useful for beginners who enjoy compact handmade accessories.
With contrasting yarn colors, this crochet design gets its butterfly shape through three short rounds on each wing. Crochet assembly then brings both sides together, while one chain strip creates its center body and antennae.
Materials and Size
Before stitching, gather yarn in two contrasting colors, your hook, scissors, finishing tools, and one keychain ring. Polycherry yarn works with this tutorial, while comparable sport/DK weight yarn can also be used.
Materials & Tools
- Yarn: Polycherry yarn, or comparable sport/DK weight yarn, in two contrasting colors such as Light Blue and Dark Blue.
- Crochet Hook: Hakpen crochet hook sized suitably for chosen yarn, typically 2.0mm to 3.0mm for Polycherry yarn.
- Notions: Scissors, lighter or yarn needle for securing and weaving ends, plus one keychain ring.
Finished Size
Finished butterfly measures approximately 2 inches wide by 2 inches tall. This compact size suits keys, bags, and zipper pulls without adding much weight.
Image suggestion: Finished butterfly beside keys or bag zipper, showing its approximate 2-inch size.
Stitch Abbreviations
- Ch: Chain
- Sl St: Slip Stitch
- HDC: Half Double Crochet
- Inc: Increase – work 2 HDC in same stitch
- St(s): Stitch(es)

Wing Pattern: Build First Side
Begin with Light Blue yarn and form first wing. Keep each round aligned with supplied stitch counts so both wings can later meet evenly.
Form First Ring
Make slip knot, then chain 5. Join with slip stitch into first chain to form small ring.
Work Round 1
Chain 2, then work 7 HDC directly into center of ring.
Shape Round 2
Chain 2 and turn. Work 1 HDC in same space, then work HDC increase in each remaining stitch across, including turning chain space. This gives 8 HDC increases.
Shape Round 3
Chain 2 and turn. Work 1 HDC increase in very first space. Continue by alternating 1 HDC and 1 HDC increase across to end, finishing with 1 HDC in last turning chain space.
Chain 1, cut yarn, and pull through to fasten off.
Image suggestion: First wing after Round 3, positioned flat so its curved edge and turning-chain side are easy to inspect.
Matching Second Wing in Contrasting Color
Repeat exact pattern from Round 1 through Round 3 using Dark Blue yarn. Keep yarn attached after Round 3 because next row joins both wing pieces.
Join Both Wings
Chain 2 and turn. Working across both wing pieces, crochet 1 HDC into each stitch to bind and link both pieces side-by-side.
Chain 1, cut yarn, and leave short tail for fastening.
Image suggestion: Both wings during joining row, with side-by-side placement and center seam visible.
Center Strip and Antennae
Now create separate center detail using one slip knot and chain 12. Fasten off, leaving small tail.
This strip becomes both center body detail and antennae. Position it vertically down center seam between joined wings, matching supplied tutorial placement.
Image suggestion: Chain-12 strip positioned over center seam before securing, showing how it extends beyond wing body.
Secure Loose Ends and Add Keychain Ring
Weave in or tie off loose yarn ends at back using yarn needle. If using synthetic Polycherry yarn, secure ends carefully with lighter.
Next, attach keychain ring securely through top loops of butterfly structure. Check that ring passes through stable top loops before using butterfly as keychain, bag charm, or zipper pull.
Customize Your Butterfly
Keep core wing pattern unchanged while varying yarn choice or scale through yarn and hook changes described in supplied tutorial.
- Try variegated yarn for soft multi-colored wings.
- Use pastel yarns for gentle color changes.
- Choose cotton thread with smaller hook for delicate miniature butterfly.
- Try chunky velvet yarn for larger plush charm.
Quick Check Before Use
Confirm both wing pieces are joined side-by-side, center strip sits along seam, loose ends are secured, and keychain ring is attached through top loops. Finished size should be approximately 2 inches wide by 2 inches tall.
Your butterfly is now ready to hang from keys, decorate bag hardware, or brighten up zipper pulls. Its small size also makes it suitable for handmade gifts and craft-fair items.