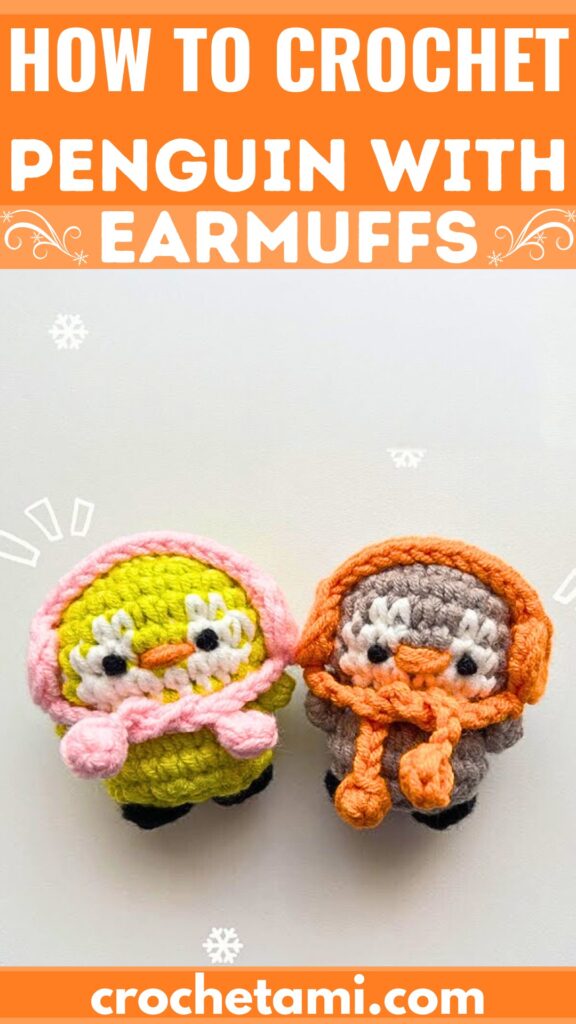
Those little penguin details-contrasting face, black feet, colorful earmuffs, and a cozy scarf—make this crochet winter friend a charming handmade seasonal companion.
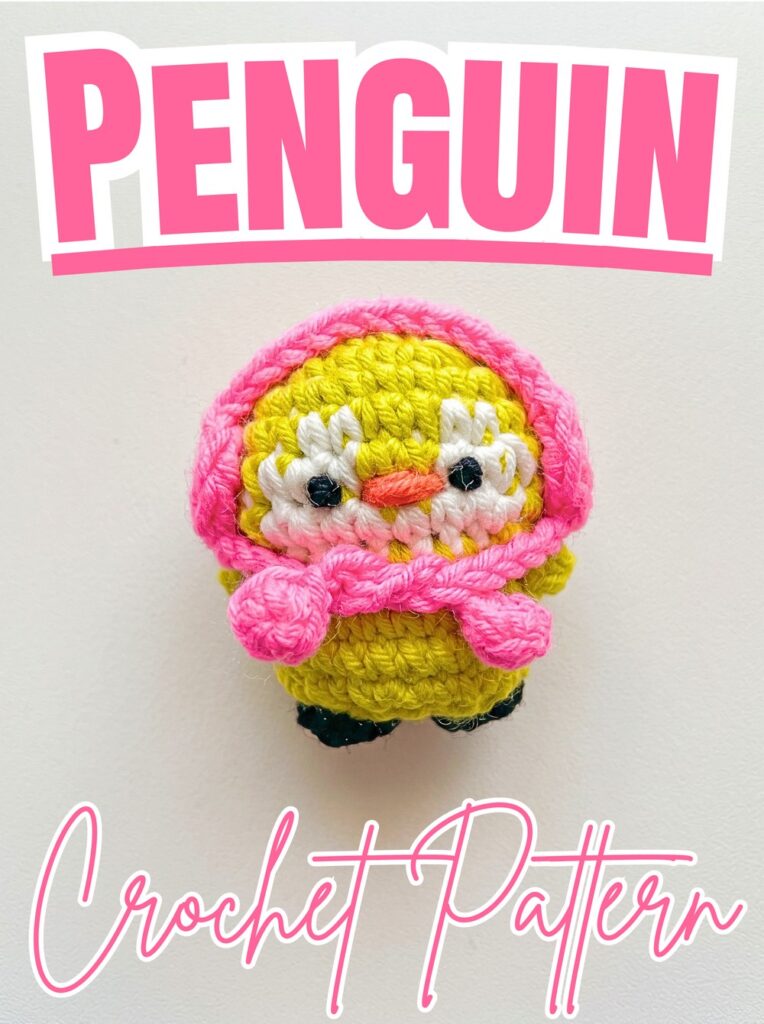
A round body, bright beak, and contrasting white face give this crochet penguin its recognizable look, while tiny black feet and stitched eyes bring its expression to life. Colorful earmuffs and a snug scarf add a playful winter finish, making this crochet palm-sized amigurumi easy to style as a seasonal decoration or handmade gift.
This crochet tutorial covers shaping the penguin’s body, making its small hands and feet, and assembling the winter accessories. You’ll also find guidance for embroidering the beak and eyes, attaching the earmuffs, and finishing the plushie neatly.
Credit Crochetbynisa
Materials & Tools Needed
- Five-strand cotton yarn:
- Main body color, such as sprout green or grey.
- White for the face.
- Black for the feet and eye details.
- Orange for the beak.
- Pink or orange for the earmuffs and scarf.
- Crochet hook: 3.00 mm.
- Other supplies: Sewing needle, glue, stuffing cotton, and scissors.
The source describes the finished penguin as a compact, palm-sized plushie. It does not provide an exact finished height or width.
Pattern Abbreviations & Terminology
- ch: Chain stitch.
- sc: Single crochet.
- hdc: Half double crochet.
- inc: Increase; work 2 sc into the same stitch.
- dec: Decrease; single crochet two stitches together.
- sl st: Slip stitch.
- st / sts: Stitch / stitches.
- R: Round.
Pattern note: The supplied instructions list hdc as an abbreviation, but the provided body, hands, feet, earmuffs, and scarf instructions do not specify where to use it.

Step-by-Step: How to Crochet the Little Penguin
Step 1: Crochet the Main Body
Use your main body color and the 3.00 mm hook. The head and body are worked together as one rounded piece, with white yarn introduced to form the face. Since the pattern uses joined rounds, finish each specified round with a slip stitch and chain 1 unless the instructions say otherwise.
Round 1: Make a magic ring and work 5 sc into it. Join with a sl st and chain 1.
Round 2: Work 5 increases around, bringing the total to 10 stitches. Join with a sl st and chain 1.
Round 3: Repeat 1 sc, 1 increase five times. You should have 15 stitches. Join and chain 1.
Round 4: Repeat 1 sc, 1 increase, 1 sc five times. The round should finish with 20 stitches. Join and chain 1.
Round 5: Repeat 3 sc, 1 increase five times, bringing the total to 25 stitches. Join and chain 1.
Check the opening and the shape before continuing. The increases expand the round gradually to create the rounded base of the penguin.
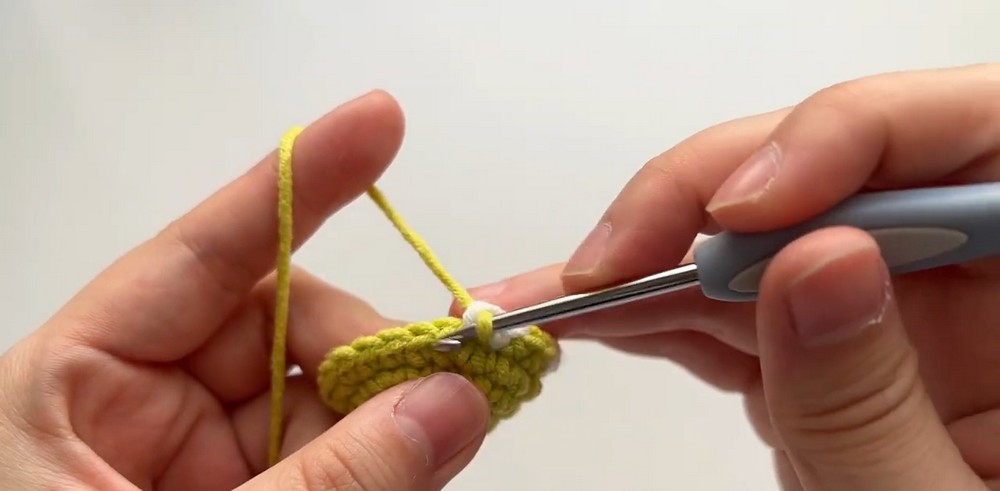
Step 2: Introduce the White Face
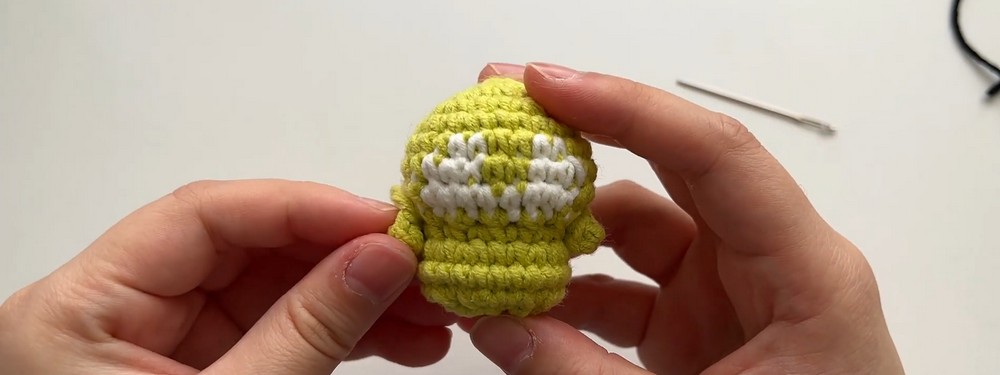
In Round 6, change to white yarn for the face area as demonstrated in the source video. The supplied written sequence is:
- Round 6:
8 sc, 2 sc, 2 sc, 2 sc, 11 scwith color changes, for a stated total of 25 stitches. Join with a sl st and chain 1. - Round 7:
7 sc, 3 sc, 2 sc, 3 sc, 10 sc, for a stated total of 25 stitches. Join and chain 1. - Round 8:
7 sc, 8 sc, 10 sc, for a stated total of 25 stitches. Join and chain 1.
When changing colors, keep the transition tidy and avoid pulling the yarn so tightly that the face panel puckers. Check the white section from the front to ensure it sits centrally.
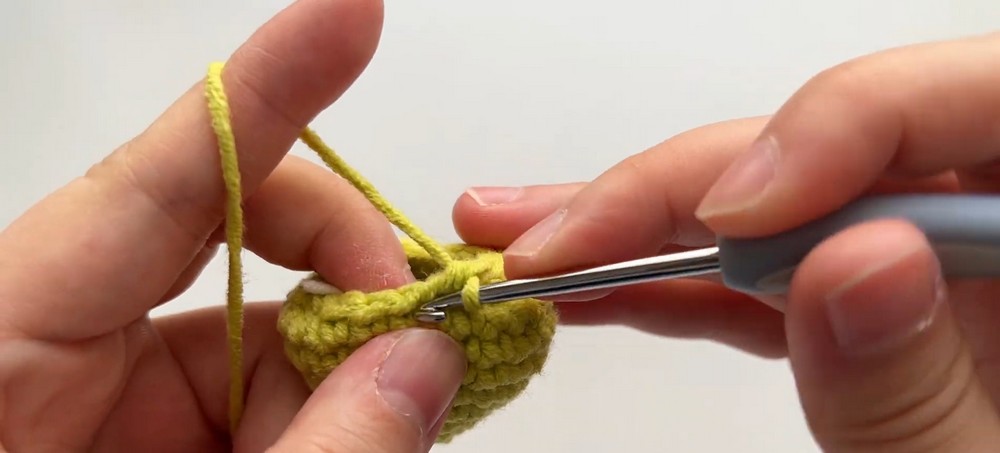
Step 3: Shape the Upper Body and Close the Opening
Continue with the supplied decreases and increases to shape the body.
- Round 9: The source lists
12 sc dec, 1 sc, states a total of 13 stitches, and instructs you to cut the white yarn. Join with a sl st and chain 1. - Round 10: Repeat
sc, incsix times, then work 1 sc. The stated total is 19 stitches. Join and chain 1. - Round 11: Work
6 sc, 2 inc, 2 sc, 2 inc, 7 sc, for a stated total of 23 stitches. Join and chain 1. - Round 12: Work 23 sc around. Join and chain 1.
- Round 13: Work
6 sc, 2 dec, 2 sc, 2 dec, 7 sc, for a stated total of 19 stitches. Join and chain 1. - Round 14: The source lists
9 dec, 1 sc, with a stated total of 10 stitches. Stuff the body firmly with filling cotton during this round. Finish with a sl st, then cut the yarn, leaving a long tail. - Round 15 – Closing: Thread the yarn tail through the outer loops of the stitches with a sewing needle, skipping one stitch at a time as described in the source. Pull the yarn tight to close the bottom opening securely.
Before closing the body completely, make sure the stuffing is distributed evenly. Add small amounts at a time so the plushie keeps its rounded shape without stretching the stitches.
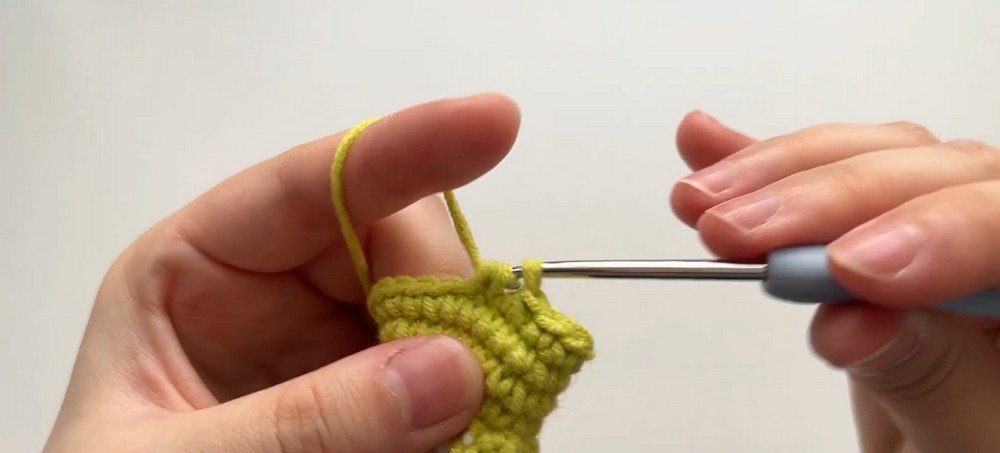
Step 4: Make the Two Hands
Use the main body color for both hands.
- Make a magic ring.
- Work 5 sc into the ring.
- Finish with a sl st and chain 1, as specified in the source.
- Fasten off, leaving a yarn tail long enough for sewing.
Repeat to make the second hand. Keep both pieces similar in size so they can be attached symmetrically to the sides of the body.
The supplied instructions do not specify additional rounds or shaping for the hands, so do not add extra rounds unless you are following a demonstrated variation from the video.
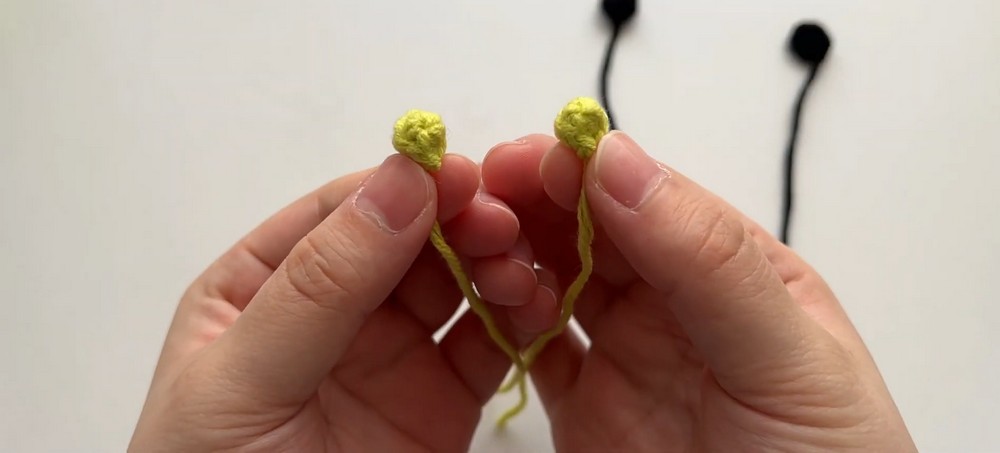
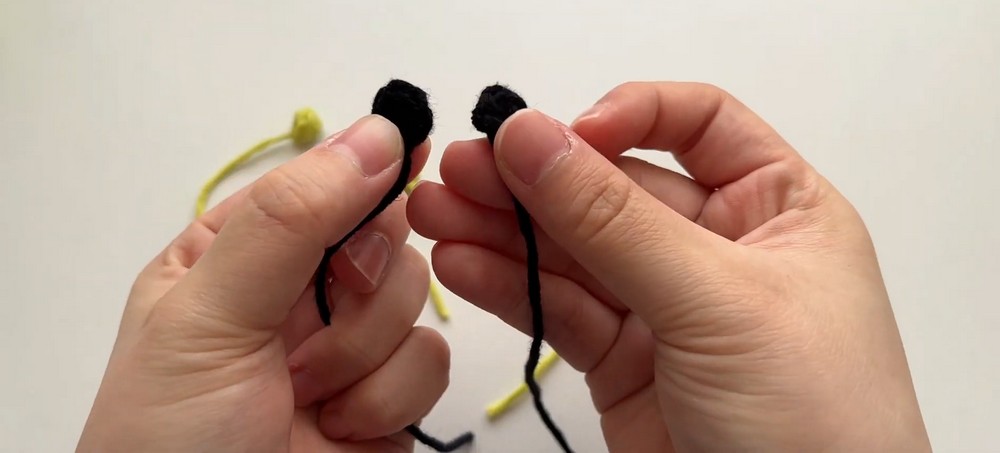
Step 5: Crochet the Black Feet
Make two feet using black yarn.
- Create a magic ring.
- Work 6 sc into the ring.
- Finish with a sl st.
- Fasten off, leaving a tail for sewing.
Set the two feet aside until assembly. Keep the stitches compact so the feet remain small enough to suit the palm-sized body.
Step 6: Make the Earmuffs
Choose pink or orange accent yarn for the earmuffs.
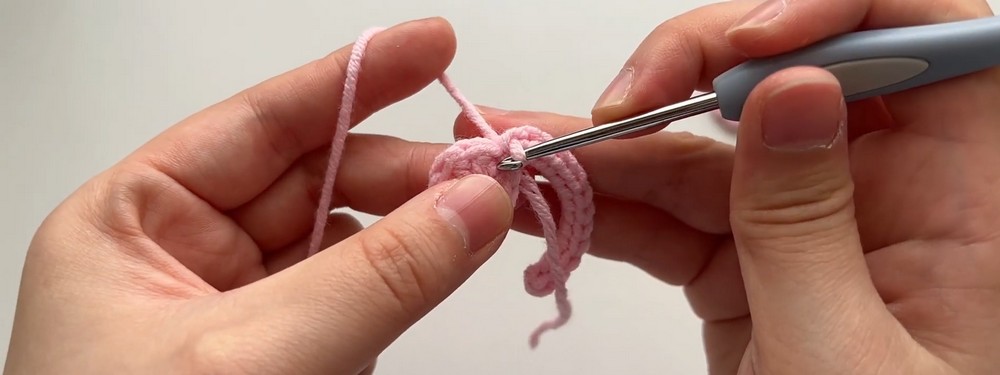
Ear Covers – Make 2
- Make a magic ring.
- Work 5 sc into the ring.
- Finish with a sl st.
Repeat to create the second circular ear cover.
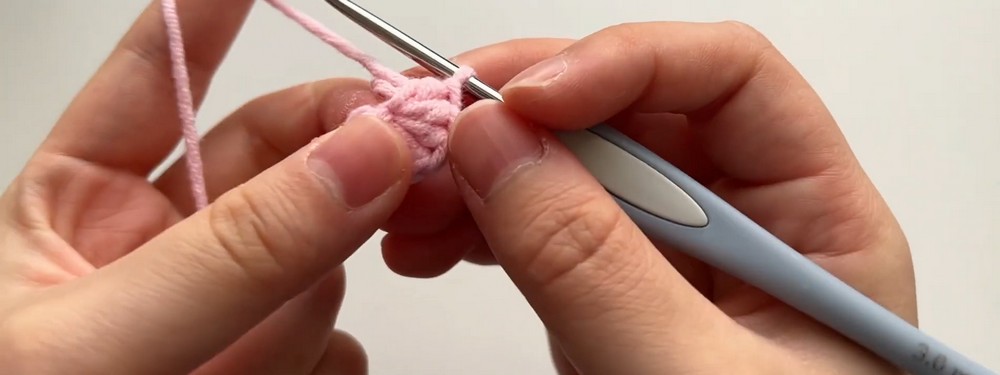
Headband
- Chain 14.
- Work 13 sl st across the chain.
- Fasten off.
The source does not specify a separate fastening method for the headband ends at this stage. Leave enough yarn for attaching the ear covers and securing the band during assembly.
Step 7: Crochet the Scarf
Use the chosen accent color for the scarf.
- Chain 10.
- Fasten off, leaving yarn tails to tie or secure the scarf.
- Test the chain around the penguin’s neck before tying it into place.
The source allows the scarf length to be adjusted for a comfortable fit. If the chain feels too short or too loose around your particular plushie, adjust the length before securing it.
Step 8: Sew on the Hands and Feet
Use the yarn tails left on the hands and feet, along with a sewing needle.
- Hands: Sew one hand to each side of the body, following the placement shown in the source video.
- Feet: Sew the two black feet to the bottom of the body.
Before fastening the yarn tails securely, set the penguin upright and check the placement from the front. Position the hands at similar heights and keep the feet balanced so the plushie can sit neatly.
The written source does not specify exact stitch or round numbers for attaching these pieces, so use the demonstrated placement rather than assigning unsupported row positions.
Step 9: Attach the Earmuffs
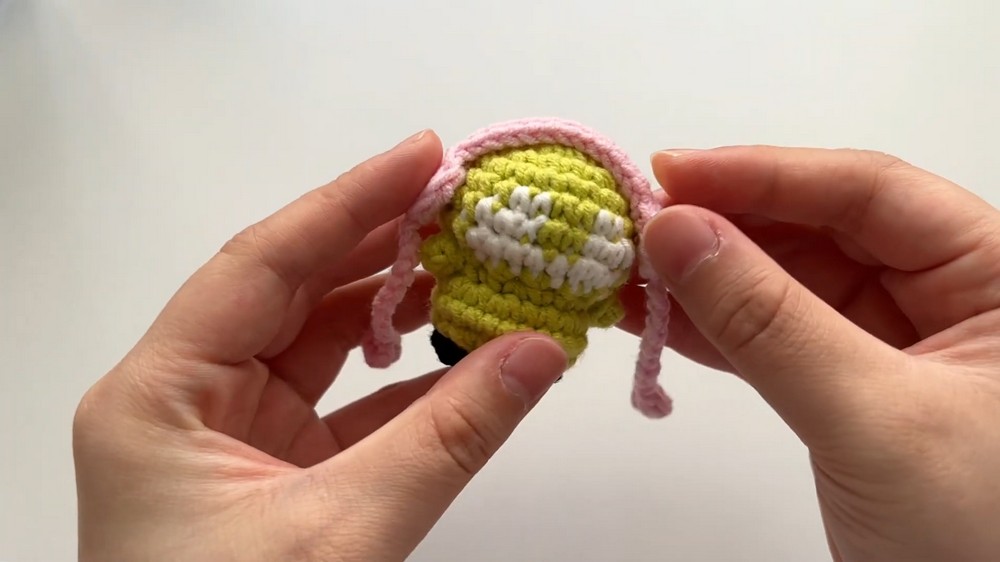
Attach one circular ear cover to each end of the crocheted headband.
Position the band across the penguin’s head so the covers sit neatly over the sides where the ears would be. Use the glue mentioned in the source to secure the band in place.
Check the placement before the glue sets. The band should follow the curve of the head, and both ear covers should sit at a similar height. Keep excess glue away from the visible stitches.
Step 10: Add the Scarf
Wrap the crocheted chain around the penguin’s neck and tie it into a neat knot, following the source instructions.
Adjust the scarf so it sits comfortably without covering too much of the white face. Arrange the ends neatly, then secure them if needed using the available yarn tails.
Step 11: Embroider the Orange Beak
Use orange yarn to embroider a small triangle beak in the white face area.
Work the triangle centrally so it sits between the two eye positions. Keep the stitches close together to create a clear shape, and check the placement from the front before hiding the yarn ends.
Step 12: Embroider the Eyes
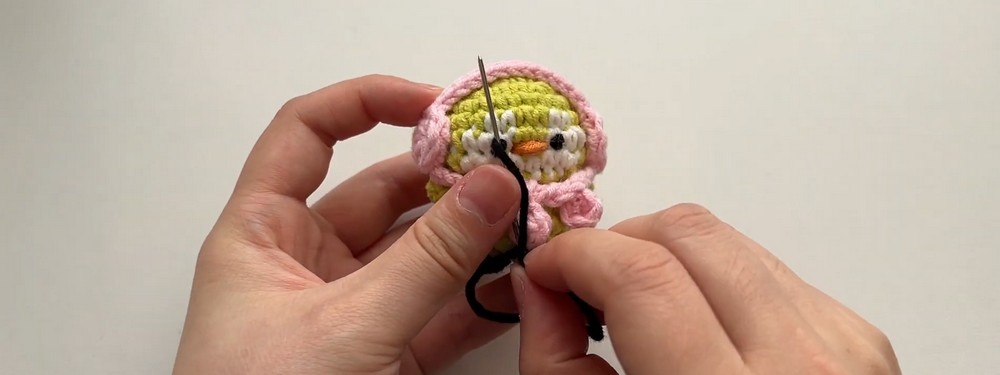
Use black yarn to embroider the eye details on either side of the beak. The source allows either sleeping or open eyes.
- For open eyes: Use small, defined embroidered shapes.
- For sleeping eyes: Use short curved lines to create a closed-eye expression.
Keep the two eyes balanced around the beak. Since the penguin is small, a few neat stitches can be enough to establish its expression without crowding the white face.
Step 13: Finish and Check the Plushie
Weave all remaining loose yarn ends securely inside the plushie. Inspect the sewn parts, embroidered features, scarf, and earmuffs before displaying the penguin.
Use this final checklist:
- The body is stuffed evenly and the opening is fully closed.
- Both hands are sewn securely to the sides.
- The two black feet sit evenly at the base.
- The white face area is clearly defined.
- The orange beak is centered between the eyes.
- The earmuff covers are attached to the headband and sit neatly on the head.
- The scarf is tied securely around the neck.
- No loose yarn tails or visible glue distract from the finished design.
Customize Your Little Penguin
- Try different body colors: The source suggests sprout green, grey, or blue for different versions of the design.
- Coordinate winter accessories: Pair a pink or orange earmuff set with a matching scarf for a coordinated seasonal look.
Your little crochet penguin is complete with its rounded body, contrasting face, embroidered expression, tiny feet, earmuffs, and scarf. Careful placement of the small features gives this palm-sized plushie its distinctive winter character.