A five-point crochet star becomes a cheerful little keepsake with a soft stuffed center, sweet embroidered face, and plenty of ways to use it.
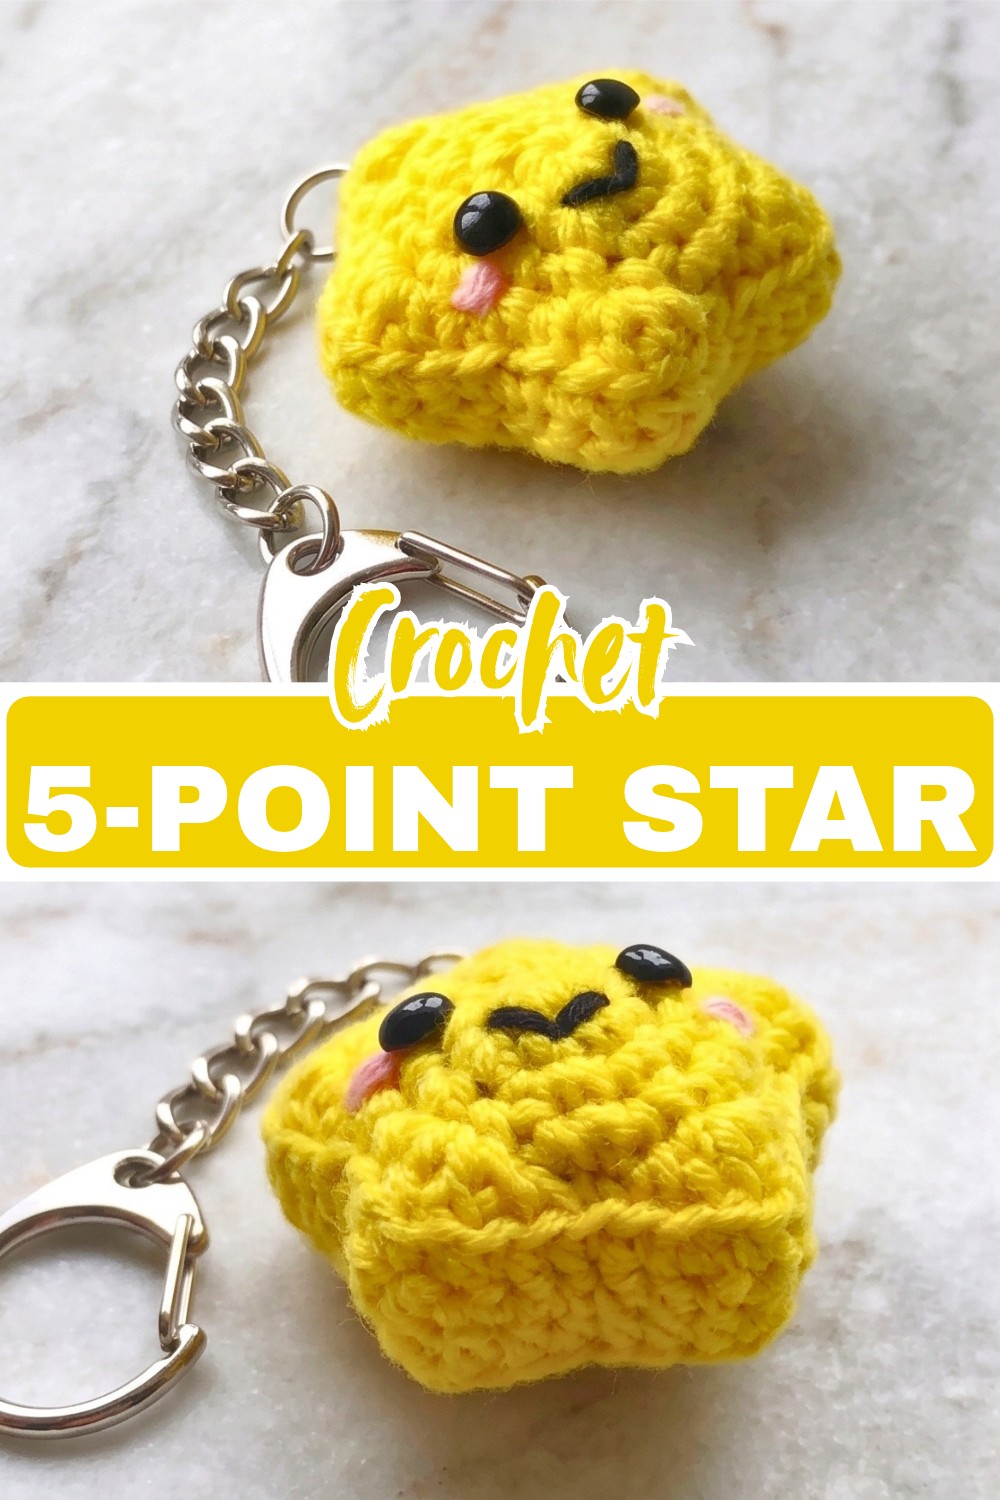
Crochet 5-Point Star Amigurumi Pattern
The appeal of this little crochet star is in its shape: five defined points surround a softly stuffed center, giving the finished piece a playful look without requiring complicated construction. Making two matching star crochet pieces also means you can concentrate on getting the points neat before joining them together.
Once the two sides are sewn and stuffed, the same tiny crochet star can take on several different roles. Add a keychain ring for an everyday accessory, a hanging loop for an ornament, or a simple face and rosy cheeks for an especially cute gift accent.
Credit Cute Crochet
Materials & Tools Needed
- Yarn: Yellow 4-ply yarn or another color of your choice
- Crochet Hook: 3 mm
- Stuffing: Polyester fiberfill
- Yarn Needle: For sewing the two star pieces together and embroidery
- Black Yarn: For the eyes and smile
- Pink Yarn: For optional rosy cheeks
- Stitch Marker or Paperclip: For marking the round
- Keychain Ring: Optional
- Hanging Yarn: Optional for an ornament loop
Finished Size & Customization Ideas
The finished star is approximately palm-sized, although the exact size will vary with your yarn weight, hook, and tension.
You can crochet each side in a different color for a two-tone star, or make several stars in different shades for a cheerful garland or mobile. A simple embroidered expression can also change its personality, from a sleepy little star to a wide-smiling one.
Pattern Abbreviations & Terminology
- MC: Magic Circle
- ch: Chain
- sc: Single Crochet
- hdc: Half Double Crochet
- dc: Double Crochet
- inc: Increase – 2 sc in the same stitch
- sl st: Slip Stitch
- st/sts: Stitch/Stitches
- Rnd: Round

Step-by-Step Crochet Instructions
Star Front & Back
Make 2 identical pieces. Each piece is crocheted from the center outward before the five points are shaped around the edge.
Round 1: Make a magic circle, ch 1, then work 5 sc into the circle; pull the yarn tail firmly to close the center. (5 sts)
Round 2: Work 2 sc in each stitch around. (10 sts)
Round 3: Repeat (1 sc, 1 inc) around. (15 sts)
Round 4: Repeat (2 sc, 1 inc) around. (20 sts)

Round 5: Shape the five points by repeating (1 sc, hdc, dc, hdc in next st, 1 sc, sl st in next st) around; fasten off, leaving a long tail for sewing on at least one piece. (5 star points)
Shape check: The fifth round is where the round base turns into a star. Work the stitches of each point into the intended sequence rather than spreading the increases around the edge. After each point is anchored with the slip stitch, the next point should begin from the following section of the edge.

Embroider the Face
Add the face to one star piece before sewing the two sides together. This makes the embroidery easier to position and keeps the knots hidden inside the finished star.
Eyes
Use Black yarn to embroider two small French knots between Rounds 2 and 3. Keep the eyes evenly spaced on either side of the center.
Smile
Embroider a small curved smile beneath the eyes. A single curved line is enough to give the star its expression.

Rosy Cheeks
For an optional detail, use Pink yarn to make two tiny embroidered circles beneath the eyes.
Placement tip: Because the five points are not symmetrical once the face is added, use the center of the star as your visual guide rather than measuring from the outer points. This keeps the face centered even if your points are slightly different in size.

Join the Two Star Pieces
Place the two crocheted stars back-to-back with the right sides facing outward.
Using the long yarn tail and a yarn needle, sew around the outer edge through the outer loops of the corresponding stitches.
Leave the final star point partly open while you add the stuffing.
Stuffing
Insert small amounts of polyester fiberfill into each point first, then fill the center of the star. Work the stuffing toward the tips with the back of your crochet hook or your fingers.
Avoid packing the points too tightly. A lightly firm fill helps each point remain defined without making the edges look stretched.
Once the center and all five points are evenly filled, finish sewing the remaining opening closed and weave the yarn tail securely into the star.
Add a Keychain or Hanging Loop
For a keychain, form a sturdy yarn loop through the top star point and attach the keychain ring before hiding the yarn ends inside the star.
For an ornament, make a small yarn loop at the top point and secure it firmly through several stitches so the weight of the star does not pull on a single stitch.
You can also leave the loop off entirely and use the finished star as a small gift topper, baby-mobile piece, or decorative accent.
Finishing Tips
Before trimming the final yarn ends, gently shape each of the five points with your fingers. Check that the stuffing has reached the tips evenly and that the seam is closed without gaps.
If you are making several stars, changing only the yarn color or embroidered expression can give each one a noticeably different character while keeping the basic construction the same.

Conclusion
Your Crochet Little Star Amigurumi is finished! The five-point shape, soft stuffing, and simple face make it a sweet little piece on its own, while a keychain ring or hanging loop gives it an easy practical use. Make one in classic yellow, try contrasting colors, or create a whole collection of tiny stars for decorating and gifting.