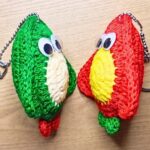
A tiny angel with delicate wings and a simple body comes together quickly, making this crochet keychain a sweet little accent for keys, bags, gifts, or a favorite corner.
Crochet Angel Keychain Pattern

This crochet angel keychain is a lovely choice when you want to make something small without losing the handmade details that give it character. The finished angel combines a compact head and simple body with rounded wings, so each part can be worked separately before assembly.
The construction is straightforward, but a few details are worth watching as you crochet. The head is shaped through increases and decreases, while the body uses different stitches across the same row to create its tapered form. The wings are worked in rounds and finished with a decorative edge, so keeping your stitch placement and proportions consistent will help the finished crochet angel look balanced.
Materials
- Lightweight cotton or acrylic yarn in white or your preferred color
- Small crochet hook suitable for your yarn, such as 2.5 mm or 3 mm
- Keychain ring or clasp
- Stitch marker
- Scissors
- Yarn needle
- Optional craft or hot glue for attaching components
- Optional gold or silver yarn for a halo or small embellishments
Finished Size
The completed angel is approximately 2–3 inches tall, depending on your yarn weight, hook size, and tension.
Because this is a small accessory, changing the yarn weight can noticeably change the finished size. If you want a more delicate keychain, use a finer yarn and a suitably smaller hook; for a slightly larger angel, choose a thicker yarn and adjust the hook accordingly.
Crochet Abbreviations
This pattern uses US crochet terminology.
- ch – chain
- sc – single crochet
- inc – increase; work 2 sc in the same stitch
- dec – decrease
- sl st – slip stitch
- hdc – half double crochet
- dc – double crochet
- MR – magic ring

Before You Start
There are three separate components to keep track of: the head, body, and wings. Make the pieces individually, then bring them together during assembly.
The body is the part that needs the most attention while crocheting. It does not use the same stitch across the entire row. The combination of slip stitches, sc, hdc, and dc creates the change in height that gives the body its shape. For that reason, keep the stitch sequence visible while working each row rather than relying only on the total stitch count.
How to Crochet the Angel Head
The head begins with a magic ring and expands to 18 stitches before decreasing back down. The increase rounds create the rounded shape, while the final decrease rounds close the piece.
Round 1: Make a magic ring and work 6 sc into the ring. Tighten the ring. (6 sts)
Round 2: Work 6 inc around, placing 2 sc in each stitch. (12 sts)
Round 3: 1 sc, 1 inc around; repeat 6 times. (18 sts)
Round 4: Work 18 sc evenly around. (18 sts)
Round 5: Work 18 sc evenly around. (18 sts)
Round 6: Work 18 sc evenly around. (18 sts)
Round 7: Work 18 sc evenly around. (18 sts)
Round 8: 1 sc, 1 dec around; repeat 6 times. (12 sts)
Round 9: Work 6 dec around. (6 sts)
Fasten off and weave in the yarn end.

Head Shape Check
The important checkpoint here is the stitch count. The head should reach 18 stitches before the decreases begin. If you have a different count at the end of Round 7, check the increase rounds before continuing, since an uneven count can make the decreases close incorrectly.
Make the Arms
Each arm is made separately and is intentionally simple.
Step 1: Make a magic ring and work 6 sc into the ring. Tighten the ring and join with a sl st.
Step 2: Chain 10.
Repeat the same steps to make the second arm.
The long chain creates the narrow arm shape, so avoid making the chain excessively loose. Keeping both arms worked with similar tension will also make placement easier during assembly.

Crochet the Angel Body
The body is worked back and forth rather than in rounds. Its shape comes from changing stitch heights across each row.
Start with a chain of 15.
Row 1: Skip the first stitch on the hook, then work 1 sl st, 5 sc, 4 hdc, and 4 dc across the chain. (14 sts) Ch 2 and turn.
Row 2: Work 4 dc, 4 hdc, 5 sc, and 1 sl st across. (14 sts) Ch 1 and turn.
Row 3: Repeat Row 1. (14 sts) Ch 2 and turn.
Row 4: Repeat Row 2. (14 sts) Ch 1 and turn.
Row 5: Repeat Row 1. (14 sts) Ch 2 and turn.
Row 6: Repeat Row 2. (14 sts) Ch 1 and turn.
Row 7: Repeat Row 1. (14 sts) Ch 2 and turn.
Row 8: Repeat Row 2. (14 sts) Ch 1 and turn.
Row 9: Repeat Row 1. (14 sts) Ch 2 and turn.
Row 10: Repeat Row 2. (14 sts) Ch 1 and turn.
Row 11: Repeat Row 1. (14 sts) Ch 2 and turn.
Row 12: Repeat Row 2. (14 sts) Ch 1 and turn.
Fasten off with a sl st.

Body Construction Note
Notice that Rows 1 and 2 are worked in opposite directions: the taller stitches on one row are followed by the shorter stitches on the next. This alternating sequence is what maintains the shape of the body. Keep the order of sl st → sc → hdc → dc on the odd rows and dc → hdc → sc → sl st on the even rows.
If the body starts looking uneven, check the stitch sequence before changing your tension.
Crochet the Wings
The wings are worked in rounds from a magic ring. The increases make each round larger before the final decorative edging is added.
Round 1: Make a magic ring and work 8 dc into the ring. Tighten the ring and join with a sl st. (8 sts)
Round 2: Work 2 dc in each stitch around. (16 sts)
Round 3: 1 dc in the next stitch, 2 dc in the next stitch around; repeat 8 times. (24 sts)
Round 4: Ch 1, sl st around all 24 stitches to create the decorative edge. (24 sts)
Fasten off and weave in the end.

Decorative Wing Loop
To create the hanging detail, chain 18. Then work ch 1, sl st along the chain to form the decorative loop.
Keep the chain consistent with the size of the angel. A very loose loop can make the wings look disconnected from the rest of the piece, while a tighter loop may be difficult to attach to a keychain ring.
Assemble the Angel
Once all the crochet pieces are complete, arrange them before sewing anything permanently. This makes it easier to adjust the proportions and keep the angel centered.
1. Attach the Head
Position the head at the top of the body and sew it securely with a yarn needle. Check that it is centered before tightening the stitches completely.
2. Attach the Arms
Place one arm on each side of the body. Keep their positions as symmetrical as possible, then sew them securely into place.
3. Attach the Wings
Position the wings on the back of the body. Check both sides before securing them so that the wings sit evenly rather than pulling toward one side.
4. Add the Keychain Attachment
Attach the keychain ring or clasp securely to the top of the angel. You can also use the decorative loop made with the wings as the attachment point.
For something that will be handled frequently, sewing the attachment securely is preferable to relying only on glue.
Finishing Touches
The basic angel already has its defining features, but small details can change its appearance.
- Use a contrasting yarn for a simple halo.
- Add subtle embroidery to the face or body.
- Try a different wing color for contrast.
- Add a small ribbon to the hanging loop.
- Use gold or silver yarn for a more decorative finish.
Keep embellishments lightweight so they do not pull the small crochet pieces out of position.

Final Check
Before attaching the angel to your keys or bag, gently check each connection point. The head, arms, wings, and keychain attachment should all feel secure.
The most important finishing detail is balance: the head should sit centrally, the arms should be positioned evenly, and the wings should remain aligned at the back. Taking a moment to adjust these pieces before the final stitches are tightened can make a noticeable difference in the finished appearance.
This charming crochet angel keychain is small enough to make with a modest amount of yarn, yet the separate shaped pieces give it plenty of handmade character. Once you are comfortable with the construction, changing the colors or adding a few delicate details gives each angel its own look.