Looking for a festive makeover for your Labubu? This crochet Christmas outfit adds a hooded cloak, ruffled dress, and gift-box detail for a festive keepsake all season long.
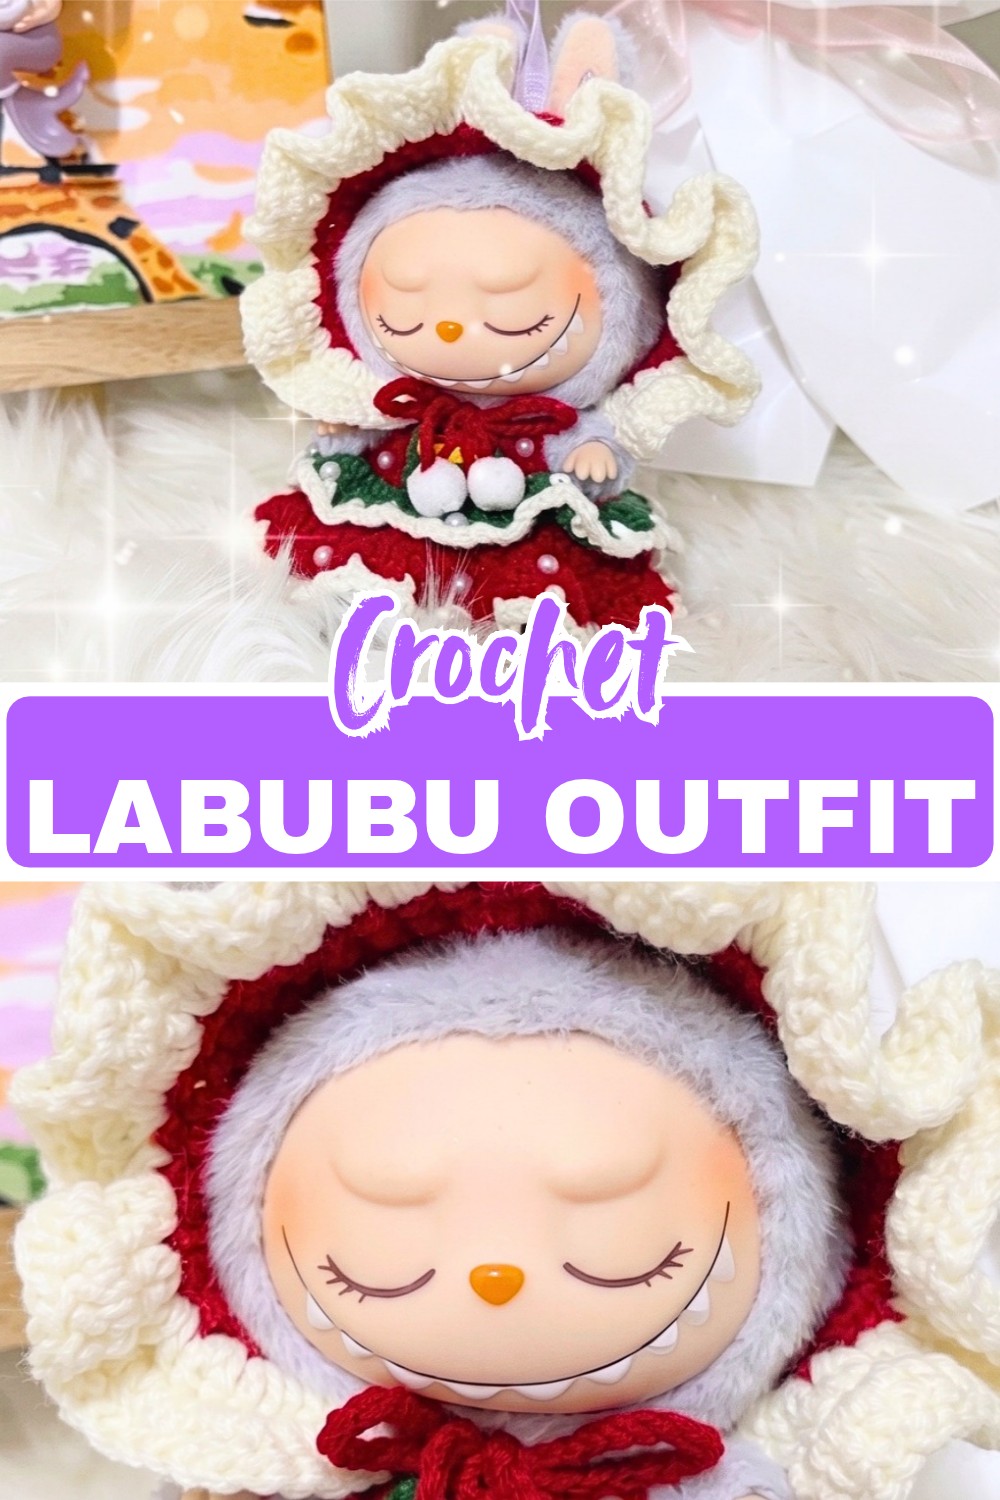
Crochet Labubu Christmas Outfit
Dress up a crochet Labubu for Christmas, and the smallest details suddenly become part of the holiday display. This set combines a red hooded cloak, a ruffled dress, and a tiny gift-box accessory, so the finished look feels more like a little Christmas character than a simple outfit. The pom-poms and pearl embellishments are what give it that extra festive finish.
The crochet pieces are worked separately, so you can focus on one part at a time instead of trying to manage the whole outfit at once. The cloak has a few shaping steps around the hood and neckline, while the dress uses increases, front and back loops, and color changes to create its layered ruffles. Once everything is finished, you can dress your crochet Labubu or use the pieces as small holiday decorations.
Credit Gold Yarn
Materials & Tools Needed
- Yarn: Red, green, cream/off-white, and yellow yarn
- Crochet Hook: 2.5 mm
- Pom-Poms: One 30 mm cream or white pom-pom and two 25 mm pom-poms
- Tapestry/Darning Needle
- Scissors
- 4 mm and 5 mm flat semicircular pearls
- Craft glue or sewing thread for attaching the pearls
Before You Begin
This pattern is designed for Labubu V1 and V2 vinyl plush figures. The outfit can be worn on the figure, while the finished pieces can also be used as small Christmas decorations.
For the cloak, leave a 30–40 cm yarn tail before making the initial slip knot. This tail will be used later to sew the top seam, so it is worth leaving the full length now rather than joining a new strand when you reach the finishing stage.
The pattern uses ch, sl st, sc, dc, dc inc, dc dec, BLO, and FLO. If you are comfortable with these basic abbreviations, the instructions will be much easier to follow.

Step-by-Step Crochet Pattern
Part 1: Christmas Cloak Hat
The cloak begins as a flat piece worked in rows. The center openings in Row 7 create the shaping needed for the hood, so keep an eye on the skipped stitches and chain spaces in that row.
Row 1: With Red Yarn, ch 35, then ch 2 more (37 ch total), skip 2 ch and work 1 dc in the 3rd ch from hook, then work 1 dc in each ch across; turn. (35 dc)
Rows 2–6: Ch 2, turn, work 1 dc in each st across; turn. (35 dc per row)

Row 7: Ch 2, turn, work 10 dc, ch 8 and skip 6 st, work 1 dc in next st, ch 3 and skip 1 st, work 1 dc in next st, ch 8 and skip 6 st, then work 9 dc to the end; turn. (35 dc)
The chain spaces in this row form the openings that will help shape the center of the cloak. If the spaces look uneven, check that you have skipped the stated number of stitches before continuing.
Row 8: Ch 2, turn, work 10 dc, then 4 dc, work 6 dc dec over the center stitches, work 5 dc, then 10 dc to the end; turn.
Rows 9–10: Ch 2, turn, work 1 dc in each st across; turn. On the final step of the last dc of Row 10, complete the stitch with Cream Yarn to change colors. (35 dc)
Row 11: With Cream Yarn, ch 2, turn, repeat [2 dc inc in next st, 3 dc in next st] across, ending with a dc inc in the final st; turn.
Row 12: Ch 2, turn, repeat [1 dc, 1 dc inc] across, ending with 1 dc in the last st; fasten off.
Cloak Hat Finishing
Fold the top edge of the hood in half and sew the seam closed securely with the long yarn tail and a tapestry needle.
To finish the lower neckline, reattach Red Yarn near Row 12, ch 1, work 3 sl st, then work sc evenly across the neck edge to straighten and flatten it. Work 3 sl st at the opposite end, fasten off, and weave in the ends.
For the drawstring, use Red Yarn to make a slip knot and ch 90. Fasten off, then thread the chain through the eyelet openings around the neck. This creates adjustable ties, so leave enough room to tie the cloak comfortably rather than pulling the cord tightly.
Sew the 30 mm cream or white pom-pom to the top point of the hood. Sew one 25 mm pom-pom to each end of the drawstring.

Part 2: Christmas Dress
The dress is worked in the round, beginning with a small neckline loop. When joining the first chain, make sure the chain is not twisted; otherwise, the dress will not sit correctly on the Labubu.
Round 1: With Red Yarn, ch 32 and join with a sl st to the first ch to form a loop without twisting, ch 1, work 1 sc in each st around, then sl st to the first sc to join. (32 sc)
Round 2: Ch 1, work 5 dc, ch 9, skip 6 st, work 10 dc, ch 9, skip 6 st, then work 5 dc; sl st to join.
The chain spaces in Round 2 create the openings that will later allow the dress to fit around the figure. Keep the two larger chain spaces even on both sides.
Round 3: Ch 2, work 1 dc in each st and ch stitch around, then sl st to join. (38 dc)
Round 4: Ch 2, work BLO 1 dc in each st around, then sl st to join. (38 dc)
Round 5: Ch 2, work 1 dc in each st around, then sl st to join. (38 dc)
Round 6: Ch 2, work 1 dc inc in every st around, then sl st to join.
Round 7: Ch 2, repeat [1 dc, 1 dc inc] around, completing the final step of the last dc with Cream Yarn; sl st to join.

The color change at the end of this round sets up the cream outer ruffle. Complete the final yarn-over with Cream Yarn so the new color is already in place for the next round.
Round 8 – Outer Ruffle Edge: Ch 3, skip 2 st, work 1 sc in next st, then repeat [ch 3, skip 2 st, 1 sc in next st] around; join with sl st, cut yarn, and weave in ends.
Inner Green Layer Ruffle
The inner ruffle is worked into the exposed front loops from Round 4. Because these loops were left visible when Round 4 was worked in BLO, you should be able to identify them as a separate line around the dress.
Attach Green Yarn to the exposed FLO from Round 4, ch 1, and work 1 dc inc in each FLO stitch around. Change to Cream Yarn on the final stitch.
With Cream Yarn, work the ruffle trim by repeating [ch 3, skip 2 st, 1 sc in next st] around. Fasten off and weave in the ends.

Part 3: Tiny Gift-Box Accessory
This small accessory is worked as a simple rectangle, then decorated with surface slip stitches and a tiny bow.
Row 1: With Red Yarn, ch 7, skip 1 ch, work 6 sc across; turn. (6 sc)
Row 2: Ch 2, turn, work 6 dc across; turn. (6 dc)
Row 3: Ch 1, turn, work 6 sc across; fasten off. (6 sc)
Using Yellow Yarn, work surface slip stitches across the middle of the box to create the ribbon lines.
Using Red Yarn, make a small bow and sew or attach it to the center of the gift box.
Finishing the Christmas Outfit
Glue or sew the 4 mm and 5 mm flat semicircular pearls onto the front of the dress as festive embellishments. If you are using glue, allow it to dry completely before putting the dress on the figure.
Once the pieces are finished, slip the dress onto the Labubu figure, place the cloak hood over the head, and loosely tie the pom-pom drawstrings around the neck. The ties should hold the cloak in place without pulling tightly against the figure.

The completed set gives you several tiny details to play with: the cream hood trim, layered ruffles, pom-poms, pearls, and gift-box accent all work together to create the finished Christmas look.