Add a little Halloween magic to your crochet collection with this tiny witch hat keychain, complete with colorful ribbons and a cute charm-style finish.
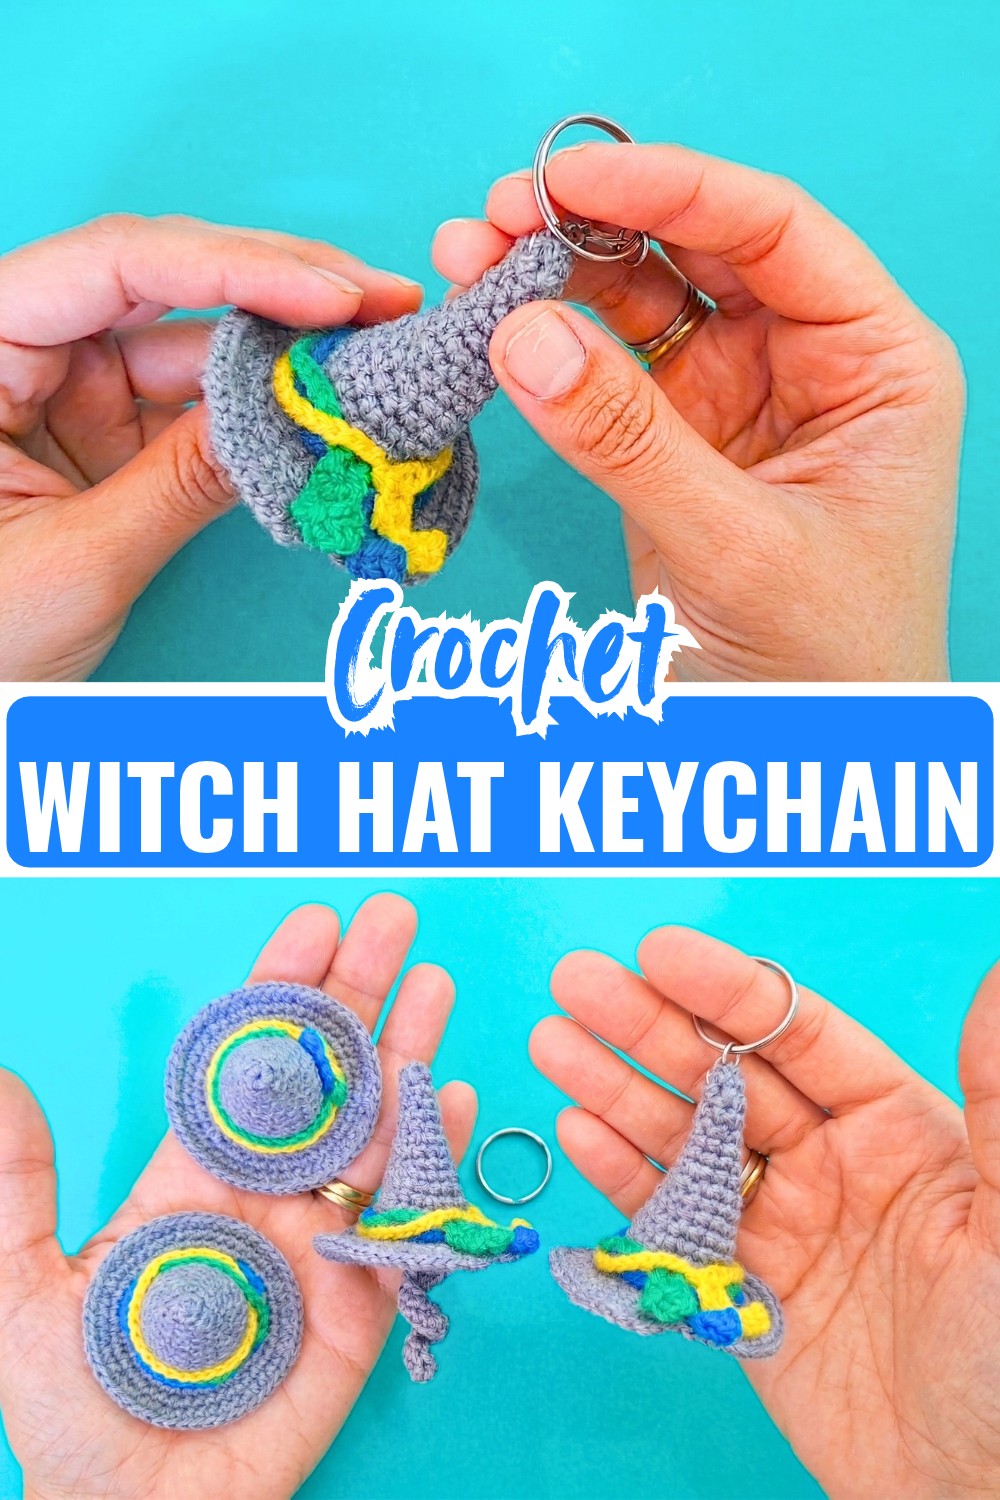
This crochet Halloween hat is a quick and playful piece when you want to make something festive without committing to a large pattern. The tiny witch hat takes shape with simple single crochet increases, a neat brim, and colorful decorative ribbons that give it plenty of personality.
What makes this Halloween witch hat keychain especially fun is how easily you can use it once it is finished. Attach it to your keys or bag, add it to a seasonal display, or make several in different color combinations for handmade gifts. The small size also makes it a satisfying crochet piece to finish in one sitting.
Credit Lemon Crochet
Materials & Tools Needed
- Yarn: 100% acrylic fine-weight yarn in:
- Grey for the main hat
- Yellow, green, and blue for the decorative ribbons
- Crochet Hook: 2.0 mm
- Yarn Needle: For weaving in ends
- Scissors
- Keychain Ring: With a jump ring
- Stitch Marker or Scrap Yarn: For marking the beginning of rounds
Finished Size & Customization Ideas
This pattern creates a miniature witch/wizard hat that works especially well as a keychain or small seasonal charm.
You can customize it by changing the main hat color to black, purple, orange, or another Halloween-inspired shade. You can also use different ribbon colors or leave off the keychain hardware and place the finished hat on a small amigurumi instead.
Tip: If you change the yarn weight, choose a crochet hook that works comfortably with your yarn. A thicker yarn will make a noticeably larger hat.
Pattern Abbreviations & Terminology
- MR: Magic Ring
- ch: Chain
- sc: Single Crochet
- hdc: Half Double Crochet
- dc: Double Crochet
- inc: Increase – 2 sc in the same stitch
- FLO: Front Loop Only
- sl st: Slip Stitch
- st(s): Stitch(es)

Step-by-Step Crochet Pattern
Crochet the Hat Body
Work the hat body in continuous spiral rounds. Use a stitch marker or a small piece of scrap yarn to mark the beginning of each round so you don’t lose your place.
Round 1: With grey yarn, make a magic ring, ch 1, work 6 sc into the ring, and pull the yarn tail to close the center. (6 sts)
Round 2: Work 1 sc in each stitch around. (6 sts)
Round 3: Work (2 sc, inc) × 2 around. (8 sts)
Round 4: Work 1 sc in each stitch around. (8 sts)
Round 5: Work (3 sc, inc) × 2 around. (10 sts)
Round 6: Work 1 sc in each stitch around. (10 sts)
Round 7: Work (4 sc, inc) × 2 around. (12 sts)
Round 8: Work 1 sc in each stitch around. (12 sts)
Round 9: Work (2 sc, inc) × 4 around. (16 sts)
Round 10: Work 1 sc in each stitch around. (16 sts)
Round 11: Work (3 sc, inc) × 4 around. (20 sts)
Round 12: Work 1 sc in each stitch around. (20 sts)
Round 13: Work (4 sc, inc) × 4 around. (24 sts)
Rounds 14–15: Work 1 sc in each stitch around. (24 sts in each round)

Shape the Brim
This is where the narrow cone begins to turn into the wider brim of the witch hat.
Round 16: Working in FLO, work (1 sc, inc) × 12 around. (36 sts)
Round 17: Working through both loops, work (2 sc, inc) × 12 around. (48 sts)
Round 18: Work 1 sc in each stitch around. (48 sts)
Finish the Hat: Slip stitch into the first stitch, ch 1, cut the yarn leaving a small tail, pull the yarn through, and weave the end securely inside the hat.
Helpful check: After Round 18, the hat should have a defined cone with a noticeably wider brim. If your brim looks too tight or curls heavily, check that you haven’t accidentally skipped stitches.

Make the Decorative Ribbons
Make three ribbons, using yellow, green, and blue yarn.
Ribbon: Make a slip knot and ch 6, skip the first chain from the hook, work 1 sc in the second chain, 1 hdc in the next chain, 1 dc in the next chain, 1 hdc in the next chain, and 1 sl st in the final chain; then ch 30, join with a sl st into the very first chain, ch 1, cut the yarn leaving a short tail, pull through, and knot the ends securely.
Repeat the same process with the remaining two colors, so you have one yellow, one green, and one blue ribbon.
Tip: Keep the ribbon loops loose enough to slide over the hat without stretching the stitches.

Add the Ribbons to the Hat
The ribbons create the colorful decorative detail around the grey witch hat.
- Take the blue ribbon and slide its loop down from the pointed top of the hat until it reaches the base of the cone.
- Slide the green ribbon over the hat next, positioning it above the blue ribbon.
- Add the yellow ribbon last, placing it over the green one.
- Arrange all three loops so they overlap and drape diagonally toward the front of the brim.
Take a moment to adjust the ribbons before securing anything. Even spacing will make the finished hat look much neater.
Attach the Keychain Ring
Attach the jump ring to the top point of the hat cone and connect the keychain ring to it.
Make sure the ring is closed securely so the hat does not come loose when attached to a bag or set of keys.

Finishing Your Halloween Witch Hat
Your tiny crochet Halloween witch hat is now ready to use as a festive keychain or bag charm. Before using it, check that all yarn tails are woven in and that the keychain hardware is firmly attached.
For a fun Halloween set, try making several hats with different main colors and ribbon combinations. Black and orange, purple and green, or even classic grey with bright accents can each give the same pattern a completely different personality.
Conclusion
This tiny Halloween witch hat keychain is a simple way to turn basic crochet stitches into a festive handmade accessory. The gradual increases create the pointed hat, while the FLO brim gives it its characteristic witch-hat shape. Add the colorful ribbons and secure the keychain ring, and you have a small Halloween project that’s ready to gift, display, or carry with you.