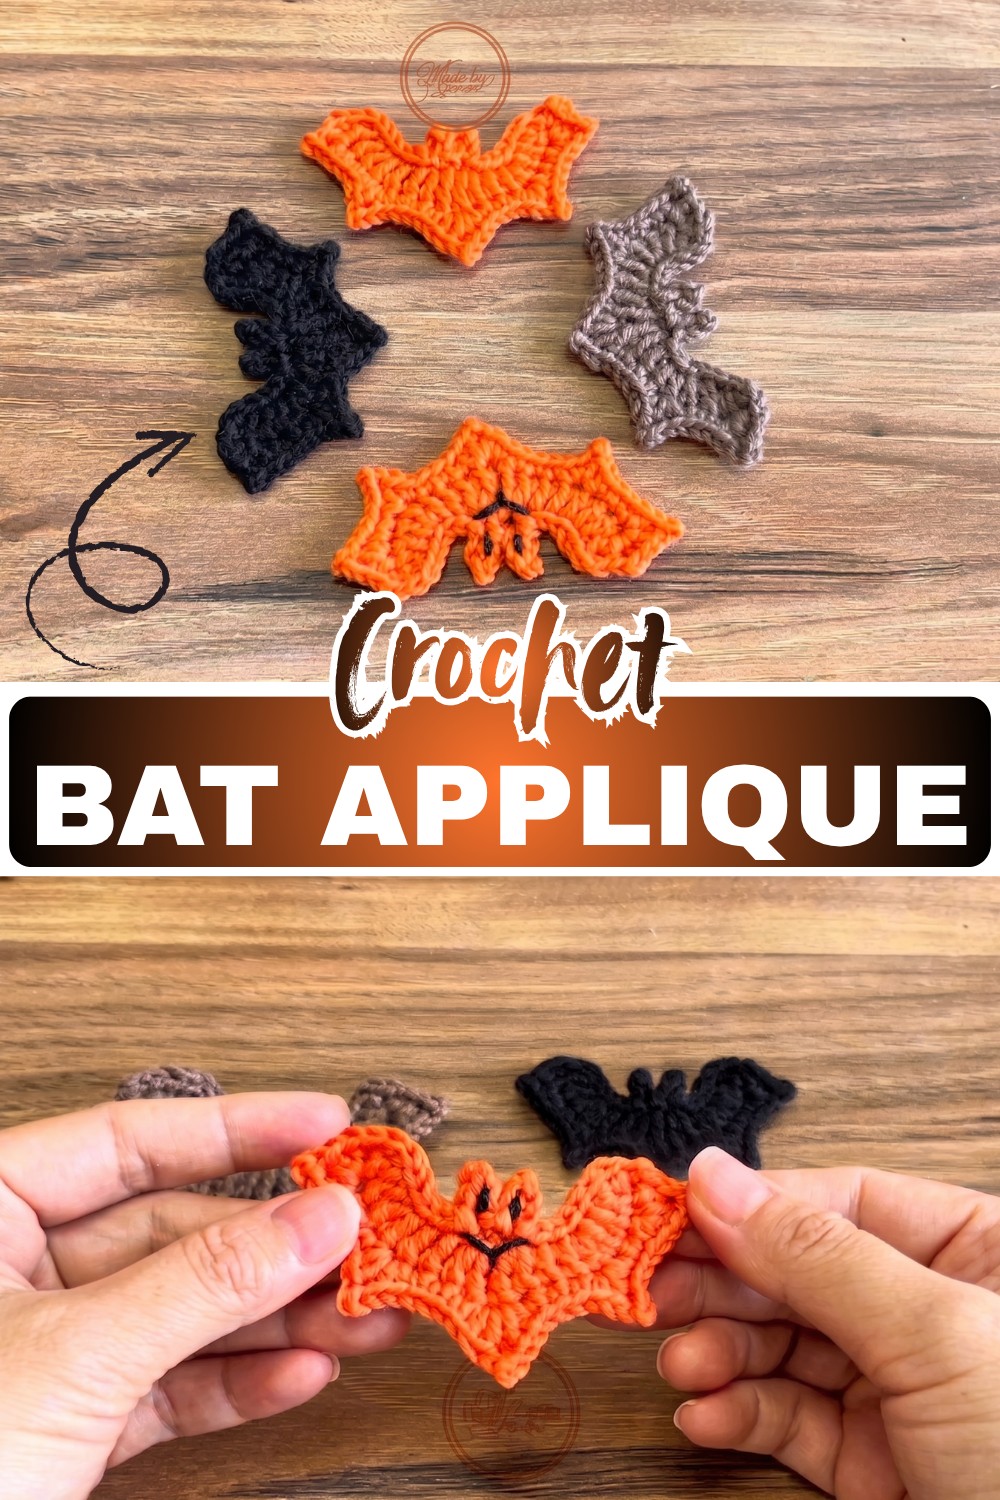
This little crochet bat is one of those designs that can be made with very little yarn but still has plenty of character. The pointed wings, small center body, and decorative picot details give it a recognizable bat shape without making the pattern overly complicated. Made with a 3mm crochet hook, it works beautifully as a small Halloween embellishment, and you can easily change the yarn color to suit your pattern.
Crochet Bat Applique Pattern
I especially like how versatile a small appliqué like this can be. Once finished, you can sew it onto a hat, bag, costume, sweater, greeting card, or seasonal decoration. The pattern mainly uses familiar stitches such as double crochet, single crochet, slip stitch, and a few taller stitches for shaping, so it is also a nice way for beginners to practice working with different stitch heights while creating something useful.
Credit ANDREI Crafts Show
Materials & Tools
- Yarn in your preferred color
- 3mm crochet hook
- Scissors
- Tapestry needle for weaving in ends
- Black embroidery thread or yarn for optional facial details
Finished Size
With a 3mm hook, the finished appliqué is approximately 2.5 inches wide, although the exact size will depend on your yarn weight and tension.
You can make the bat larger or smaller by changing the yarn weight and hook size. Black is perfect for a traditional Halloween bat, while orange, purple, white, or even metallic yarn can give it a completely different look.
Crochet Abbreviations
This pattern uses US crochet terminology.
- ch = chain
- sl st = slip stitch
- sc = single crochet
- hdc = half double crochet
- dc = double crochet
- tr = treble crochet
- pc = picot
- st/sts = stitch/stitches

Crochet Bat Pattern
Row 1: Make the Base
Start with a slip knot and ch 16.
Beginning in the 4th chain from the hook, work 1 dc in the same chain, 1 dc in the next chain, 2 dc in the next chain, and 1 dc in each of the following 2 chains.
In the next chain, work 1 dc, 1 tr, and 1 dc in the same stitch. In the following chain, work 1 tr and 1 dc in the same stitch.
Continue with 1 dc in each of the next 2 chains. Work 2 dc in the next chain, 1 dc in the following chain, and 2 dc in the final chain.
Your foundation should now have a gently curved shape, with the taller treble stitches helping to establish the center and future wing shaping.
Teaching tip: Keep your stitches relaxed while working this foundation. If the chain curls slightly, that is normal at this stage; the later slip stitches and edging will help define the bat’s final shape.

Shape the First Wing
Turn your work so you can continue along the opposite side of the foundation.
Insert the hook into the center of the final dc and make a sl st. Continue working slip stitches along the foundation until you reach the section containing the taller tr and dc stitches.
To create the first pointed wing detail, ch 3, sl st into the 2nd chain from the hook, then make 1 sc in the remaining chain. Sl st back into the appropriate foundation stitch to secure the point.
Continue along the foundation with slip stitches, repeating the same ch-3 peak in the corresponding stitches to build the pointed edge of the wing.
Keep the peaks evenly spaced so the wing develops a clean, symmetrical outline.

Shape the Other Wing
Now work back across the opposite side of the foundation to create the second wing.
Use slip stitches to move into position, matching the placement used for the first wing.
For each wing point, ch 3, sl st into the 2nd chain from the hook, make 1 sc in the remaining chain, and sl st into the corresponding foundation stitch.
Repeat the wing-point sequence across the remaining side.
Teaching tip: At this stage, place the piece flat on your work surface and compare both wings. If one side looks wider or has a different number of points, it is easier to correct it now before adding the decorative edging.
Add the Decorative Edge
The final round adds the smaller details that make the bat look more finished.
Work around the remaining foundation stitches using sc, hdc, dc, and picot stitches. At the center section, work:

1 hdc, 1 dc, 1 picot, 1 dc, and 1 hdc in the same stitch.
Continue along the wing using the corresponding decorative sequence: 1 sc, 1 hdc, 1 picot, 1 hdc, and 1 sc in the same stitch.
Repeat the decorative shaping across the wing points, keeping the details as symmetrical as possible. Finish the remaining edge with sc and slip stitches.
When the complete outline is finished, join with a slip stitch, fasten off, and leave a yarn tail for weaving.
Note: A picot is made by chaining 2 and slip stitching into the top/front portion of the preceding stitch.
Finishing
Use a tapestry needle to weave the remaining yarn ends securely into the back of the appliqué. Trim any excess yarn once the ends are safely hidden.
For extra character, you can embroider two tiny eyes and a small mouth using black embroidery thread or a small amount of contrasting yarn.
Attaching the Bat
Before sewing the bat onto another item, place it where you want it and check that the wings are sitting evenly.
For fabric items such as hats, bags, costumes, or clothing, use small matching stitches around the center body and along the stronger parts of the wings. Avoid pulling the stitches too tightly, as this can distort the pointed wing shape.
For paper crafts or greeting cards, a small amount of suitable craft adhesive can be used instead.

Keeping the Shape Neat
Because this is a small appliqué, uneven tension can noticeably affect its shape. If the bat looks slightly uneven after finishing, gently arrange the wings with your fingers and lay the piece flat.
For a particularly neat result, lightly block the appliqué before attaching it. Do not stretch the points aggressively; the goal is simply to encourage both wings to sit evenly.
Ways to Use It
This small bat is easy to adapt beyond Halloween décor. You can sew it onto:
- Hats and headbands
- Tote bags
- Halloween costumes
- Sweaters and jackets
- Gift bags
- Greeting cards
- Seasonal table décor
- Handmade decorations
Making several bats in different colors can also create a fun garland or a playful Halloween display.
Final Thoughts
Your crochet bat appliqué is now ready to use. The combination of a simple foundation, pointed wing shaping, and decorative picot edging gives this small design plenty of personality without requiring complicated techniques.
Try making it in classic black for a traditional Halloween look, or experiment with brighter colors for something playful. Once you are comfortable with the shaping, you can easily make several bats for different decorations and handmade accessories.