
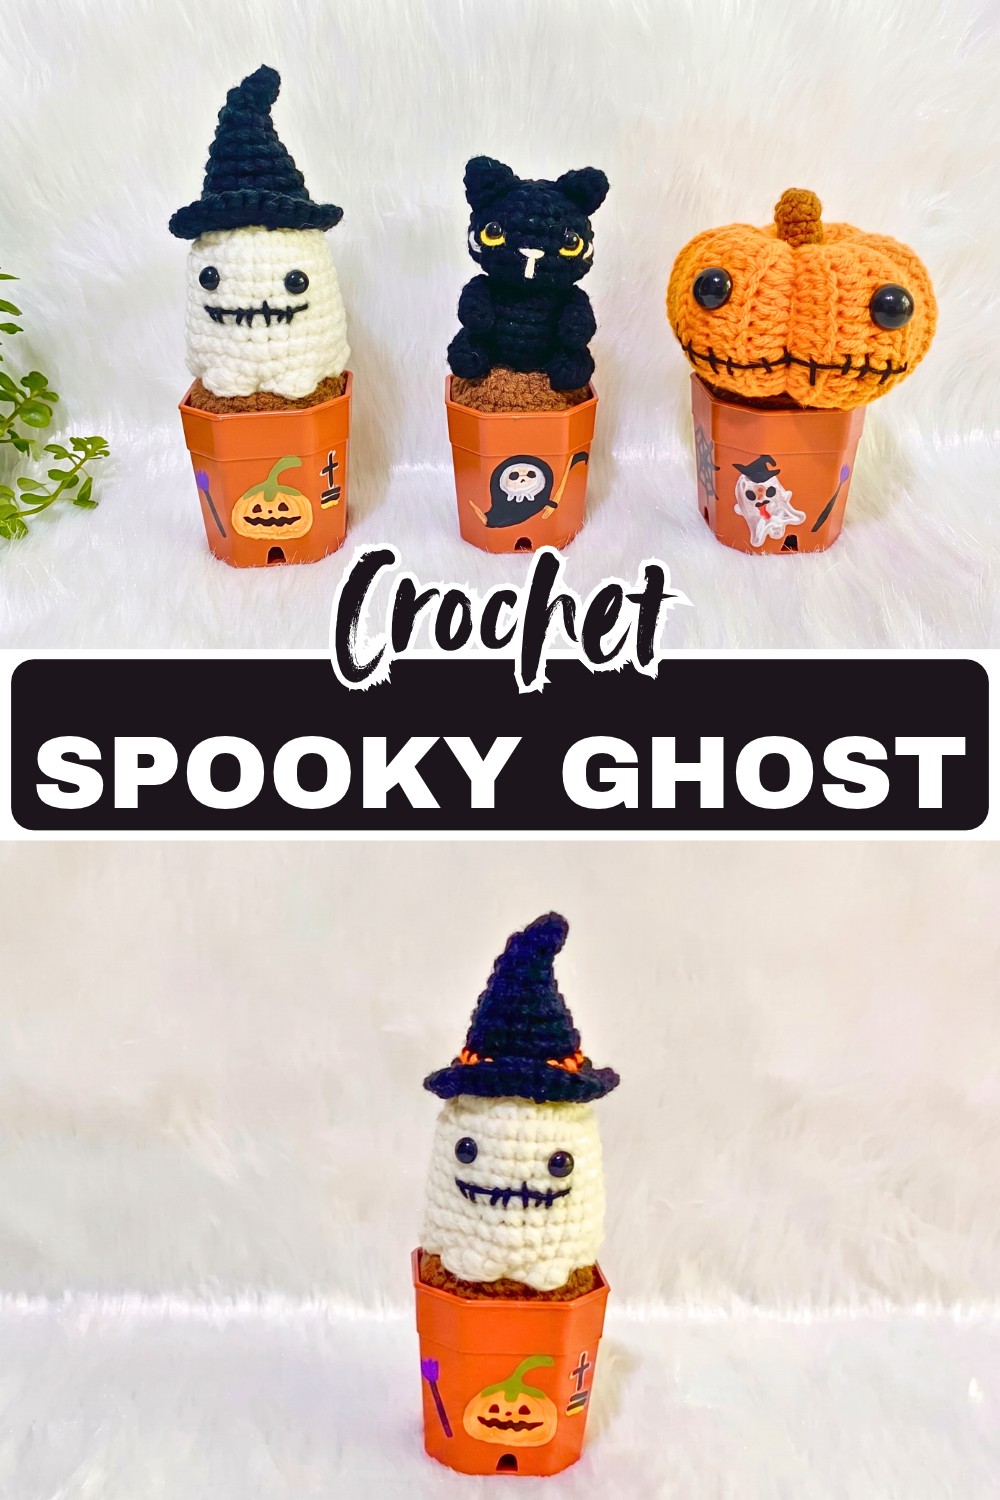
Looking for a cute way to add a little spooky charm to your Halloween decor? This adorable ghost amigurumi is a fun handmade piece that’s perfect for decorating shelves, tables, or cozy corners.
Cute Crochet Ghost Pattern
There’s something about a little crochet ghost that makes Halloween decorations feel more playful than frightening. With its simple shape and sweet handmade texture, this little crochet ghost adds just the right amount of seasonal personality without feeling too spooky. It’s a lovely choice if you enjoy making small decorations that bring a cozy touch to your home or handmade collection.
The simple shape is what gives this ghost most of its character, so keeping your stitches even will help create a neat, defined finish. As you follow the tutorial, you’ll see how a few basic crochet steps come together to create a charming little ghost you can display, gift, or enjoy as part of your Halloween decorations.
Credit Kane Crochet
Materials and Tools
- Cotton yarn, size 2 mm
- 2.5 mm crochet hook
- 7 mm plastic safety eyes
- Polyester fiber stuffing
- Plastic plant pot, 5 cm wide
- Stitch marker, optional
- Scissors
- Yarn needle
Finished Size
- Height: Approximately 14 cm
- Width: Approximately 5 cm
Crochet Abbreviations
This pattern uses US crochet terminology.
- mr: Magic ring
- sc: Single crochet
- inc: Increase – 2 sc in the same stitch
- dec: Decrease – single crochet 2 stitches together
- hdc: Half double crochet
- dc: Double crochet
- slst: Slip stitch
- ch: Chain
- R: Round

Steps: How to Crochet the Halloween Ghost
The ghost is made in two crocheted pieces: the body and the hat. Work the body first, including the stuffing and top closure, then crochet the hat before adding the face and assembling the pieces.
Section 1: Crochet the Ghost Body
Begin: Create the Rounded Base Using a Magic Ring
Start at the center of the ghost’s body with a magic ring. Gradually increase stitches in the first five rounds to shape the curved base.
Rounds 1-5: Build the Base of the Body
- Round 1 (R1): Magic ring, work 6 single crochet (sc) into the ring.
Stitch count: 6 - Round 2 (R2): Work 1 increase (inc = 2 sc) in each stitch around.
Stitch count: 12 - Round 3 (R3): (1 sc, 1 inc), repeat around.
Stitch count: 18 - Round 4 (R4): (2 sc, 1 inc), repeat around.
Stitch count: 24 - Round 5 (R5): (3 sc, 1 inc), repeat around.
Stitch count: 30
Tip: After Round 5, ensure you have 30 stitches before moving on.

Rounds 6-12: Create Height for the Body
- Rounds 6–12: Work 1 sc in each stitch around (no increases or decreases). Repeat for 7 rounds total.
Stitch count: 30 stitches per round.
Rounds 13–15: Shape the Body’s Top
- Round 13 (R13): (3 sc, 1 decrease [dec]), repeat around.
Stitch count: 24 - Round 14 (R14): (2 sc, 1 dec), repeat around.
Stitch count: 18 - Round 15 (R15): (1 sc, 1 dec), repeat around.
Stitch count: 12
Round 16: Stuff and Close the Body
- Round 16 (R16): Firmly stuff the ghost’s body with polyester fiber. Work decreases around.
Stitch count: 6
Finish Off: Use slip stitches (slst) or weave through the final 6 stitches with a yarn needle. Pull tight to close the top and securely weave in the remaining tail.
Section 2: Crochet the Ghost Hat
Rounds 1-6: Shape the Hat Base
Similar to the body, the hat begins with a magic ring and expands outward.
- Round 1 (R1): Magic ring, 6 sc into the ring.
Stitch count: 6 - Round 2 (R2): Work 1 inc in each stitch around.
Stitch count: 12 - Round 3 (R3): (1 sc, 1 inc), repeat around.
Stitch count: 18 - Round 4 (R4): (2 sc, 1 inc), repeat around.
Stitch count: 24 - Round 5 (R5): (3 sc, 1 inc), repeat around.
Stitch count: 30 - Round 6 (R6): (4 sc, 1 inc), repeat around.
Stitch count: 36
Rounds 7-8: Narrow and Finish the Hat
- Round 7 (R7): Sc in each stitch around (no increases).
Stitch count: 36 - Round 8 (R8): (1 sc, 1 dec), repeat around.
Stitch count: 24

Finish Off: Leave a long yarn tail for attaching the hat to the body later.
Add the Ghost Face
- Attach Safety Eyes: Place 7 mm plastic safety eyes between R6 and R7 of the body, spacing them evenly apart.
- Embroider the Smile (Optional): Using black thread and a yarn needle, stitch a cute smile below the eyes.
Assemble the Ghost
Attach the Hat to the Ghost’s Body
Use the long yarn tail from the hat to stitch it securely to the top of the ghost’s body. Work around the hat’s edge using a hidden whip stitch for a seamless look.
Add the Plant-Pot Base
- Place the completed ghost into a small plastic plant pot (approximately 5 cm wide).
- Adjust the polyester fiber stuffing as needed to make the ghost snug and maintain its shape inside the pot.

Customization Ideas
The ghost can be personalized while keeping the basic construction intact.
- Try different yarn colors for a creative variation, including pastel or multicolor ghosts.
- Add decorative bows for extra personality.
- Embroider facial details or add heart-shaped cheeks.
- Adjust the height by modifying the body and hat rounds.
Finishing Notes
Before considering the ghost finished, check that the body is firmly stuffed, the top is securely closed, the safety eyes are attached between R6 and R7, and the hat is firmly sewn to the body.
The completed ghost measures approximately 14 cm in height and 5 cm in width. Once the finishing and assembly are complete, place it into the plastic plant pot to give the crocheted figure its intended sturdy base.
With its rounded body, simple face, crocheted hat, and small pot base, this Halloween ghost has a charming handmade look that works especially well for seasonal decorating or gifting.


